Start with EdrawMind Desktop Guide
Change Background and Add Watermarks
The background feature in EdrawMind allows you to easily customize the appearance of your mind maps to reflect your personal preferences or organizational branding.
You can also add a custom or built-in watermark to your mind maps to protect your intellectual property or reinforce your brand. By utilizing these background options, you can elevate the overall design of your mind maps and better communicate your ideas to your audience.
Index
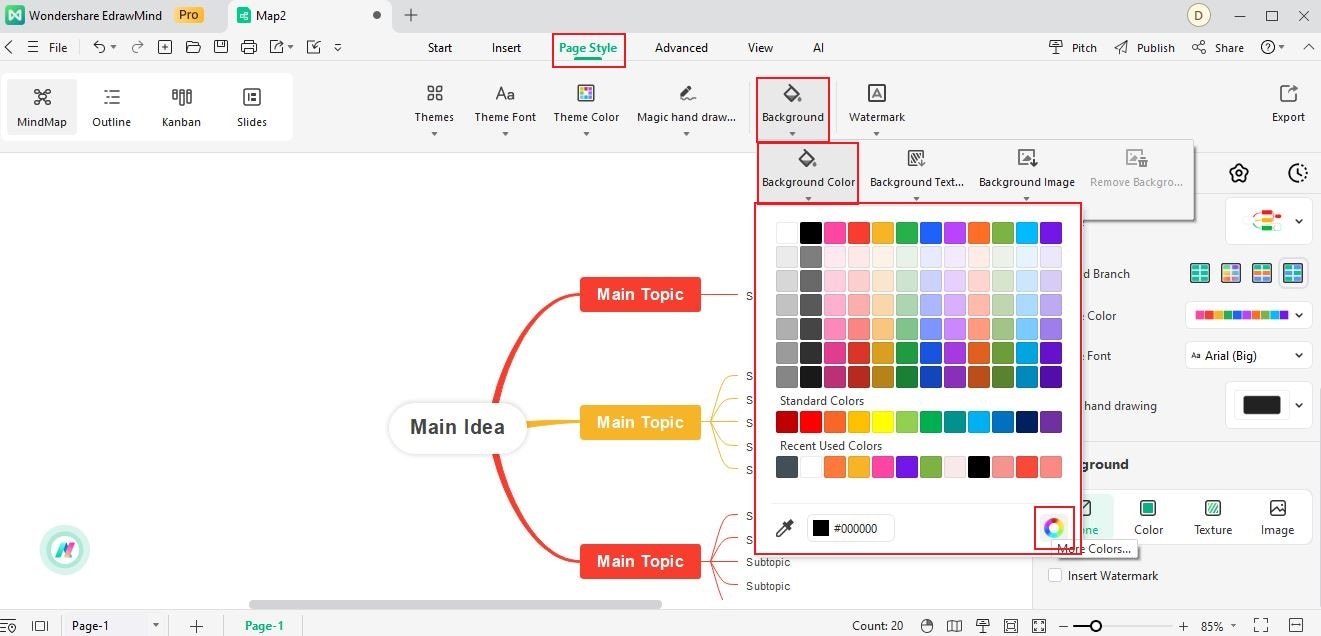
01 Add a Background Color
Contrasting colors can highlight key concepts, which reduces visual noise and makes the mind map easier to navigate. Solid colors can also enhance the mood and ambiance of your mind map, allowing you to convey a specific emotion or tone. With just a few clicks, you can transform your mind maps from bland to brilliant by following the step-by-step guide to changing the background color in EdrawMind.
1. Using the Page Style Tab
Learn how to add a background color to your mind map from the Page Style tab.
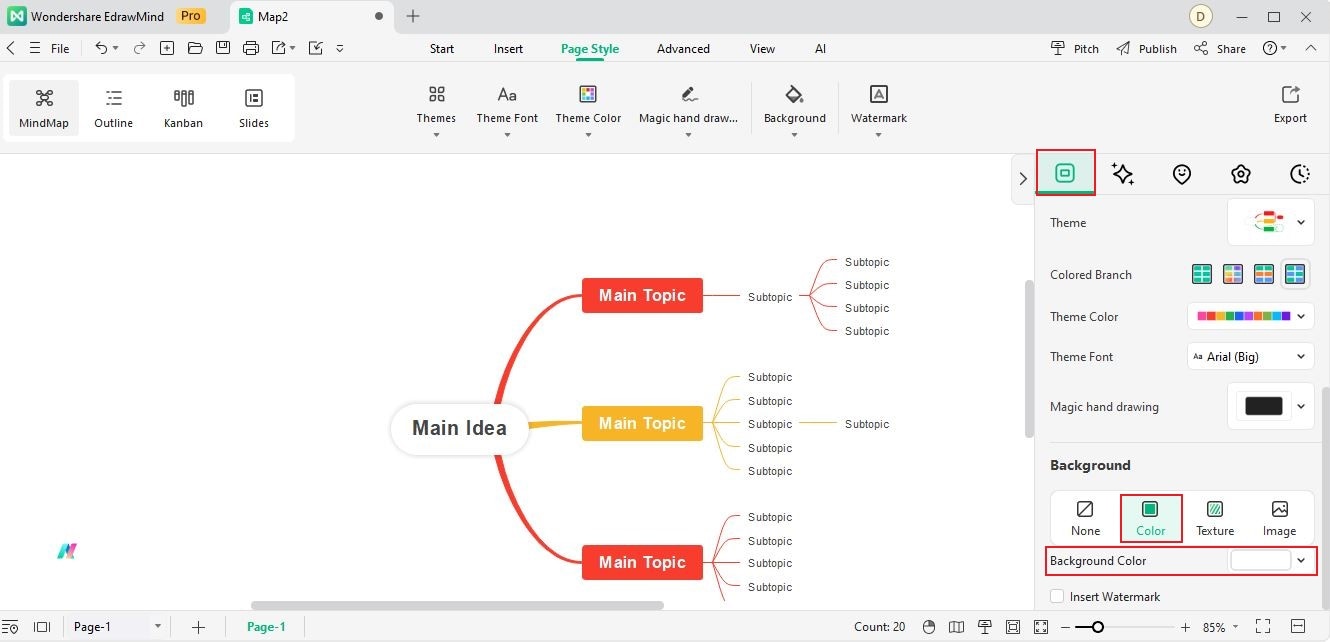
2. Using Map Tab Bar
Here's how to add a background color in the Map tab bar in the right panel.
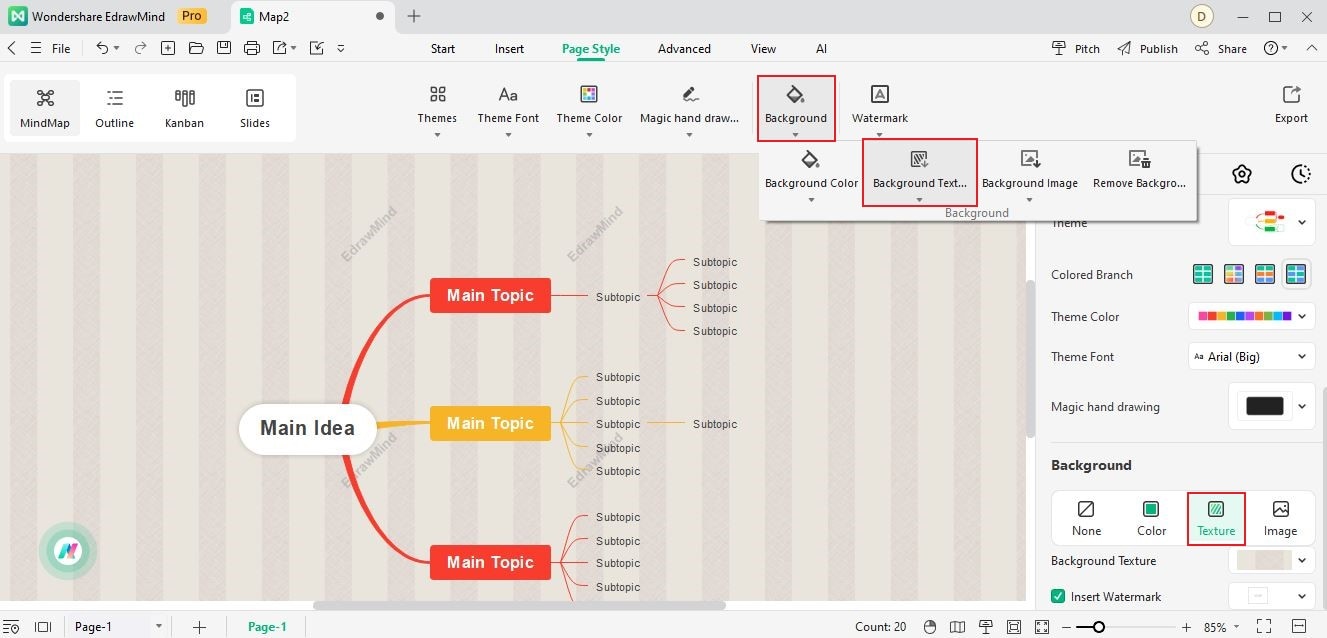
02 Add a Background Texture
A background texture can be a great alternative to a solid color or an image. It can create a visually stimulating background without overpowering your content. Follow these easy steps to add a background texture to your mind map and create a subtle and sophisticated backdrop.
1. Using Page Style Tab
Learn how to create a more visually dynamic mind map by incorporating a textured background with these easy steps in the Page Style tab.
2. Using Map Tab Bar
See the steps below to navigate the Map tab bar for a textured background.
Note: The operation process is illustrated in the last image.
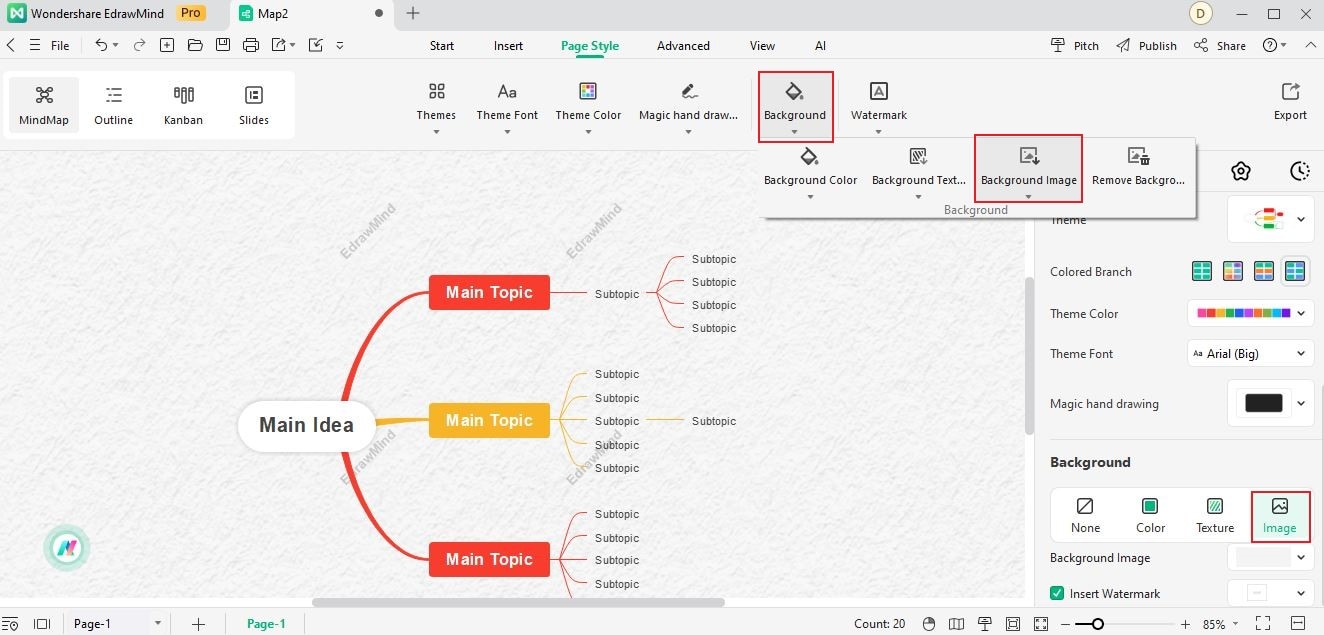
03 Add a Background Image
Whether it's a nature scene, a pattern, or a custom image, a background image can add depth and dimension to your mind map. It provides an extra layer of personalization and catches the viewer's attention. Follow these simple steps to add a background image to your mind map.
1. Using Page Style Tab
Follow the steps below to add a visually stunning background image to your mind map using the Page Style tab in EdrawMind.
Tip: Click the Fit to page screen to fit the selected background image in the entire page as one cohesive mind map.
2. Using Map Tab Bar
Follow the steps below to add a background image in a different way.
Note: The operation process is illustrated in the last image.
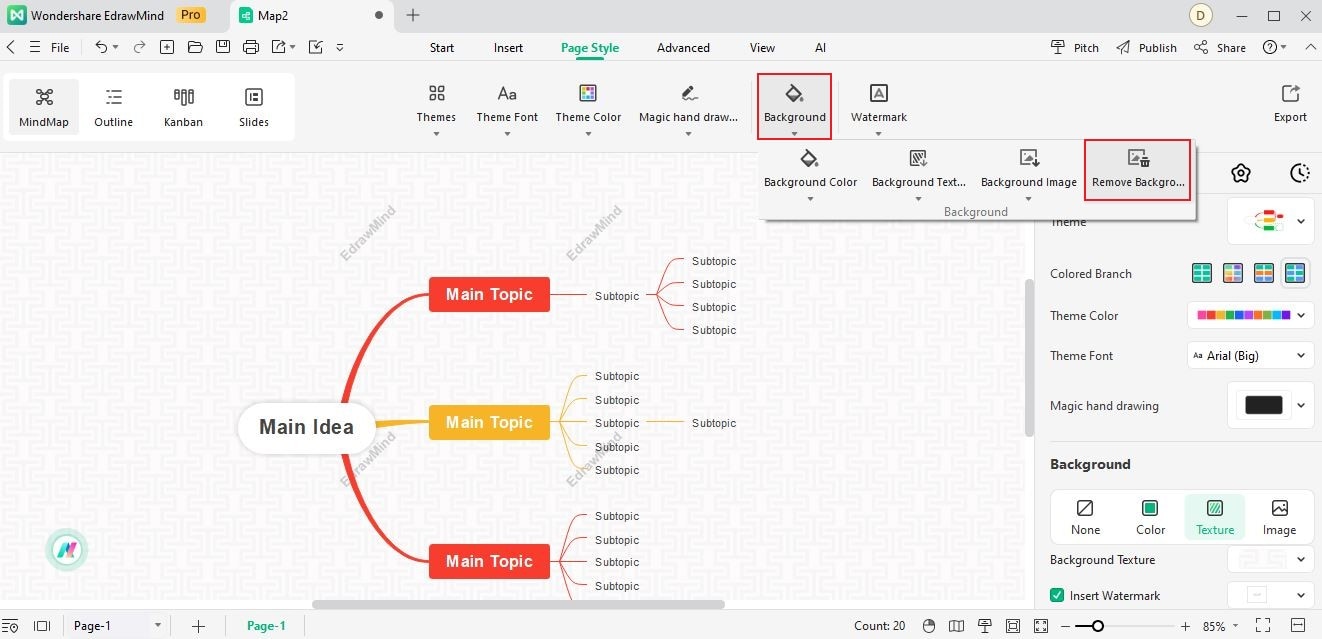
3. Remove Background
To remove added background, click Background > Remove Background under the Page Style tab.
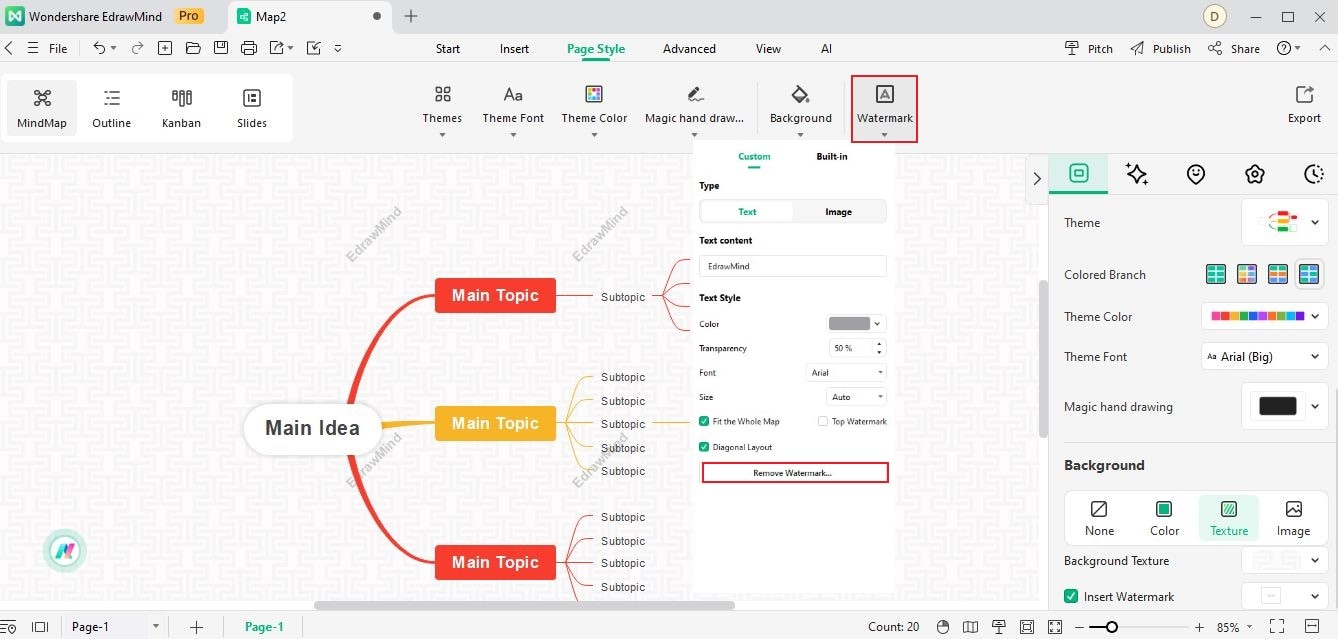
04 Add a Watermark
Adding a watermark to your mind map can be a great way to prevent unauthorized use, copying, or adding branding to your work. With EdrawMind's custom watermark feature, you can choose from several options, like a Text or Image, and even use Built-in watermarks. The watermark won't affect the quality or hinder the mind map. You can also preview it before finalizing your design.
Learn here how to insert a watermark into your mind maps.
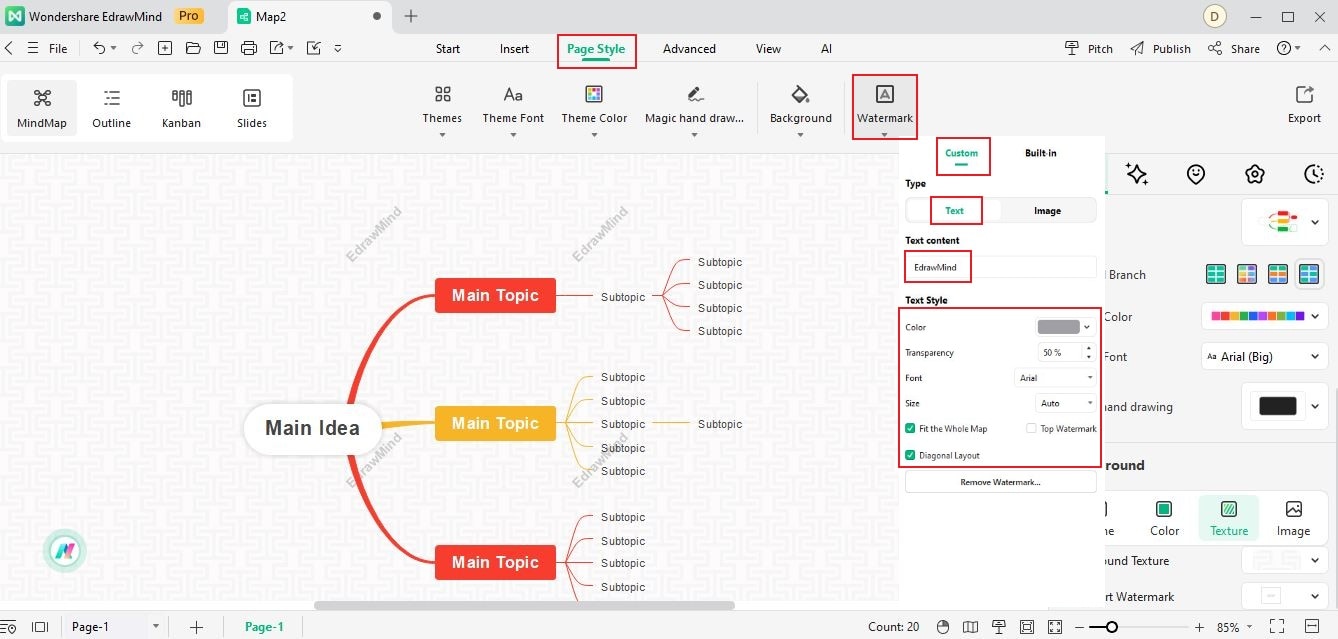
Tip: Select the Fit the Whole Map, Top Watermark, or Diagonal Layout checkbox to adjust the watermark setup.
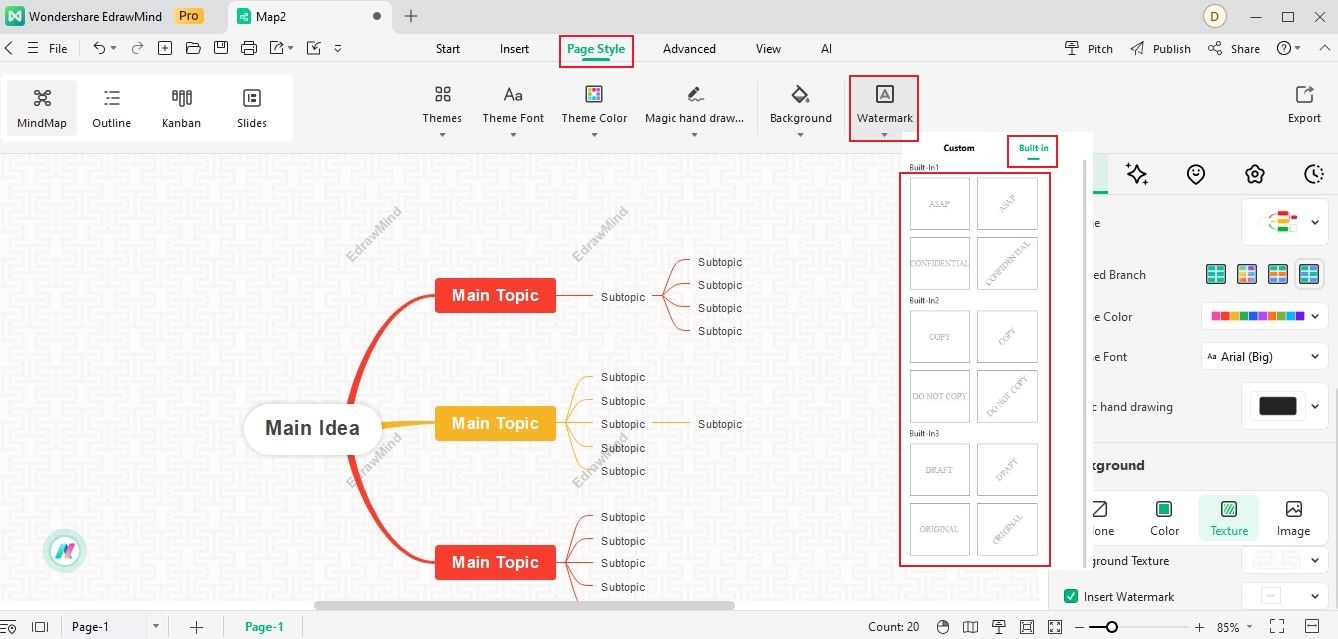
Notes:
- To access the Built-in options for Watermark, repeat Step 1. Next, click Built-in, and you will see several examples, such as ASAP, Confidential, Copy, and Draft, from which you can choose.
- You can also insert a watermark into your mind map from the right panel. To access this feature, go to the Map tab bar and select the Insert Watermark checkbox.
- To remove the watermark, click Remove Watermark… in the Watermark menu.