Start with EdrawMind Desktop Guide
Insert Illustrations
Index
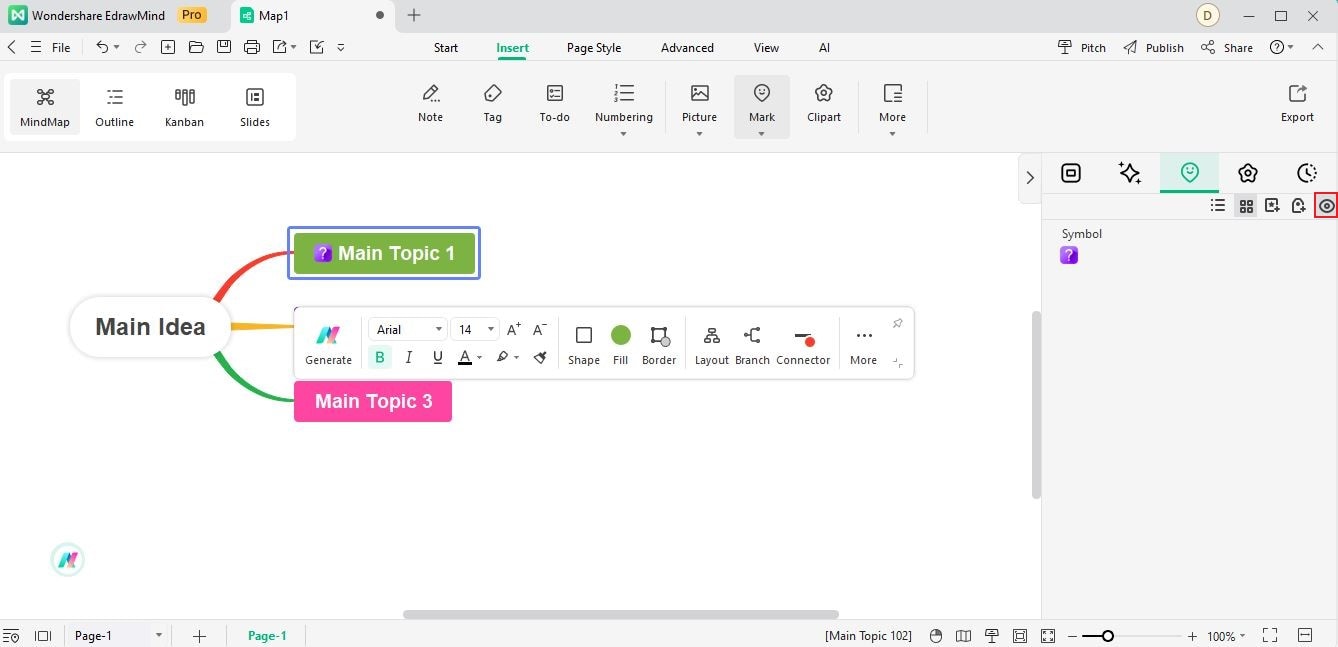
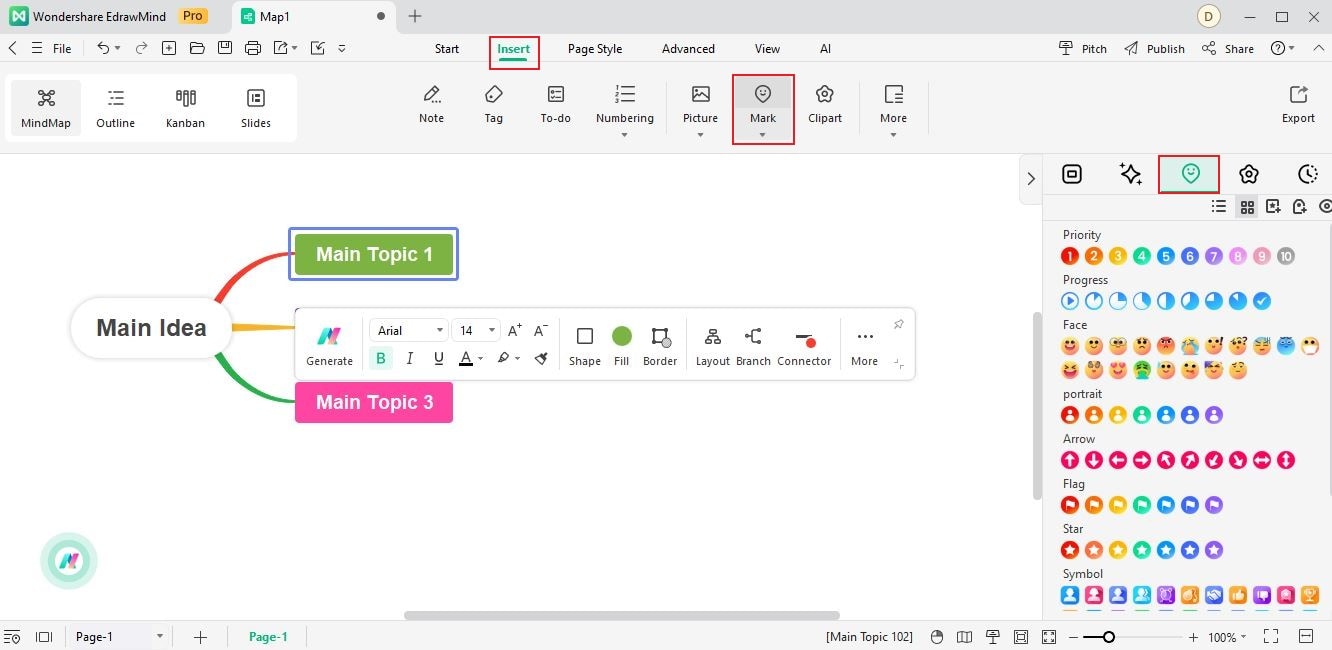
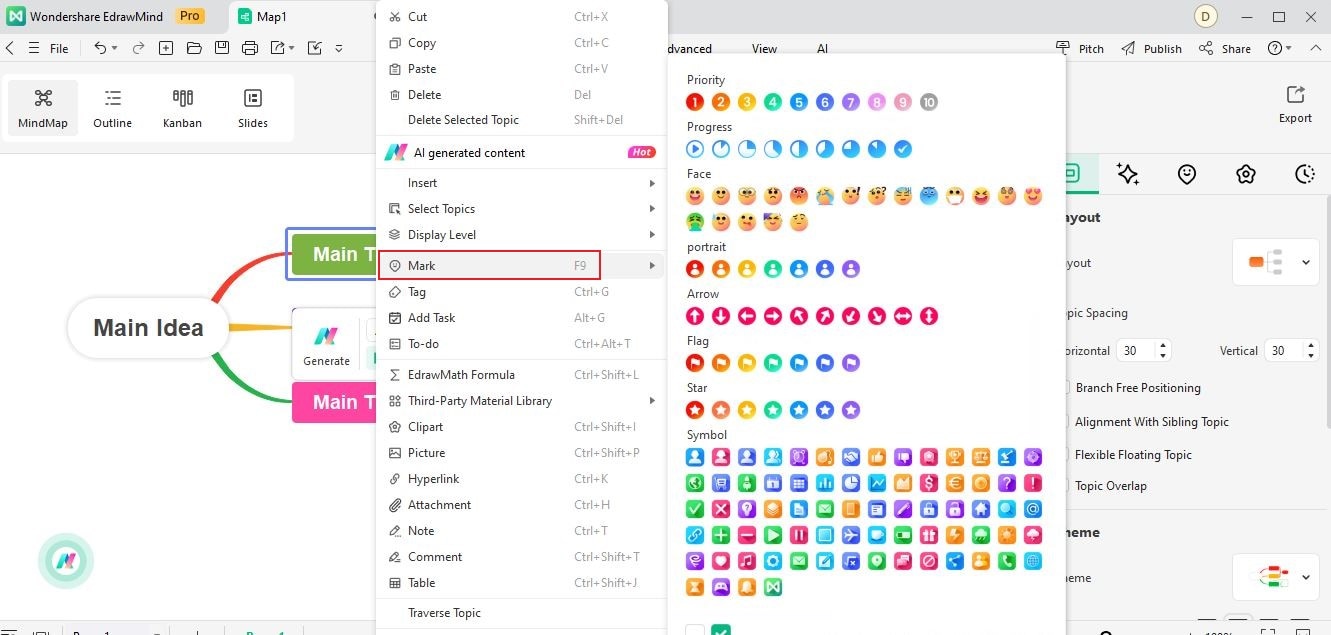
Marks or icons can make diagrams and mind maps more lucid and easier to understand. They can draw attention to key concepts, progress, or priority items. EdrawMind has marks in various categories, including priority, progress, portrait, star, flag, arrow, and symbol available.
You can also customize a group of icons for easier access, making your mind maps more engaging, persuasive, and effective.
01 Add Mark Into a Map
Inserting a mark or icon into a topic or an entire mind map is easy, and here's how to do it.

- Press F9 on your keyboard.
- Click the Mark dropdown list under the Insert tab bar.
- Click the Mark tab bar in the right panel.
- Right-click on the Topic and then choose Mark.
Tip: Once you have added an icon to a topic, you can easily switch to other icons from the same category. To do so, click on the added icon, and its category will appear below.
You can click on any icon to replace or delete it from there. This feature allows you to update the icons quickly and seamlessly in your mind map or diagram without starting again from scratch.
Note:
Except for Symbol, you can only attach a single mark from each category to a topic. But you can add several icons from various mark groups to the same topic.It ensures that each mark effectively serves its purpose without overwhelming the content. You should choose the most appropriate mark for each instance and use it judiciously. By limiting the number of marks you can use per category, EdrawMind encourages users to intentionally use icons, leading to more focused and impactful diagrams and mind maps.
02 Manage Icon Group
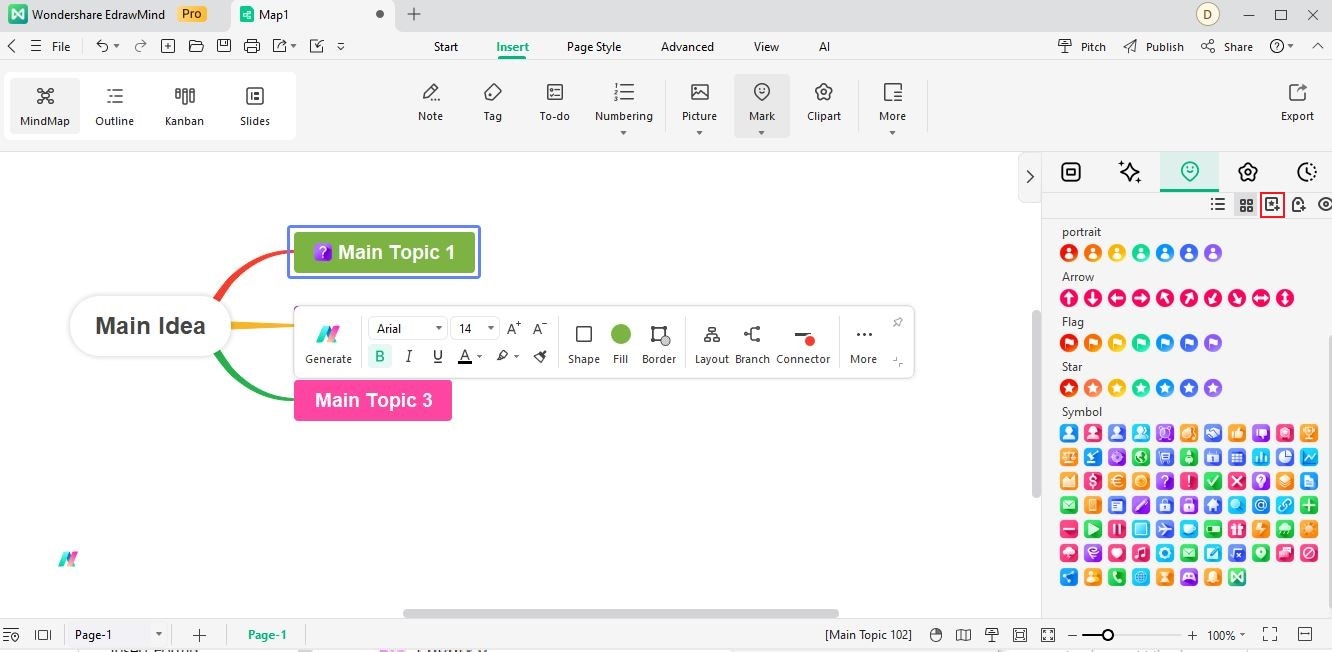
The Mark tab bar in EdrawMind offers two different ways to view the icons: Icon list view and Icon tile view. This feature provides greater flexibility in organizing and managing the icons, ensuring a more efficient and personalized diagramming experience. Click the display command buttons below the Mark tab bar to switch between the two.
- With the Icon list view, you can see all your marks in a vertical list format, making it easy to browse through and select the desired mark.
03 Add Icon Group
Here are the steps to creating your icon group.
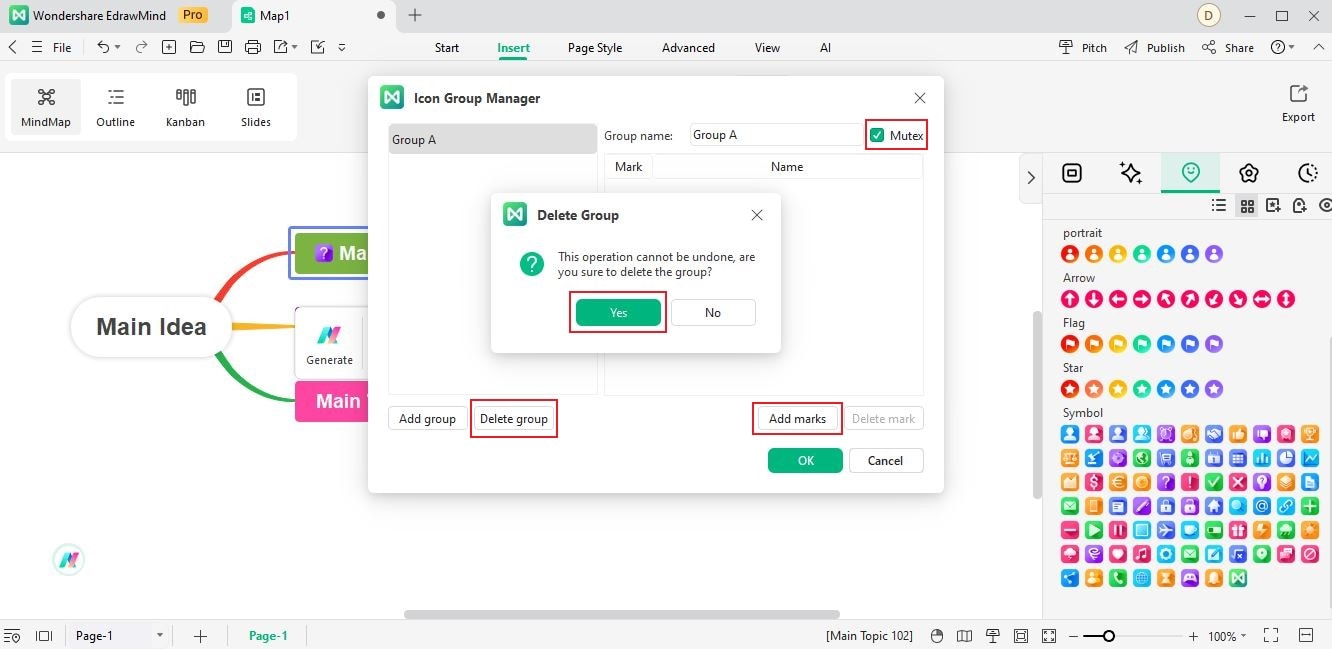
Here are the methods of managing icon groups in the Icon Group Manager box.
- Select the Mutex checkbox in the upper right corner of the Icon Group Manager dialogue box to define the marking icons as mutually exclusive.
- Click Add marks to open your local device storage, and select the icon you want to upload in EdrawMind.
- Click Delete Group to delete the entire mark group, then select Yes in the Delete Group dialogue box.
04 Hide Unused Marks
The Hide unused marks function lets you mask idle icons, leaving only the ones you work with. It can help you stay focused and avoid getting sidetracked by unnecessary visual elements.