Start with EdrawMind Desktop Guide
Add Relationship Lines
Relationship lines are essential for creating a clear and organized flow of information. They establish connections between ideas or concepts and help you visualize their links. You can customize these lines to match your specific preferences.
Follow the steps below to improve the clarity and coherence of your ideas, which results in more effective communication and a better understanding of your ideas. By doing so, you can keep your audience engaged and focused on the information you're presenting.
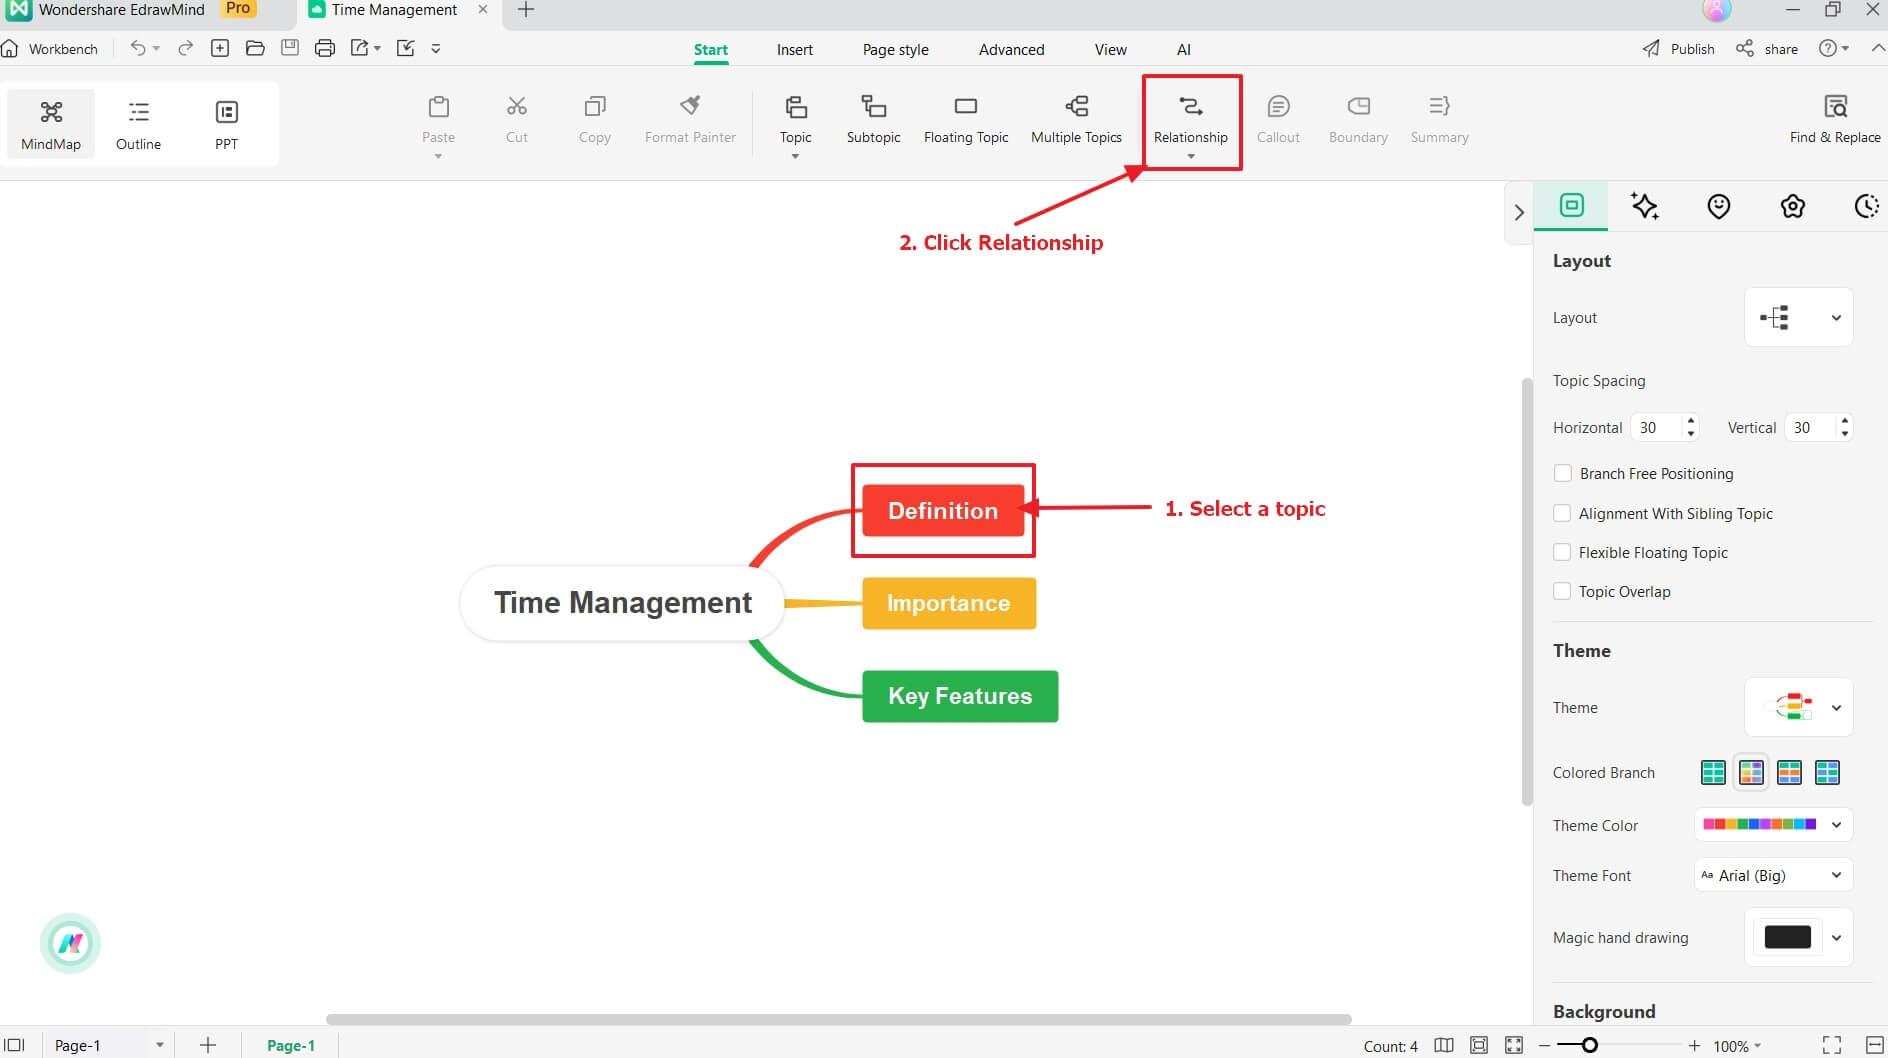
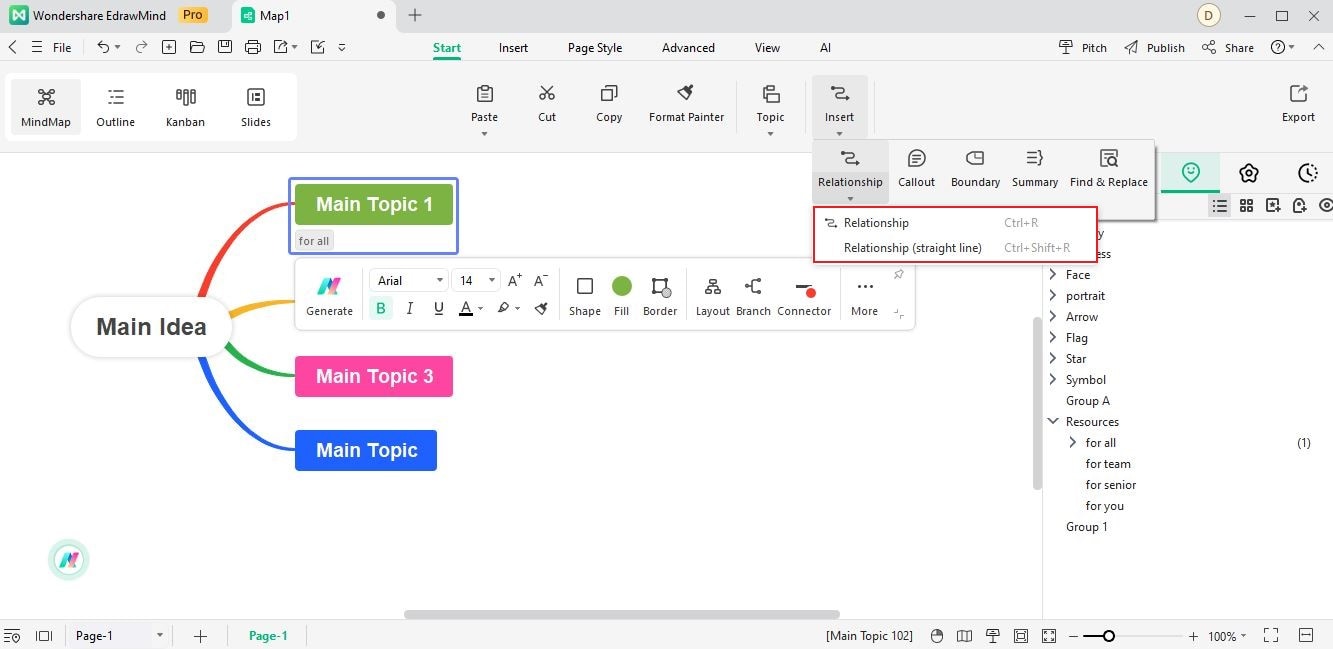
- Option 1: Access the Start tab, then click the Insert > Relationship command button.
- Option 2: Go to the Start tab. Then click the Relationship dropdown list and select a relevant relationship line style.
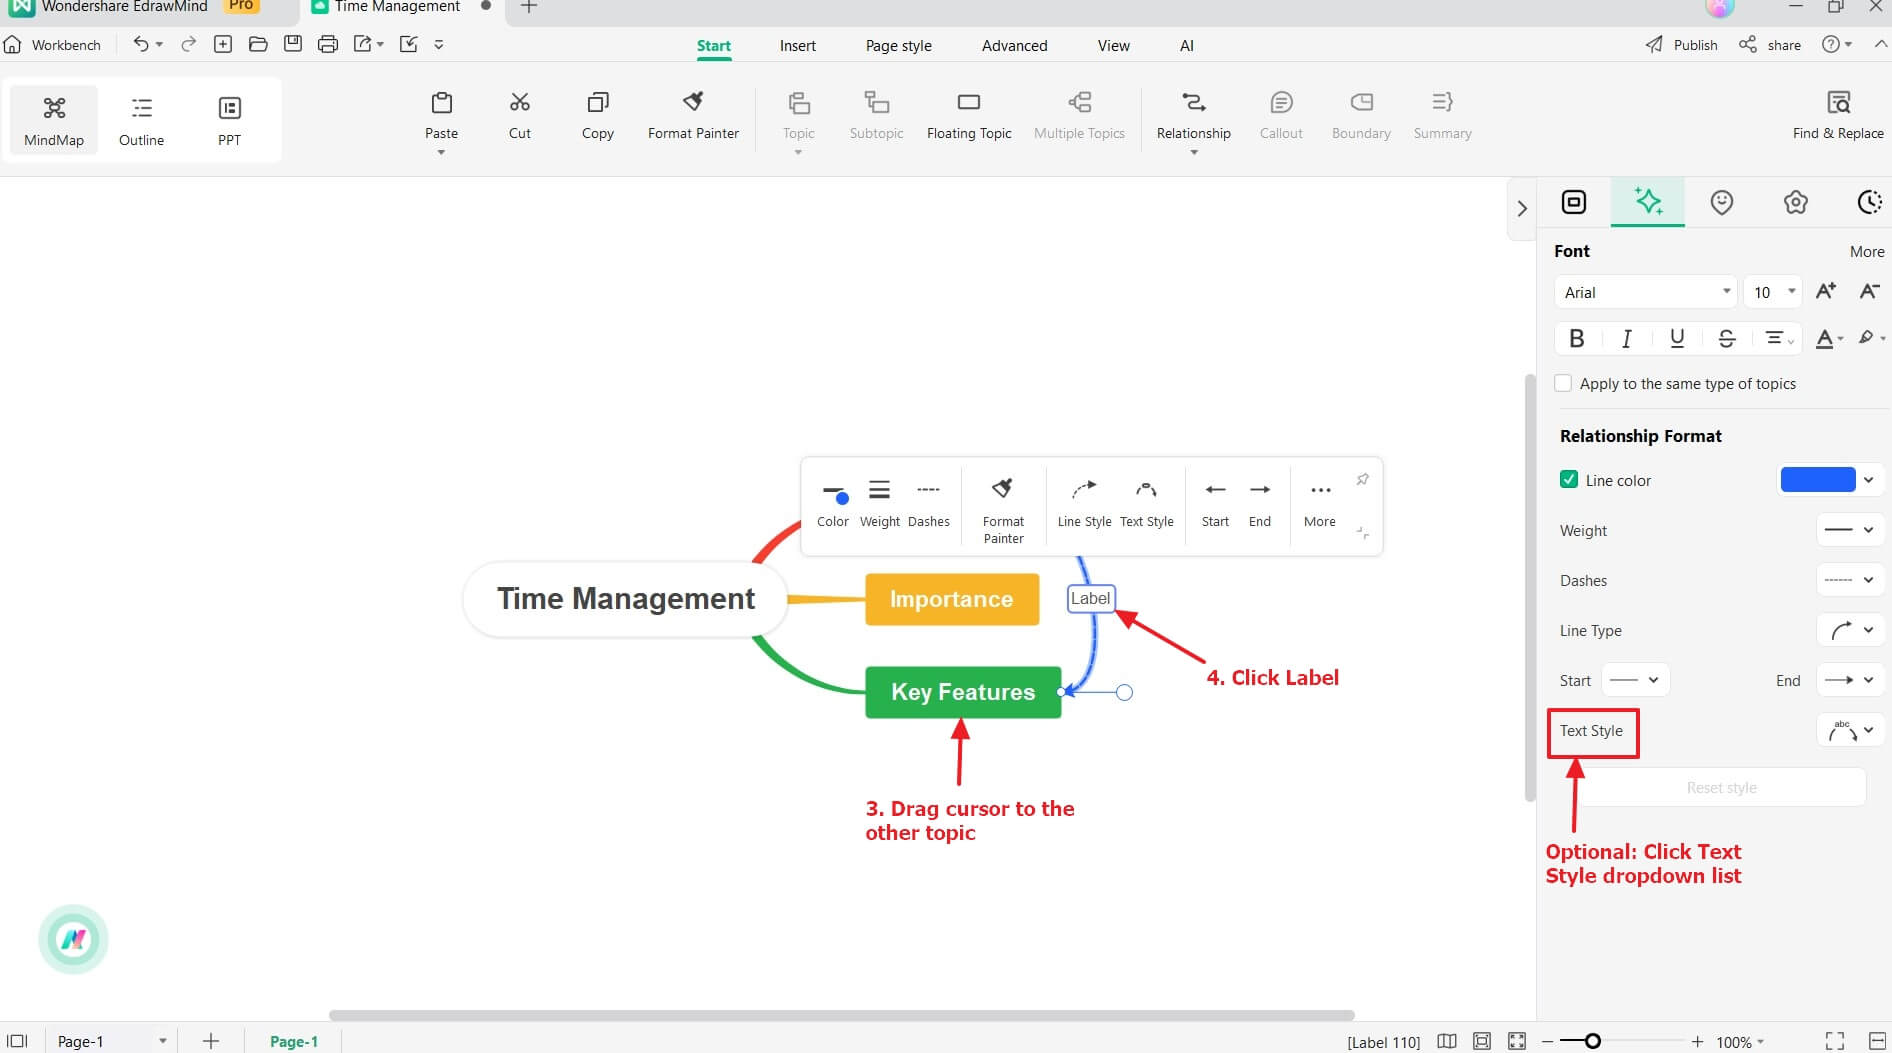
Tip:
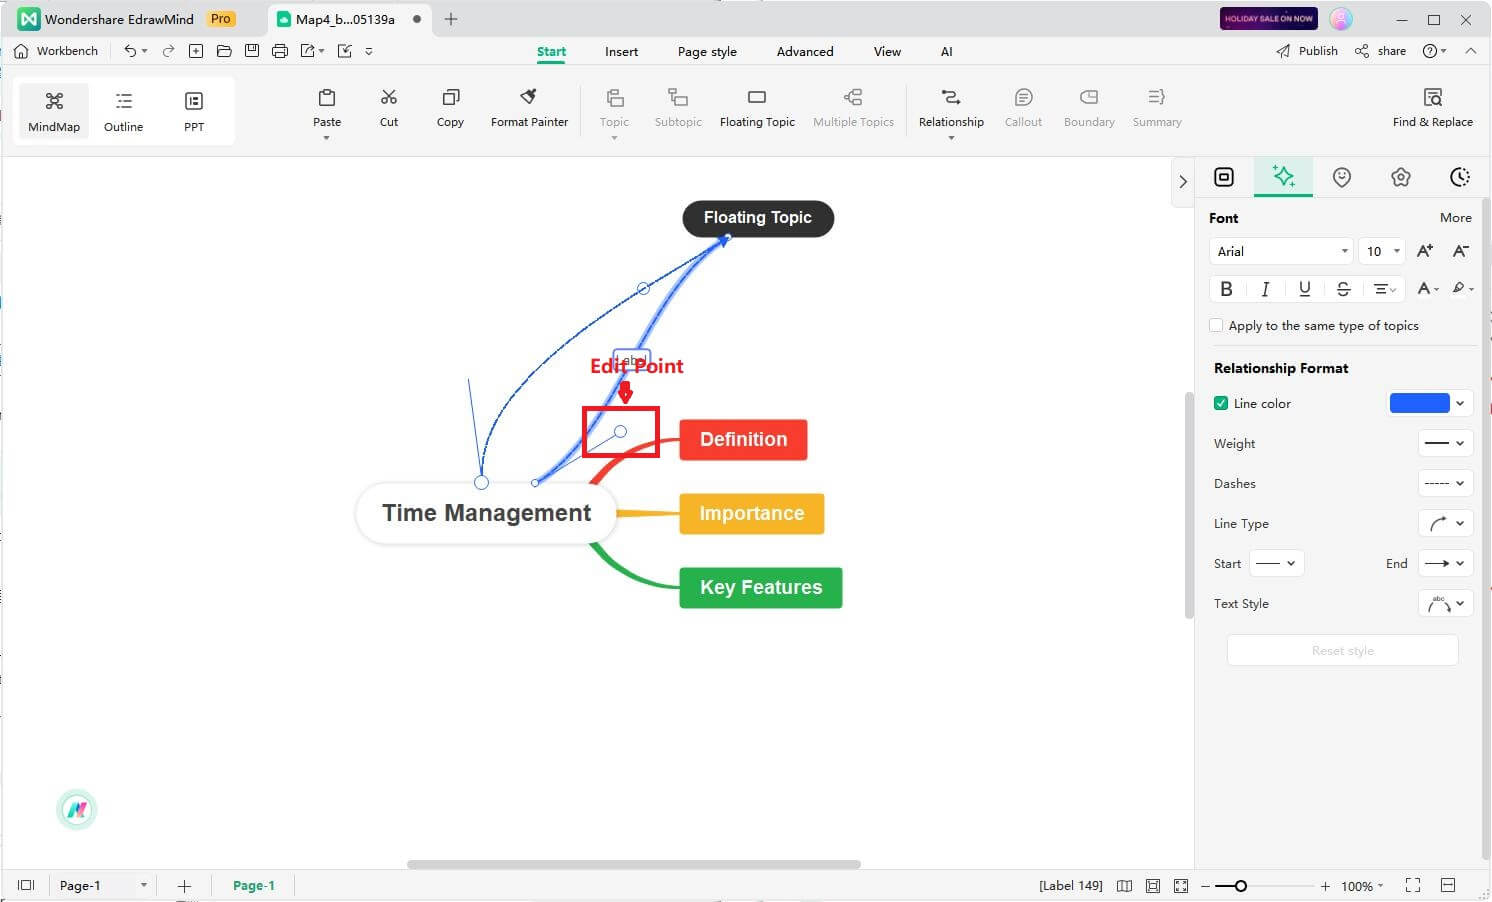
Click the Text Style dropdown list in the Relationship Format section to modify the style. Next, select the desired appearance of the text in the Relationship.Relationship Format
Customizing the design of relationship lines enhances visual appeal and functionality for a more effective and insightful mind map. For instance, different line types, thicknesses, and colors can help you convey specific meanings and correlations between ideas on the map. It can help you and your audience better understand and remember the linkages, especially when dealing with complex or interconnected ideas.
Follow the steps outlined below for each tool to achieve this level of clarity and organization in your mind maps.
1. Adjust Curvature
It can help you make the most of the canvas space and prevent clutter caused by overlapping lines.
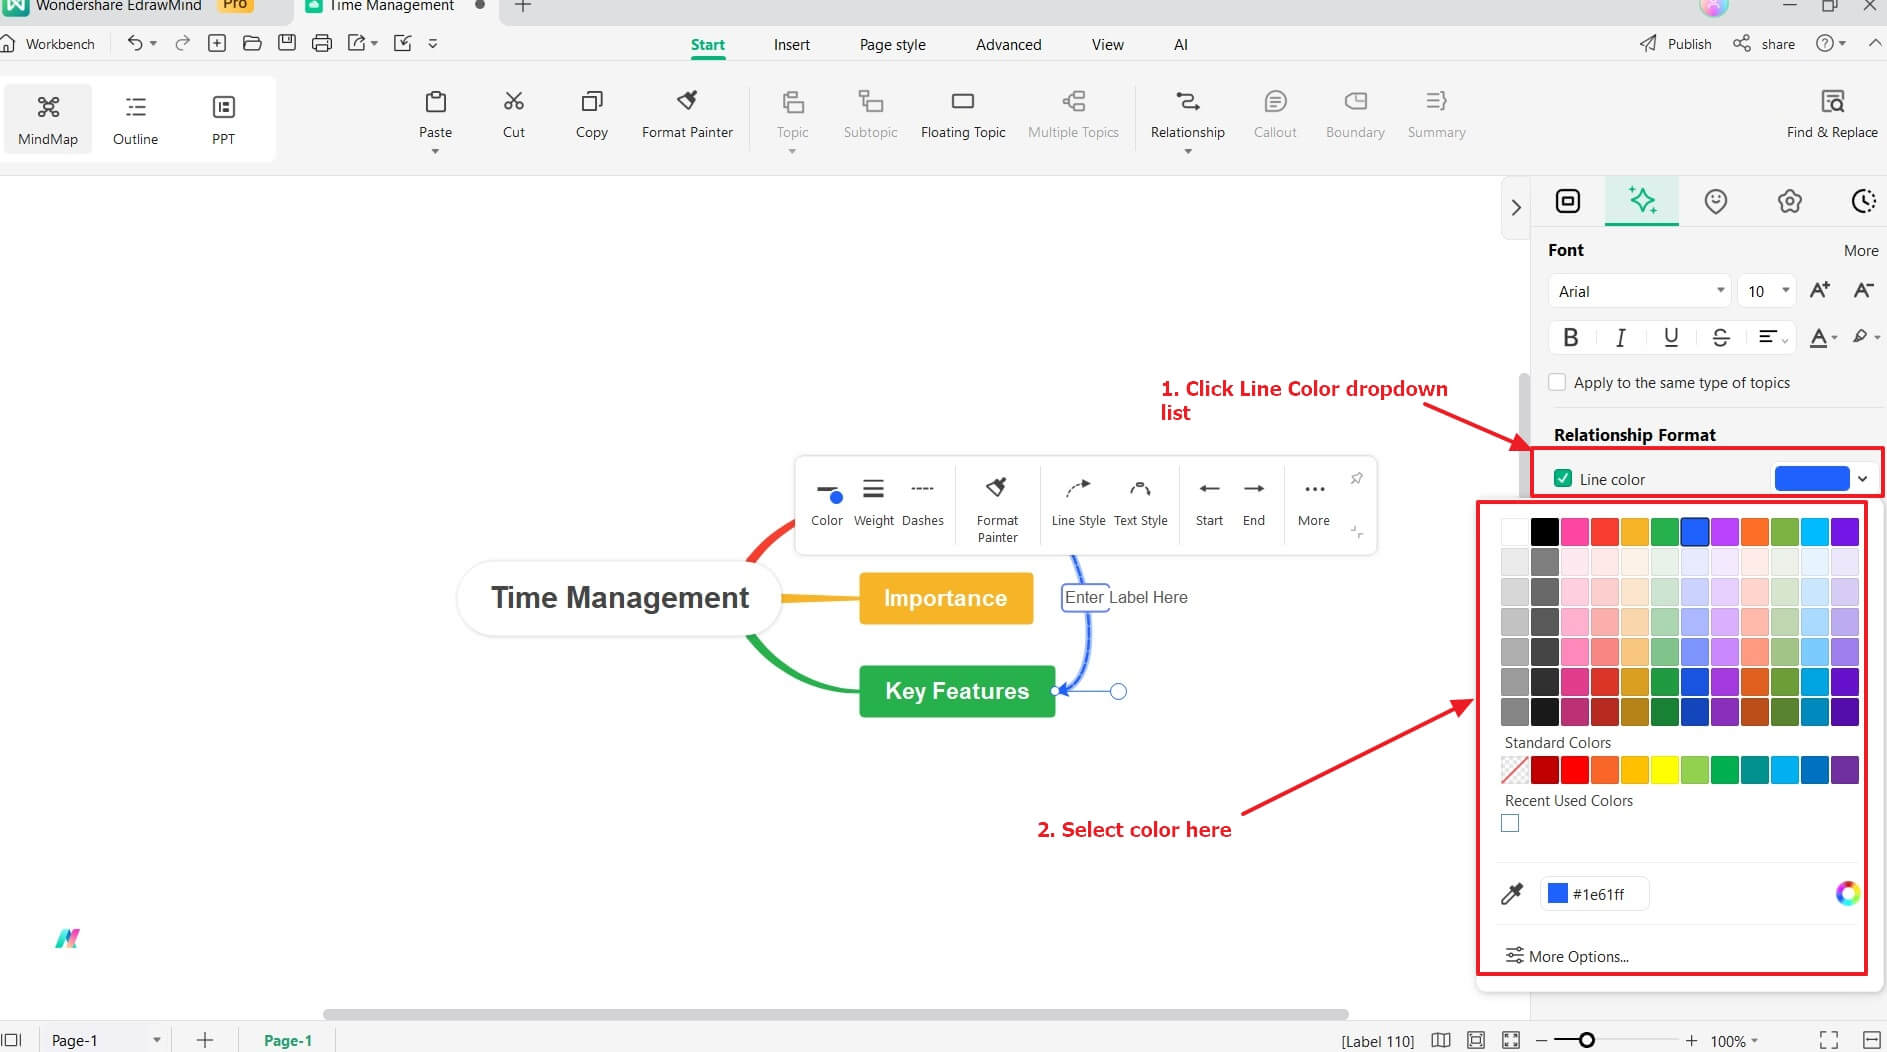
2. Line Color
Using a different line color can highlight a specific category. It can also help you visually differentiate between associations and add meaning.
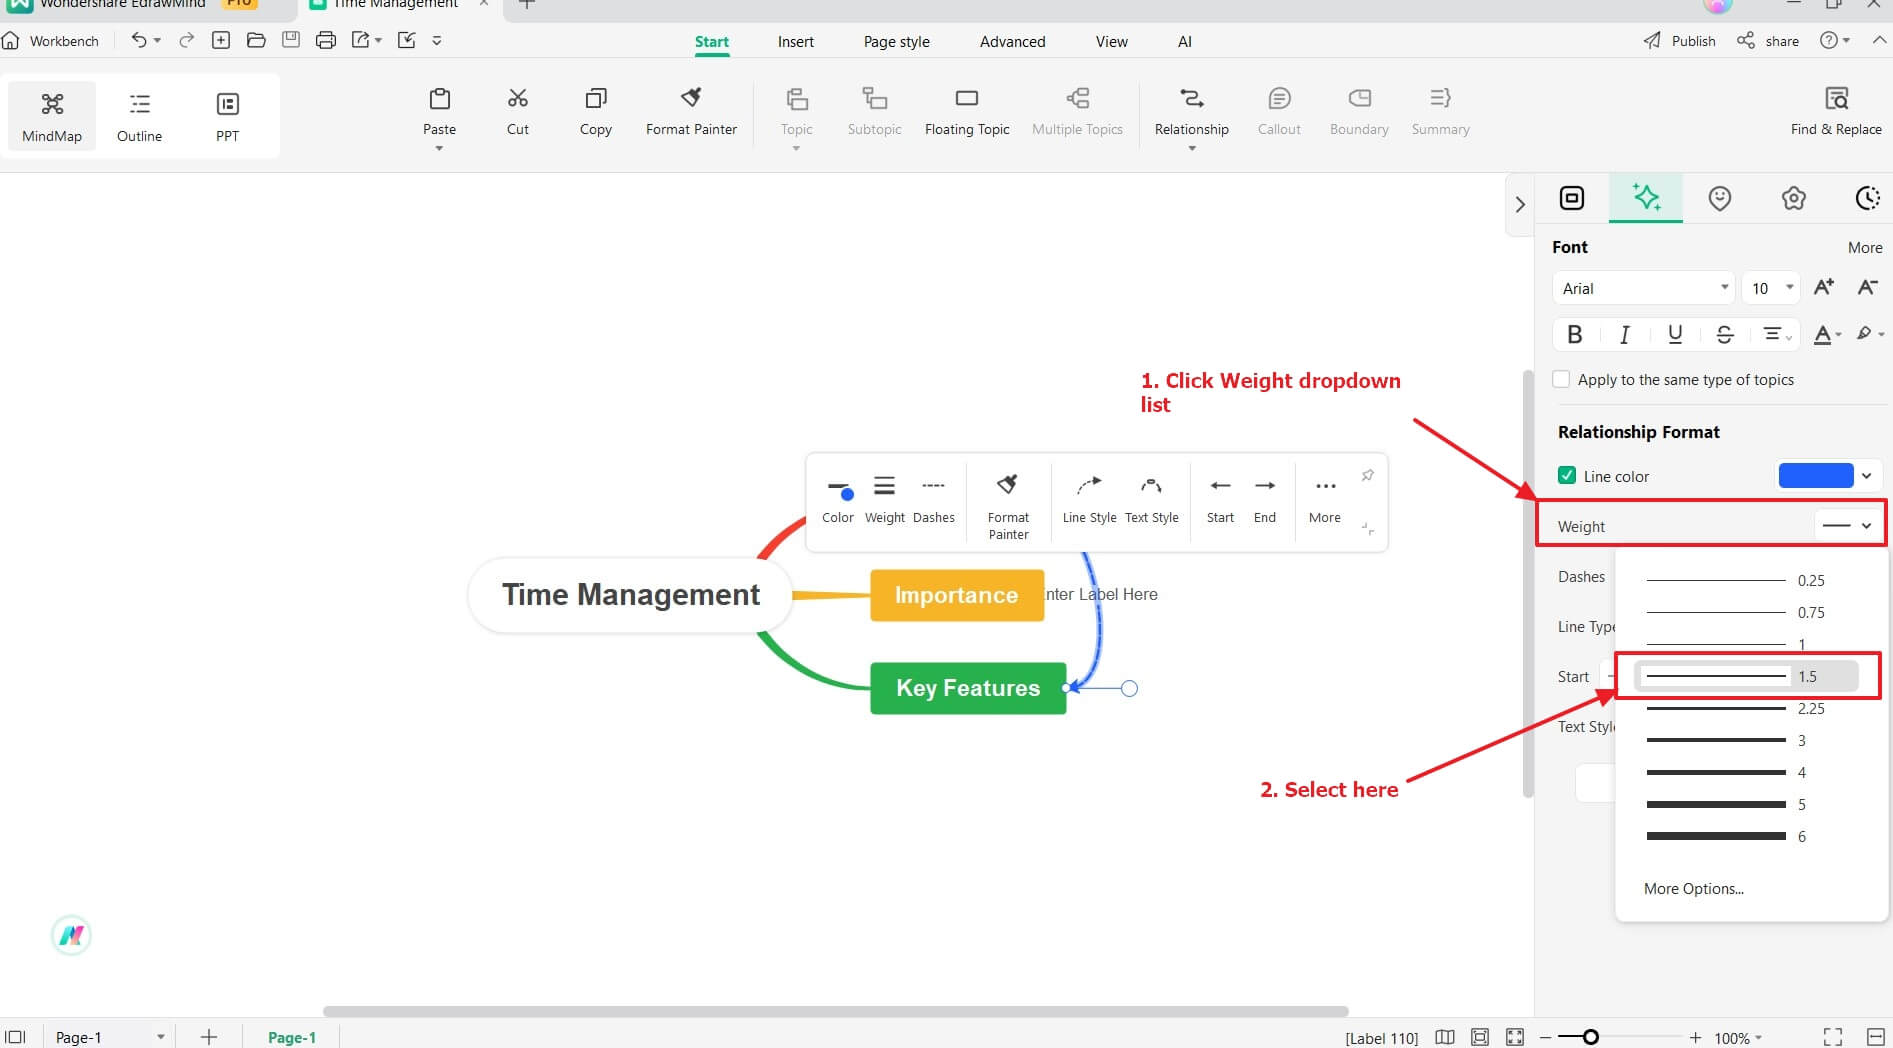
3. Weight
Using a thicker line can indicate a more significant relationship. Conversely, a thinner line can imply a weaker or less meaningful connection.
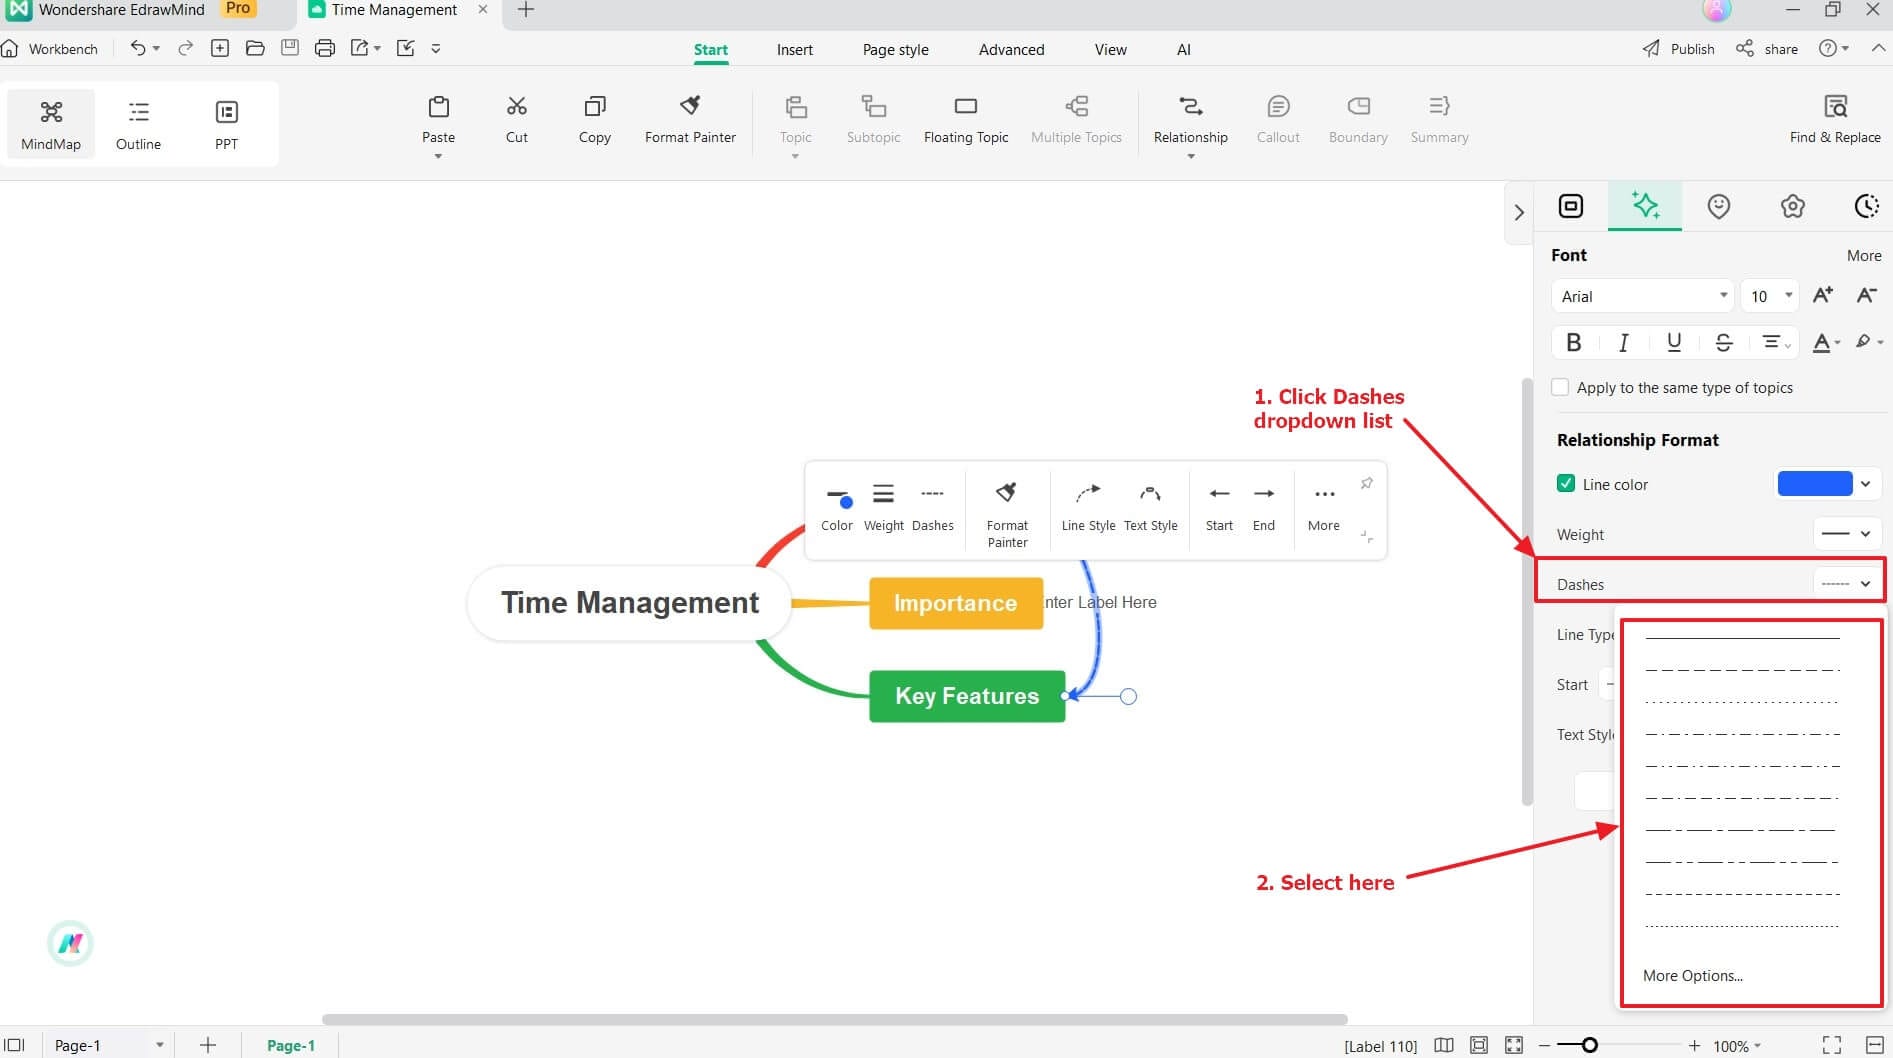
4. Dashes
Using a dashed line can indicate a temporary or uncertain relationship between elements. A solid line can imply a permanent or more established connection.
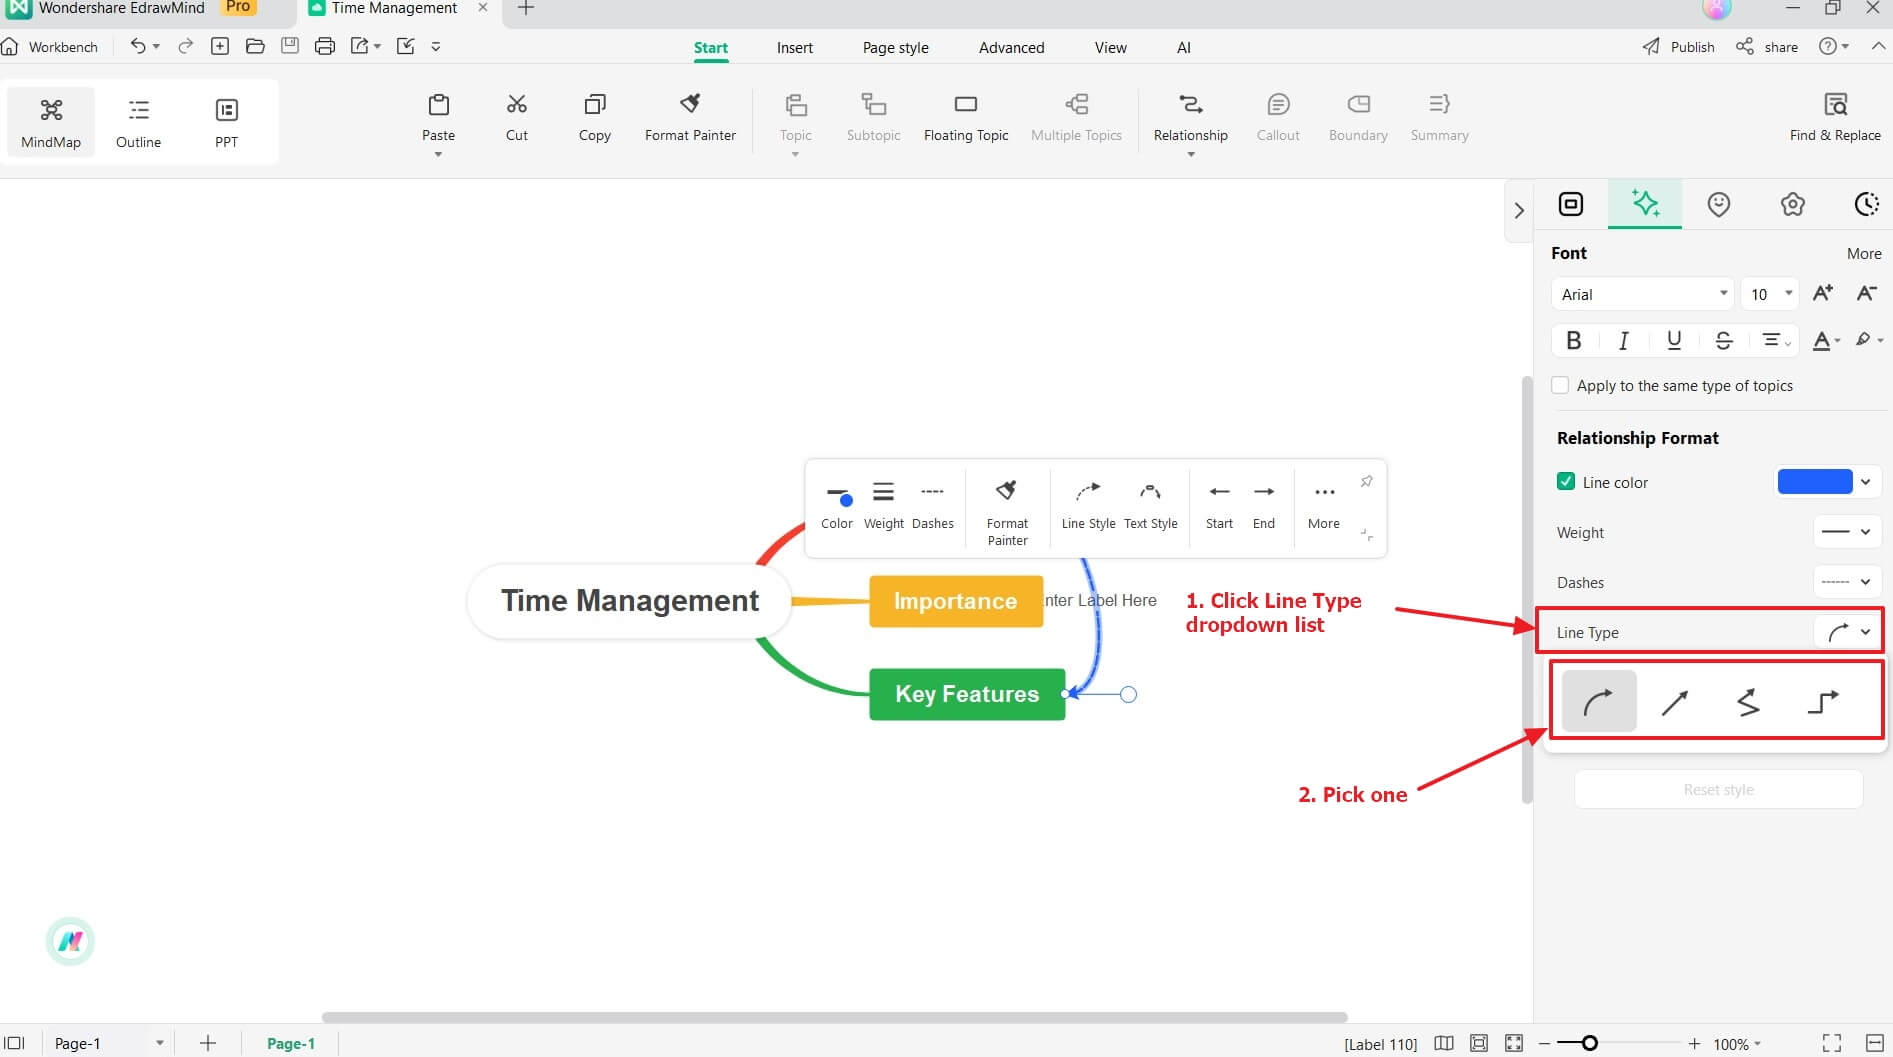
5. Line Type
Curved lines give the mind map a softer and more organic look. Straight lines can indicate a direct connection between two ideas. Zigzag lines may be helpful when conveying more dynamic or unconventional associations between different concepts.
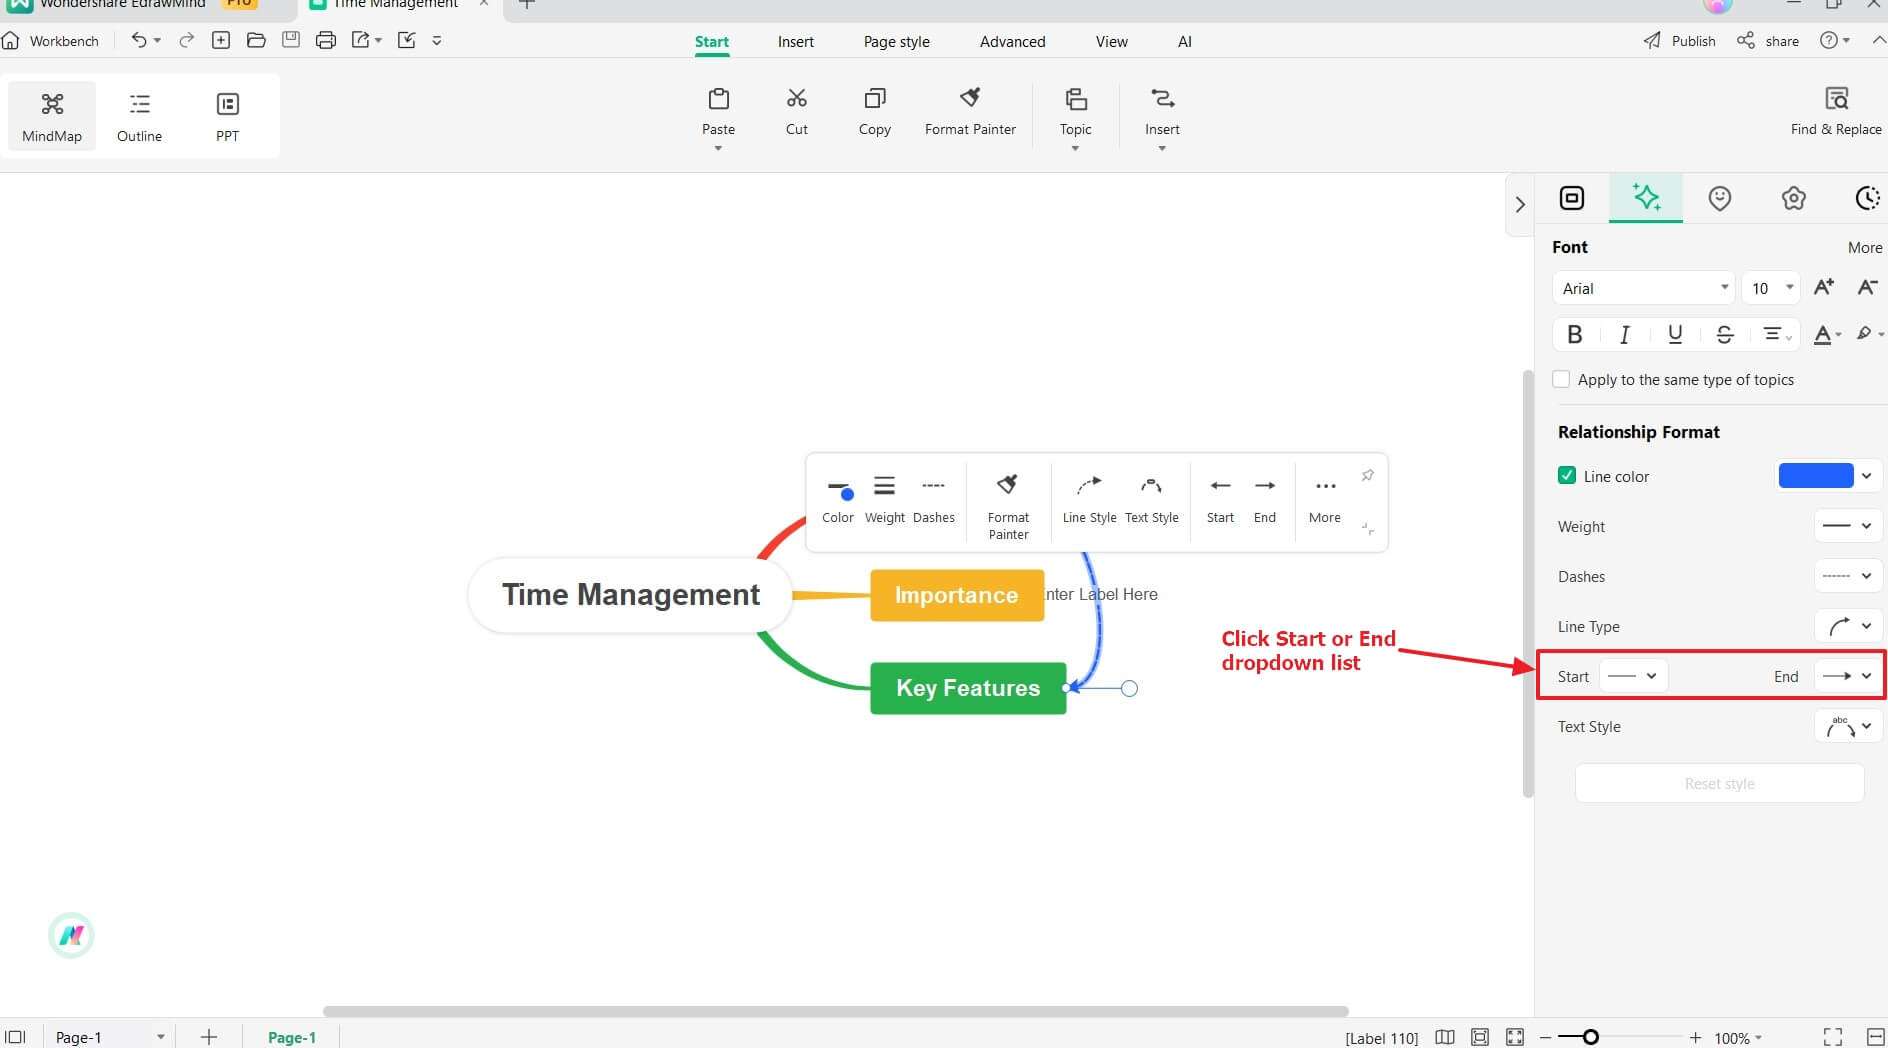
6. Start and End
Customizing the start and end of the relationship arrow in a mind map by indicating an arrowhead can help your team or audience better understand the direction of the connection. This visual cue can help clarify the starting point and the end point, making it easier to follow the flow of ideas and understand relationships within the map.