Start with EdrawMind Desktop Guide
Generate a mind map with AI
Enter prompts & generate a mind map
User Guide for PC
-
Get Started
-
Topics
-
Notes & Knowledge Base
-
Symbols
-
Layout
-
Theme and Style
- Change and Customize the Theme
- Change Topic Font
- Theme Color and Colored Branch
- Hand-Drawn Style
- Change Background and Add Watermarks
- Change Text Style and Color
- Change Topic Shape and Border
- Change Topic Colors
- Change Styles of Topic Shadows
- Change Branch Style
- Adjust Topic Margins and Topic Text Width
- Change Connector Style
- Format Painter and Style Follows
-
AI & OCR
-
Outline Mode
-
Slides Mode
-
Brainstorming Mode
-
Mind Map Gallery
-
Task Management Tips
-
Document Operations
-
View Mind Map
-
Open, Save, Share and Print
-
Real-time Collaboration
Print a Mind Map
Follow these steps to print your mind map:
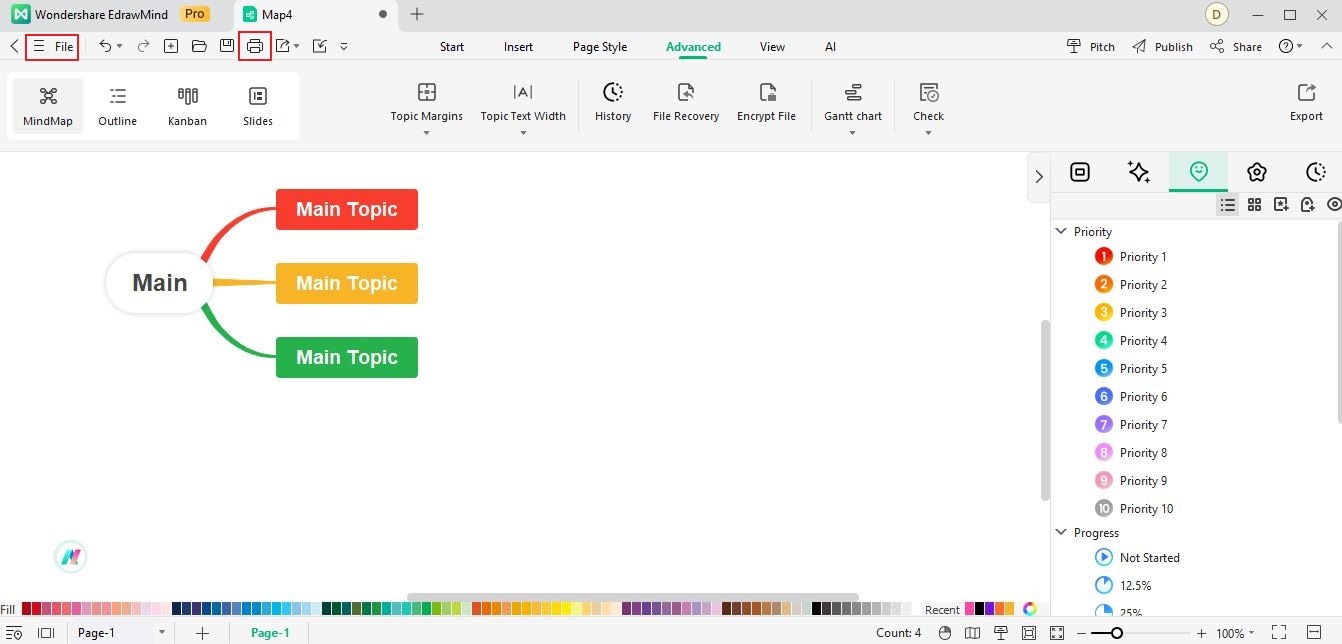
Step 1Click the Print icon in the quick access toolbar on top. Alternatively, click the File tab in the upper navigation pane.
Note:
You can also press the keyboard shortcut Ctrl + P.
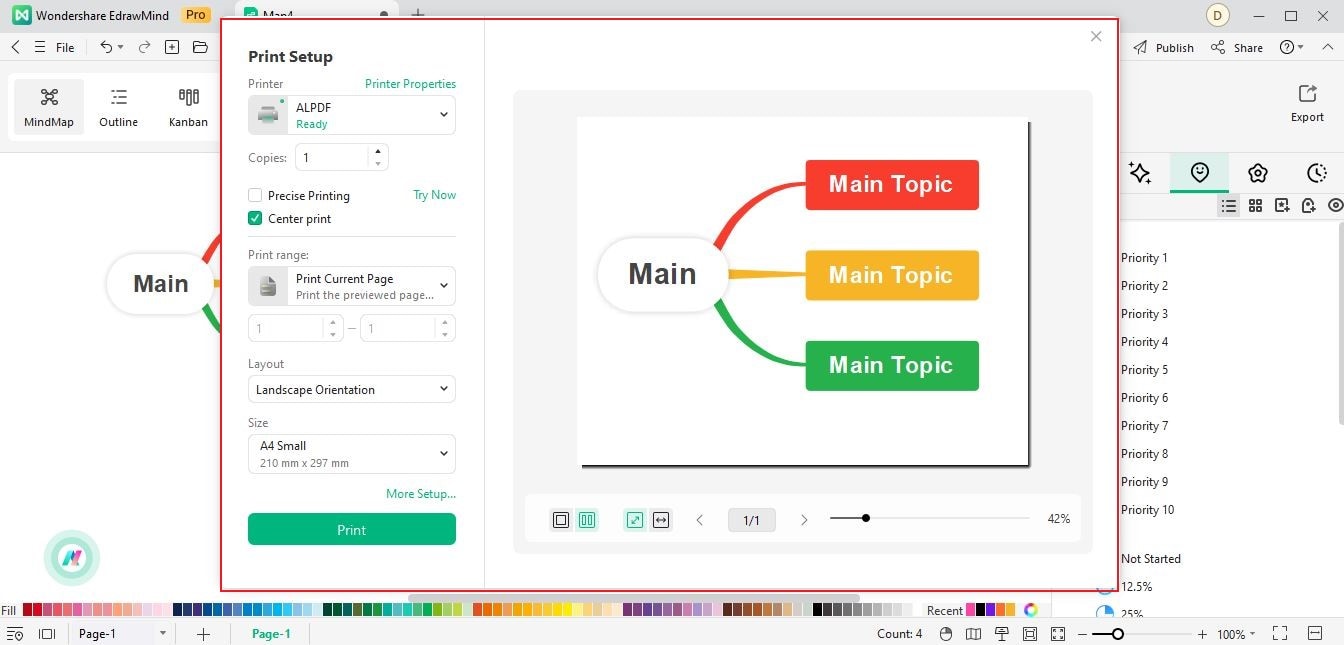
Step 2Choose Print. Select the Printer, enter the number of Copies, change the Settings, choose the Pages to print, select the Layout, and set the Size of the file.

Step 3Click Print to start printing the file.
Printer Properties
Follow these steps to change more printer properties:
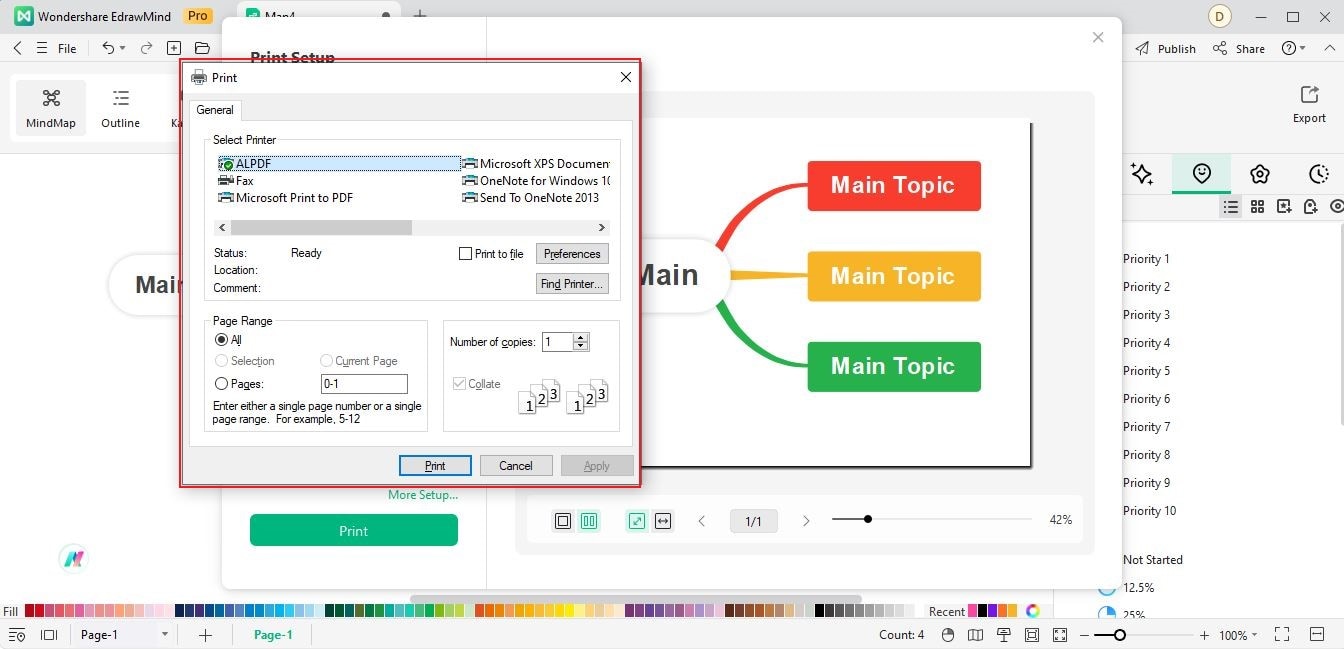
Step 1Click Printer Properties in the Print section.
Step 2In the Print dialogue box, you should see the following settings in the General tab:
- Select Printer: Select from the available printers connected.
- Print to file: It is a way to save a document in a format that a different printer can use. Selecting Print to file can be helpful if you want to print the file on a printer with different capabilities than your current printer.
- Page Range: You can print all or a specific range of pages in the Page Range section. Select the All radio button to print all pages. To print a specific range of pages, enter the required number of pages in the Custom range.
- Number of Copies: Enter a value for the number of copies you want to print.

Step 3Click Apply to save the changes. Then, click Print to start printing the file.
More Setup
Here are the steps on how to set up page print settings:
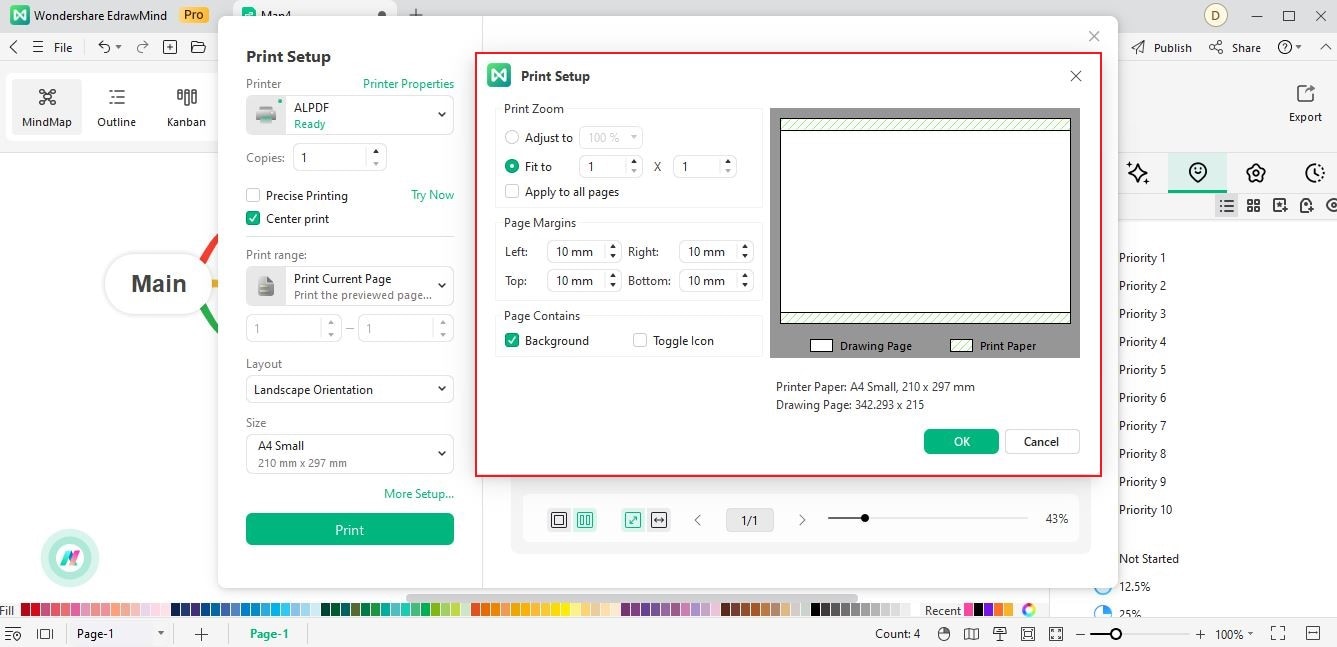
Step 1Click More Setup… in the Print section.
Step 2In the Print Setup dialogue box, you can change Print Zoom, Page Margins, and Page Contains sections according to your preferences.

Step 3Click OK to apply the changes and close the dialogue box.