Start with EdrawMind Desktop Guide
Convert Files to MindMap
Use EdrawMind to instantly convert files to MindMap and turn your slides, reports, outlines, and ideas into organized visual maps. The designs are fully customizable with drag-and-drop ease — ready to export, present, or share with others. Just format your outlines properly and unleash the power of automation to get the best results.
Index
Step 1: Upload a File
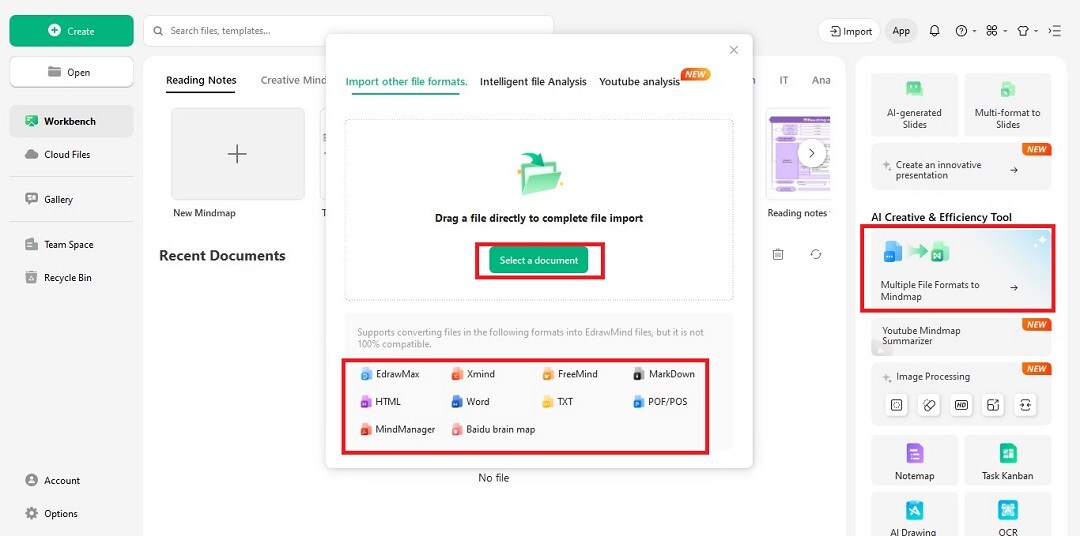
Within the EdrawMind home page, you can see the Multiple File Formats to MindMap button on the right-hand side panel. Click on it and drop a document that you want to convert to a mind map.
Currently, EdrawMind supports MS Word, MS PowerPoint, EdrawMax, Markdown, XMind, MindManager, Txt, FreeMind, HTML, POF/POS, and Baidu Brain Map.
Step 2: Generate a Mindmap
EdrawMind automatically analyzes your imported document, detects the sequence, and converts it into MindMaps. However, you can improve auto-generation by formatting your outlines and reports with detectable styles for best results.
Headings & Subheadings
EdrawMind can detect the headings and subheadings in your MS Word and Markdown documents. The heading hierarchy (H1, H2, H3, H4) will be converted to topics and subtopics in the MindMap.

Bullets and Lists
The tool also supports detailed outlines with ordered and unordered bullets and lists written under relevant headings. These lists are converted into child nodes and populate data under each topic.
Slide Title and Content
In the case of MS PowerPoint slides, the title is converted into the main topic, and the content within each slide is treated as sub-topics and child nodes.
Markdown Syntax
EdrawMind can also read the Markdown Syntax, i.e., ###, ##, #, - etc. The syntax is then translated as the main topic, sub-topic, and child nodes based on the prefix.
AI Adjustments
If your formatting isn’t perfect, just try to write the outlines in sequence, and the AI will automatically adjust and restructure the content for clarity.
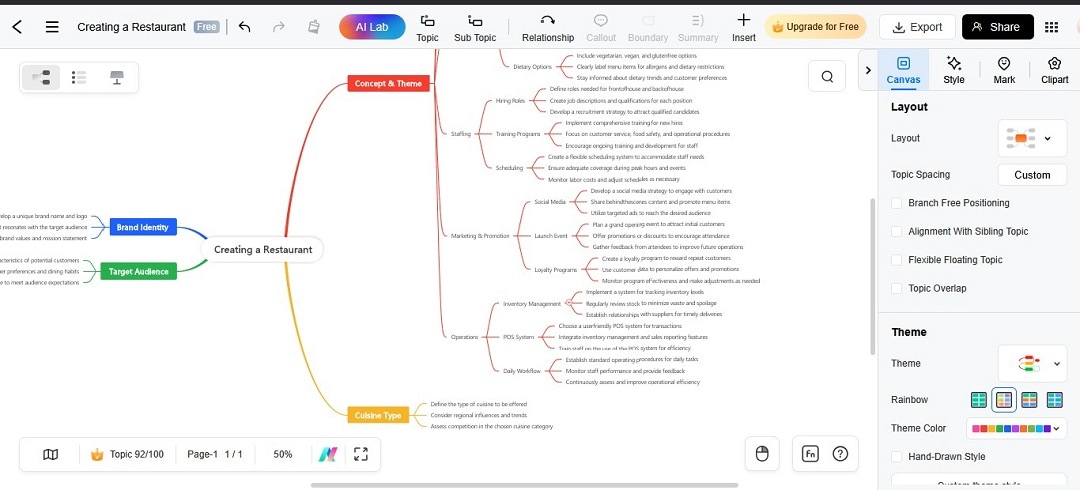
Step 3: Customize the Map
Once EdrawMind generates your MindMap, you can fine-tune it to add a personal touch before exporting.
Edit & Customize with Canva
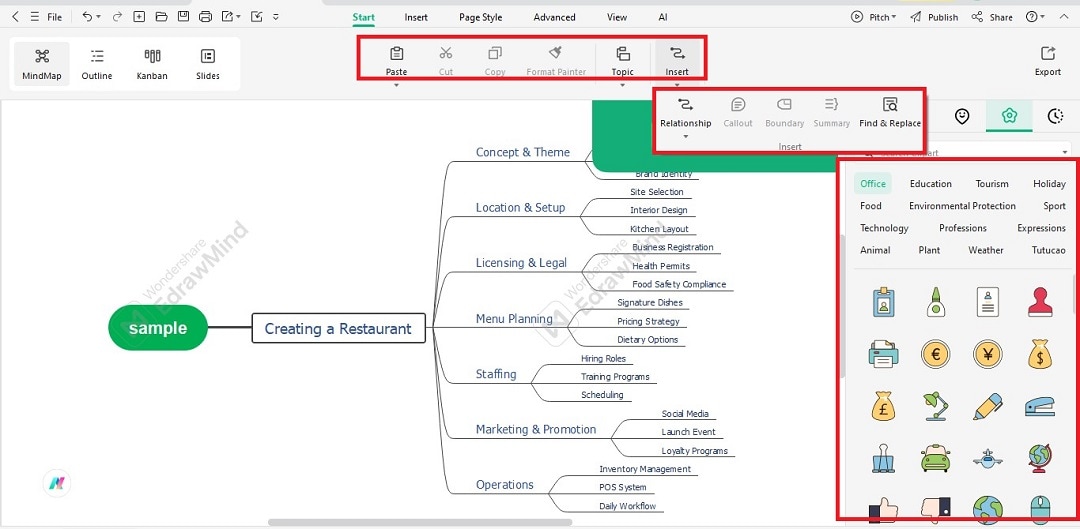
Once EdrawMind generates your MindMap, you can fine-tune it to add a personal touch before exporting. Use the Canva-style toolbar to edit your generated MindMap with drag-and-drop ease. Add new elements, restructure the nodes, insert icons or ClipArt, and use visual cues to show progress for each element.
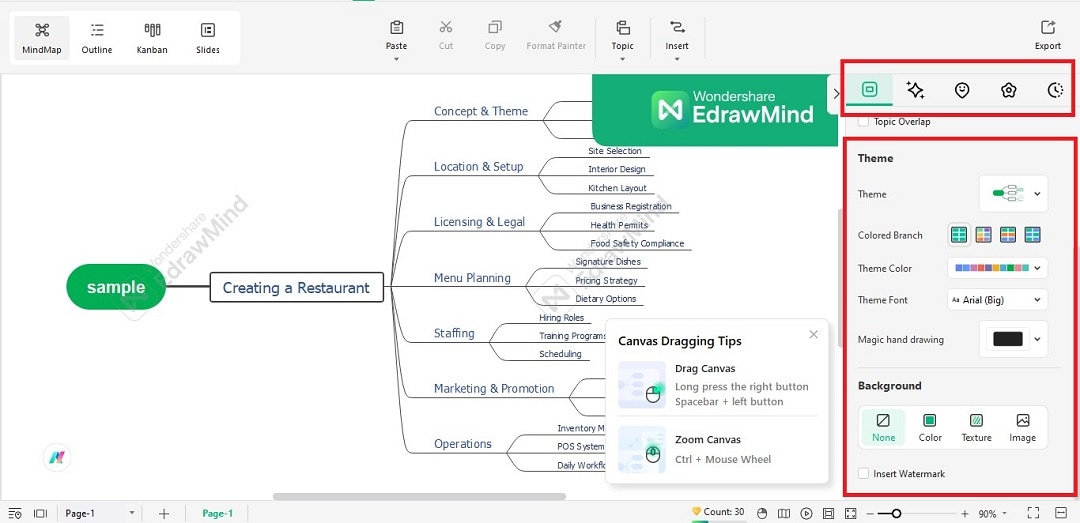
Adjust the Styles
The right side of the screen contains design and style elements. You can use these options to change the theme, color scheme, MindMap layout, theme font, and background colors, or use Magic Hand Drawing to add new nodes.
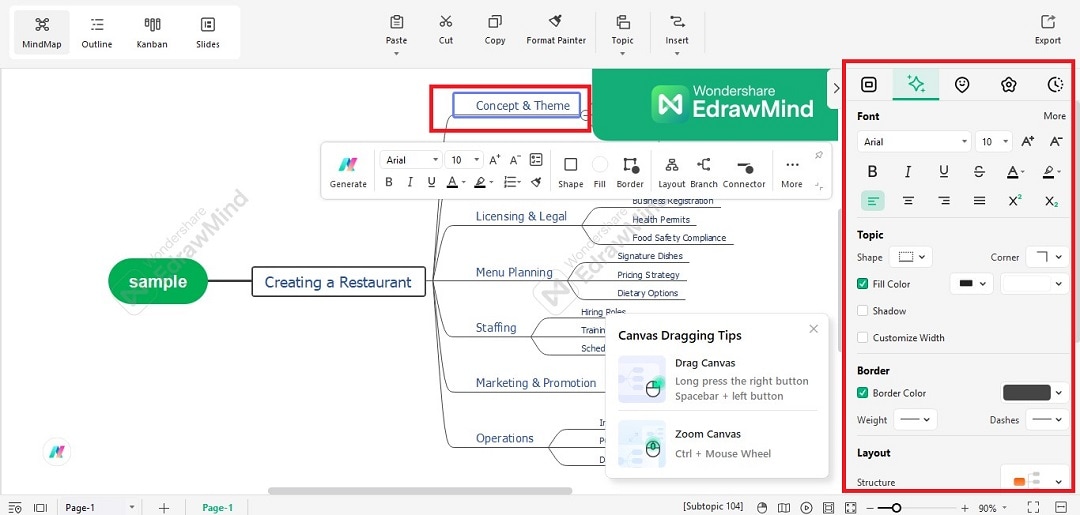
Complete Control Over Branch Management
Select individual nodes to customize their font, weight, color, connector style, and more. Moreover, you can expand or collapse them to change the level of details and even drag them to adjust the map's flow.
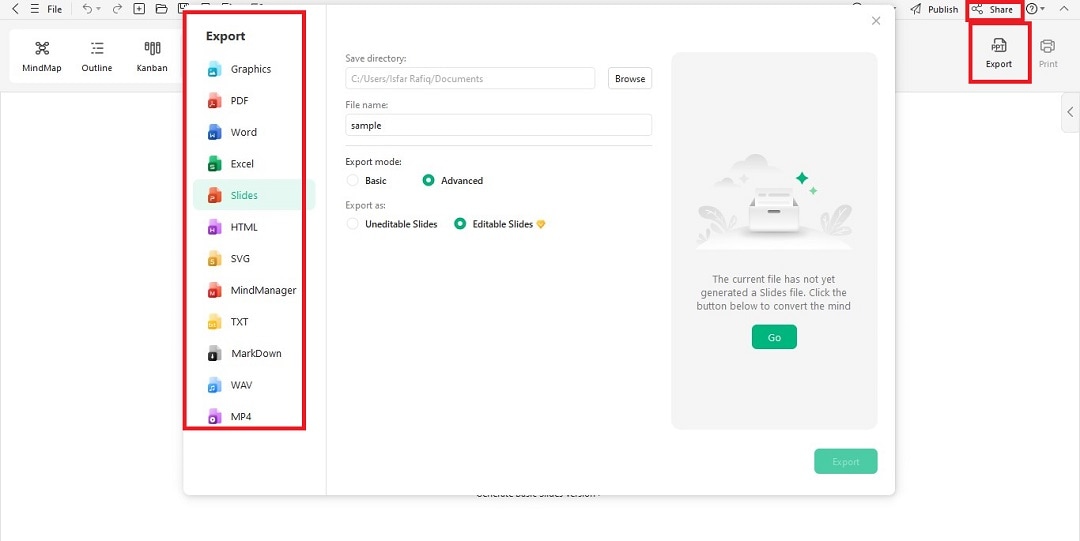
Step 4: Share the Result
Once finalized, your mindmap will be automatically saved to the cloud storage. You can access your work from EdrawMind on Windows, Web, Linux, MacOS, Android, and IOS. Click the Export button to save your map locally in multiple file formats, including PNG, Jpeg, XML, PPT, PDF, SVG, etc.