Start with EdrawMind Mobile Guide
Understanding the User Interface
The first step in learning a new app is understanding its user interface. While it might often feel overwhelming, EdrawMind is simple, so you can understand quickly. Here’s a quick guide.
Note:
This guide will touch upon the basic user interfaces, but if you want more specific operations, please see the other pages.Homepage
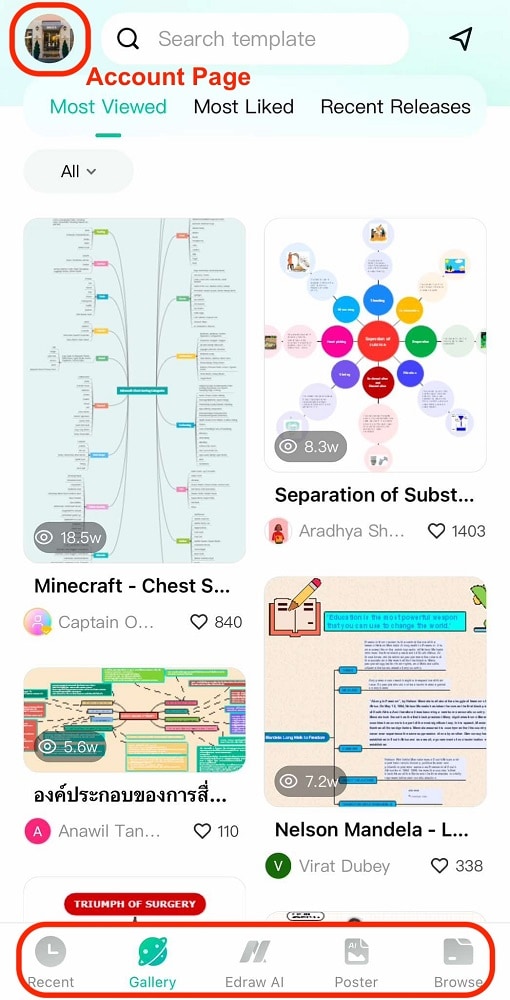
On the homepage, there are several tabs you can work with:
- Account Page. It is usually placed at the top-left side. You can log in, sign up, and handle your account settings.
- Recent. You can find the latest projects that you have worked on here.
- Gallery. Browse and select over 30,000 templates offered by EdrawMind here.
- Edraw AI. This is the main access point for all Edraw AI tools, such as One-click Mind Map, AI Drawing, etc.
- Poster. Here, you can find the dedicated tools for poster-making within EdrawMind.
- Browse. You should go here if you want to look for projects/files on your local device or in the cloud.
Workspace
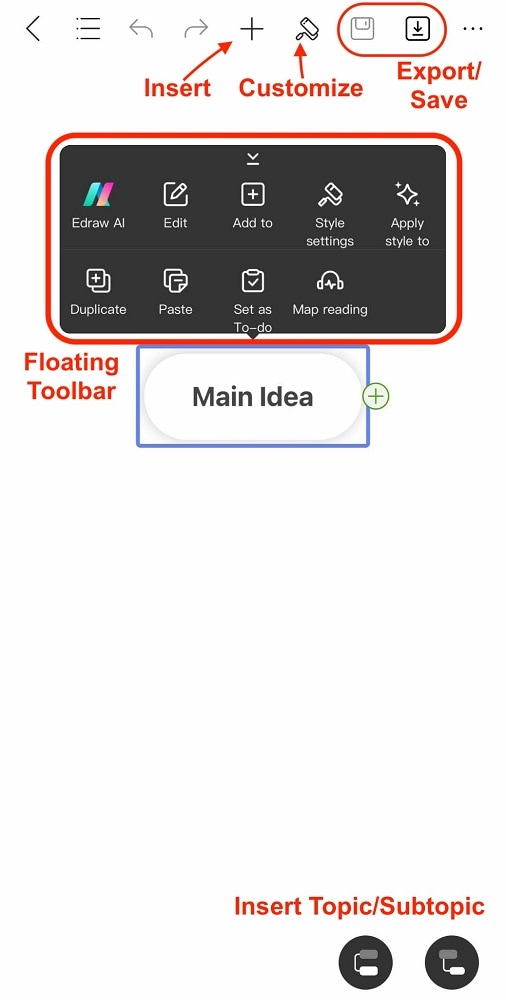
In the workspace (or when working with a mind map), here are some basic menus or access points that you have to note:
- Insert. Here, you can insert images, marks, attachments, and more.
- Customize. You can customize the theme, background, connector styles, and more here.
- Export/Save. You can save your mind map/diagram through this tool.
- Floating Toolbar. You can quickly access editing tools from the floating toolbar when selecting an element.
- Insert Topic/Subtopic. To add new nodes to your mind map, use the respective button.