Traditional mind mapping tools require constant clicking, adjusting node size, nudging lines into place, or fixing spacing. That works fine until you're updating them regularly. For me, it wasn't sustainable.
Mermaid offered a better path: type a few lines of syntax, and get a structured mind map that fits in any Markdown file. No exporting. No broken layout. Just reproducible results.
In this write-up, I'll show you how to build professional mind maps using Mermaid with practical examples, templates, concrete workflow tips, and the best Mermaid alternative for mind mapping.
So let's start by looking at why Mermaid works so well in a modern mind-mapping or planning setup.
In this article
Why Mermaid for Mind Maps?
The Traditional Mind Mapping Pain
Most visual mind-mapping tools require constant dragging, resizing, and rearranging. It works until it doesn't, especially once the diagram becomes complex or requires regular updates. Every manual adjustment risks misalignment. And if you want to share it in a Git-tracked project? You're stuck. Tools like Miro or XMind generate binary files, so version control becomes almost impossible.
They also don't integrate into docs-as-code workflows. You can't embed the mind map in Markdown without a screenshot. And you can't treat it as part of your documentation pipeline. It lives outside the workflow, not inside it.
Mermaid's Structural Advantage
Mermaid doesn't rely on mouse interactions or design interfaces. It turns plain text into diagrams using syntax blocks you can version, edit, and reuse. The structure is entirely controlled by code, which removes layout guesswork and supports direct embedding.
Here's what that looks like in Mermaid syntax:
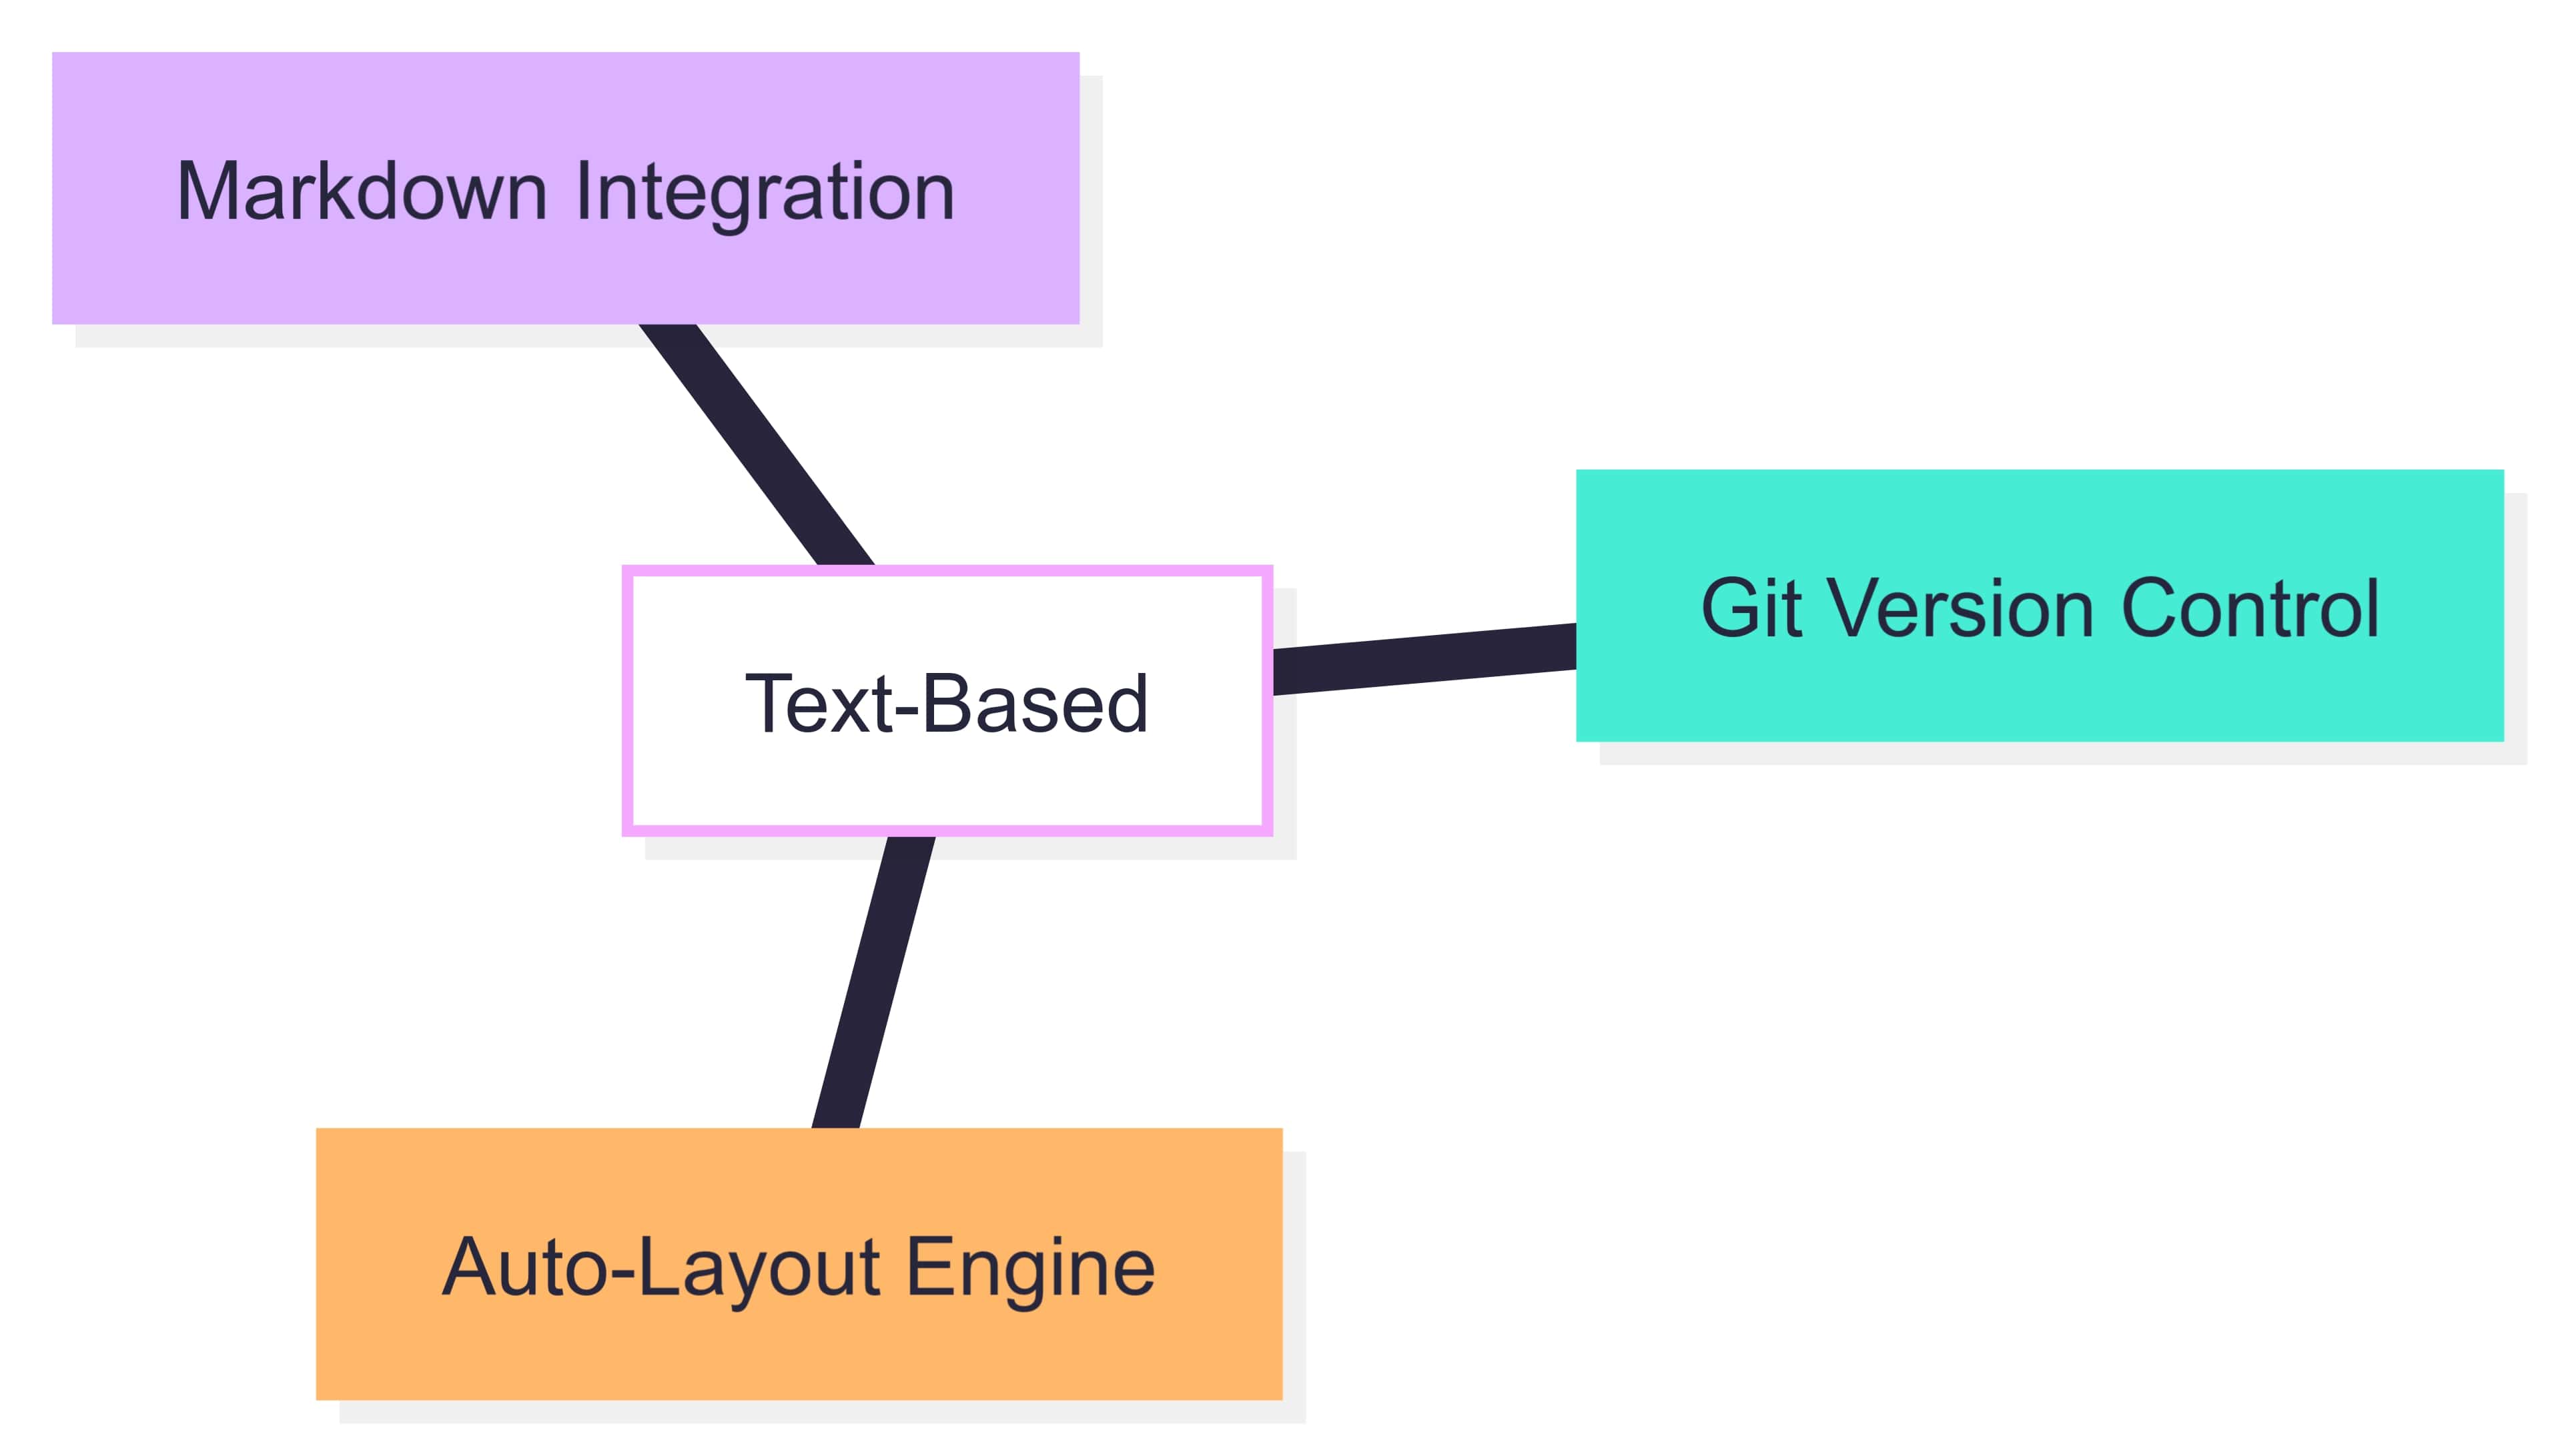
graph LR
  A[Text-Based] --> B[Git Version Control]
  A --> C[Auto-Layout Engine]
  A --> D[Markdown Integration]
Key Features
- Text-Based: The mind map is stored as plain text, making it lightweight, portable, and editable in any text editor.
- Git Version Control: Changes are trackable, and diagrams can be updated with pull requests, diffs, and history.
- Auto-Layout Engine: Nodes align automatically. No manual adjustments are required as the structure grows.
- Markdown Integration: Mermaid blocks are embedded directly into Markdown. Perfect for GitHub, GitLab, VS Code, and static site tools.
What It Means in Practice?
Using Mermaid means you no longer need to switch between planning and diagramming tools. You write your outline in code blocks, and the diagram builds itself.
Every node, branch, or update stays inside the same file. That makes your mind map version-controlled, readable, and instantly updateable across tools like GitHub, Notion, and VS Code.
Mind Map Basics: Core Syntax
A basic mind map in Mermaid utilizes straightforward syntax: nodes represent ideas, arrows denote connections, and layout rules govern direction. Unlike visual tools, you don't need to draw anything; just describe the structure with text.
Simple Mind Map Structure
graph TD
 A[Core Idea] --> B[Main Branch 1]
 A --> C[Main Branch 2]
 B --> D[Sub-Idea 1]
 B --> E[Sub-Idea 2]
 C --> F[Sub-Idea 3]
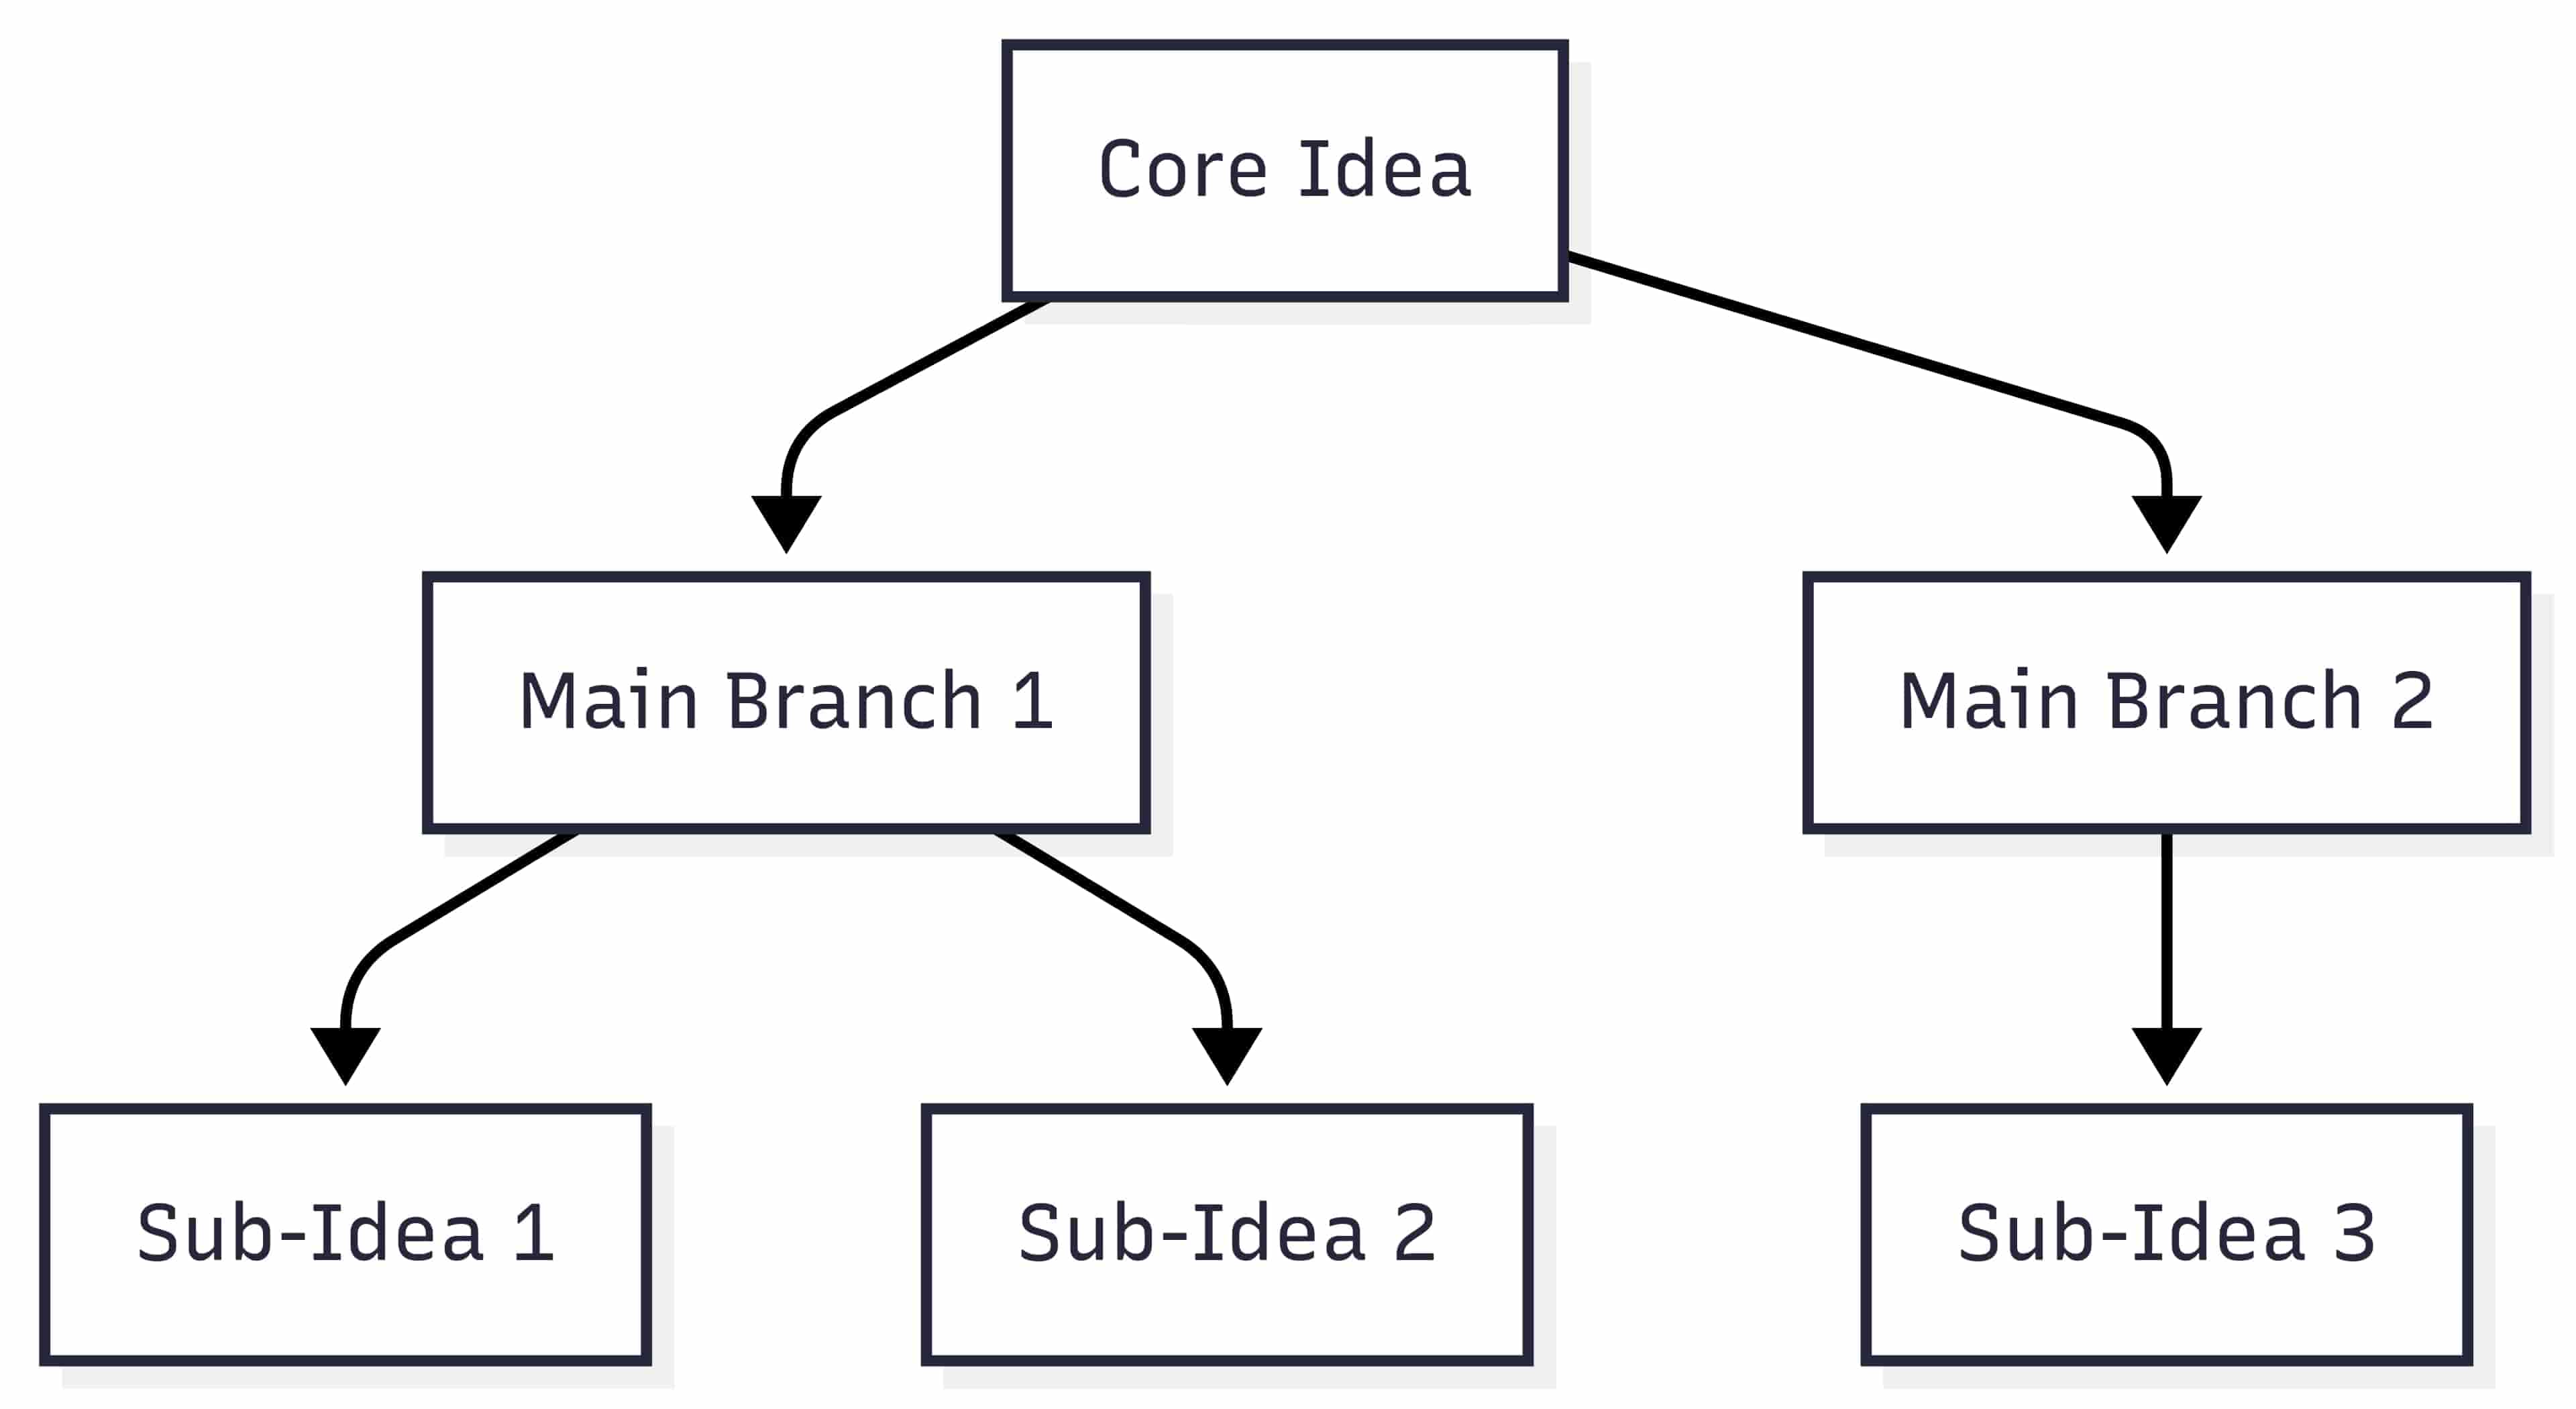
This structure creates a tree from a central idea, branching out to its major subtopics. You don't need to place any elements manually; Mermaid handles the spacing automatically.
Main Syntax Elements
Here's what each part of the syntax does:
- graph TD: Sets the layout to top-down. Use graph LR if you want a left-to-right orientation instead.
- A[Core Idea]: Creates a rectangular node labeled "Core Idea." Letters are internal identifiers; they can be reused for multiple connections.
- -->: Draws a one-way arrow between nodes. It defines the flow or relationship.
- {Decision}: If you use curly braces instead of brackets, Mermaid creates a diamond-shaped decision node (applicable in flowcharts, not typically in mind maps).
Each node can link to multiple child ideas, and every arrow adds a clear relationship. When I work with content teams, this format helps break large topics into structured branches without visual clutter.
Even with this basic structure, the result is a clean and readable mind map that can be dropped into Markdown docs, GitHub files, or shared as rendered diagrams without touching a mouse.
Professional Mind Map Techniques
Mermaid gives you more than just basic nodes and arrows. You can style each part of your mind map to reflect its fundamental role or function. This is all about making information simple to read, follow, and interpret.
Custom Styling
Let's start with something that often gets messy in visual tools: structure. When working with multiple project phases, I use Mermaid's classDef to visually separate high-level plans from tasks.
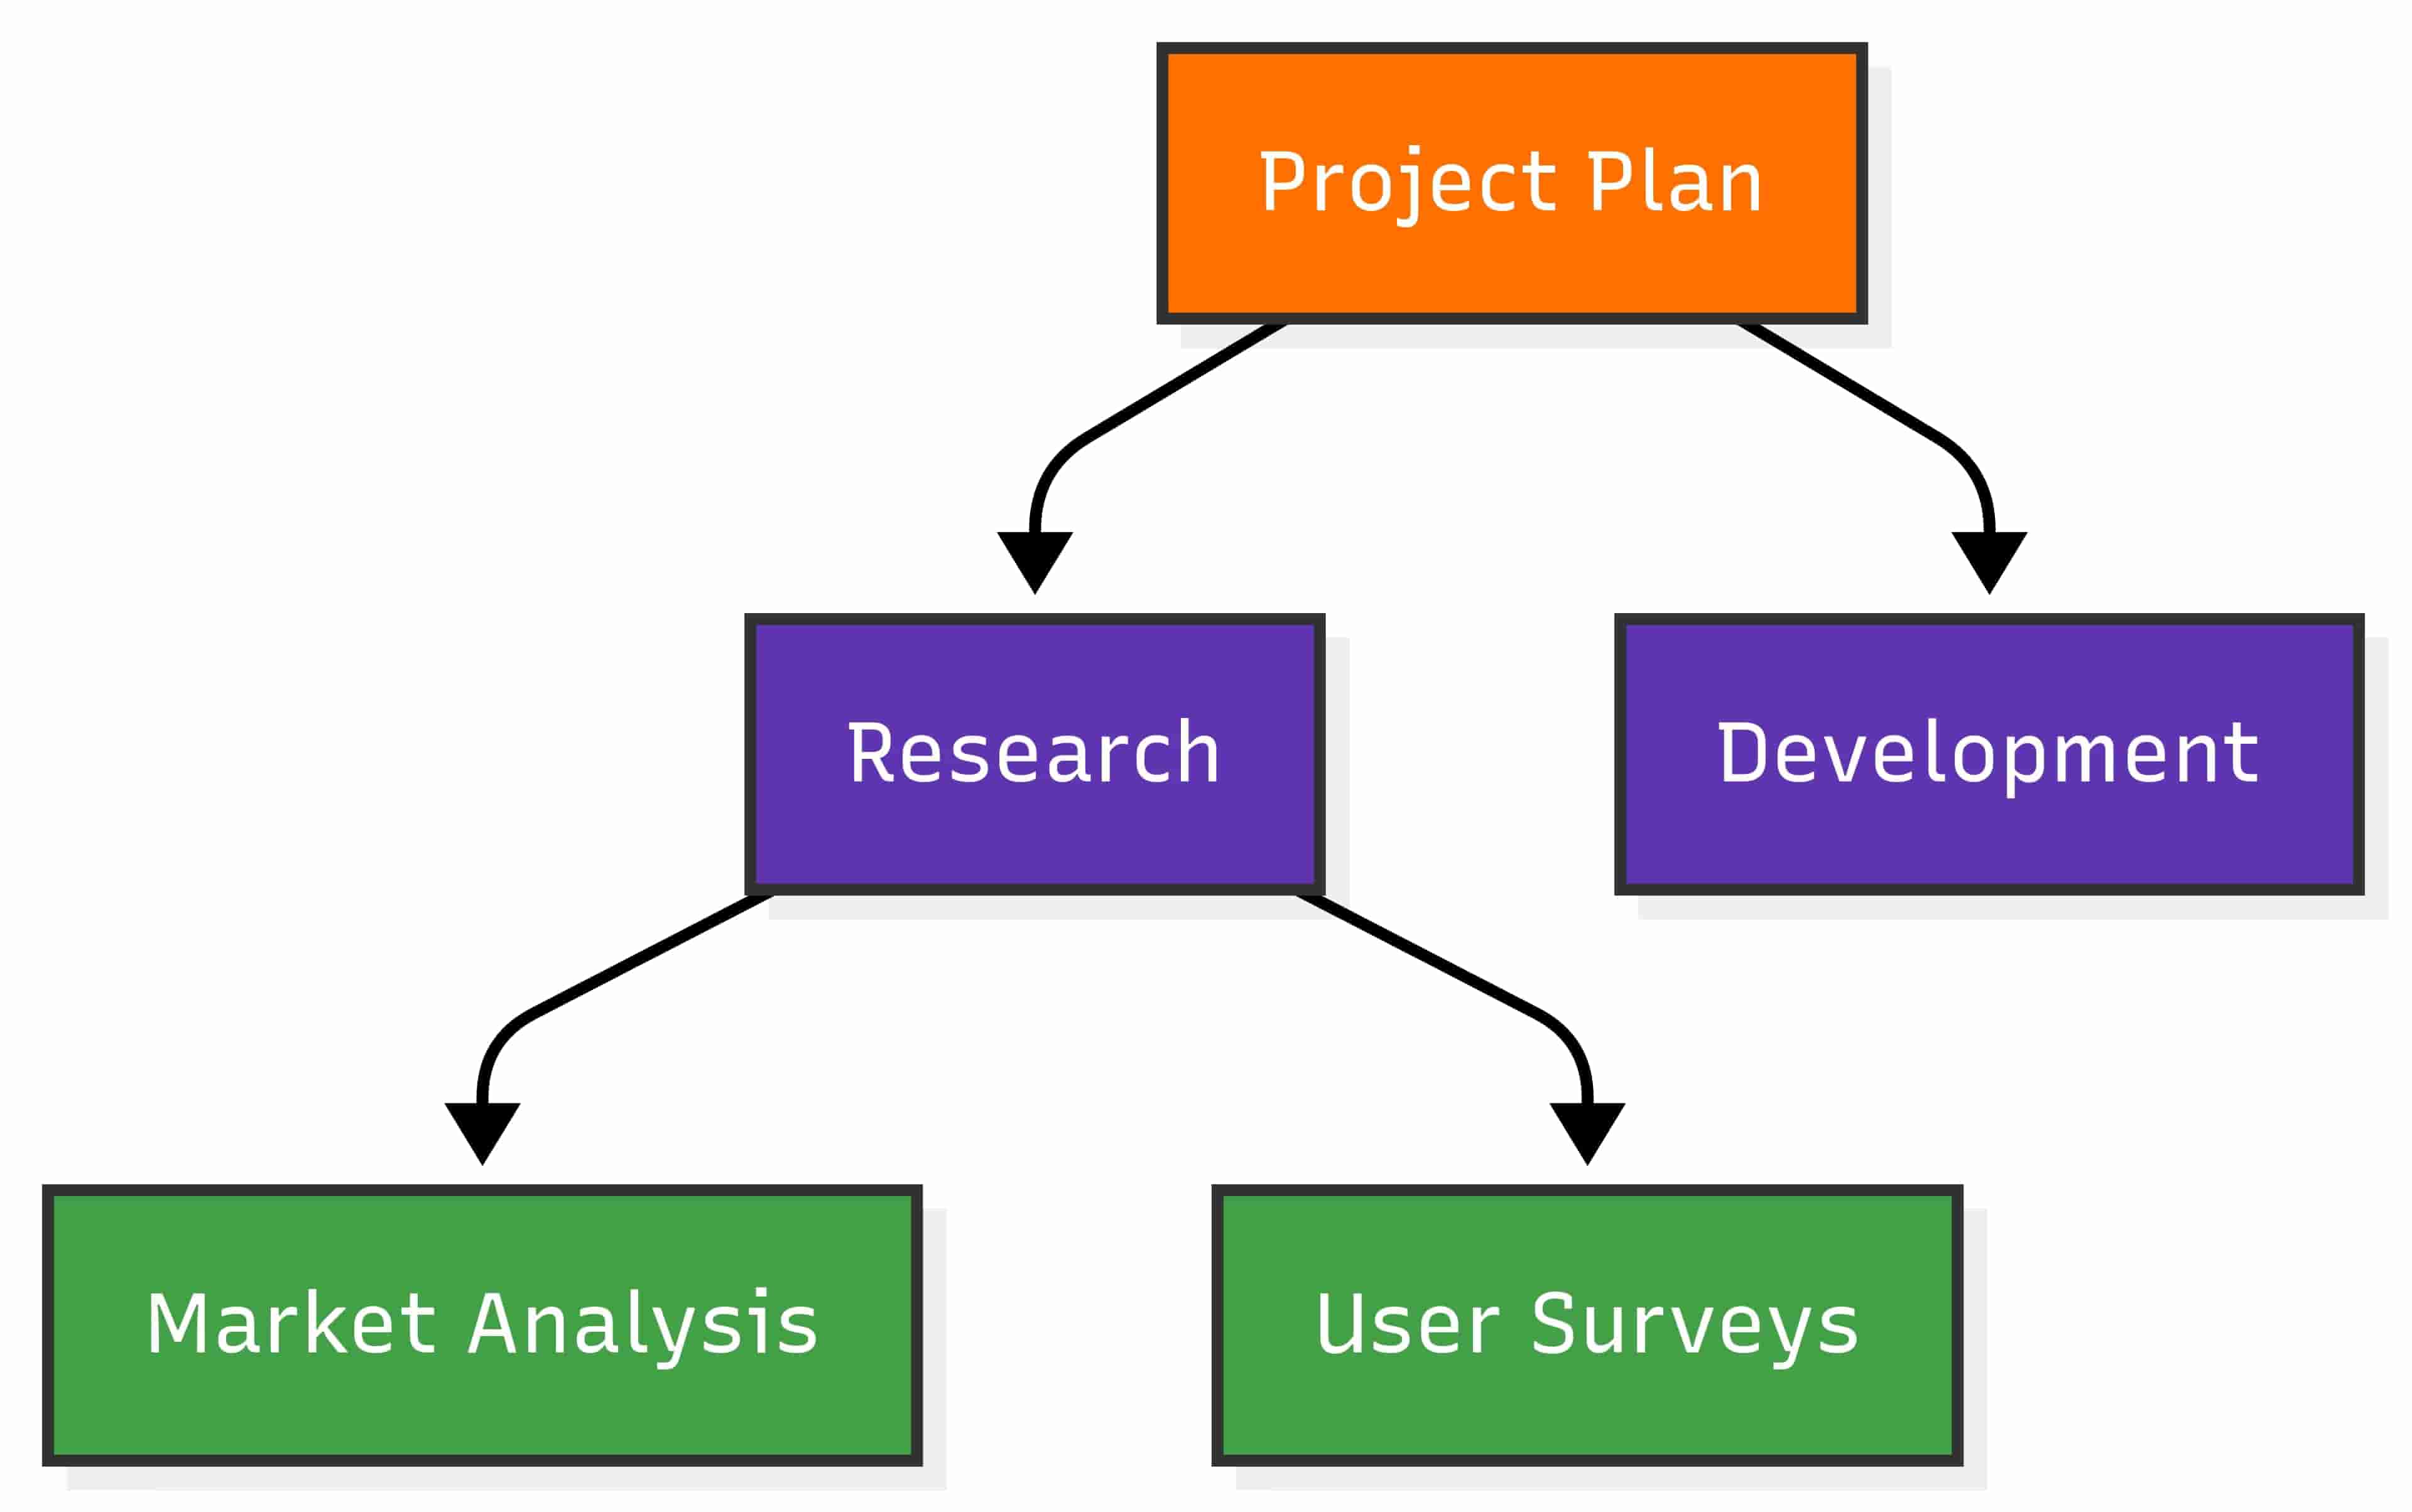
graph TD
  A[Project Plan]:::main --> B[Research]:::phase
  A --> C[Development]:::phase
  B --> D[Market Analysis]:::task
  B --> E[User Surveys]:::task
  classDef main fill:#FF6F00,stroke:#333,color:white
  classDef phase fill:#5E35B1,stroke:#333,color:white
  classDef task fill:#43A047,stroke:#333,color:white
In this structure:
- The central node, "Project Plan," uses a standout color to signal top-level content.
- "Research" and "Development" are tagged as phases and styled the same way, so it's instantly clear they're on the same level.
- "Market Analysis" and "User Surveys" are individual tasks under "Research," styled in green to indicate they're execution-level tasks.
The key here is consistency. Once you assign visual classes, use them across diagrams. That way, someone else looking at your diagram knows precisely what they're seeing without a single extra explanation.
Multi-Level Grouping
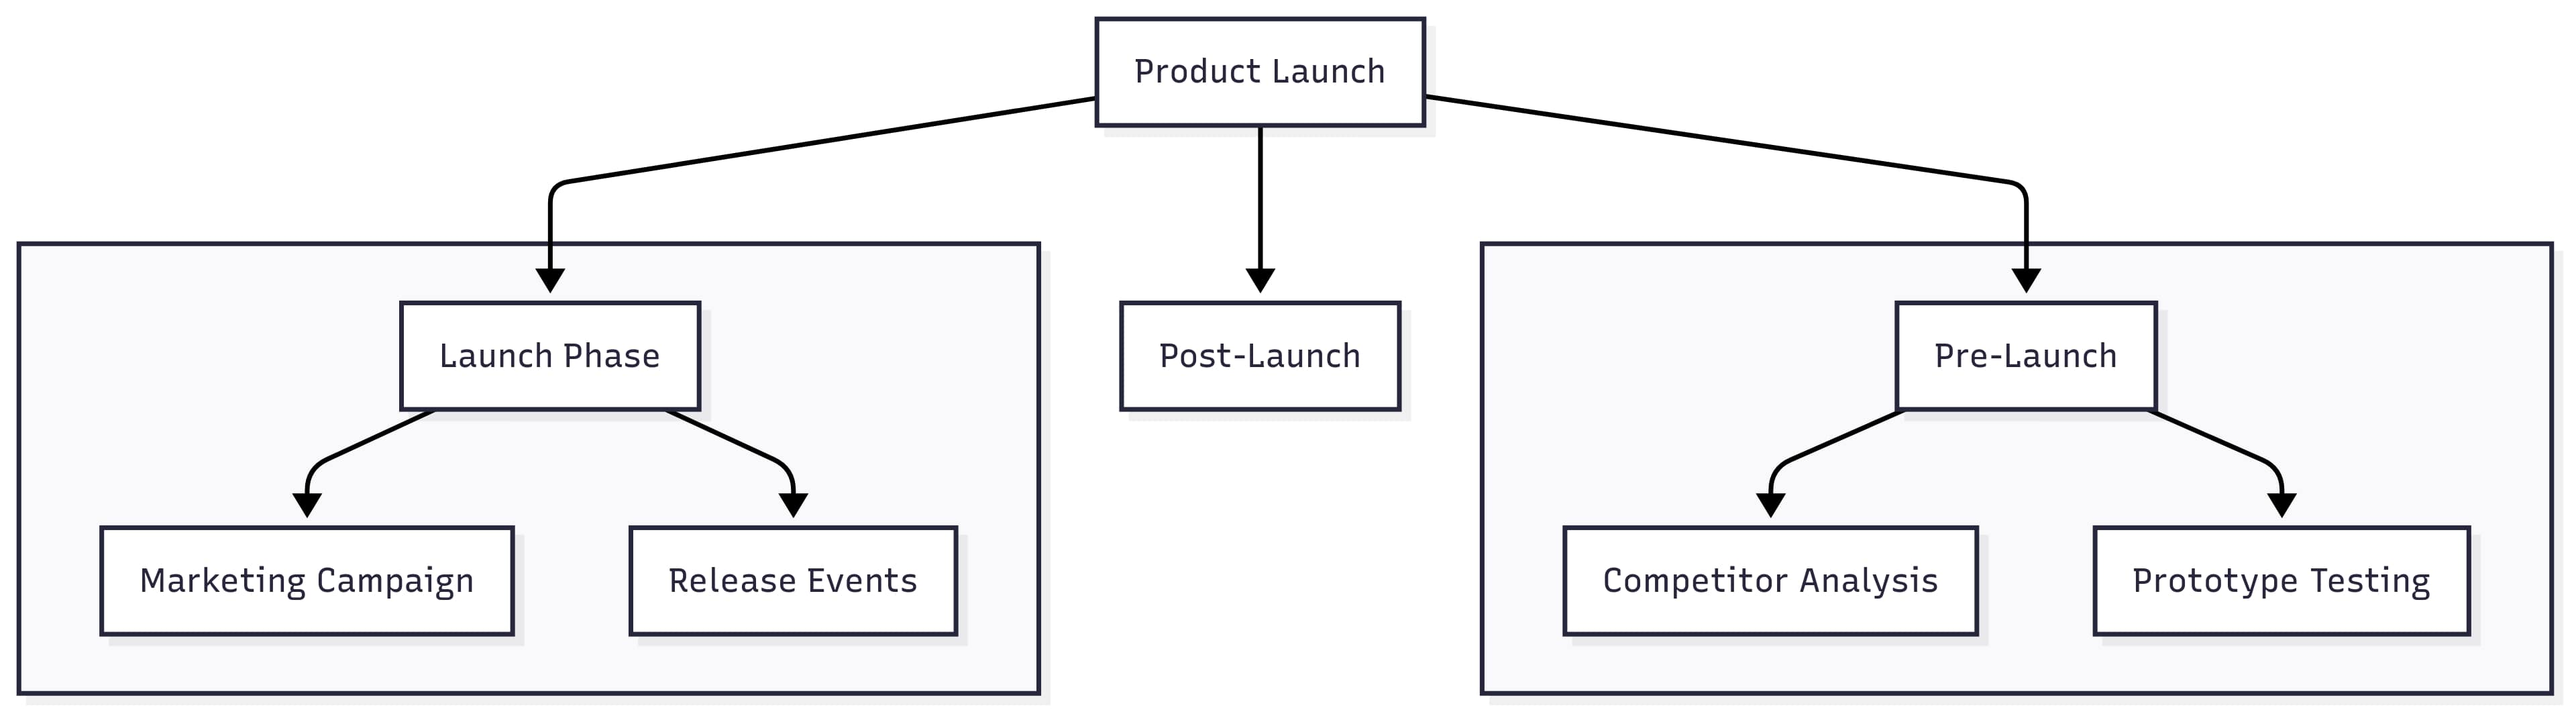
Grouping related branches can clarify how a mind map unfolds over time or across categories. I use subgraph when I want to group activities into stages, such as in a product launch plan.
graph TD
  A[Product Launch] --> B[Pre-Launch]
  A --> C[Launch Phase]
  A --> D[Post-Launch]
  subgraph
    B --> E[Competitor Analysis]
    B --> F[Prototype Testing]
  end
  subgraph
    C --> G[Marketing Campaign]
    C --> H[Release Events]
  end
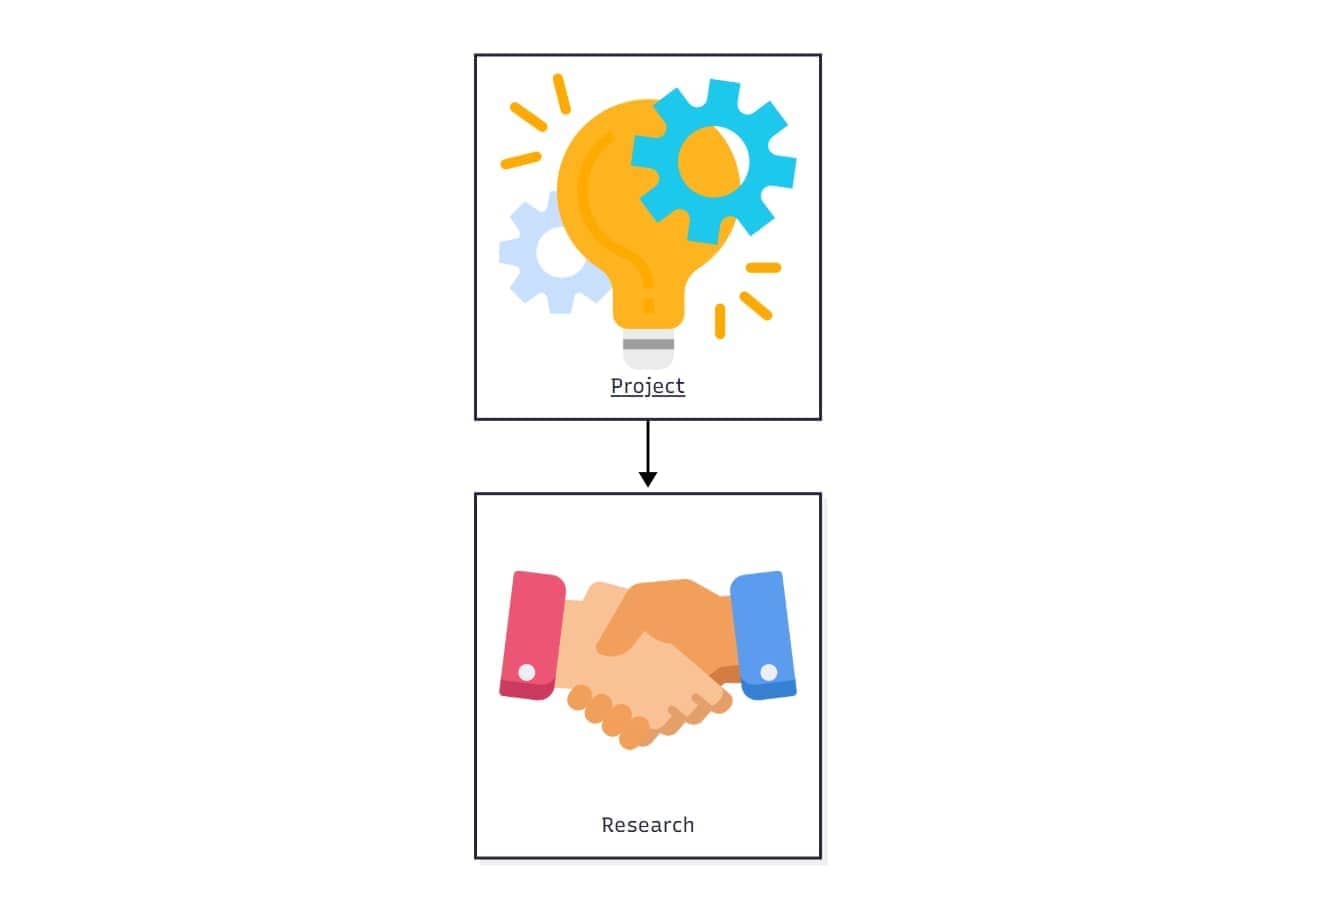
Add Icons & Links
When sharing the map with others, especially in a team, I add quick links and icons for faster navigation. Mermaid supports embedded HTML tags and the click directive.
graph TD A["Project"] --> B["
Research"] click A "https://project-wiki" "Project Docs"
A few best practices:
- Keep icon sizes small (16-24px max) so they don't break node spacing.
- Use the click action only where it genuinely saves time, like linking to documentation or dashboards.
- Stick to one link per node to avoid confusion.
This feature turns static diagrams into interactive tools. Instead of switching tabs or digging into folders, your team can jump straight from a node to the source it represents.
These three techniques turn a simple Mermaid mind map into a usable, shareable working document. You get clarity, structure, and minimal clutter, even when the content gets complex.
Practical Mind Map Templates
Mind mapping with Mermaid isn't just about experimenting with syntax but solving practical structure problems quickly. You can copy/paste the code directly into MermaidChart and customize them easily.
Below are some practical templates for mind mapping that can be directly reused, adapted, or embedded into documentation, project planning, or presentations.
3 useful mind map templates
Product Development Mind Map
graph LR
  P[New Product] --> Feat[Features]
  P --> Tech[Technology]
  P --> Mkt[Marketing]
  Feat --> F1[User Dashboard]
  Feat --> F2[AI Assistant]
  Tech --> T1[React Frontend]
  Tech --> T2[Node.js Backend]
  Mkt --> M1[Launch Campaign]
  Mkt --> M2[Influencers]
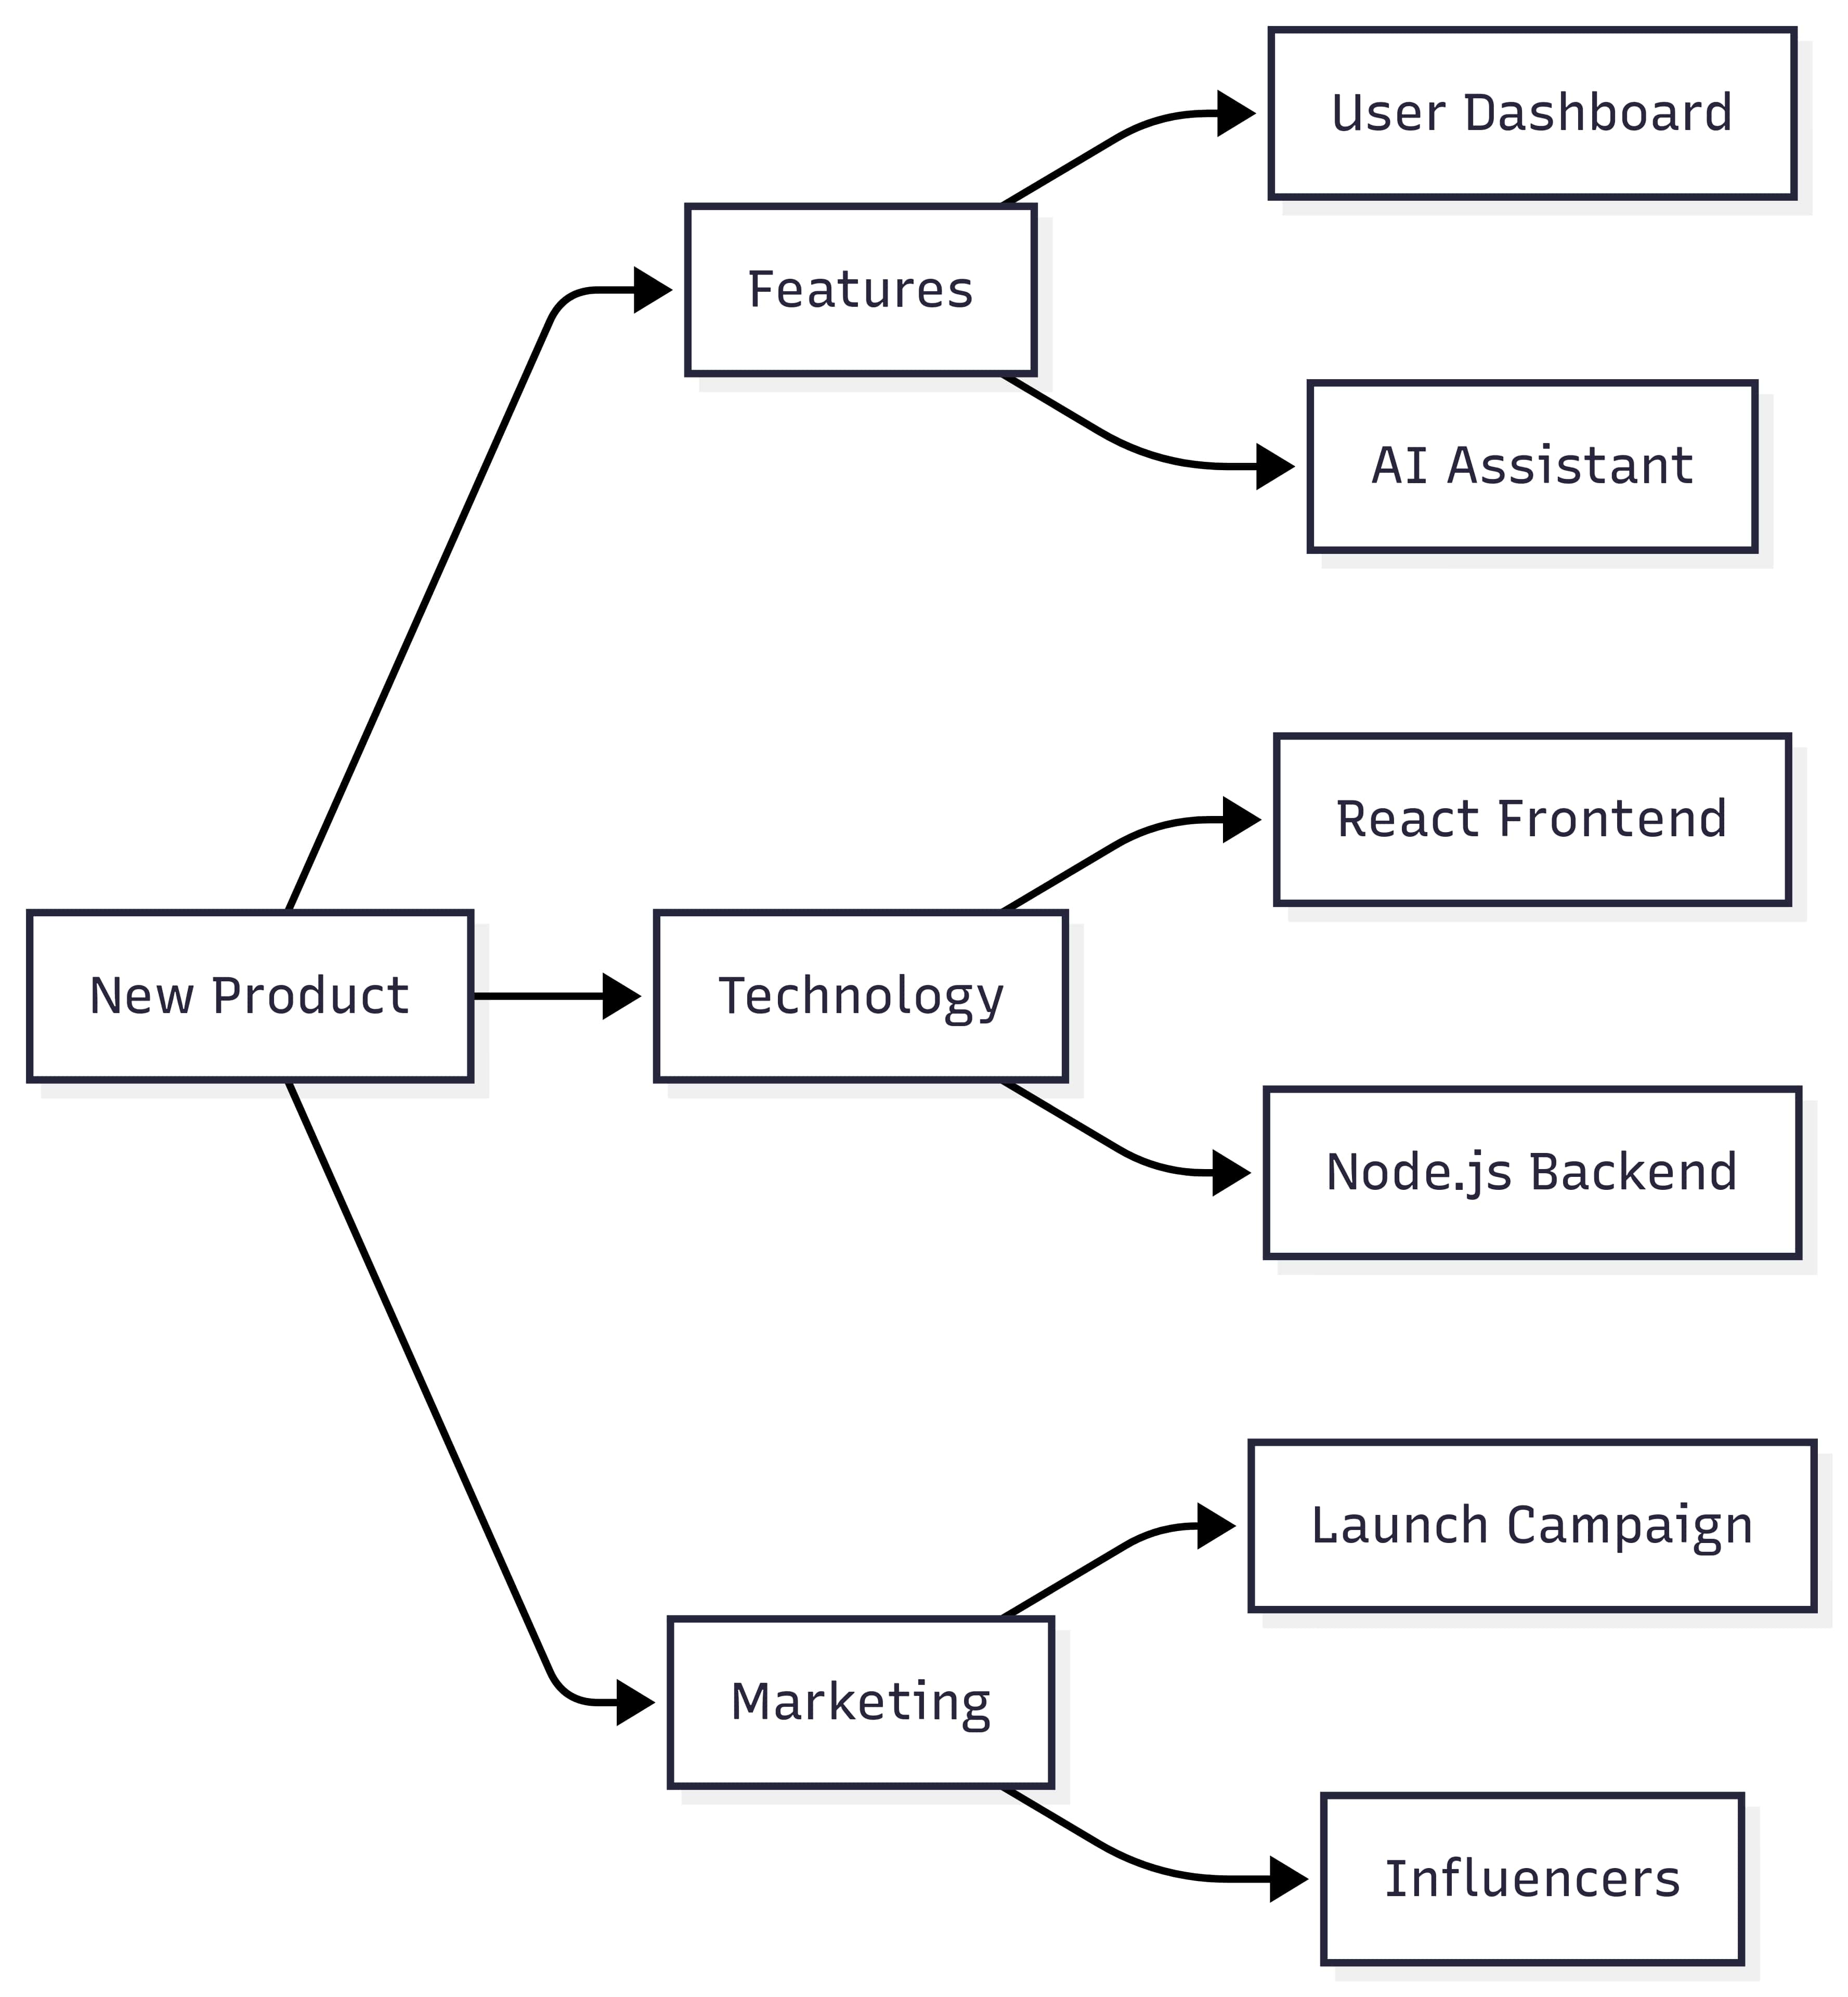
This mind map breaks product planning into three central pillars: Features, Technology, and Marketing. Each one branches into subcomponents that show the actual scope of work.
- Use this if you're preparing sprint plans, assigning roles, or presenting launch phases.
- All nodes can be easily styled or hyperlinked for documentation handoffs.
- To expand it, just add QA or Support as parallel branches.
Meeting Agenda
graph TD
  M[Quarterly Planning] --> T[Topics]
  M --> A[Action Items]
  M --> O[Owners]
  T --> T1[Budget Review]
  T --> T2[Roadmap Update]
  A --> A1[Finalize Q3 Goals]
  A --> A2[Assign Team Leads]
  O --> O1[Finance Team]
  O --> O2[Product Team]
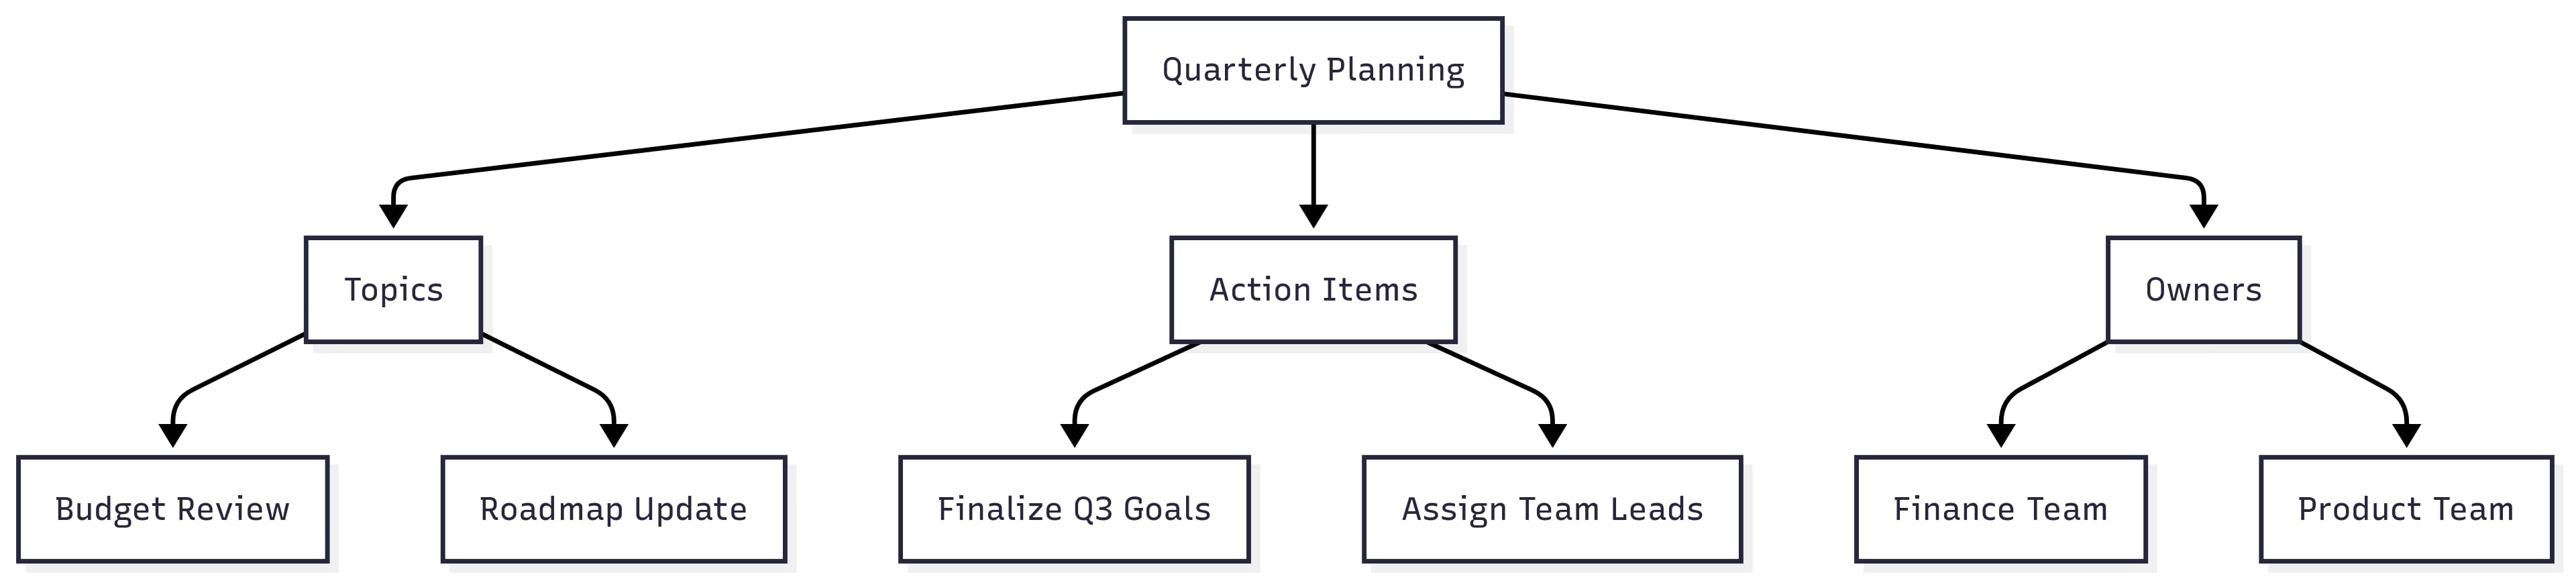
This layout works for any recurring meeting where agenda, ownership, and follow-ups need precise alignment.
- I use it to prepare internal reviews and stakeholder synchronizes.
- It's quick to adjust for different timeframes or team structures; just change the central topic or replace action items.
- You can export it before the meeting and paste it into notes or presentations.
Learning Path
graph BT
  L[Cloud Certification] --> F[Fundamentals]
  L --> S[Specializations]
  L --> E[Exam Prep]
  F --> F1[Compute]
  F --> F2[Storage]
  S --> S1[AI Services]
  S --> S2[Security]
  E --> E1[Practice Tests]
  E --> E2[Study Groups]
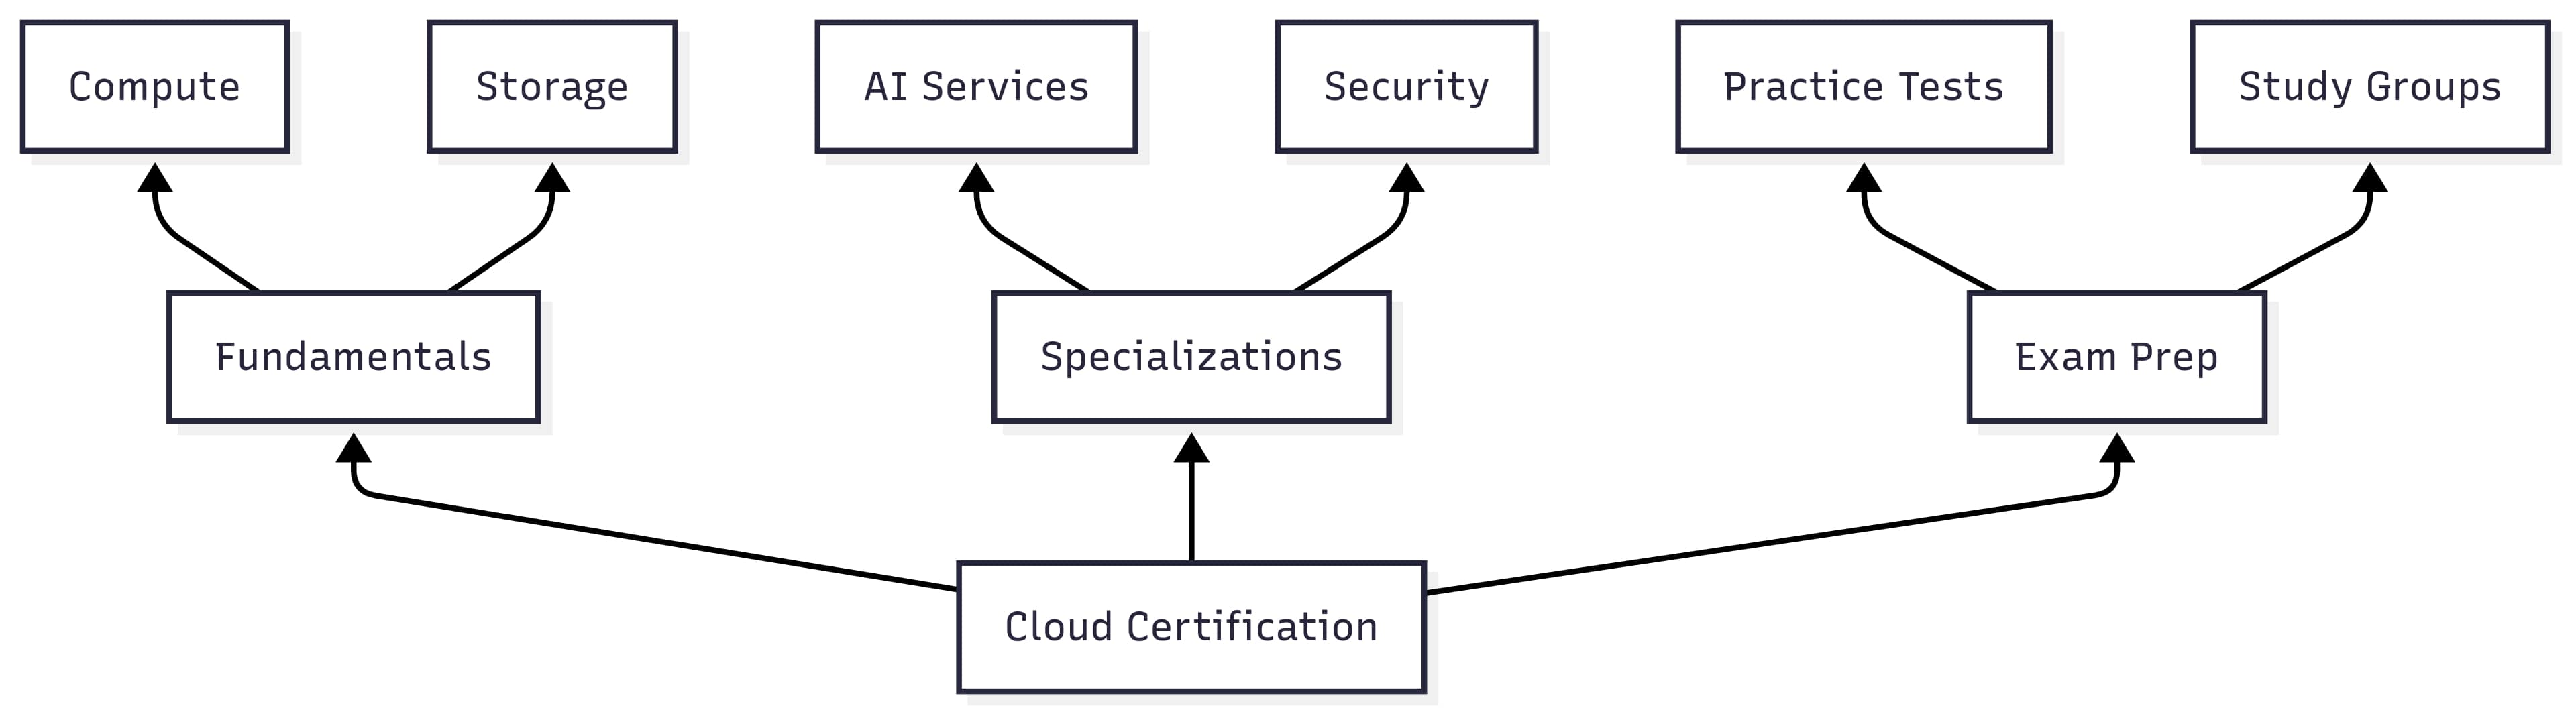
Use this template to map out study tracks, training paths, or even onboarding sequences.
- The bottom-up structure (BT) visually reinforces the progression from basics to exam readiness.
- I've used a version of this in onboarding materials where we guide new hires through required tools, docs, and internal certifications.
- If you run an online course or internal academy, this map makes it easier to explain and reference each module.
Project Retrospectives
graph TD
  R[Project Retrospective] --> P[Planning Phase]
  R --> D[Development Phase]
  R --> L[Launch & Support]
  P --> P1[What Went Well?]
  P --> P2[What Could Improve?]
  D --> D1[Workflow Issues]
  D --> D2[Team Communication]
  L --> L1[User Feedback]
  L --> L2[Support Load]
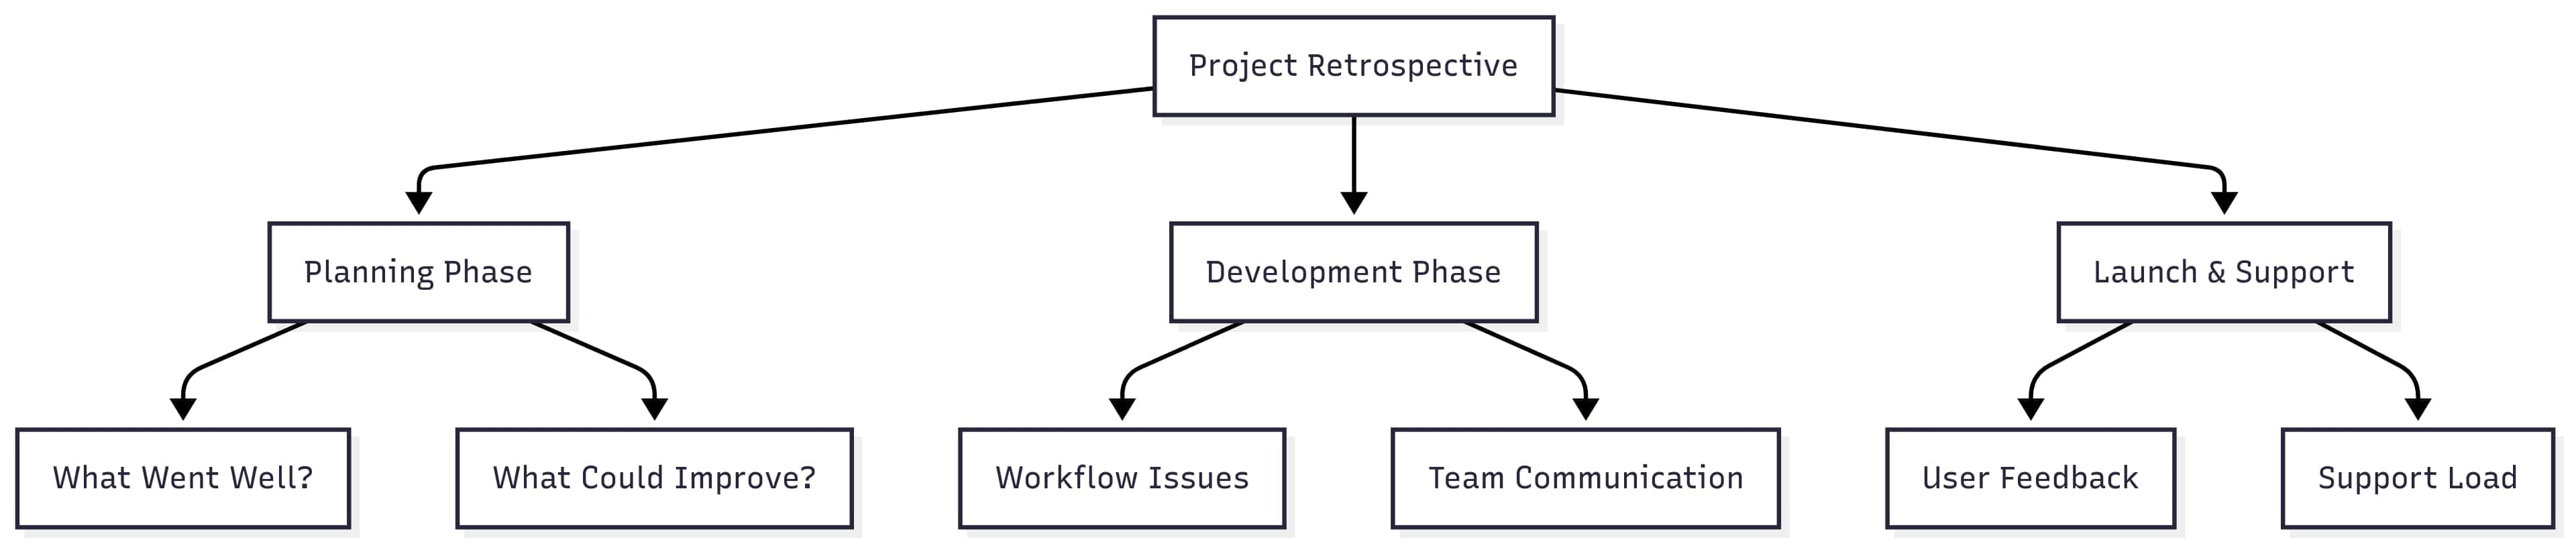
This layout facilitates the organization of feedback from retrospectives.
- Each project phase is broken down into evaluation points.
- I use this to gather post-mortem notes and convert them into concrete changes for the next sprint.
- It's useful during team reviews or when writing up project documentation.
Book Summaries
graph TD
  B[Book Title] --> C[Chapters]
  B --> T[Themes]
  B --> A[Characters]
  C --> C1[Chapter 1: Intro]
  C --> C2[Chapter 2: Conflict]
  C --> C3[Chapter 3: Resolution]
  T --> T1[Power]
  T --> T2[Loyalty]
  T --> T3[Justice]
  A --> A1[Protagonist]
  A --> A2[Antagonist]
  A --> A3[Supporting Cast]

This mind map helps summarize a book by chapter, theme, and character.
- It helps prepare reports, lesson plans, or content breakdowns for authors.
- I've used it when organizing character arcs and themes before writing a script treatment.
- You can extend it to include symbols, quotes, or even scene summaries under each chapter node.
Advanced Mermaid Mind Mapping
Not all mind maps are simple trees. If you're building visual systems for documentation, reports, or planning workflows, you'll eventually need more than just boxes and arrows. Mermaid allows for advanced features that help you keep your map readable, interactive, and scalable.
Take a look at these techniques for advanced practical diagrams:
Interactive Mind Maps
Mermaid supports clickable nodes using the click command. You can turn any node into a hyperlink that opens another page, section, or resource. It helps when the mind map is part of a larger documentation hub.
graph TD
  A["Central Idea
(Click Me)"] --> B[Branch 1]
  A --> C[Branch 2]
  click A "https://details-page" "More Info"

This example turns the central node into a clickable link. You can customize the URL or link it to a specific Markdown anchor within the same document. It works well inside GitHub README files or Confluence pages with Mermaid support.
Auto-Alignment Tricks
When a diagram feels too crowded or uneven, spacing becomes an issue. I've fixed this by using invisible links and zero-width connections that push nodes apart without adding noise.
graph LR
  A[Start] --- B
  A --- C
  B --> D[End]
  C --> D
  linkStyle 0 stroke:#fff,stroke-width:0
  linkStyle 1 stroke:#fff,stroke-width:0
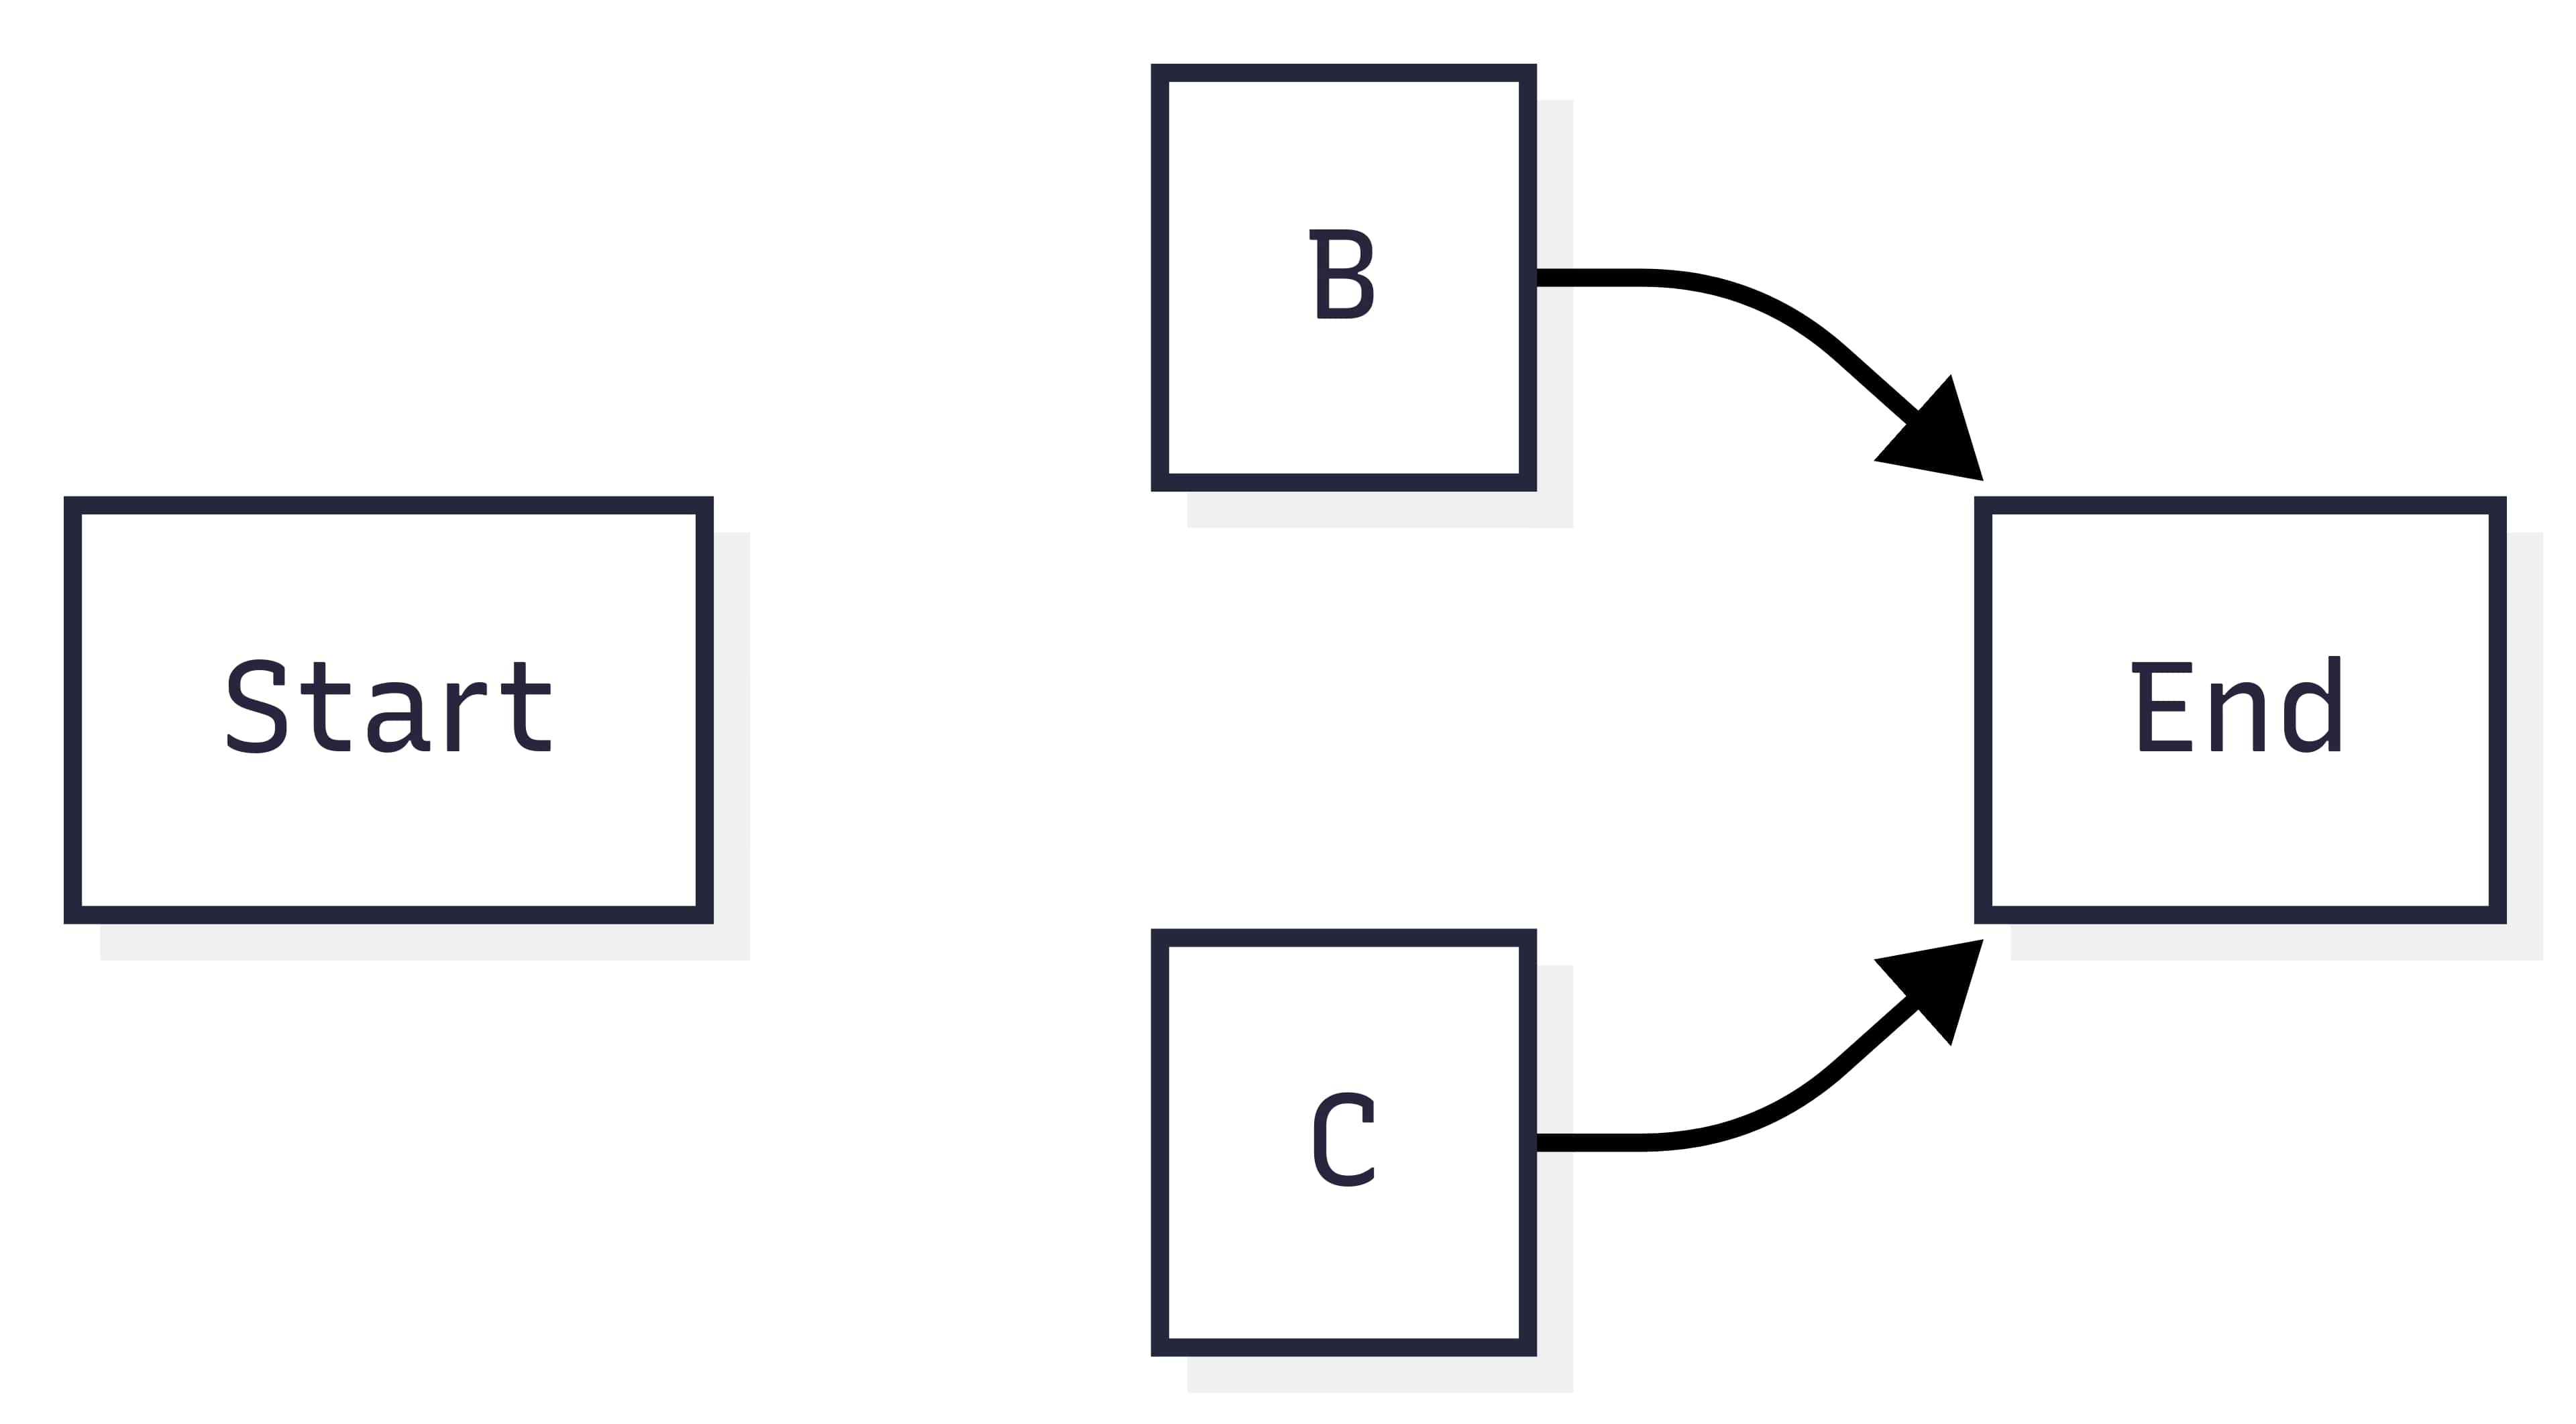
In this version, links between A and B/C are visually invisible but maintain layout spacing. It's useful when two branches crowd each other, and you need even distribution across the canvas.
Complex Layouts
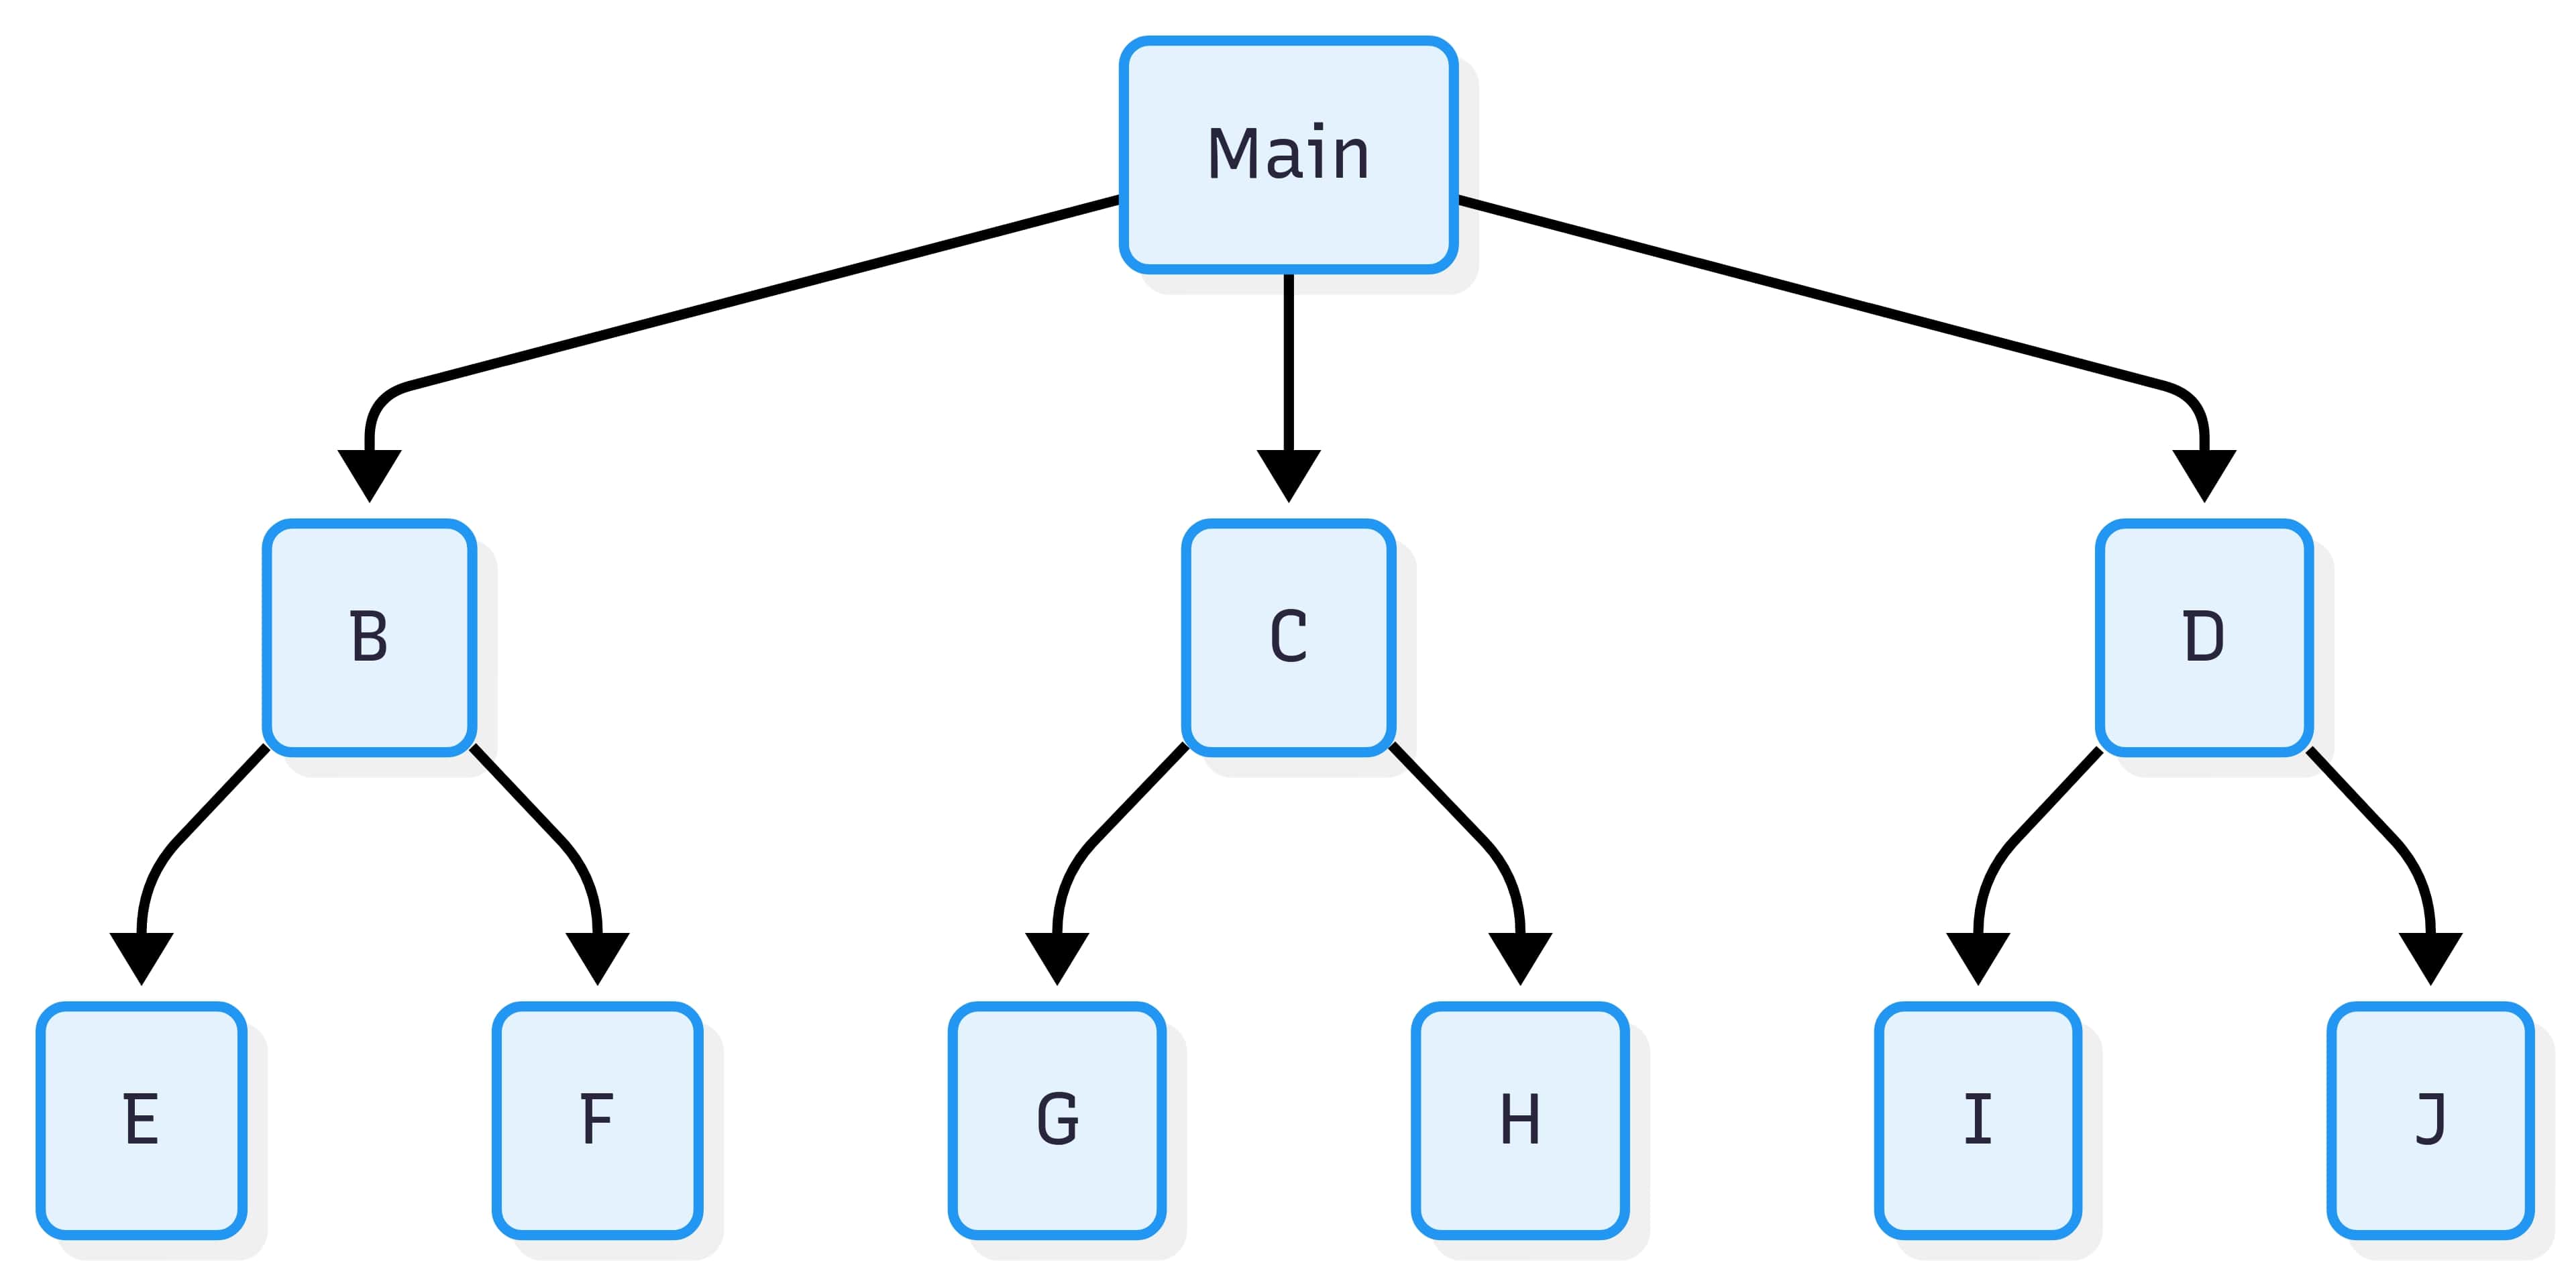
You can style multiple nodes at once using class and classDef. It's especially useful for large maps where you want specific nodes grouped visually by phase, status, or category.
flowchart TB
  A[Main] --> B & C & D
  B --> E & F
  C --> G & H
  D --> I & J


  class A,B,C,D,E,F,G,H,I,J mindMapNode
  classDef mindMapNode fill:#E3F2FD,stroke:#2196F3,stroke-width:2px,rx:5,ry:5
MermaidChart AI Mind Map Generator
You don't need to write Mermaid code from scratch every time. MermaidChart lets you generate full mind maps just by entering a prompt in an AI chat. Let's see how to use it.
Step 1: Get Started with a Prompt
Go to MermaidChart AI and click + Create new in the left side panel. Choose the AI Chat button.
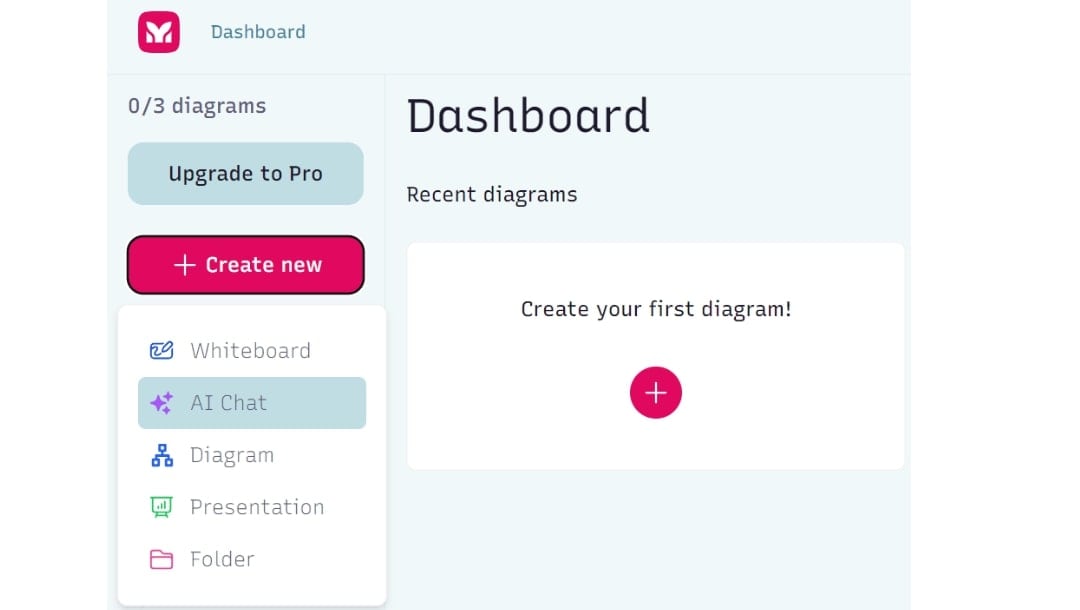
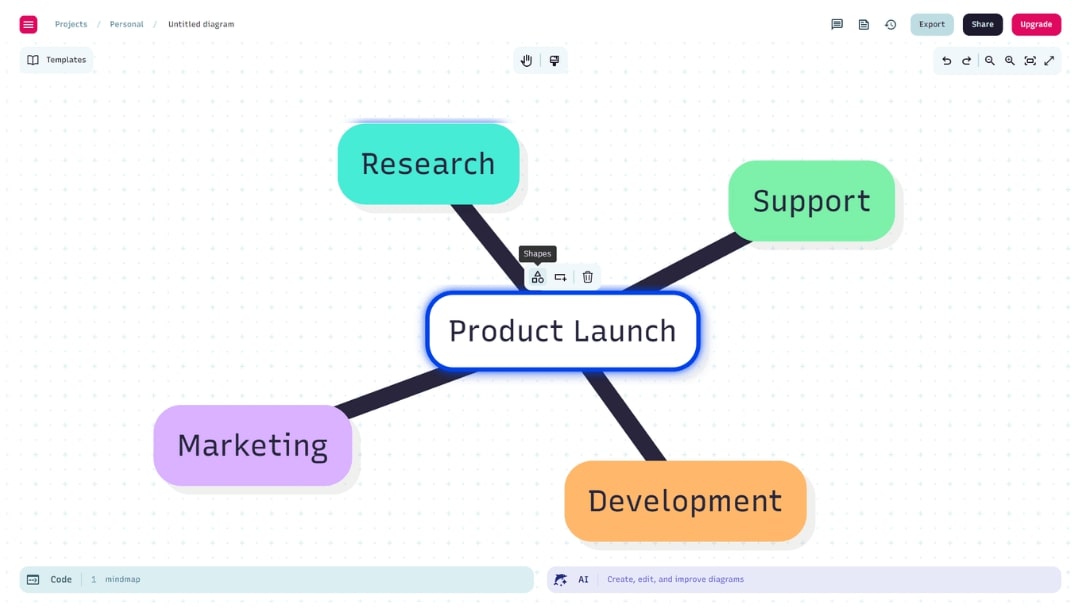
Enter a brief prompt, such as: "Product launch mind map with research, development, marketing, and support branches."
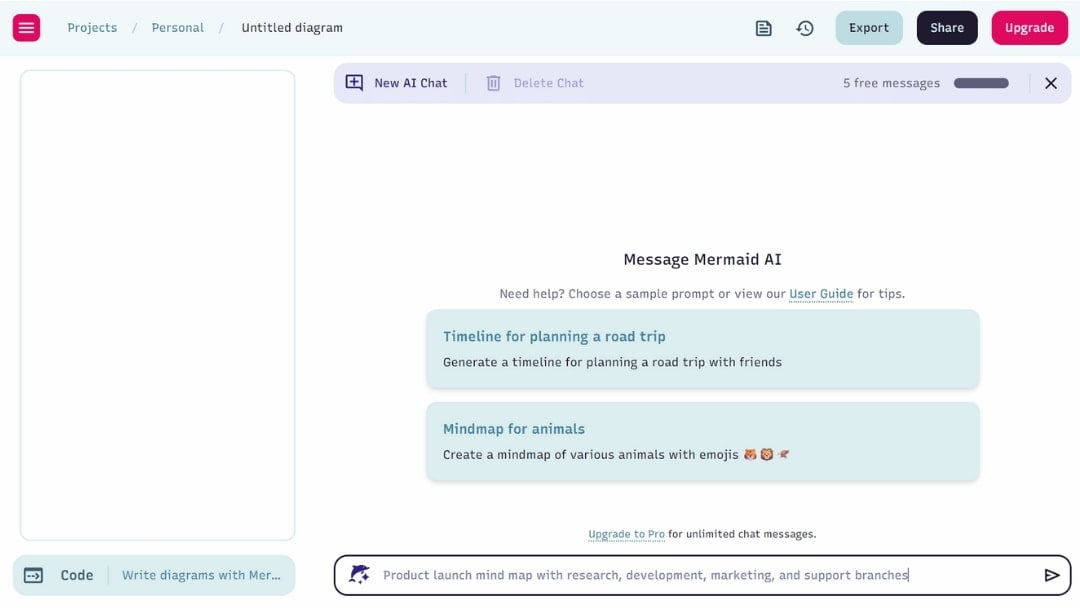
Step 2: Generate the Mind Map
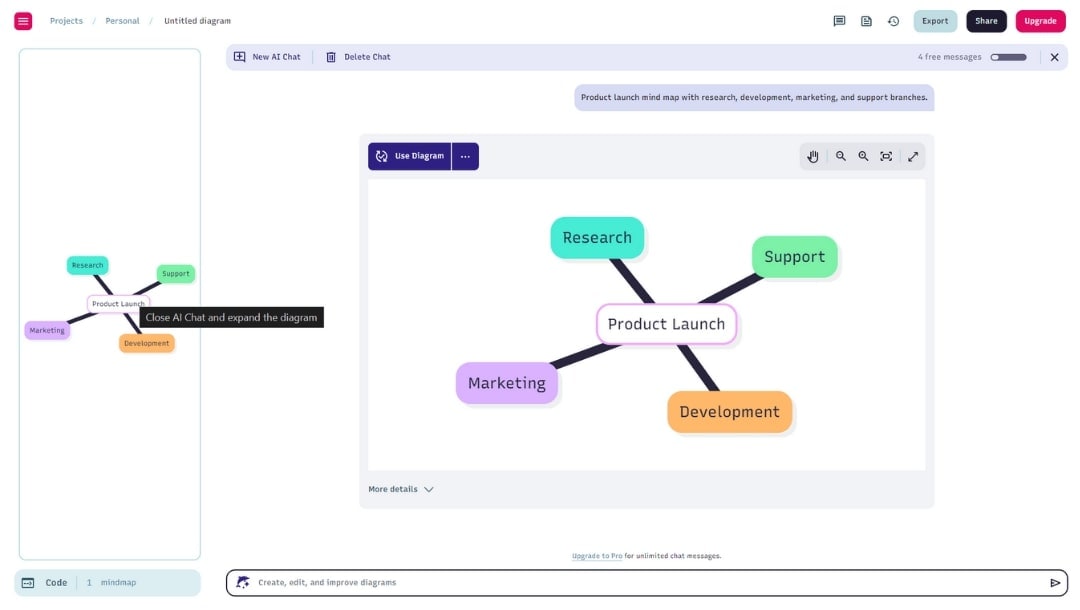
Hit Enter on your keyboard or tap the Send button in the bottom right corner. You'll get an editable Mermaid code block and a visual diagram.
Click More details to open a drop-down for details and syntax code that you can modify.
If the structure isn't appropriate, tweak the prompt and rerun it. It's fast and accurate enough for most planning needs.
Once you have the required design, click the Use Diagram button and then on the left side diagram panel to open it in the workspace for customizing.
Step 3: Customize Your Mind Map
On your workspace, click the Design icon and then Themes to customize its theme.
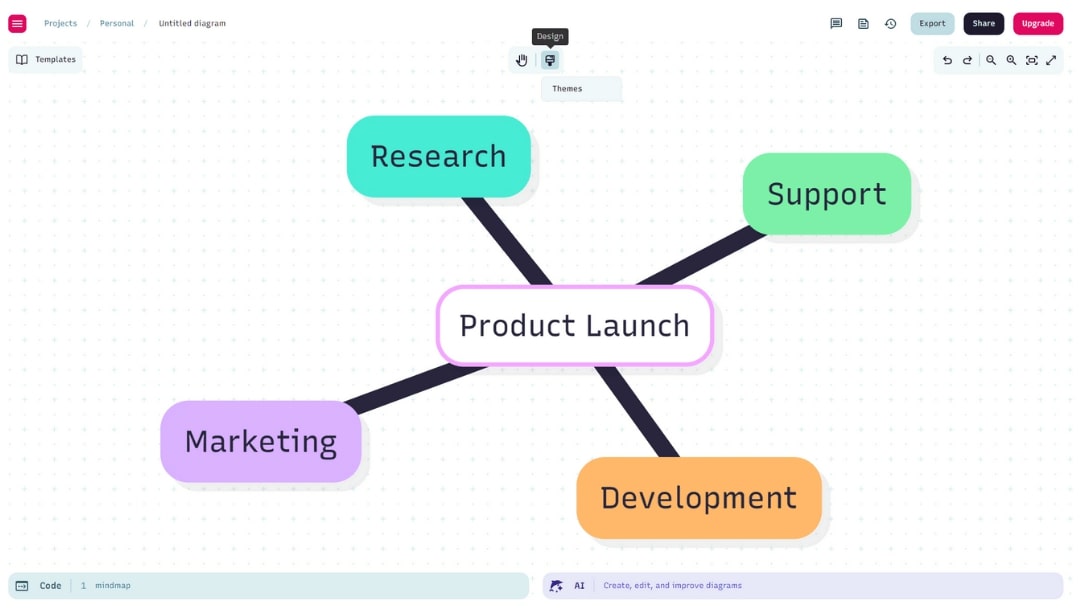
Select any shape and use the quick popup menu to change shape, add a child node or delete it.
Use zoom in and zoom out features for looking into details if your design is complex.
Step 4: Export or Share Final Mind Map
Once finalized, hit the Export button on the up right corner and choose your desired file format. It only offers PNG, SVG, and MMD Text formats.
You can also share your design with others using the Share button right beside the Export button.

Sample prompts you can try:
- "Learning path for AWS certification with fundamental and specialized topics"
- "Meeting agenda mind map for quarterly planning with 5 main topics"
- "Book chapter breakdown for sci-fi novel with character arcs"
Export & Integration
Workflow Integration
Mermaid was built for workflows where diagrams live alongside your documents. If you're working in Markdown-based environments or tools that support live rendering, integration is seamless.
| Platform | Implementation |
| GitHub | Wrap your Mermaid code in a code block using class="mermaid". GitHub renders it automatically in supported Markdown viewers and README files. |
| VS Code | Install the "Markdown Preview Mermaid Support" extension. It shows live previews inside your editor and updates with every save. |
| Notion | Use the code block feature, then set the language to Mermaid. It renders the diagram directly within the document. |
| Confluence | Install the Mermaid Plugin from Atlassian Marketplace. Paste Mermaid code into the macro to embed live, editable diagrams. |
Export Options
If you want to use diagrams in other formats or share them with people who don't use Mermaid:
- PNG or SVG: Right-click on the rendered diagram in MermaidChart or supported editors → Select Export.
- PDF: Choose Print → Select Save as PDF from your browser or tool.
- Editable Code: Just copy the Mermaid syntax and paste it into any Markdown file, documentation page, or version-controlled note.
These export methods enable you to balance live integration and static sharing without requiring additional tools.
When to Consider Enhanced Solutions?
Mermaid works best when speed, version control, and Markdown integration are your top priorities.
However, that simplicity can become a constraint once your mind map becomes more complex or is shared across non-technical teams.
Here's when it might be time to use something more advanced:
- Nested branches become too deep to manage. Mermaid syntax works well for shallow structures. But once you go beyond three levels, the code can get messy. Reordering ideas or inserting nodes often breaks the flow or requires multiple rewrites.
- You need visual control. Mermaid doesn't offer manual spacing, drag-and-drop positioning, or anchor control. That means you can't always influence how your diagram looks, especially if you want something presentation-ready.
- You're sharing with clients or stakeholders. Not everyone is comfortable reading or editing code. If your mind maps need to be updated by people outside engineering or documentation teams, Mermaid's syntax becomes a blocker.
- You're preparing deliverables. Mermaid is great for internal use but not ideal for polished decks, proposals, or visual documentation. Export options are available, but limited control over the layout makes it challenging to fine-tune the design.
If you're noticing these issues, it means you're scaling beyond what it was built for.
That's where EdrawMind fits in.
EdrawMind: Free Online Mind Map Maker
For teams or individuals who've hit Mermaid's limits, EdrawMind offers a dedicated platform to build, edit, and present mind maps without leaving anything to syntax.
Its ready-made templates let you skip layout work entirely. You can start with common structures for learning paths, product planning, or meeting agendas, and customize them instantly.


Need speed? Use the AI mind map generator. Just type your topic, and EdrawMind builds a branching map in seconds. You can refine or expand nodes with a few clicks.
When it's time to share or present, switch to Presentation Mode. It turns any mind map into full-screen slides, with transitions tied to your structure. You can walk through complex plans without leaving the editor.
Advanced live collaboration is built in. Multiple team members can edit a mind map in real-time, leave comments, and track updates. No merging syntax files. No waiting for feedback.
Your work syncs automatically to the cloud so that you can access it from Windows, macOS, Linux, iOS, Android, or a browser, cross-platform by default.
You can also import and export Markdown, making it easy to switch between Mermaid and EdrawMind when needed.
If Mermaid is your lightweight code-based tool, EdrawMind is your full-featured design board for advanced maps, shared projects, or polished output. Both can live in the same workflow.