Introduction
When learning about history, two common challenges can make things tricky. First, understanding labels like BC, AD, BCE, and CE can be confusing since they are sometimes used interchangeably. Second, history books usually use long blocks of text, which makes it hard to follow and remember information.

Overview of the BC, AD, BCE, and CE Timelines
Specific terms and abbreviations like BC, AD, BCE, and CE are often used to make sense of historical events. This section will tackle the terms' meanings, their differences, and the historical marker that shifted from BC and BCE to AD and CE. Understanding these timeline terms can make comprehending and appreciating human history easier.
1. Understanding BC and AD in Timelines
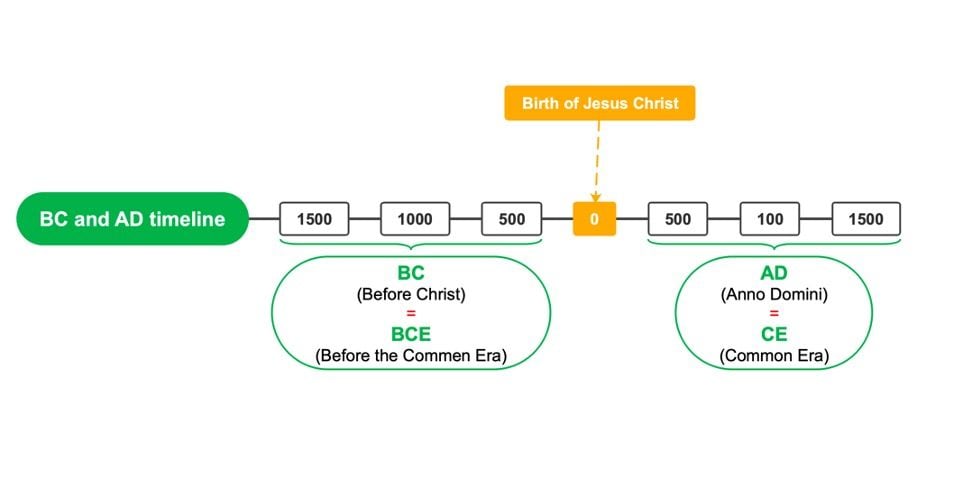
In their primary sense, BC is an abbreviation of "Before Christ", while AD stands for the Latin phrase "Anno Domini", which means "in the year of our Lord". It divides history into two significant periods. BC refers to the time before the birth of Jesus Christ, and AD for the years after.
Additionally, it's important to recognize that the sequence of dates differs between BC and AD. When dates are labeled as "BC", a higher number indicates that the event happened further back in time. On the other hand, when using "AD", the numbering is just how it's used today, where a higher number signifies that the event happened later.
As such, we can understand that 2024 BC would mean that the event happened 2024 years before the birth of Jesus Christ, while 2024 AD would pertain to recent times.
2. Differentiating BC and AD From BCE and CE
In contrast, BCE is an abbreviation of "Before the Common Era", while CE means "Common Era". These terms were introduced around the 16th century as a non-religious alternative to the standard BC and AD labels used in timelines. BCE and CE timelines began to be used more commonly as scholars from different religions could use them.
Funny enough, the only difference between BC and AD from BCE and CE is the terminology used. The BCE and CE timeline system still uses the same division of historical periods. For example, 500 BCE will be the same as 500 BC, while 500 CE is synonymous with 500 AD.
3. The Historical Marker: Shifting From BC & BCE to AD & CE
As mentioned earlier, the birth of Jesus Christ is the primary historical marker that shifts BC or BCE to AD or CE. Since both systems use this event as the divider between two significant periods, it would be logical to think that Jesus was born in 1 AD or 1 CE.
However, that is not the case. Historians believe that Jesus was born around 6-4 BC. The reason was due to a minor miscalculation by Dionysius Exiguus, who created the BC and AD systems in the first place during the 16th century.
Regardless, the birth of Jesus Christ in 1 AD became the accepted and widely used marker to divide the common era and the earlier years of human history. The BC, AD, BCE, and CE timelines help us make sense of historical events by dividing time into two significant periods: before and after the birth of Jesus Christ.
Understanding these principles of BC and AD or BCE and CE timelines makes history easier to appreciate and understand. Knowing how these terms work helps visualize the order of events, especially when creating historical activities and projects. Moreover, depending on your audience, it can help you decide whether you should use BC and AD or BCE and CE.
To make history study easier, creating timeline boards or charts allows users to visualize events and organize them in the way they happened throughout time. This way, you'll be able to remember the order of events easily.
In the next section, Wondershare EdrawMind, a powerful and user-friendly tool, will be explored. This software organizes and visualizes history through timeline boards or charts. It will help make the study of history more engaging and enjoyable for you and your audience.
Creating a BC, AD, BCE, & CE Timeline With EdrawMind
When studying history, having a visually engaging and easy-to-understand tool is essential. In this section, you'll learn about EdrawMind, a trustworthy choice for this task. Using the platform, you'll also explore its features and how to create a BC and AD or BCE and CE timeline.
1. Introducing EdrawMind
EdrawMind is a user-friendly tool. It helps you create beautiful mind maps and timelines. Its visually appealing and intuitive interface will help you understand complex historical information better. Moreover, it can assist you in planning your projects.
The following are some of its features that can help you create BCE and CE timelines.
- Pre-made Templates: EdrawMind has a bunch of beautiful pre-made templates. They are convenient for you to start creating timelines. They are easily customizable to fit your needs if you want to go the extra mile.
- Drag-and-Drop Interface: You can add photos, videos, and other elements. They make your timelines more immersive and detailed. Just use the drag-and-drop feature of EdrawMind to add them.
- Unlimited Canvas: EdrawMind offers a virtually infinite canvas for your timeline. This way, even longer stretches of history can be visualized and organized.
- Zoom and Pan: The increasing number of elements on your timeline as you work may make navigating and viewing everything hard. EdrawMind has a Zoom and Pan feature for you to check the progress of your work.
- Import and Export Options: After creating your BC and AD timeline, you can export your work to various file formats. It also allows you to import files and information from other apps to your timeline.
- Collaboration and Sharing: EdrawMind supports teamwork and provides collaboration and sharing features for team members to cooperate in real-time
With these features, EdrawMind offers many benefits for you to make a flawless timeline:
- Improved Understanding: Visualizing information in a timeline helps you understand the order of events and the relationships between them.
- Enhanced Creativity: With the flexible functions of changing colors, fonts, and shapes, you can create a beautiful timeline that showcases your creativity and makes your work stand out.
- Better Organization: You can arrange information, patterns, gaps, and areas for further research correctly and efficiently. This makes information presentation more accurate.
- Effective Communication: EdrawMind offers a visually appealing and easy-to-understand format to effectively share your ideas with classmates, teachers, and family members.
- Time Management: EdrawMind allows you to set deadlines, allocate resources, and monitor your progress in the timeline, ensuring you stay on track and complete your tasks on time.
Now that you've learned the features and benefits of EdrawMind, delve into creating BC, AD, BCE, and CE timelines with this versatile tool.
2. How To Create a BCE, CE, BC, and AD Timeline With EdrawMind

Follow the steps below to create a timeline with EdrawMind:
Step 1: Download EdrawMind (below button). Open the application after installing it.
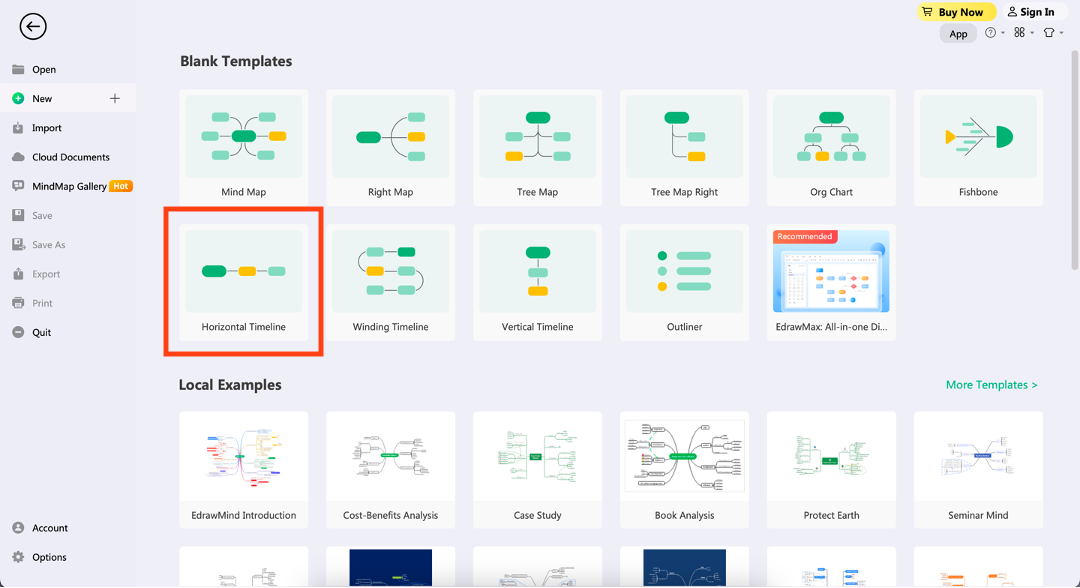
Step 2: Click Horizontal Timeline under the Blank Templates to create your timeline.
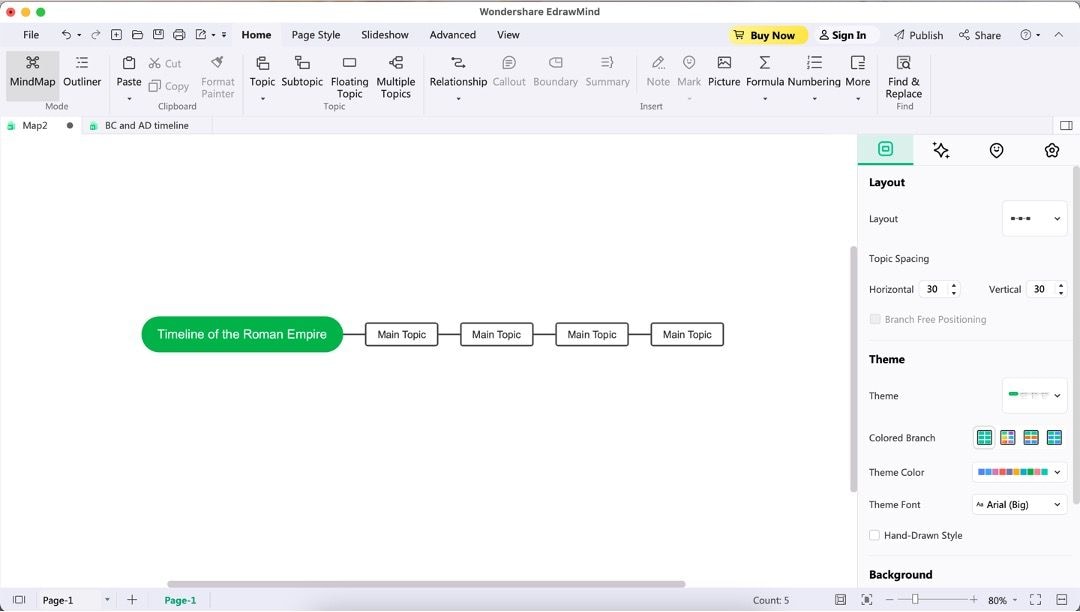
Step 3: Double-click the Main Idea topic and edit its text. In this example, the topic is "Timeline of the Roman Empire".
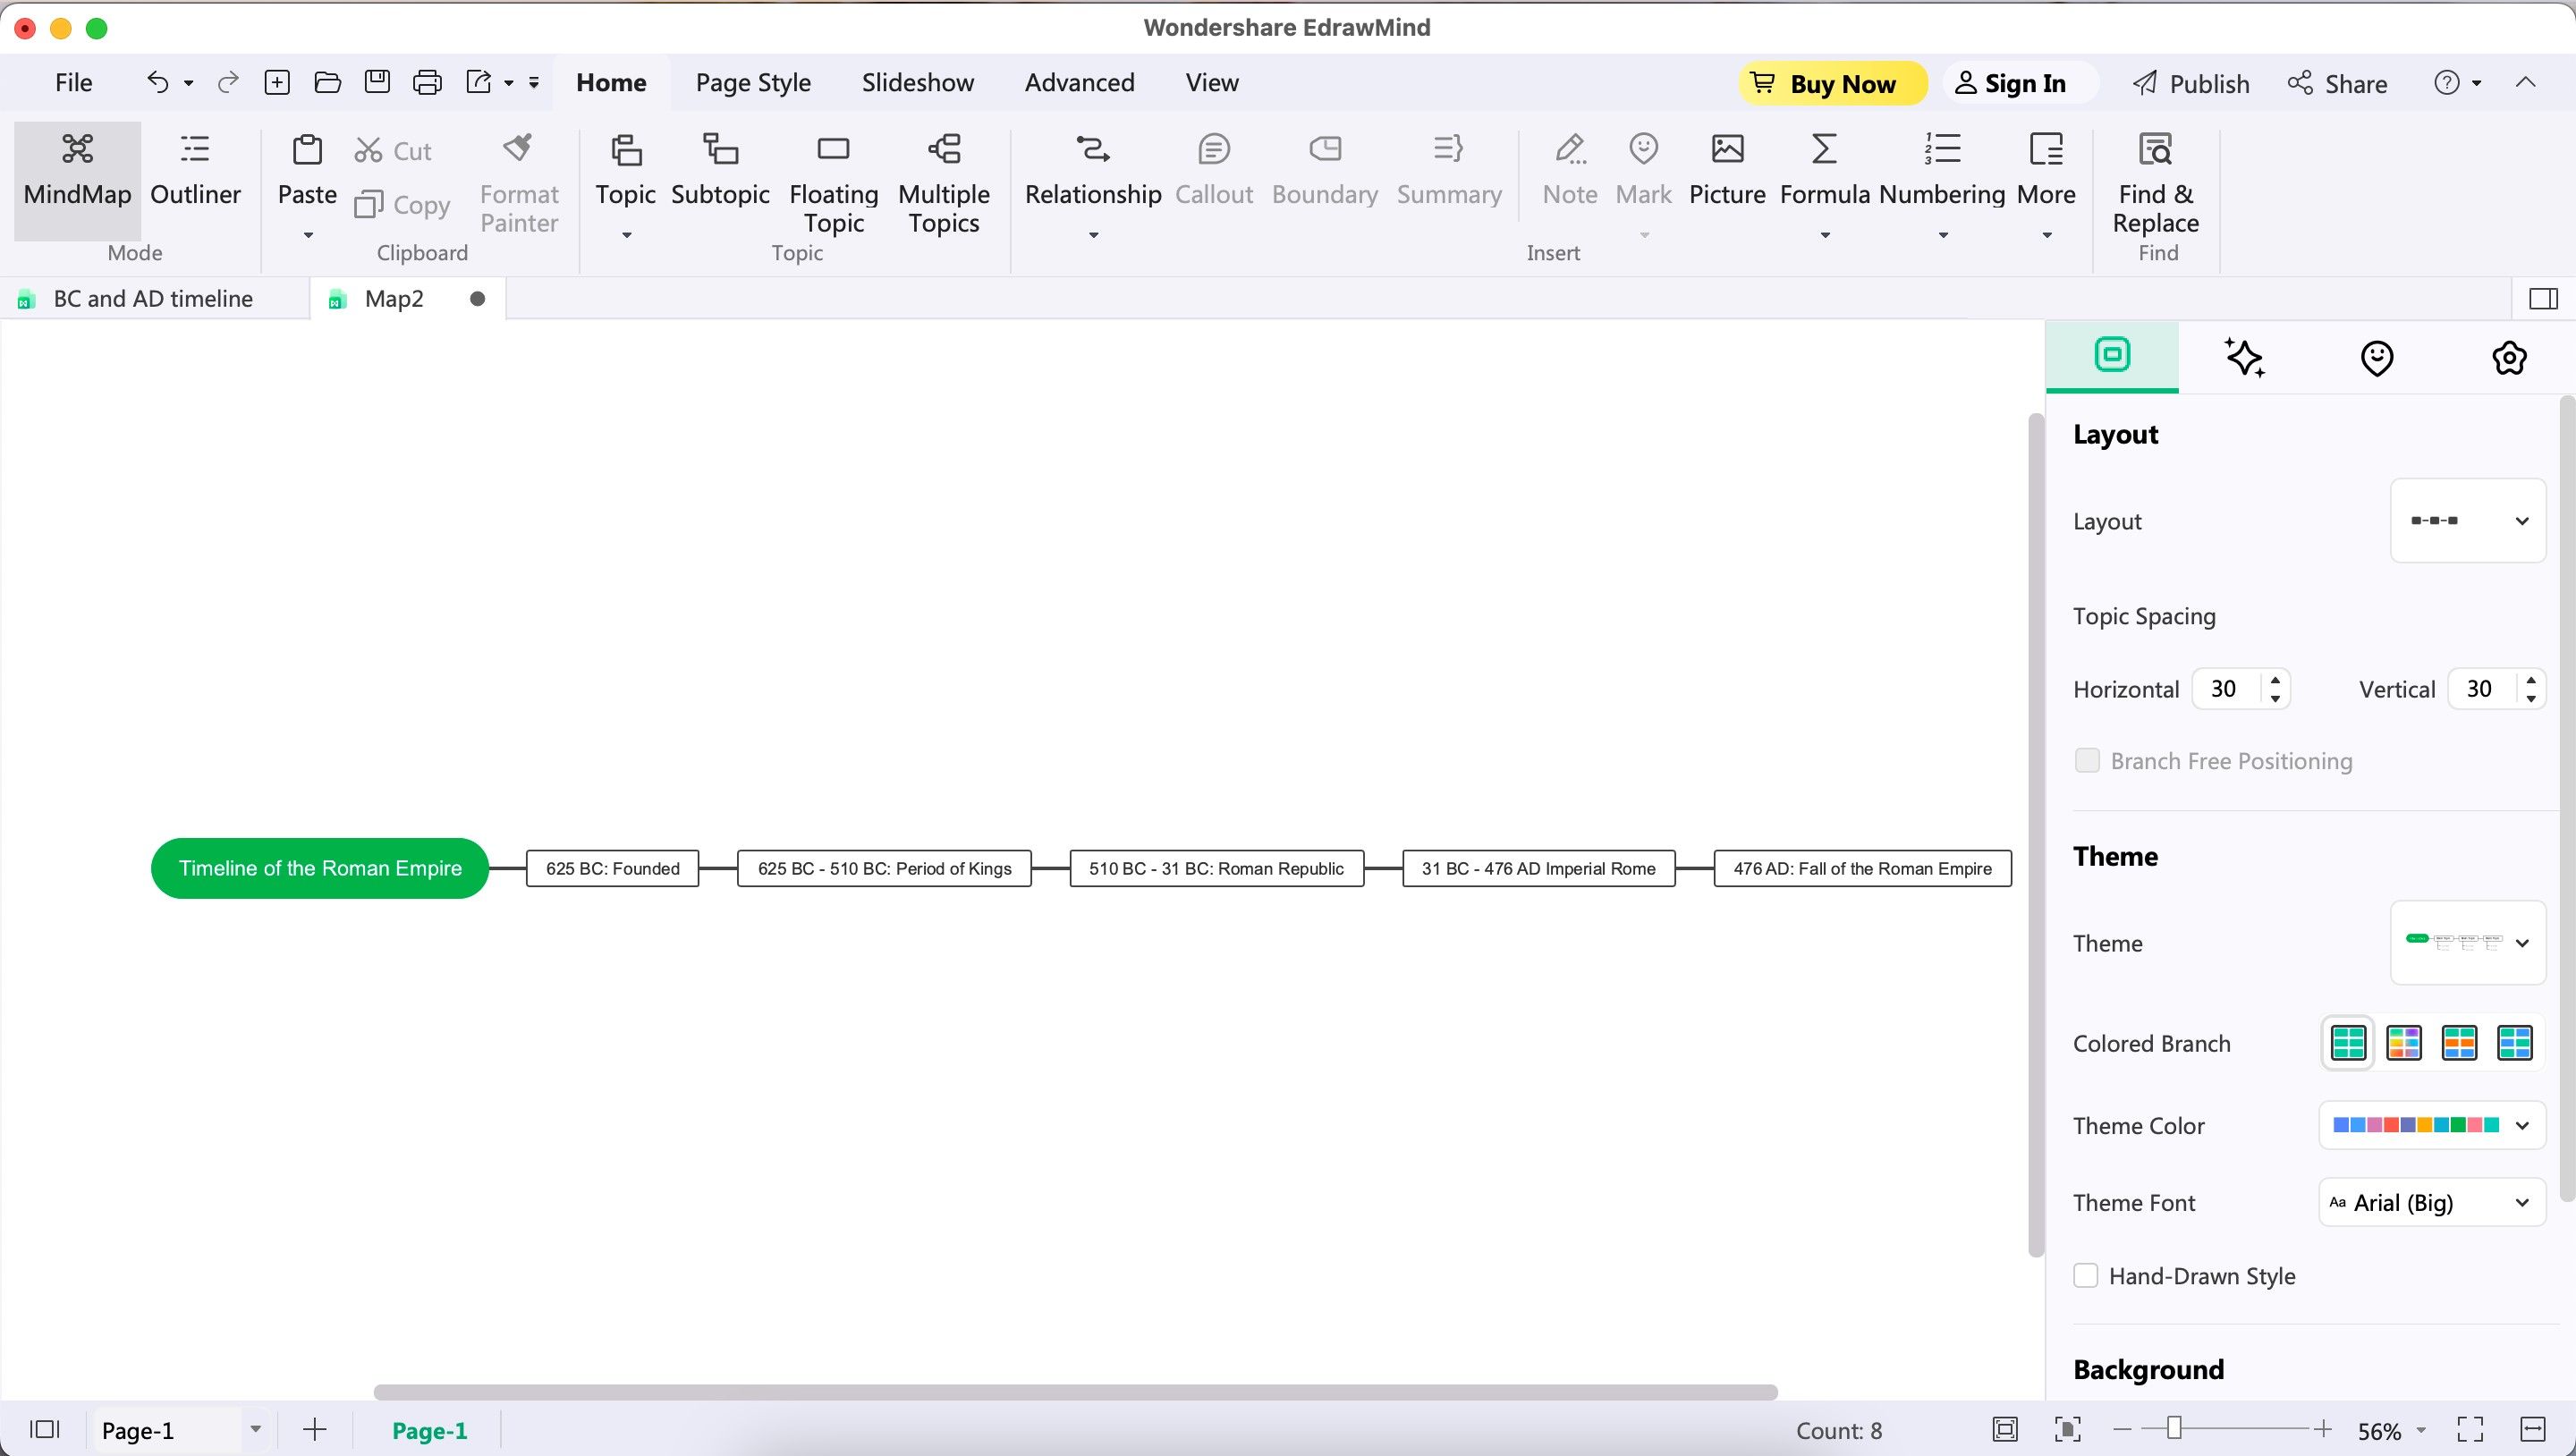
Step 4: Then, fill in the information in the Main Topic boxes.
Step 5: Press the left mouse button and drag the cursor to select as many topics as you want to classify. After that, click Summary under the Home tab. It will add a bracket and a Summary topic under the selected information. Edit it accordingly.
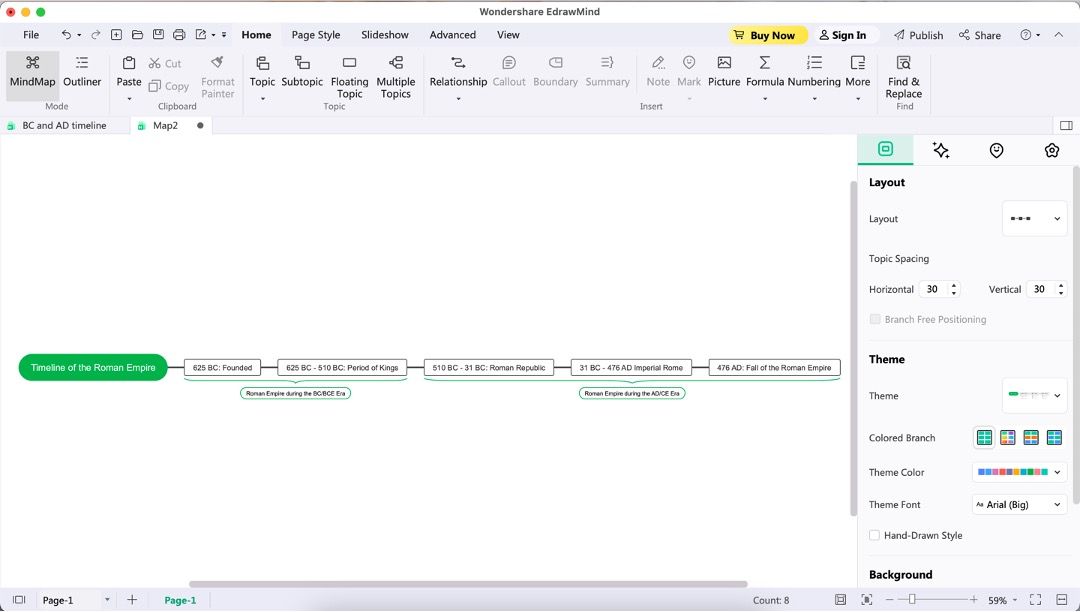
There are other ways to create timelines with EdrawMind, but this is a simple way to create them using the Horizontal Timeline template and the Summary feature of the application. Be sure to explore this tool to find more ways to create the timeline you want.
Conclusion
This article has introduced the differences between BC/AD and BCE/CE timelines. It reveals the seemingly confusing order of historical events and gives a distinct structure for people to learn history. Learning how to create timelines as such can significantly help you study and present historical information.
With EdrawMind's powerful features, such as Horizontal Timeline and Summary, the efficiency of creating timelines is escalated, and the clarity of the timelines is improved. Use EdrawMind for your historical projects and see the difference it can make.


 below.
  below.