Do you require assistance with evaluating strategic options, risk, potential prospects, and financial assets as a business or financial analyst? The decision tree is the go-to option. Let’s start with what a decision tree is.
A decision tree is a type of mind map that is the hierarchical model for decision support. It shows choices and their possible outcomes in the form of a tree. These outcomes can include random events, resource costs, and utility. But the question is how to create a decision tree in PowerPoint.
If you know how to use PowerPoint, it's easy to make a decision tree. But if you are just starting out, you won't be able to make your decision tree bigger because PowerPoint has limited editing options.
This is where EdrawMind comes in handy. It takes half as long to make a decision tree with its mindmap-specific symbols and editable templates from the gallery. In this article, we will learn how to make decision trees in both of these software.
In this article
How to Make a Decision Tree in PowerPoint
Crafting a decision tree in PowerPoint requires you to know several options like shapes, text, fonts, connectors, and elements. They are important to learn for creating understandable decision trees. Here is how you use these shapes to make a decision tree in PowerPoint.
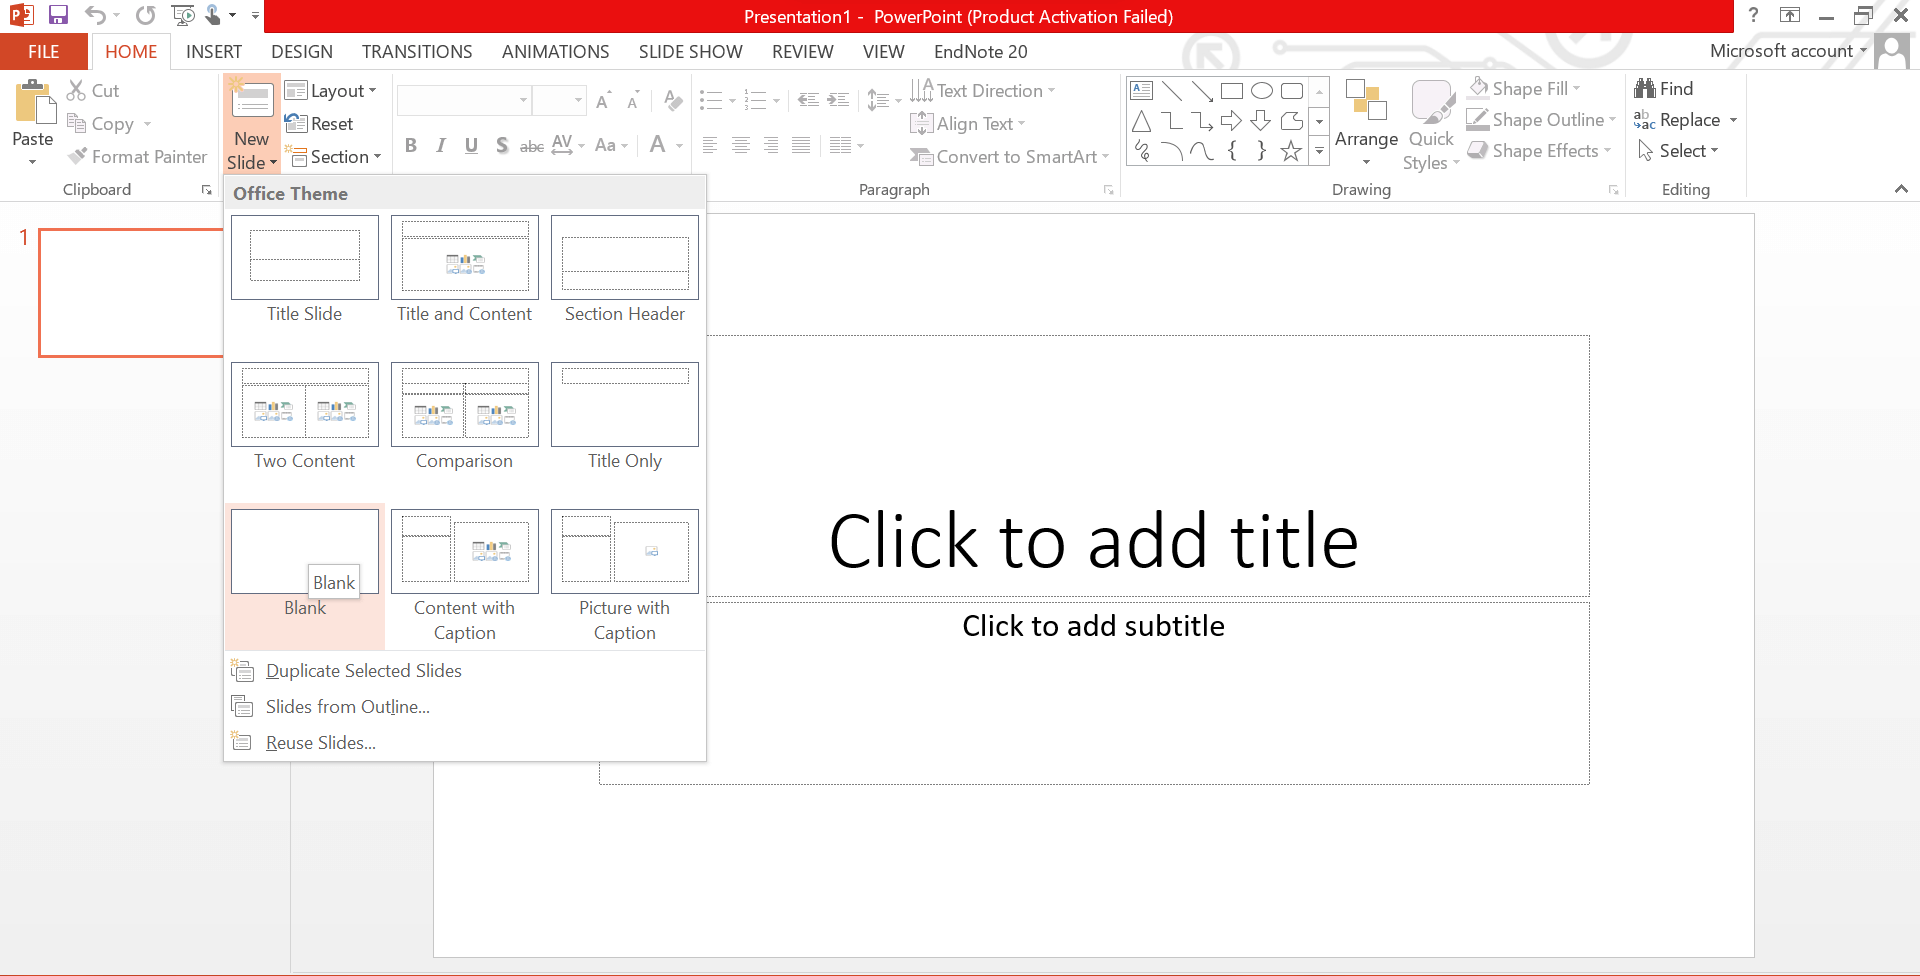
- Open PowerPoint and start a new presentation. Go to the Home tab and click New Slide to create a blank slide.
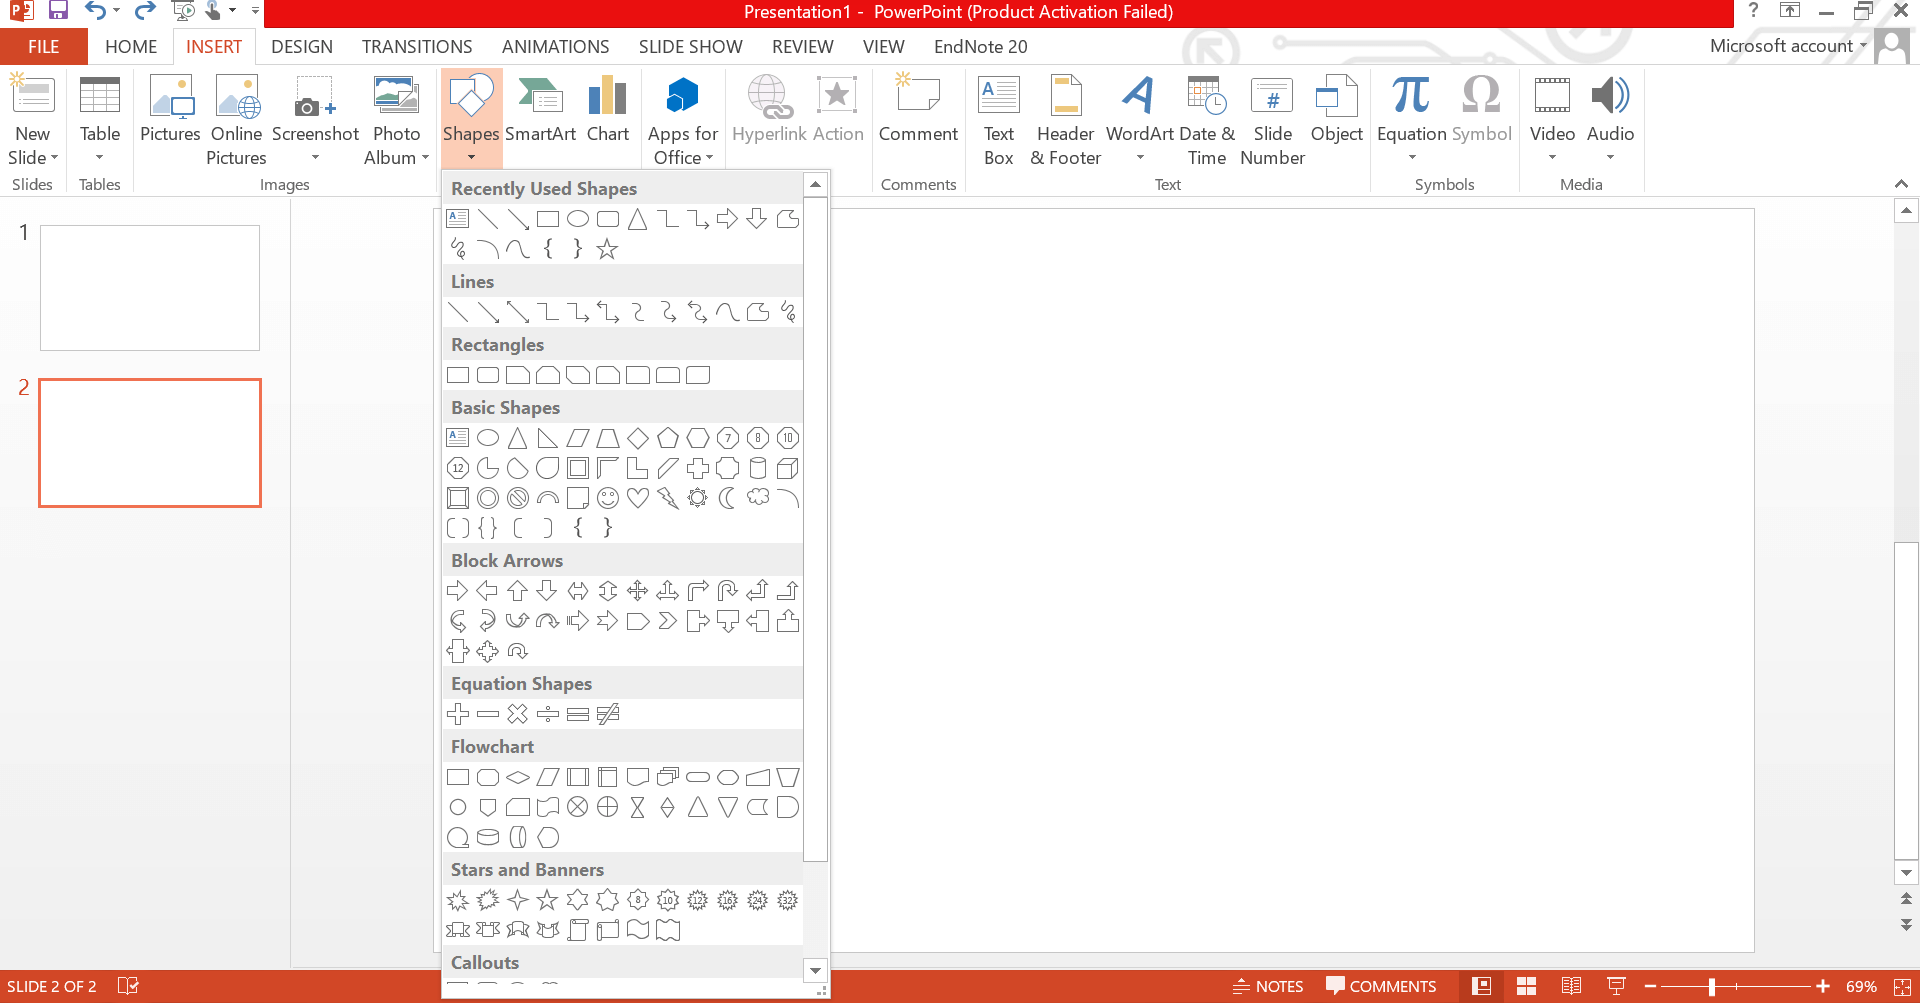
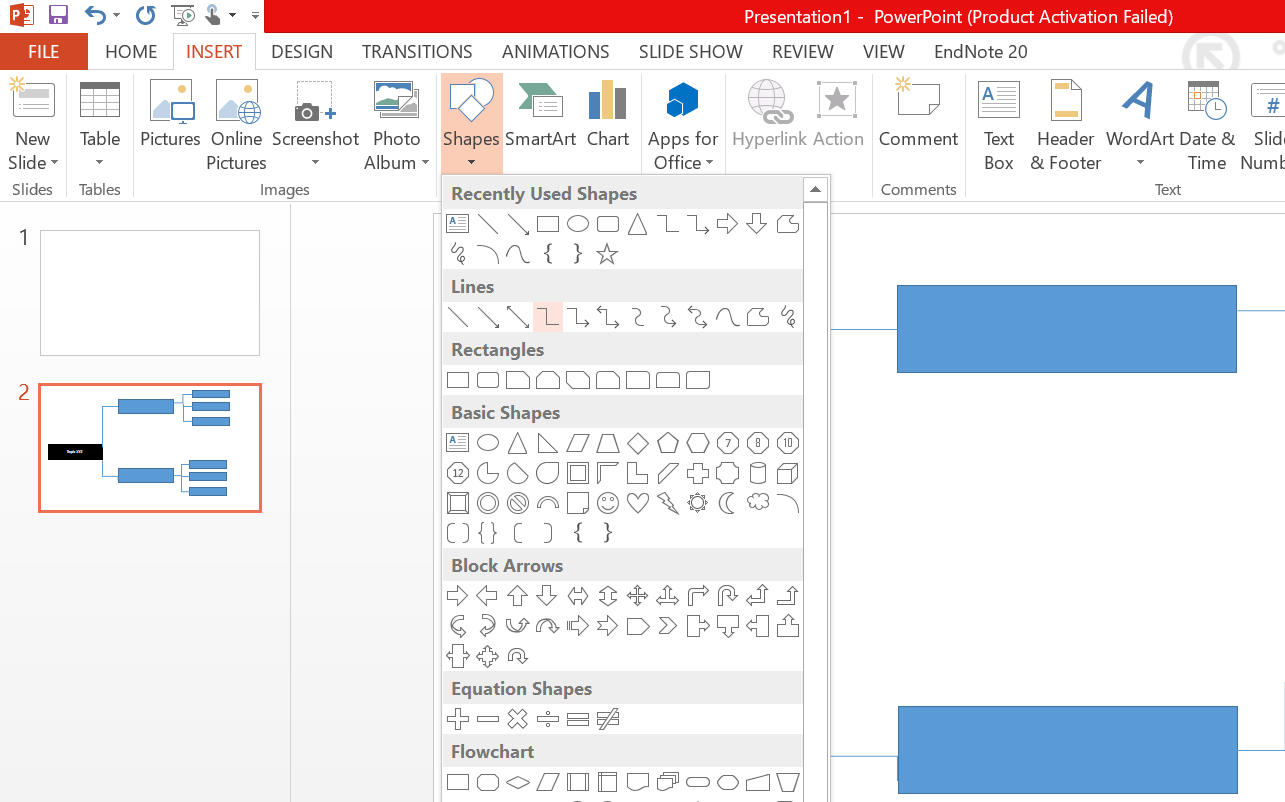
- Now, click Insert tab and select Shapes from the lower tab. Choose the shapes you want to use for the decision box; commonly, rectangles are used.
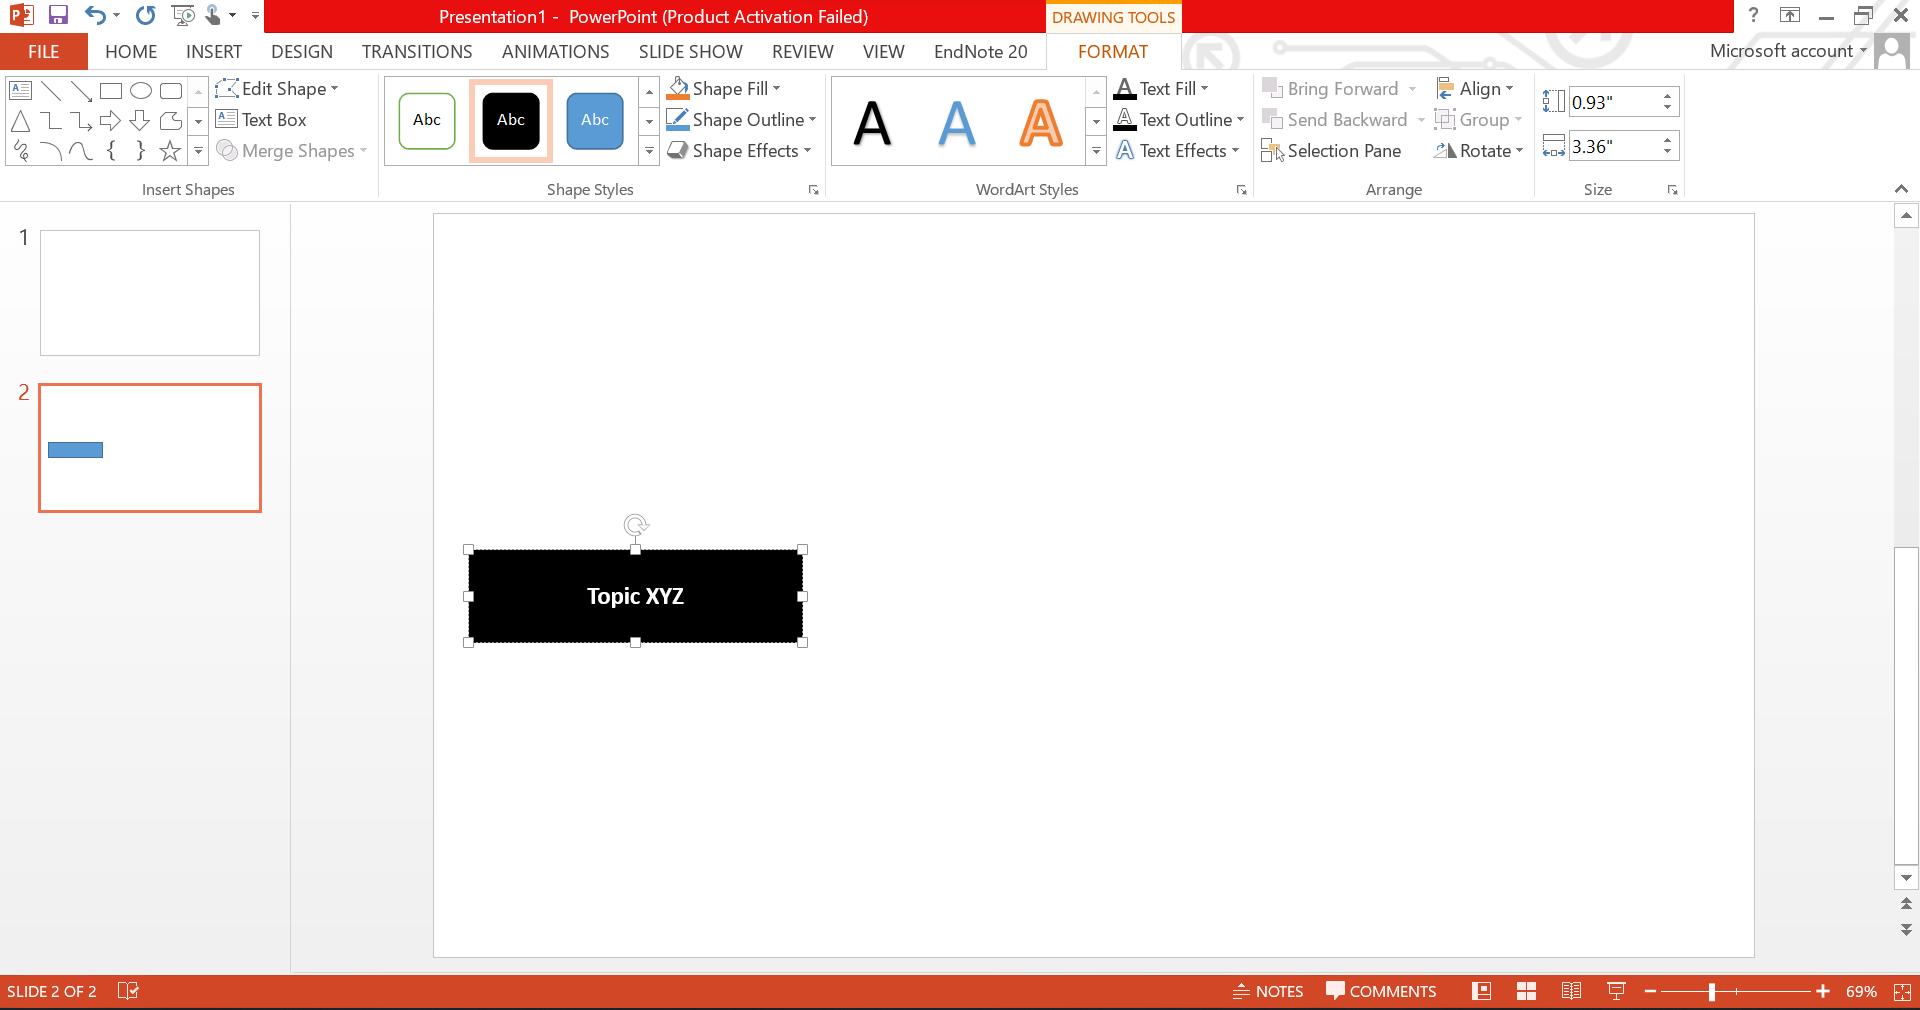
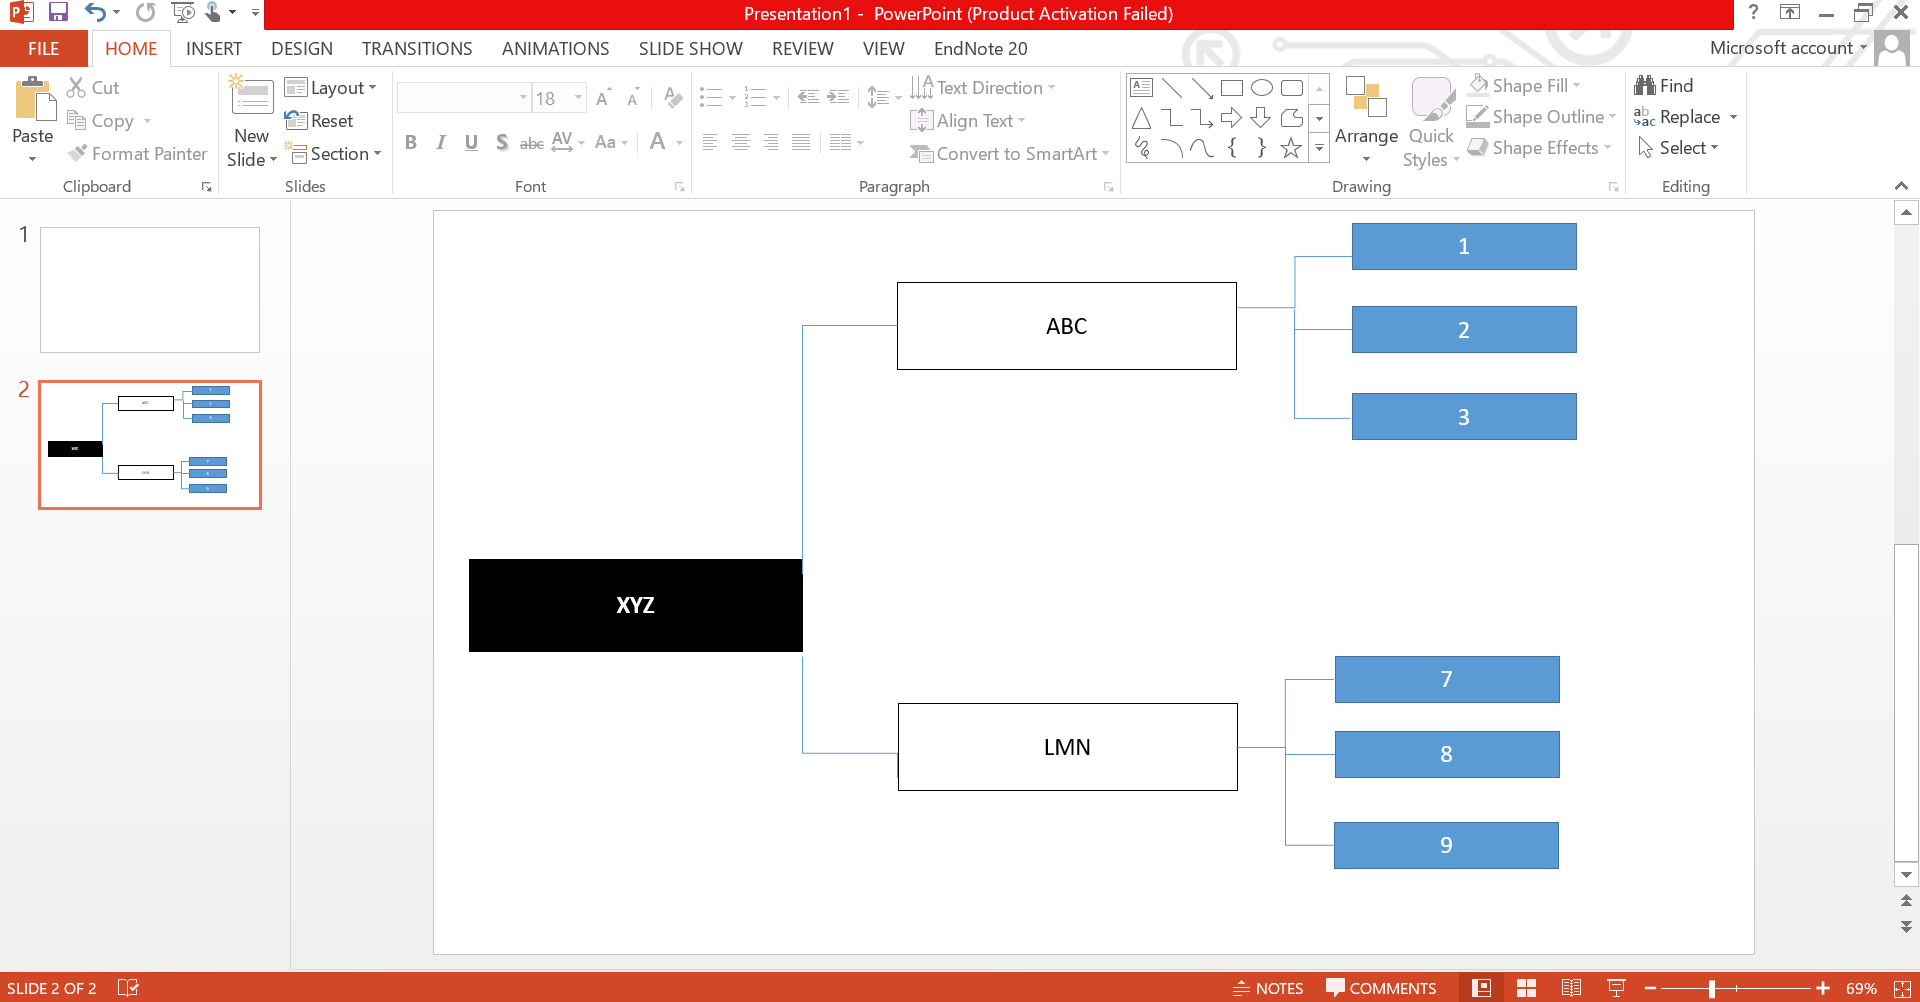
- Click and drag on the slide to draw the shape. Then click inside the decision box and add text; customize the text by changing the font, size, and color. Keep on repeating this process for each outcome box, too.
- Click the Insert tab again,select Shapes, and choose theLine tool. Now, click and drag on the slide to draw lines connecting the decision boxes to their corresponding outcome boxes. Ensure the lines are straight and clear to represent the flow of the decision tree.
- Make the choice tree clear and attractive. Change line color, style, and thickness. Add shapes or symbols to represent different decisions or consequences. For visual clarity, add labels, colors, and icons.
Tips and Tricks for Making a Decision Tree in PowerPoint
Creating a compelling decision tree in PowerPoint requires finesse and clarity. Here are five tips to ensure effectiveness:
1. Simplicity
Don't give your audience too much information; just use precise wording and the most important details. Each node should have a short text that focuses on the main decisions and outcomes. It makes decision trees easy to understand.
2. Visual Consistency
It's essential to keep the visual style consistent throughout the decision tree. A skilled and well-put-together presentation always uses the same shapes, colors, and formatting. This consistency helps show that the decision-making process is orderly and well-organized.
3. Utilize Hierarchy
Use PowerPoint's hierarchy features to show the importance or sequence in your decision tree. Indentation helps visually organize information by creating an order to signify sub-decisions or outcomes.
4. Add Infographics
Use icons or symbols for visual enhancement. Infographics help convey information effectively and enhance engagement in decision-making. Icons simplify concepts for communication.
5. Strategic Color Usage
Use colors strategically to distinguish decision nodes, chance nodes, and outcomes. Color coding improves visual clarity, helping viewers understand the decision tree's logic more easily.
How to Make a Decision Tree in EdrawMind
A decision tree is an effective tool that can help you create a visually appealing and well-structured representation. While PowerPoint is a user-friendly tool for starting your decision tree creation, many individuals seek a faster alternative. A faster option like EdrawMind offers users an intuitive interface, multiple variety of customizable templates, and now AI assistance, too.
Let's take a look at how you can craft a decision tree on EdrawMind from scratch.
Step 1:Launch EdrawMind
Firstly, open the desktop version of Edrawmind. If you don’t have one downloaded, you can use EdrawMind online from your browser
Step 2:Create a Decision Tree Mind Map
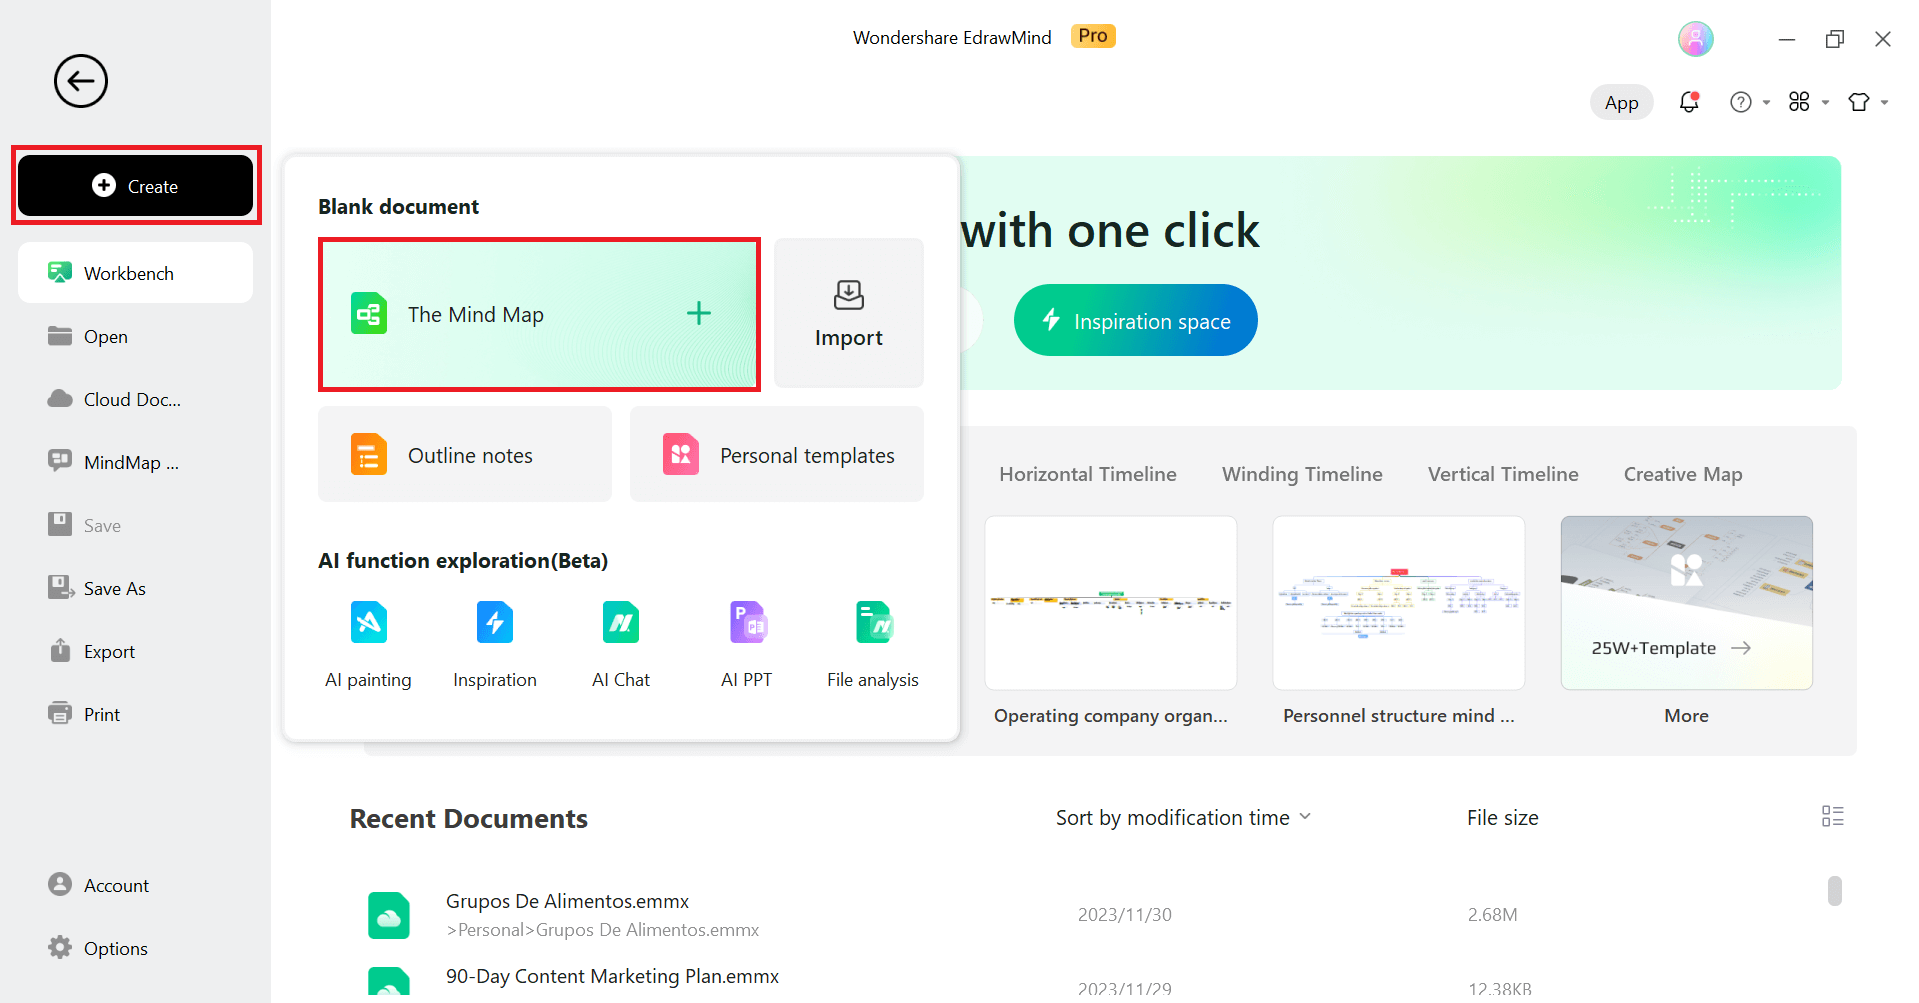
Once you get your hands on the software, Click Create from the left-hand menu. Then, select The Mind Map Option from the expanded menu.
Step 3:Crafting Decision Tree
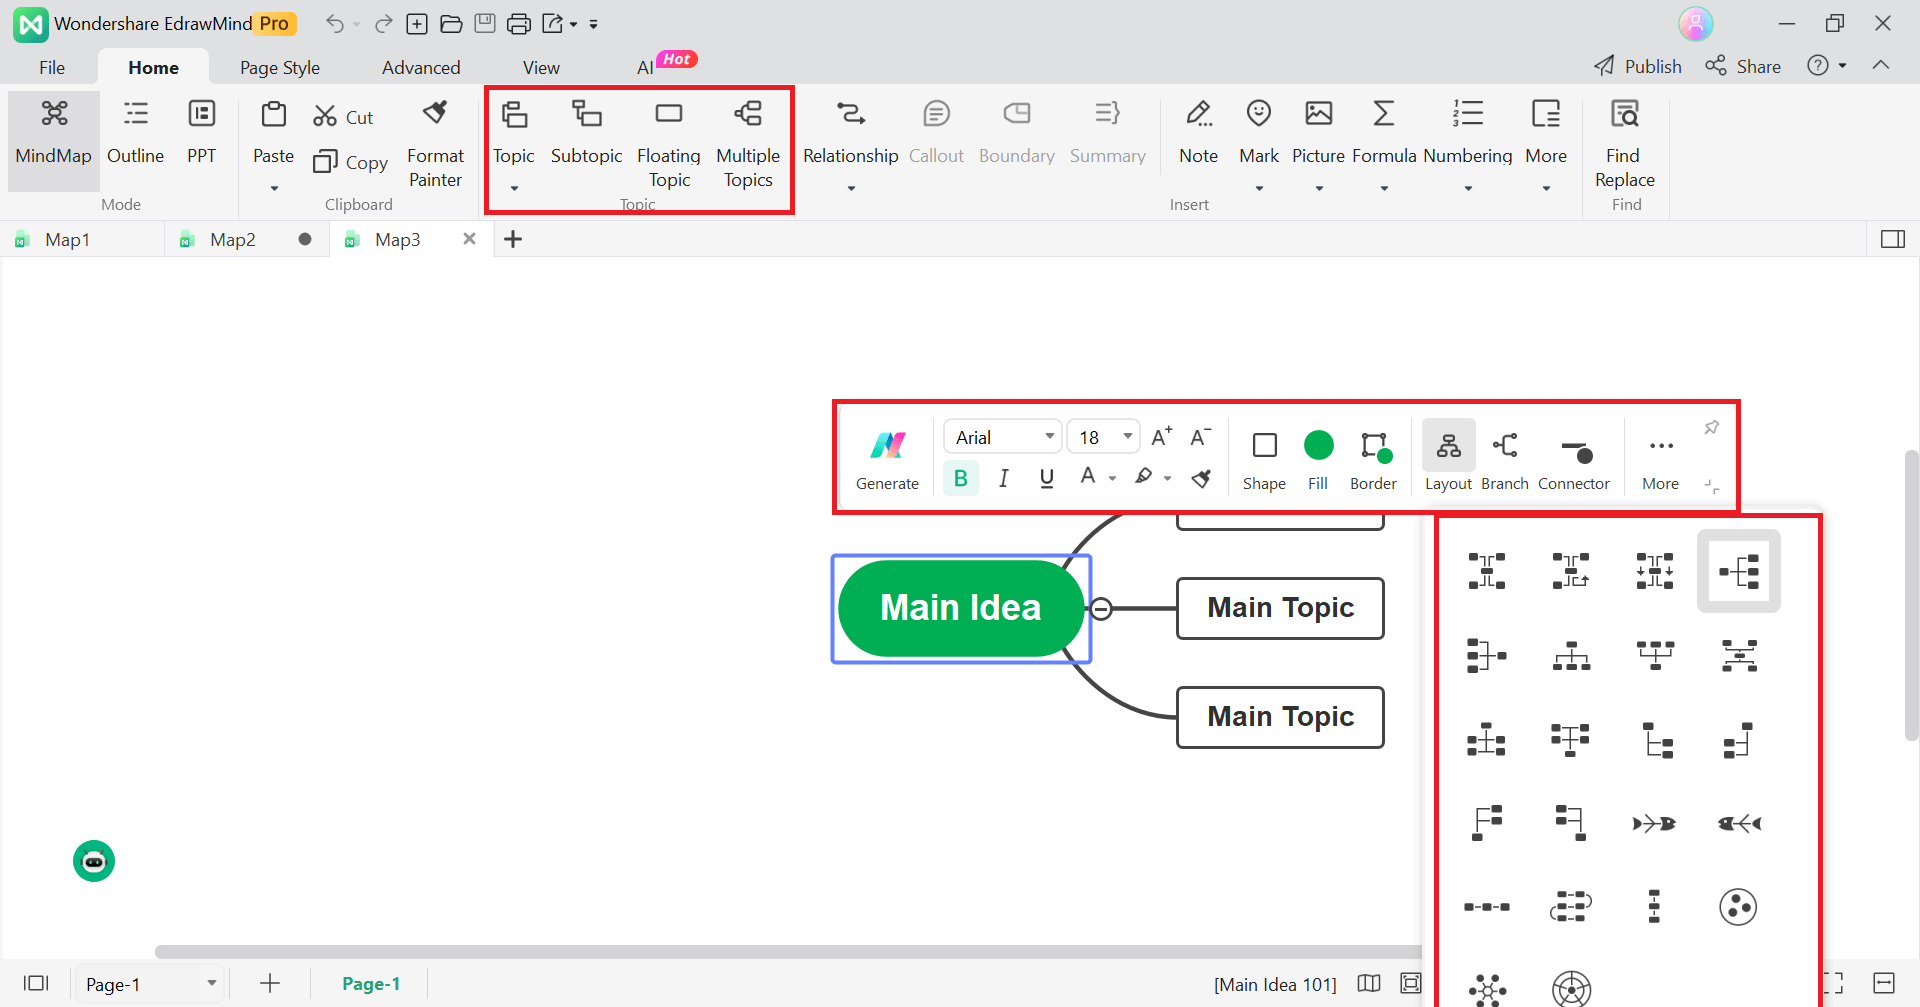
Your screen will display a simple and customizable layout. Click Main Idea box and the supporting detail box will appear from there, you can modify and change the layout style. Select Topics and Sub-Topics from the sub-bar in the Home Menu to create a personalized hierarchical design for your decision tree. It will assist you in clearly defining your decision nodes, outcome nodes, and circumstances.
Step 4:Format and Customize
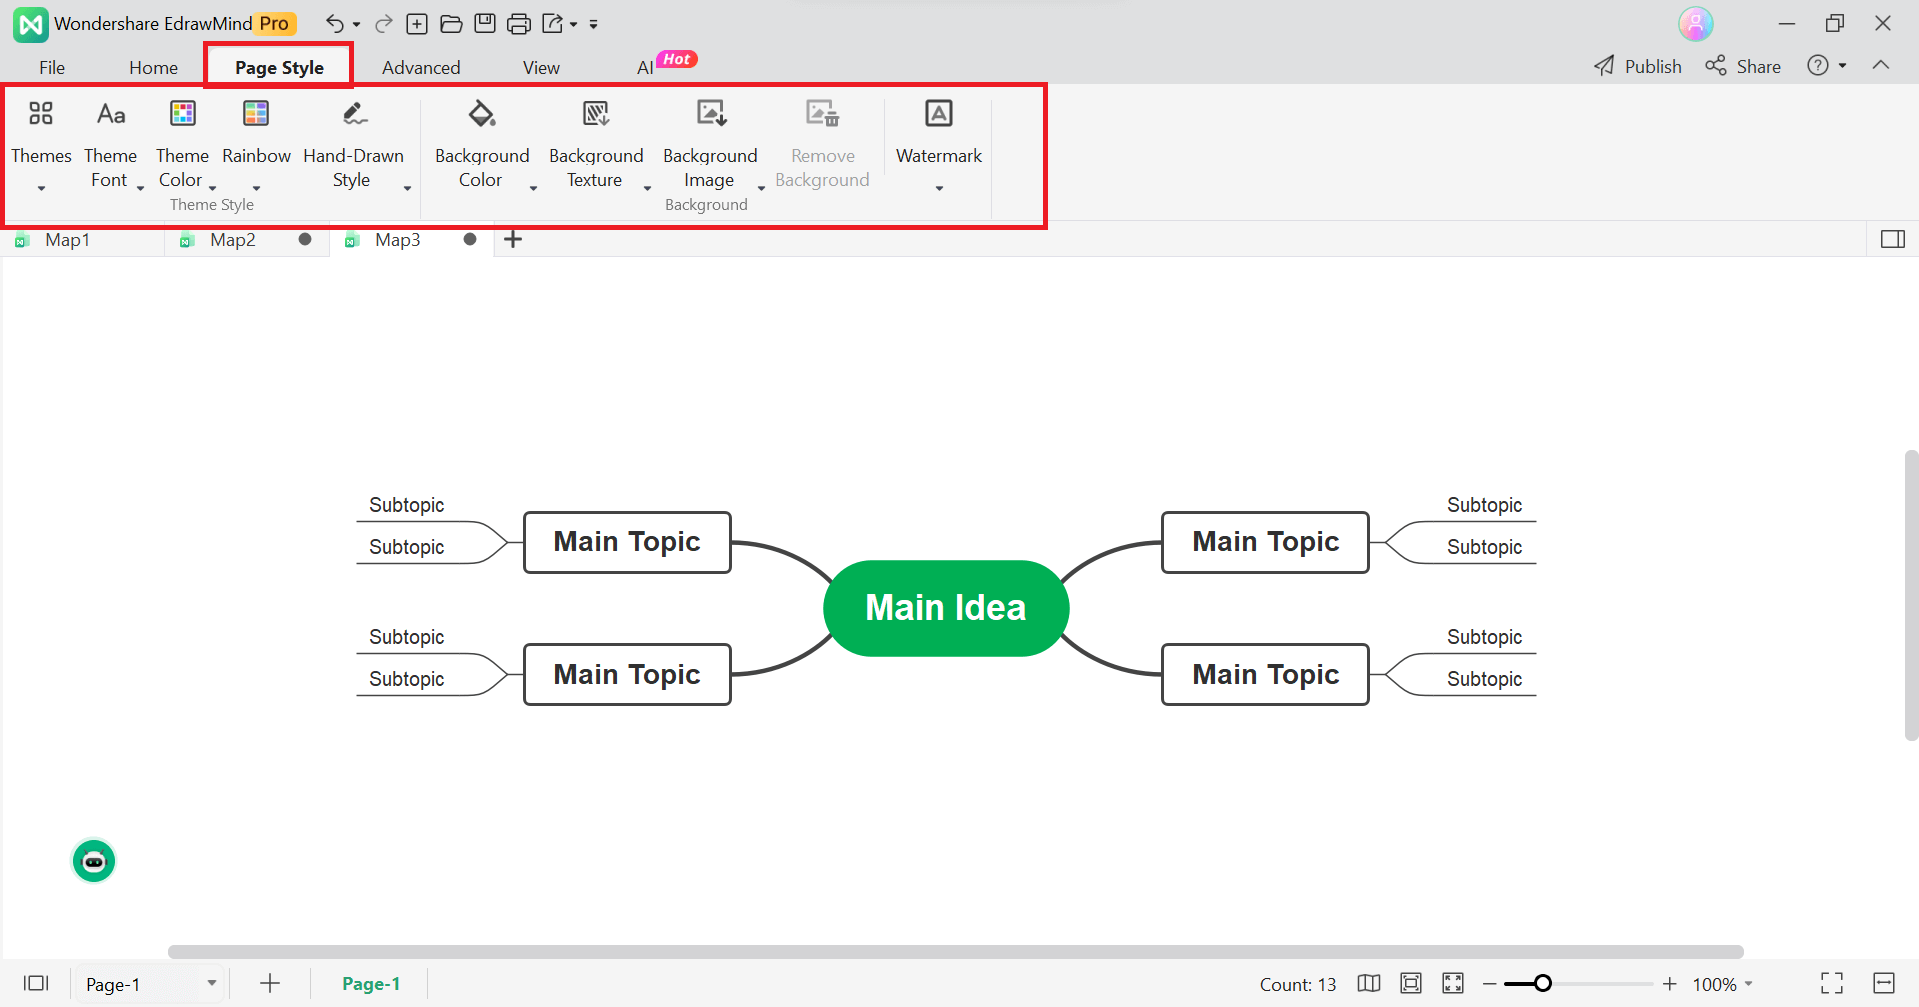
After you have finished revising and organizing your decision tree, the next step is to add your own personal touches and ensure it looks good. Click Page Style tab to customize the colors, themes, shapes, and fonts.
Step 5:Sharing and Saving
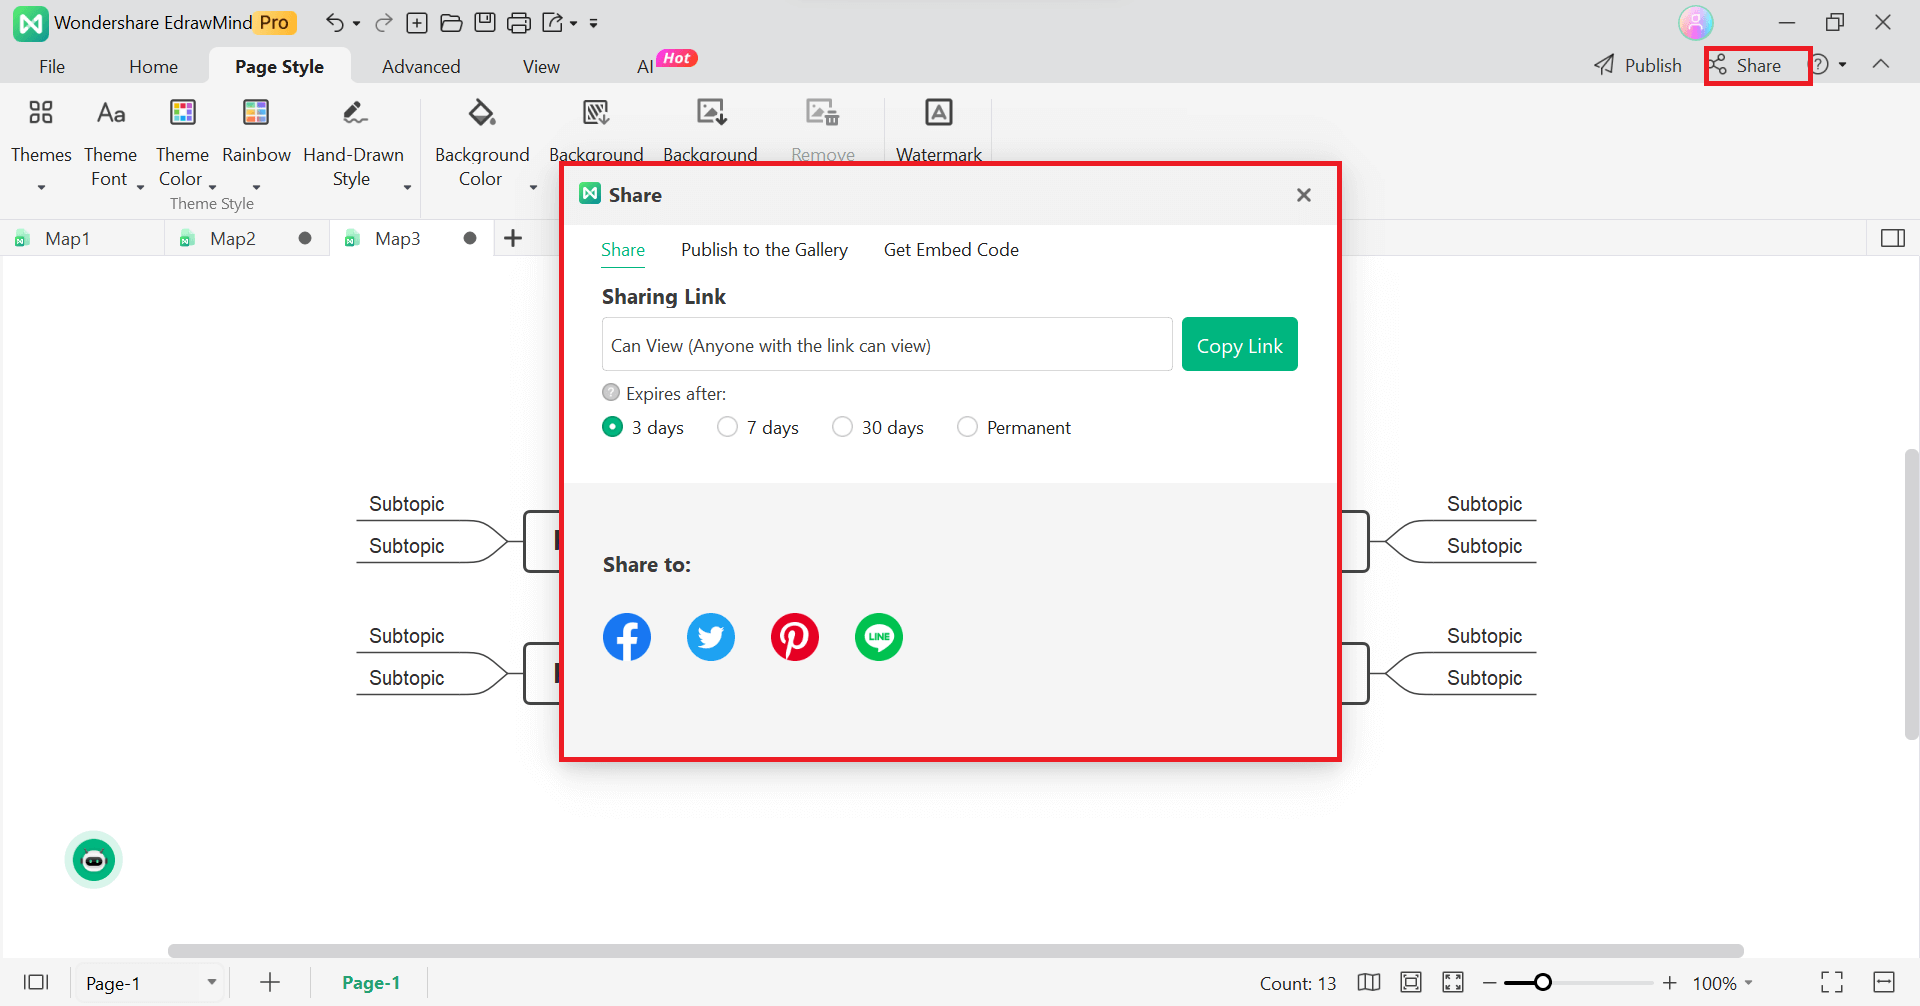
Once you have customized your decision tree to your satisfaction, it is time to save it on your computer. Simply navigate to the File menu, select Save as, and choose your preferred saving option. You can also share your design by accessing the Share button on the upper right side.
Making Decision Tree in PowerPoint Vs in EdrawMind
If you are starting out, you must be confused about which software to use and which fits the best to your requirements. Both EdrawMind and PowerPoint have distinct features and advantages. Let’s see what unique features both software have to offer.
EdrawMind Unique Features
- Collaboration and Sharing
- Versatile Templates
- Cross-Platform Compatibility
- Integration and Export Options
The tool often supports collaboration features, allowing users to work on mind maps in real-time with team members. Users can share their mind maps, making it a collaborative platform for brainstorming and project planning.
EdrawMind typically offers a variety of templates for different purposes, such as project management, brainstorming, decision-making, and more. These templates can save time and provide a starting point for users.
Users can often access EdrawMind across multiple devices and platforms, including web browsers, desktop applications, and mobile apps. This ensures flexibility and convenience in creating and editing mind maps from different devices.
EdrawMind usually supports integration with other productivity tools and platforms. Additionally, users can often export mind maps in various formats (e.g., PDF, image files) for easy sharing or presentation purposes.
PowerPoint Unique Features
- Slide Design and Layouts
- Collaboration and Co-Authoring
- Presenter View and Slide Show Options
PowerPoint provides a variety of pre-designed slide layouts and themes. Users can choose from different designs to create visually appealing slides, incorporating elements such as text, images, charts, and multimedia.
PowerPoint offers collaboration features, allowing multiple users to work on a presentation simultaneously. Co-authors can edit and contribute to the presentation in real-time, making it a valuable tool for team collaboration.
PowerPoint provides a Presenter View, allowing presenters to view speaker notes, upcoming slides, and other details on their screen while the audience sees only the current slide. The software also offers various options for customizing and controlling the slide show, such as rehearsing timings and navigating slides.
Free Decision Tree Maker
EdrawMind stands out in mind-mapping tools, providing essential features that cater to users of all levels. The free version of this tool is highly robust, and the premium features offer even more advanced capabilities, making it the ultimate choice for efficient mind mapping.
Here are some reasons why EdrawMind is the perfect choice for designing decision trees.
1. Customization
EdrawMind offers a wide range of customization possibilities. Countless modifications can be made to redefine the layout of a mind map, including altering the shape, color, and style of each element. These features enhance your ability to express your thoughts and ideas effectively.
2. Multiple Templates
The mind map gallery in EdrawMind offers a wide range of incredibly useful templates for quickly creating diagrams. It simplifies creating mind maps for various purposes, such as project management, idea generation, and education.
3. Various Export and Sharing Options
Users of EdrawMind can easily share their mind maps with others by exporting them in several different forms, such as PDF, Word, Excel, PPT, and more.
Conclusion
A decision tree is a crucial tool for individuals and teams, aiding in navigating complex decisions by assessing risks and conditions. If you're new to diagramming, EdrawMind's Template Gallery and step-by-step guidance make creating your decision tree a breeze.
For those familiar with PowerPoint, it's a handy choice, but when it comes to advanced technology, EdrawMind stands out as the top option. It offers efficiency and time savings. So, whether you're starting fresh or diving into advanced tech, both tools have covered you for effective decision-making.


