
Making mind maps is a contemporary way of organizing your thoughts into colorful visuals. You can create exciting mind maps through your hands or professional mind mapping software. Some writing applications can also generate these diagrams, e.g., Microsoft Word. However, you can only access basic features through this method.
Designing a mind map in Word is relatively easy, and you can create interactive maps in the bat of an eye. Below are some steps that you can follow to design mind maps in Microsoft Word.
In this article
Overview: Making Mind Map in Word vs EdrawMind
For a better presentation, we'd better watch out for the tool we select to make a mind map. This article will use Word and EdrawMind to create a mind map. Before we walk through the steps, let's take a quick overview of them. You can decide which to use later.
| Features | EdrawMind | Word |
| Built-in templates | ||
| Mapping themes | ||
| SmartArt | ||
| One-click AI | ||
| Cloud Storage | ||
| Auto-arrange | ||
| Real-time collaboration |
Microsoft Word was essentially designed to write and organize documents.
Therefore, the software offers a pretty basic layout for creating mind maps. Though you can still create engaging mind maps, you need to perform thorough customization and be a lot more creative.
EdrawMind, on the other hand, is different.
The software is designed explicitly to create mind maps that are realistic yet flexible. Its smart controls, customization options, and 30+ mapping themes allow you to provide a creative outlook to your thoughts.
Also, EdrawMax is an AI text-to-mind-map tool. You can enter text and it will generate a mind map from the words. No manual steps at all. Easy and fast.
Bonus: Generate a Mind Map with AI
AI helps make a high-quality mind map quickly. We can skip the time-consuming and complex process of making a mind map bit by bit. Let's generate one with EdrawMind AI Mind Map Maker. Enter your requirements in the box and hit Generate for Free Now. AI will do its job! Let's try it!
Method 1: How to Make a Mind Map in Word
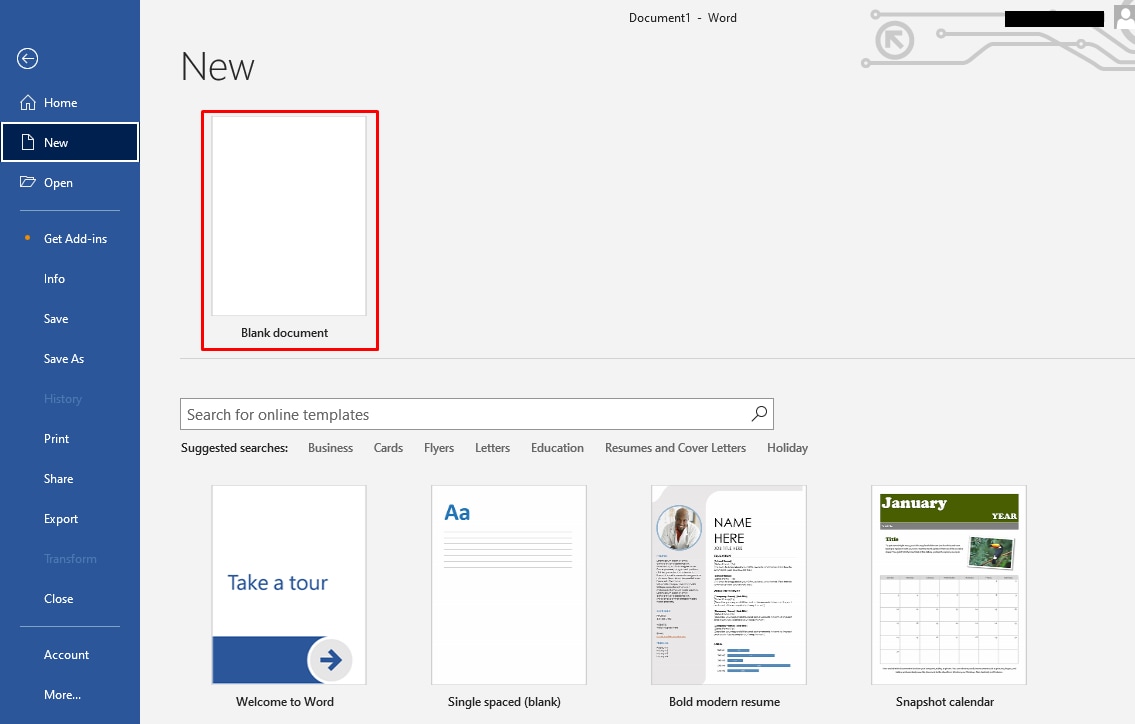
Step 1: Create a new file
Microsoft Word allows you to create a new file before beginning a task. To do so:
- Choose File > New > Blank Page > Create.
- This will open a blank Word page to work.
Step 2: Use SmartArt
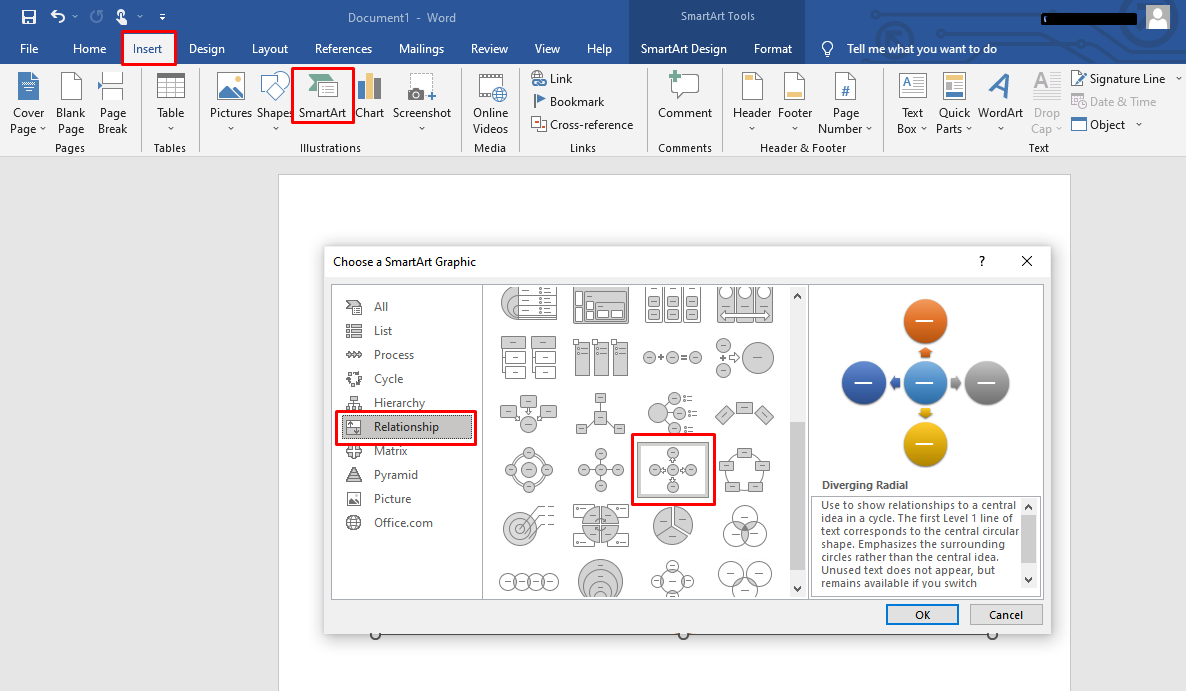
You can easily create interactive mind maps using SmartArt functionality instead of manually adding each shape, such as rectangles and arrows. Navigate to Insert > Smartart > Hierarchy > Choose a template.
Step 3: Include Topics/ Subtopics
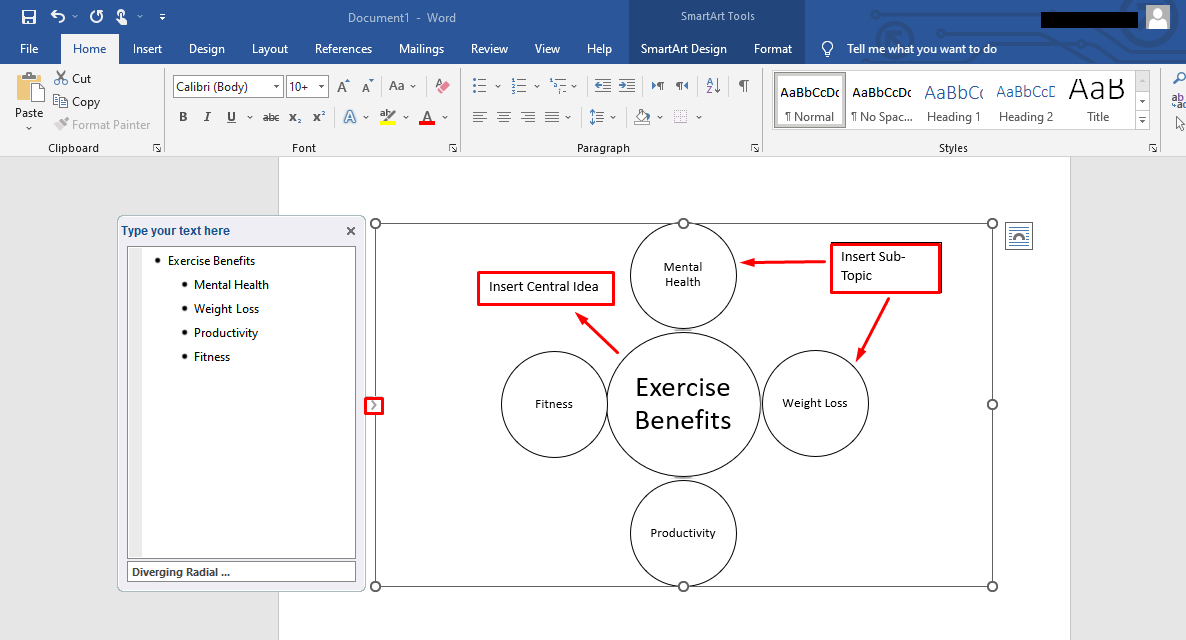
The next step involves populating your mind map. This can be done by editing the content. You need to include the topic and subtopics related to your main idea. To do this:
- Use the cursor to add text to the target area.
- Press backspace to remove existing content from the SmartArt and then add desired text using your keyboard.
- For Example, you can create a mind map on the benefits of exercise. The main idea would be 'exercise benefits,' and the main topics would be 'weight loss,' 'fitness,' 'mental health,' etc.
Step 4: Customize the mind map
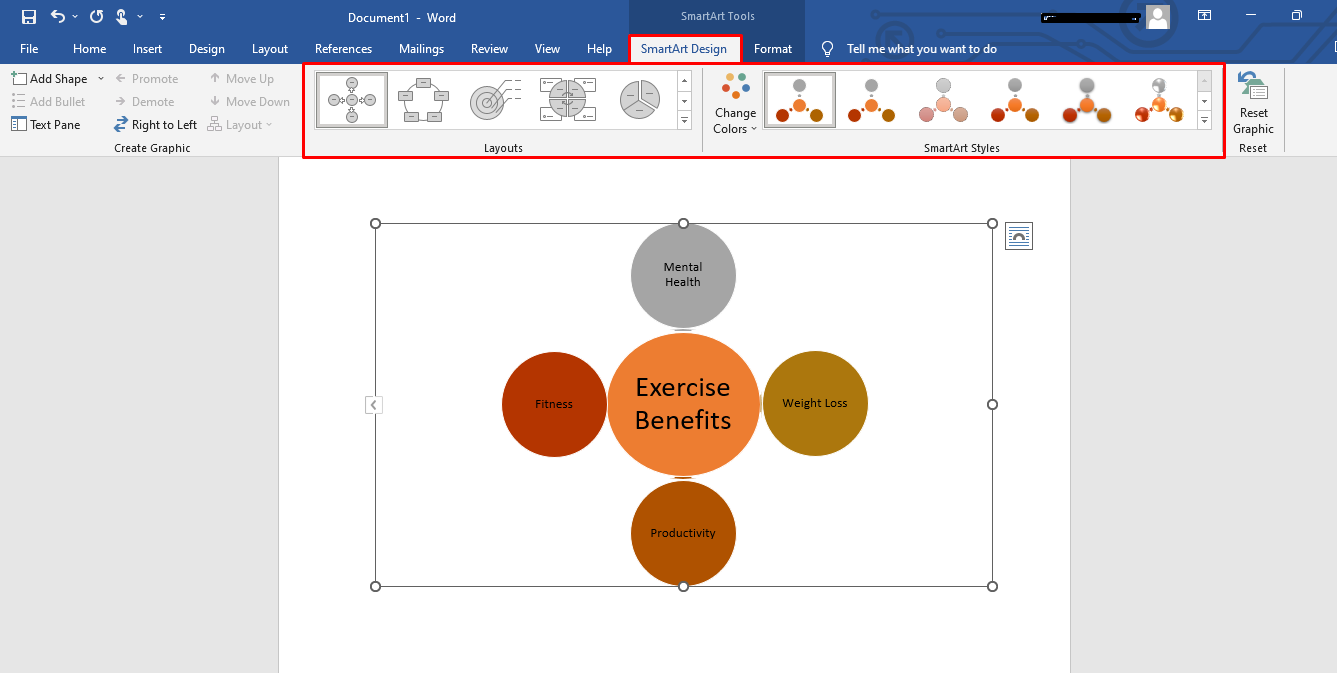
You can customize the mind map by changing its color palette, text size, etc. Use the top ribbon for this purpose.
- Select your mind map.
- Choose 'Smartart Tools' > 'Design/ Format'.
- Use the text size option to modify the size of the text.
- Select the color option to change the color.
- If you are unsatisfied with the SmartArt, you can change it using the 'Layouts' option.
Step 5: Save the map
The last step involves saving your visuals. Microsoft Word allows you to save the document on your device or the Cloud Storage.
To save the map on the device:
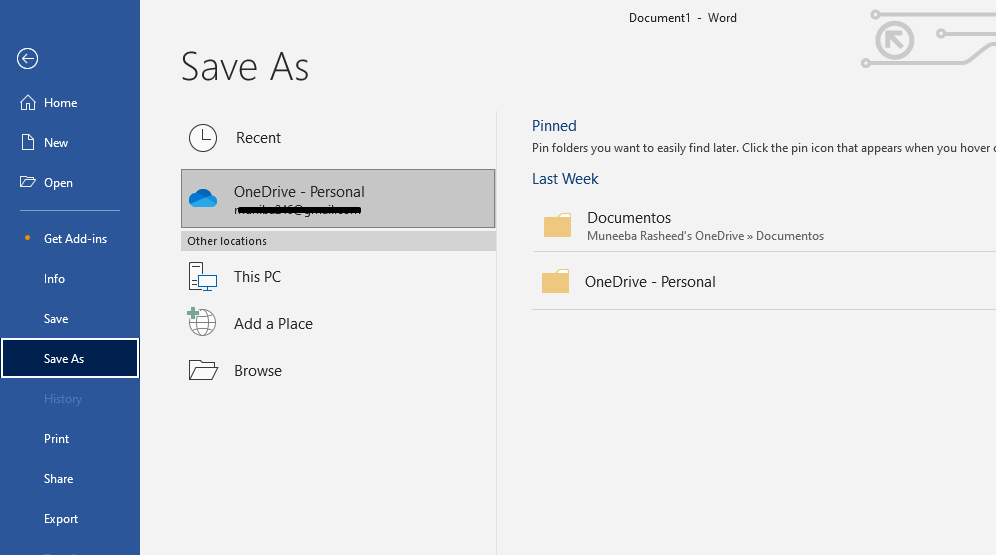
- Navigate to File > Save as > Downloads.
- Following this command will save the maps in the Downloads folder of your device.
Alternatively, for cloud storage:
- Choose File > Save as > Save in OneDrive.
- This will save the document on OneDrive, which can be accessed anywhere.
Method 2: How to Make A Mind Map In Edrawmind
Compared to Word, EdrawMind provides many free mind map templates. So, you won't waste your time composing the structure or layout of the mind map. Just select one from the library and use it for free.
Step 1 Create a new file
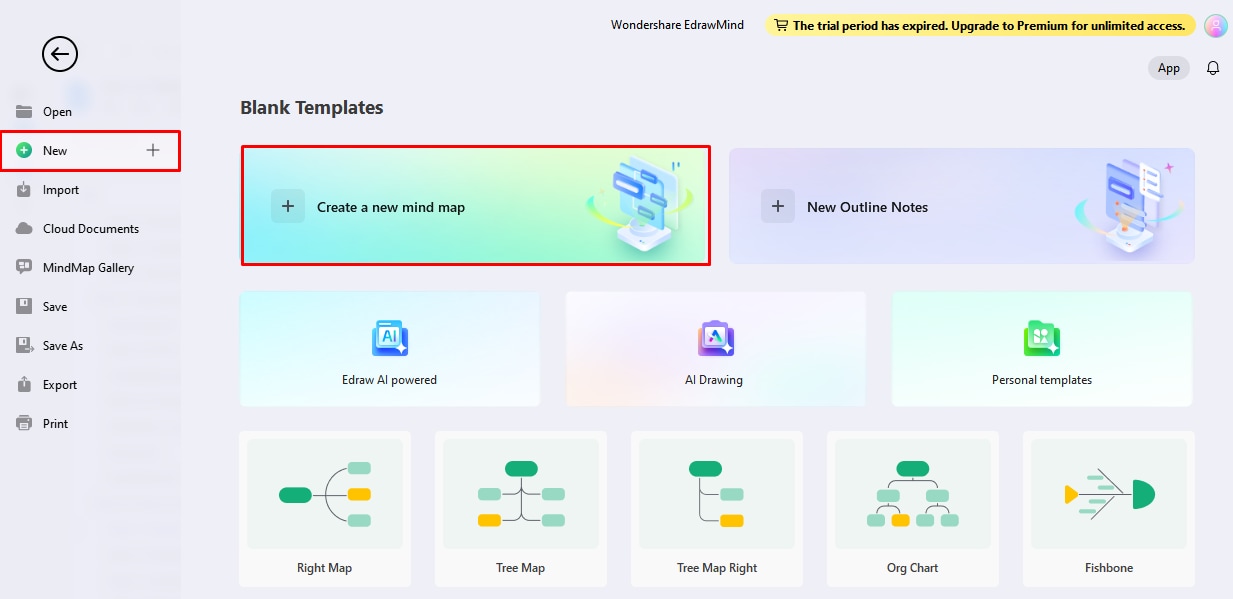
Using Sketch: A new file can be created using the blank canvas. For this:
- Navigate to File > New > Create a map from a blank canvas.
- This will open an empty page that can be used to add elements such as shapes and arrows to create a mind map.
Using mind map templates from the mind map gallery:
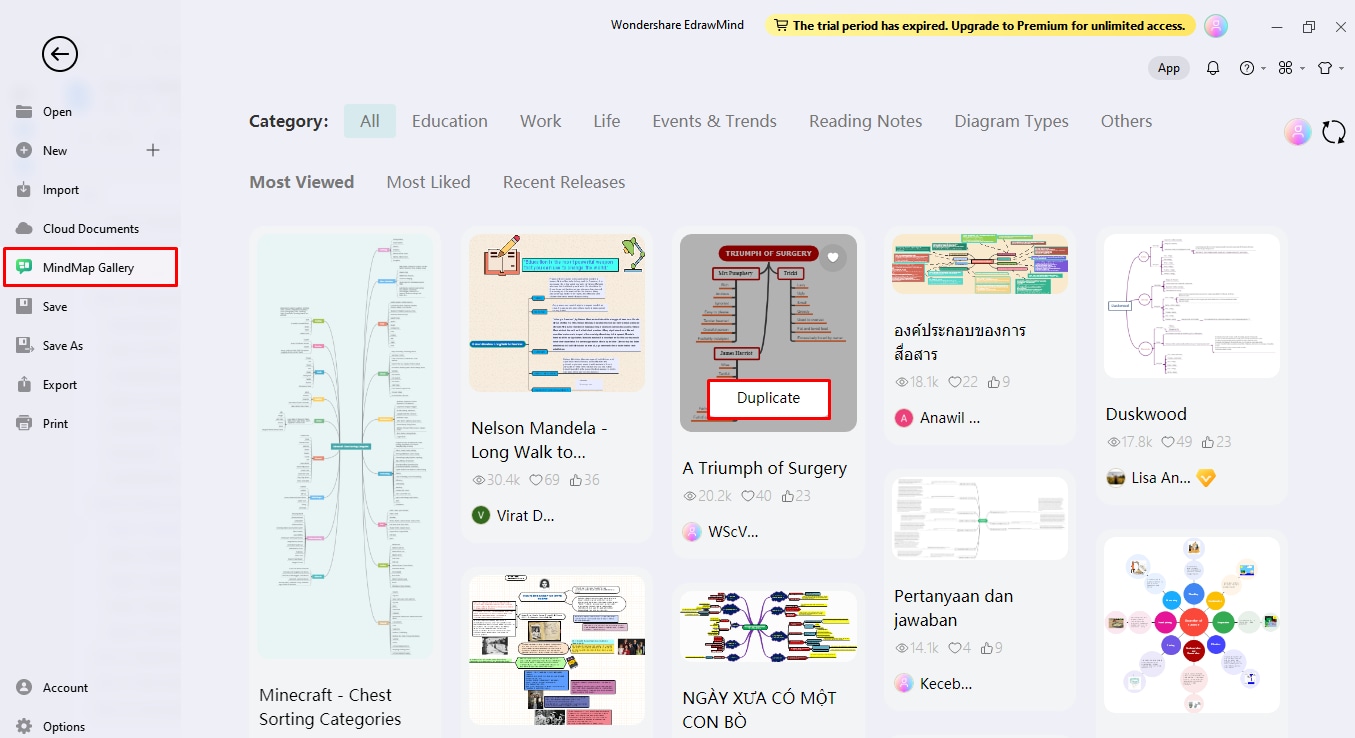
- Choose File > Mind Map Gallery > Category > Select the template.
- This will add the chosen template to the file, and you can start working immediately.
Step 2 Populate your map
Add elements and relationships to your diagram. This includes the main idea, topic, and subtopics. Here is how to it:
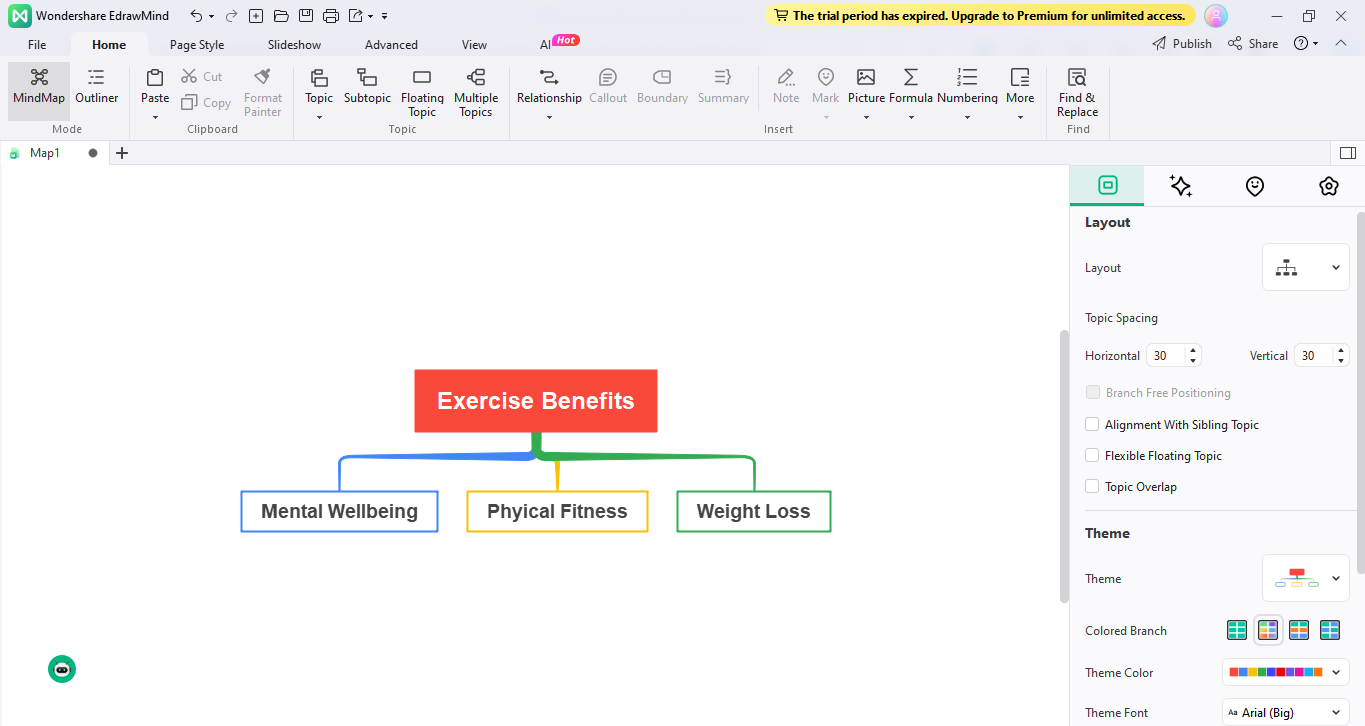
- Press Backspace and remove the existing content from the template.
- Press Enter to include a new topic. This will automatically create a relationship between the main idea and the topic.
- Similarly, press the Tab to include the subtopic of your choice.
- Remember to keep the cursor on the main topic for which you want to enter the subtopic before pressing the Tab button.
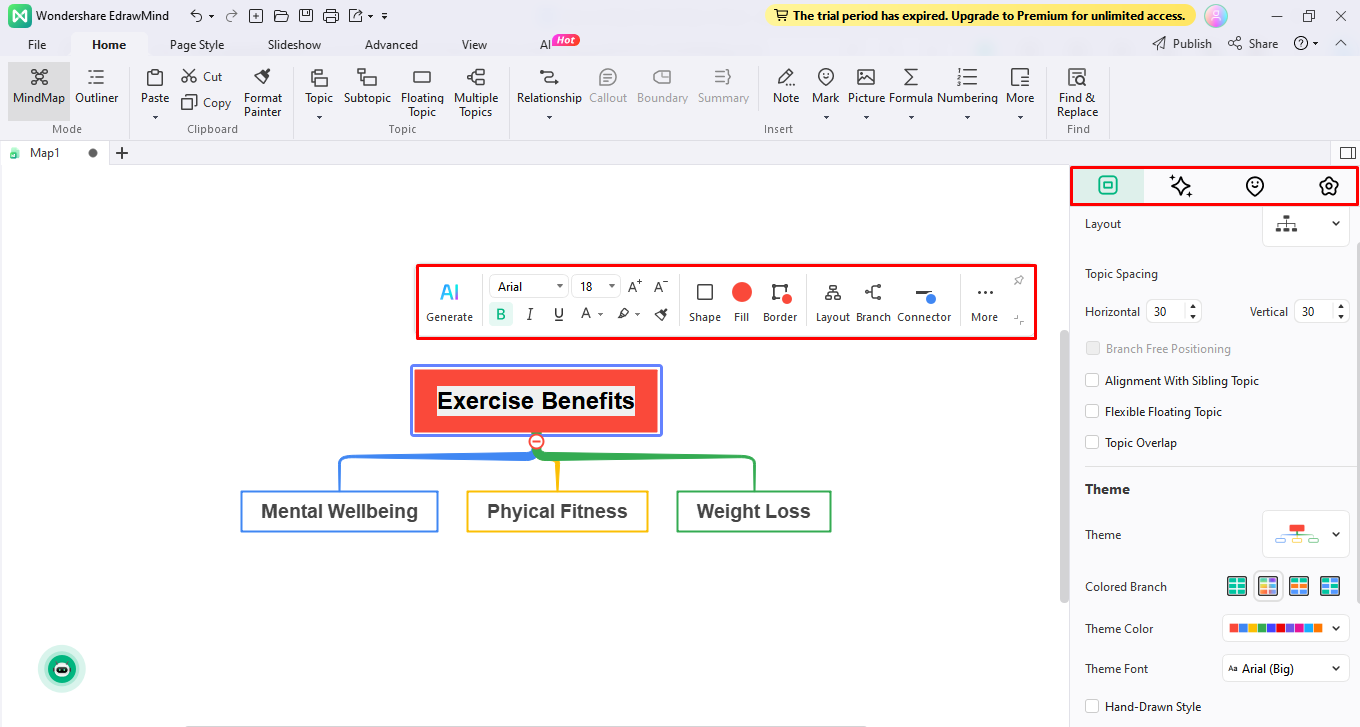
- For example, the main idea is 'Exercise benefits', and the main topic is 'mental health', 'weight loss', 'fitness', etc.
Step 3 Customize the mind map
It is super easy to customize the mins maps in EdrawMind. Either use the right-hand side control panel or shortcut menu to do this.
- Right-click on the screen, keeping the cursor on the element you want to modify.
- Use text sizing and styling options for modifying text.
- Similarly, use the same method for customizing the shapes and lines, regardless of whether you use the template or canvas.
Step 4 Export the map
It is recommended to save the map before exporting it. To save:
- Navigate to File > Save as > Device/ Personal Cloud.
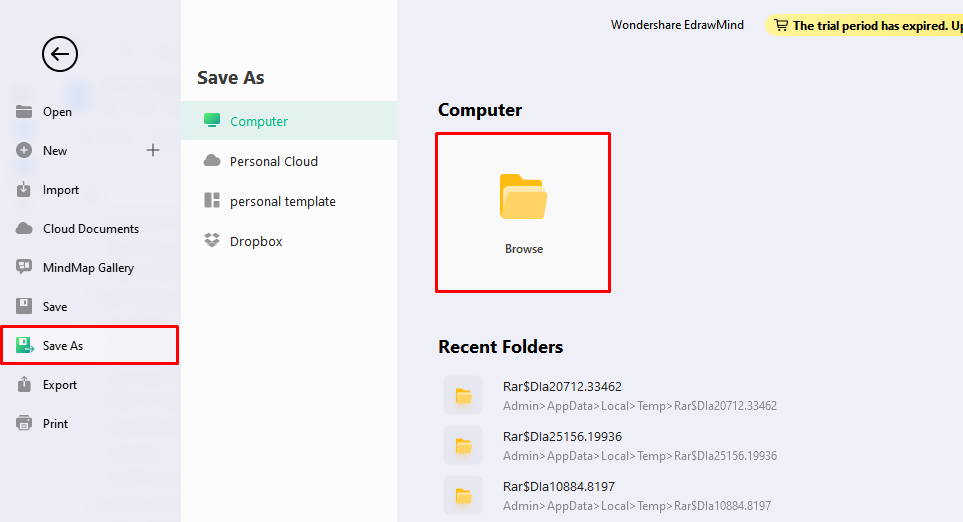
Once saved, begin exporting your mind map.
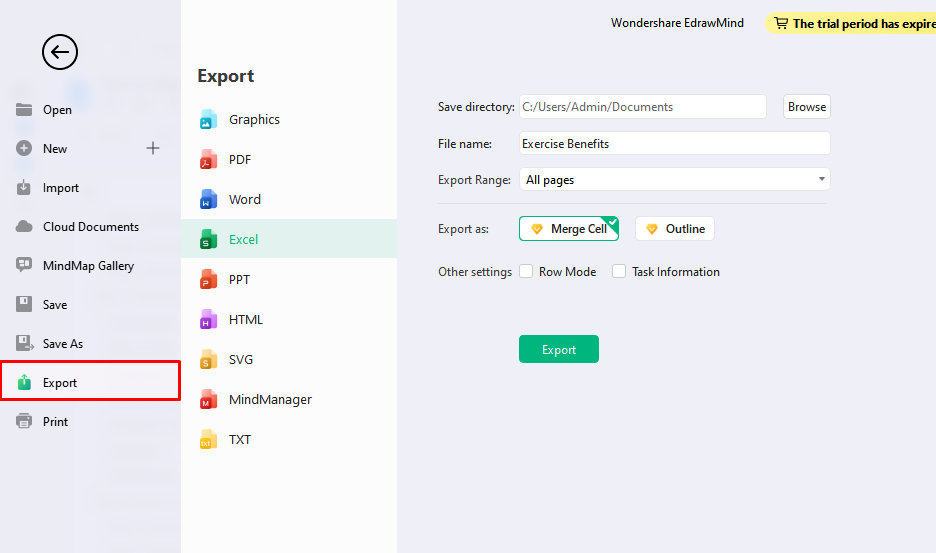
- Go to File > Export > Select the format e.g., PNG, Word, PDF, etc.
- Click the Export option to convert your map to the chosen format.—for example, graphic PNG in this case.
Step 5 Print the map
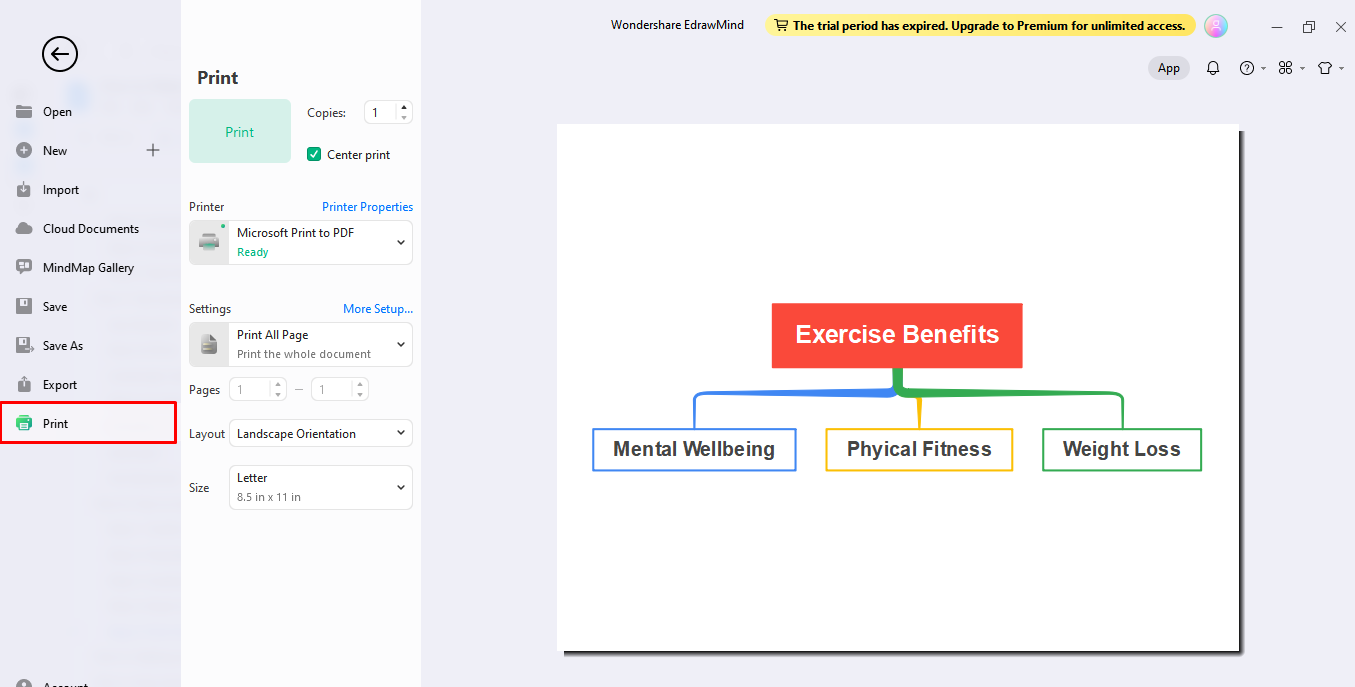
Besides saving in soft copy, you can print the map from within the EdrawMind. This option suits those who urgently require the visual and avoid going through the additional export step.
- Go to File > and click Print.
- Check whether the page size, number, and other details are correct.
- Choose between colored or monochromatic printing.
- Press the Print option, and the mind map will be printed within a minute.
To Know More About Free Mind Map Maker
EdrawMind is a professional mind map maker that features a variety of templates to help you design practical mind maps without wasting time and effort. Moreover, it is free and can be used for real-time collaboration on group projects.
So, there is no need to organize work meet-ups when you can do it at your convenience. Here, I have outlined a few features that make EdrawMind stand out among its competitors.
- The mind map gallery offers you access to 6000+ built-in templates for map creation. So, you can quickly work on your mind maps without starting from scratch.
- The one-click AI brainstorming feature can organize ideas and generate personalized mind maps without human input. So you can focus on other essential tasks.
- Cloud storage enables you to store multiple mind maps together without concerns about storage or accidental deletion. That's something worth appreciating for someone like me who keeps deleting files constantly.
- The online version of the mind map maker can be used on any device, irrespective of your location. So, you can use the desktop version when you are home and the online version when outside, completely free of cost.
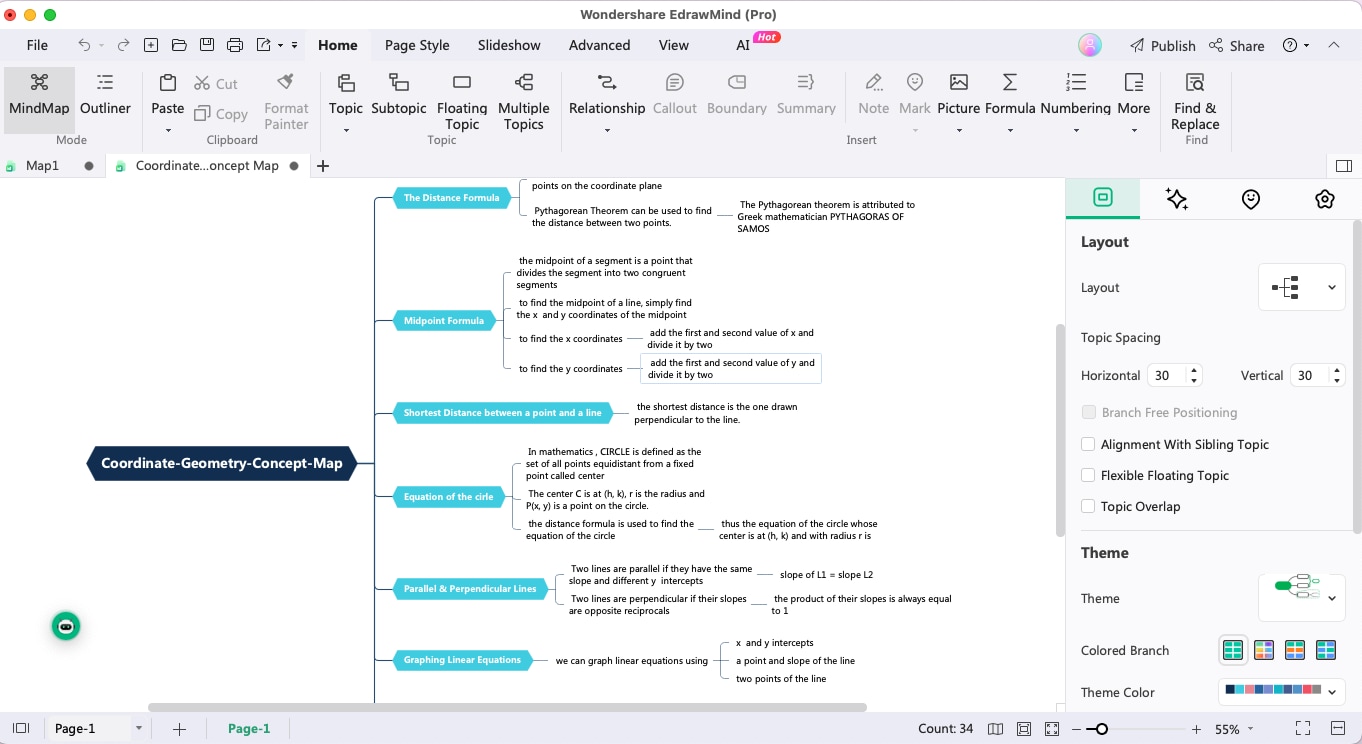
Tips And Tips For Effective Mind Mapping In Word
- Landscape mode: The Word document uses a portrait-style page by default, which is suitable for writing reports and letters. However, using landscape mode is beneficial if you are supposed to work on a mind map. This is because it will offer increased width that can be used to include new elements without congesting the map.
- Short-cut menu: Another thing that can improve your mind-mapping experience in Word is using the shortcut menu. As Microsoft owns Word, there are different ways to customize your visuals, and the method is the same as that of PowerPoint or Visio. However, short-cut keys for modifications and customization can be a great choice to save time and energy.
- Flexibility is important: As mentioned earlier, Microsoft Word is not a professional mind map maker, and the tool was initially designed for writing purposes. Therefore, you should keep your map flexible. As a rule of thumb, keep the elements wide apart from each other to leave room for the addition of new topics.
- Auto-save: Microsoft Word would only save your work automatically if the auto-save setting is turned on. Check the application settings and ensure that the auto-save option is turned on. This will allow you to work correctly without worrying about losing your work if you accidentally close the application without saving your work.
- Use keywords: Writing long sentences can disturb the alignment of your mind map and make it appear messy. Therefore, try using keywords and short phrases to keep the visual neat and understandable.
Conclusion
Making a mind map on Word is basic and does not require you to perform complex steps. However, you might not be able to create impressive mind maps, especially if you need advanced features. Therefore, EdrawMind might be a suitable alternative to design eye-catching visuals in minimum time.
Whether you want colorful templates or need ideas for the mind map, the EdrawMind's advanced AI algorithm will ensure that all the tasks are done quickly. Sounds too good to be true, right? So, why don't you try it yourself and tell us what you think?


