A business requires good decision-making abilities from its stakeholders. Otherwise, it will be like the 20% of companies that fail due to poor decisions. A decision tree is a helpful diagram that helps you plan out the potential outcomes of an event. So, you can make the right plans to sustain yourself for the future. But the real problem is making a decision tree. Is it easy to draw?
Creating a decision tree in Excel is easier than you may think. Mostly, the software offers everything at ready. But as a beginner, you might not know how to make a decision tree in Excel. So, without further ado, let’s see all the steps with a bonus alternative method!
In this article
How to Make a Decision Tree in Excel
The chances are that you already have Microsoft Excel in your system. If not, you can quickly get it from the official Microsoft store. So, how to create a decision tree in Excel? You have two ways to do it. Let’s look at both one by one:
1. How to Make Decision Tree in Excel with SmartArt
The SmartArt is a feature across different Microsoft apps, including Word, Excel, and PowerPoint. Basically, it is a collection of pre-made diagrams that you can modify. It is a comparatively easier method to create a decision tree in Excel. Let’s see how it works:
- Launch Excel and open a Blank workbook.
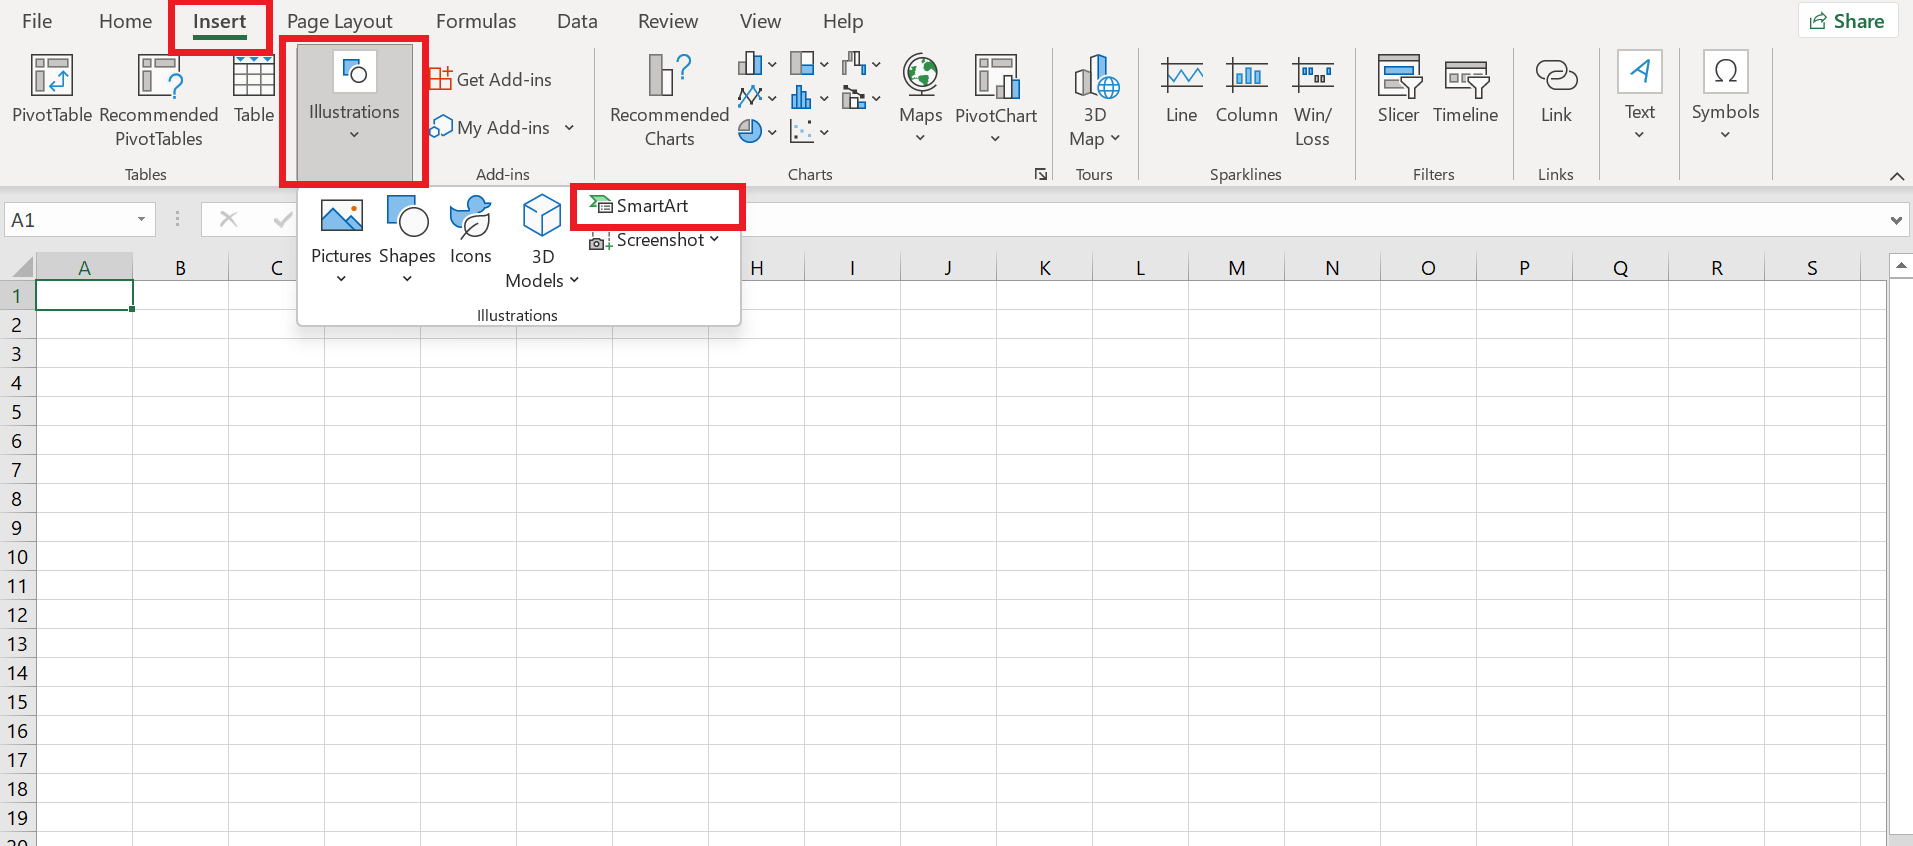
- Go to Insert from the top menu bar, click Illustrations, and choose SmartArt from the expanded menu.
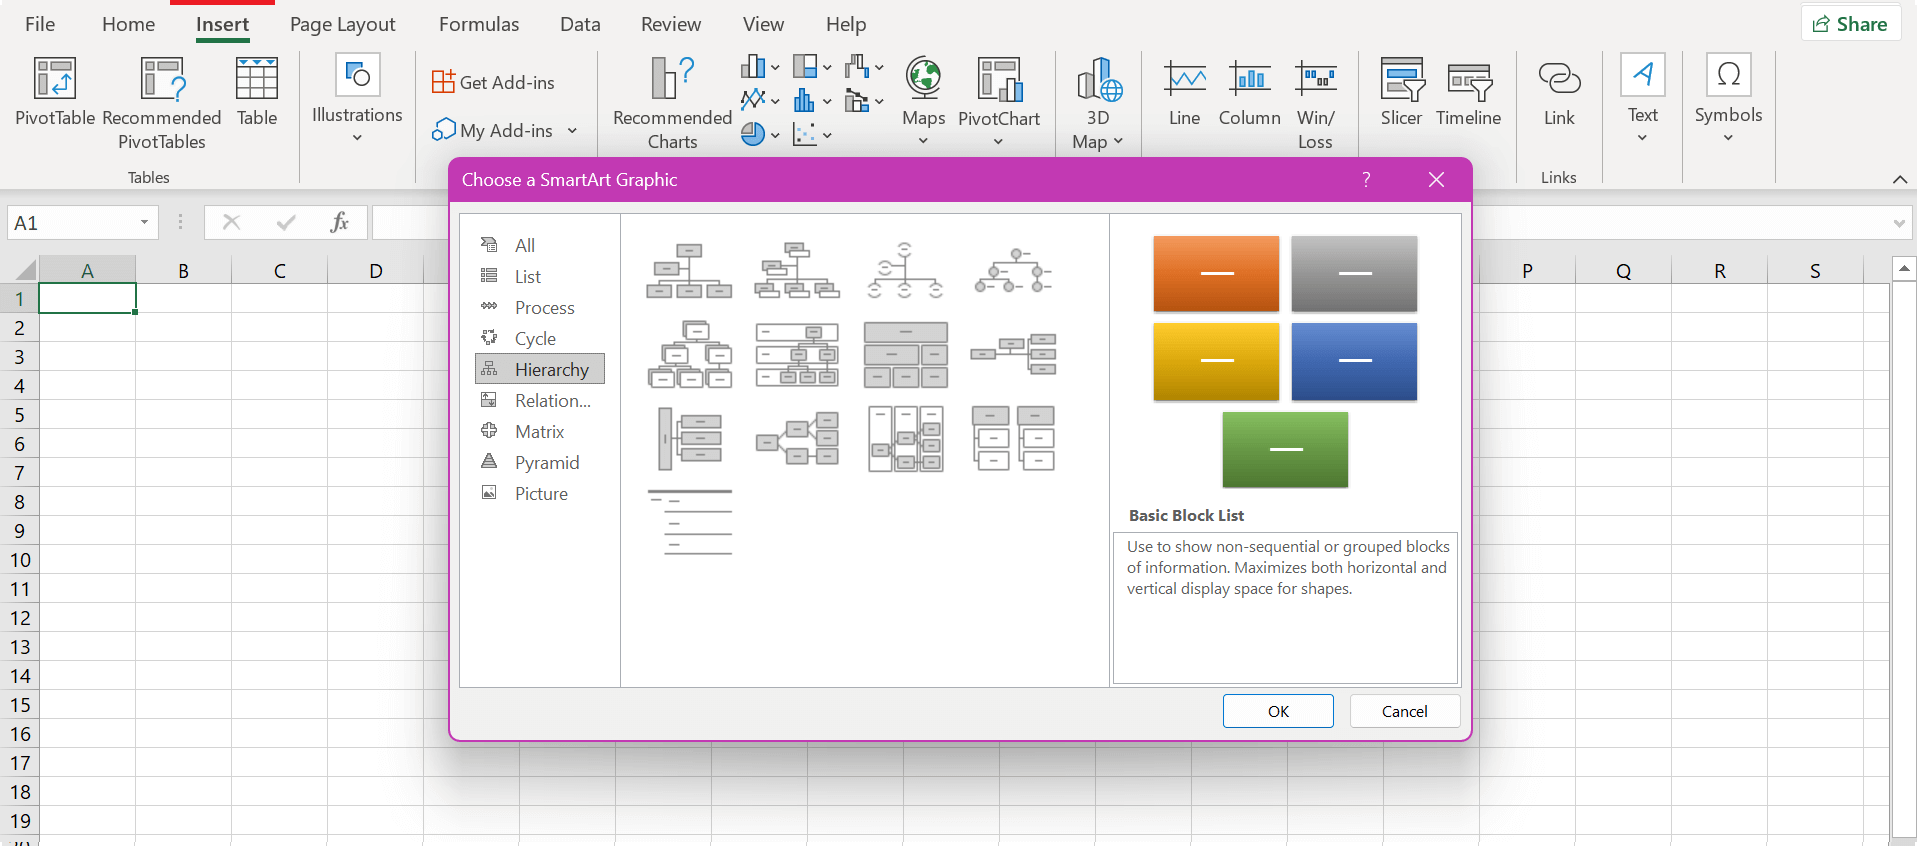
- Now, select Hierarchy from the left list of the newly-opened window. Here, you can choose any diagram on the right screen.
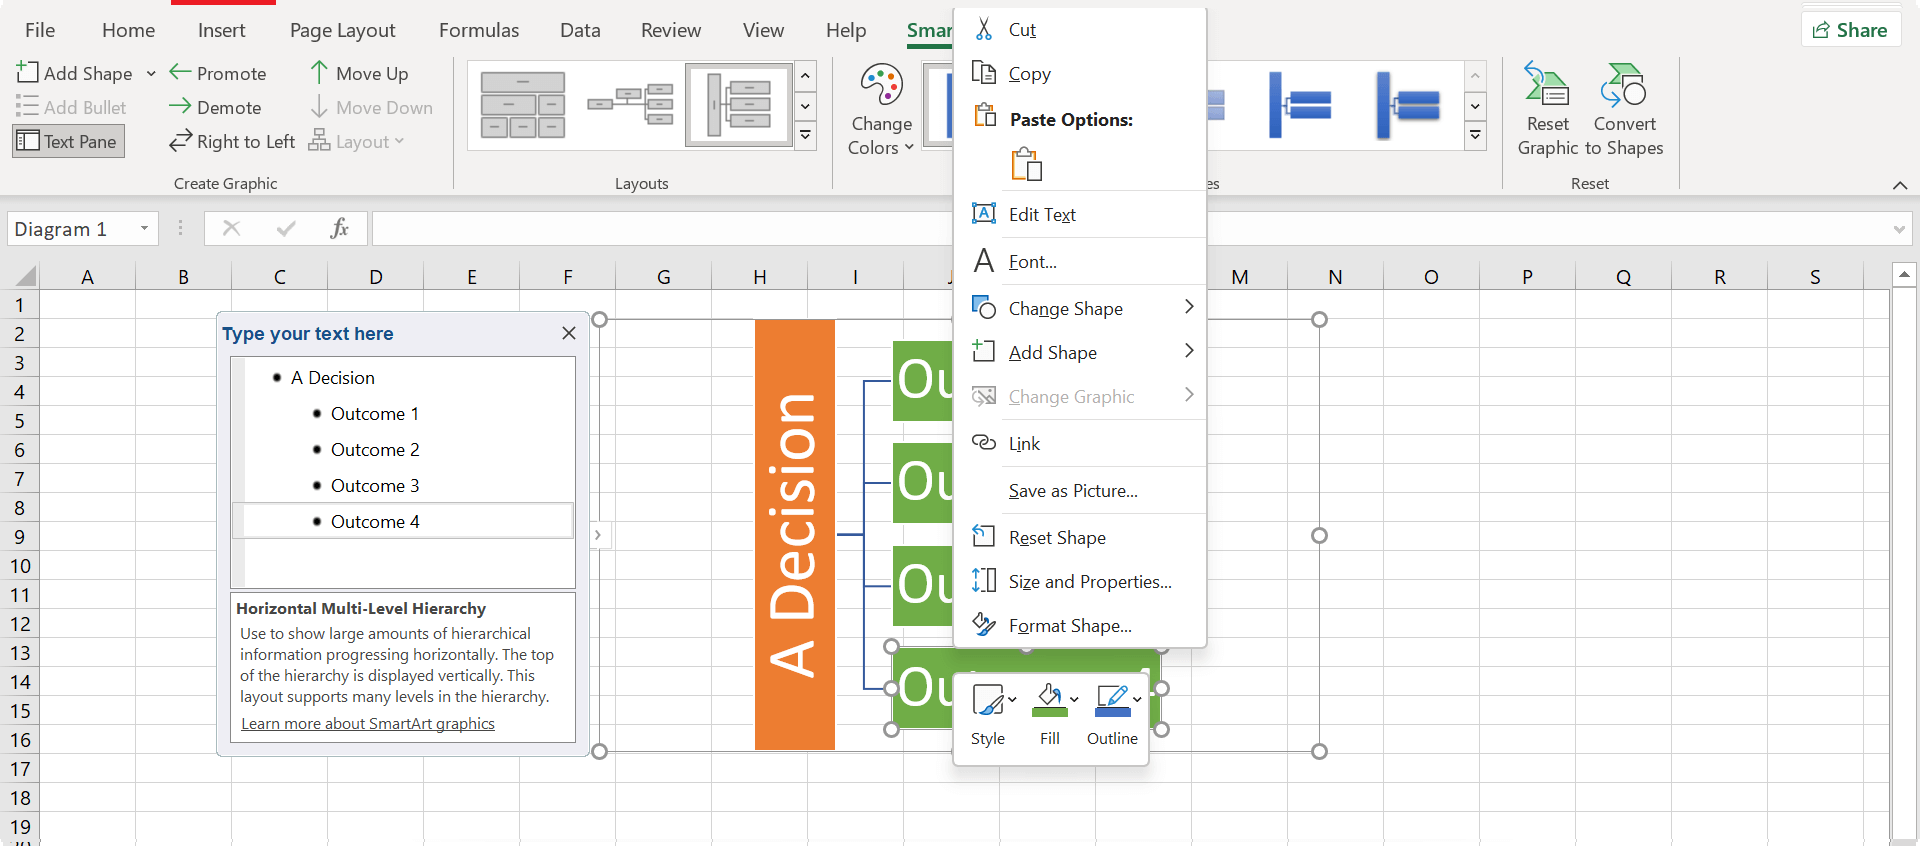
- Select any shape and right-click to customize it. For example, we can add a new shape to expand our decision tree. You can also change colors to make your diagram more appealing.
- Finally, click the File button and go to Save to save your decision tree on your device.
2. How to Make Decision Tree in Excel with the Shape Library
While SmartArt is an excellent feature, it might not offer complete control. But don’t worry because Excel lets you make decision trees manually.
The Excel shape library contains all the basic and advanced shapes. You can draw them manually on the document and connect them via lines. Here’s how to make a decision tree in Excel with its shape library:
- Open Excel and select Blank Workbook.
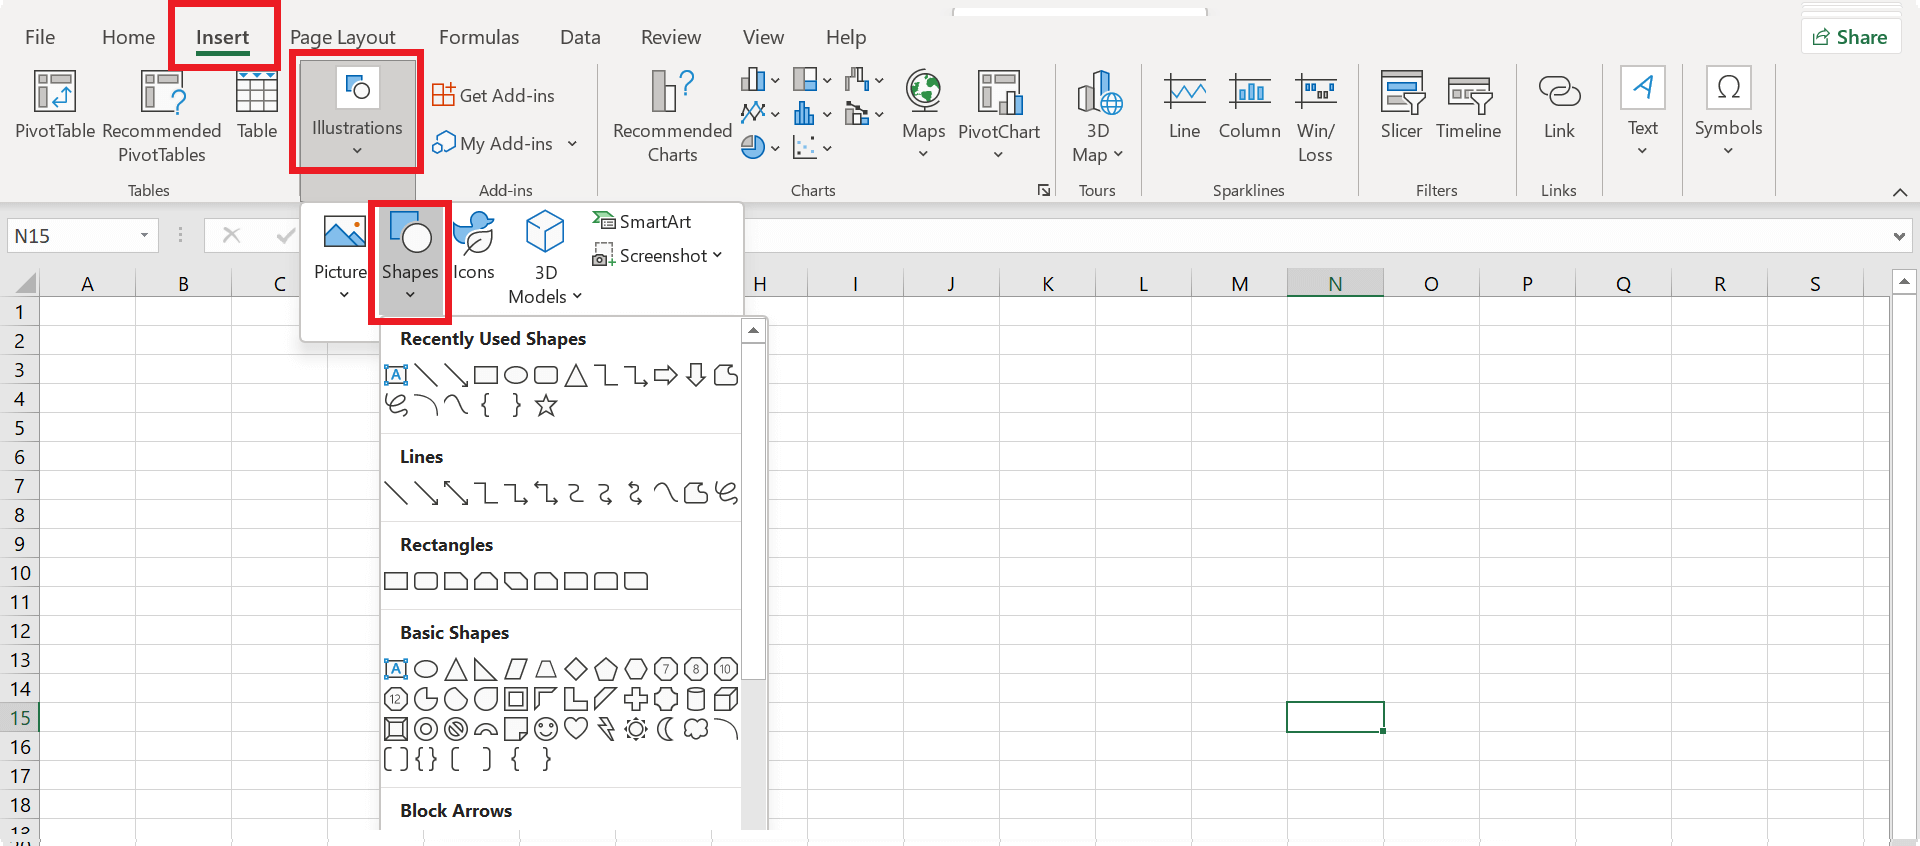
- Go to Insert > Illustrations> Shapes.
- Pick any shape and draw it on the screen. Similarly, draw more shapes to create a decision tree.
- Select lines from the library and draw them as connections between your shapes.
- Lastly, finalize your customization before saving the decision tree. Enter text, change colors, add more shapes, etc.
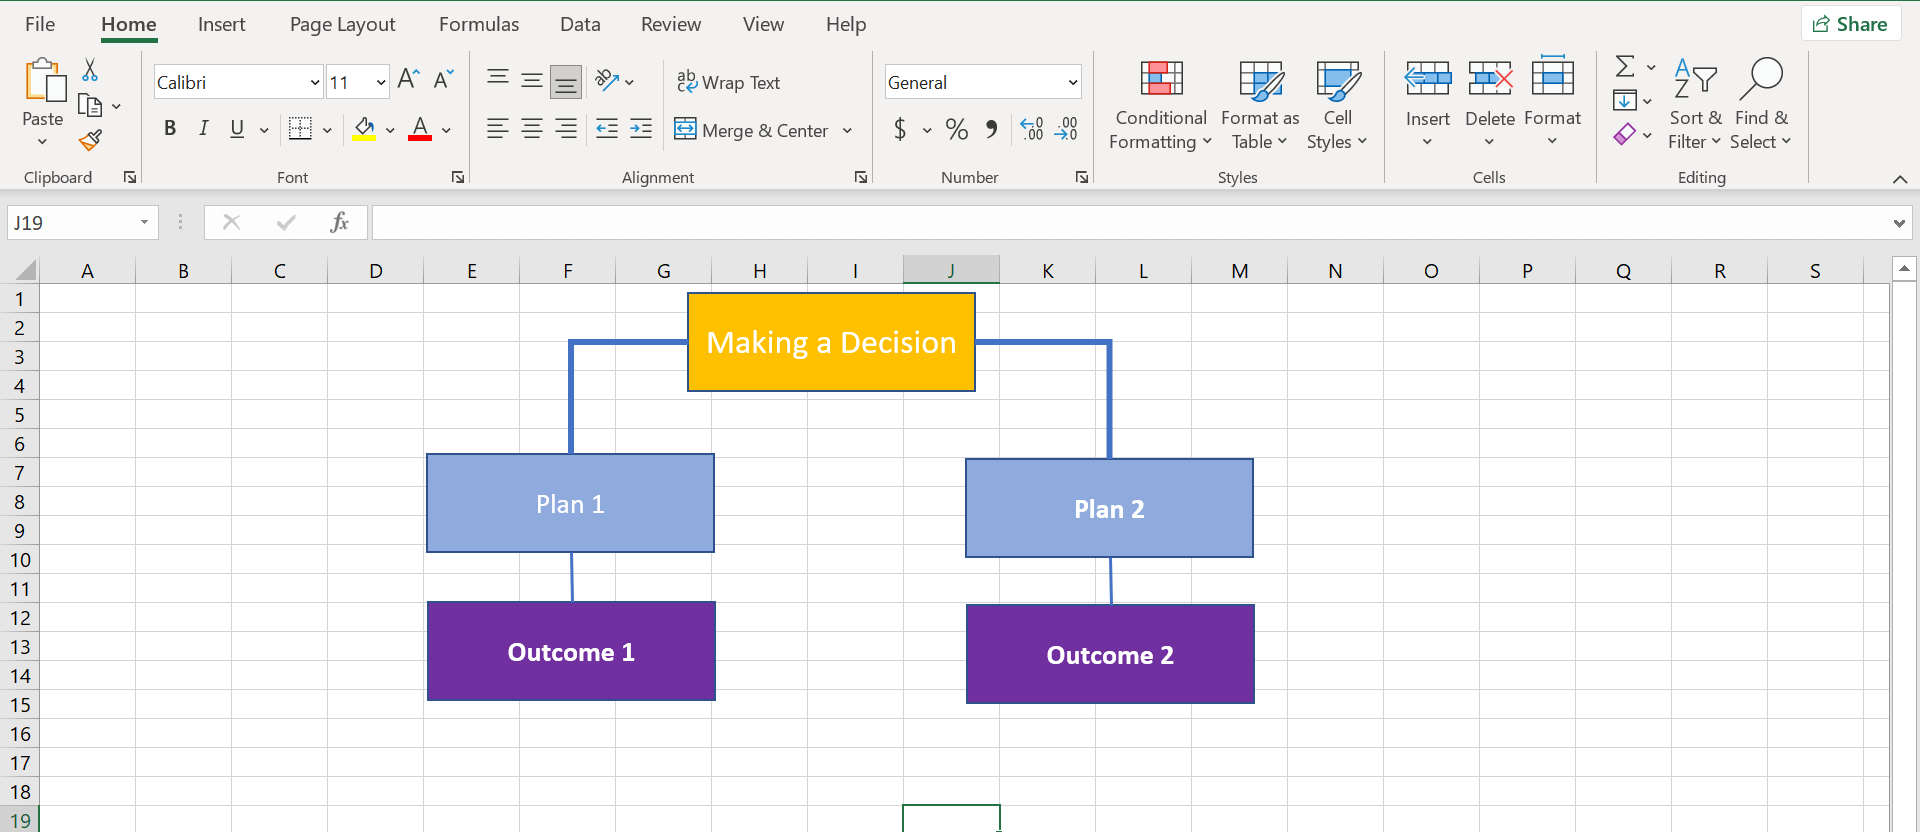
Once done, save your decision tree Excel on your device.
5 Tips & Tricks to Effectively Create a Decision Tree in Excel
Are you ready to make a decision tree in Excel? Consider these 5 tips to draw more effective diagrams!
1. Consider Your Requirements
Before drawing a decision tree, look at your requirements. If your decision tree doesn’t require much detailing and is on a smaller scale, consider making it with Excel’s SmartArt. This way, you can easily define the shape, modify where necessary, and save it. Alternatively, you may create a decision tree from scratch if it needs specific instructions.
2. Make it Engaging
Excel lets you add images, shapes, and graphical elements to your diagrams. Utilize this feature to make immersive decision trees that grab the audience's attention during your presentation.
3. First Create, Then Customize
Don’t start customizing the decision tree as you are creating it. First, finish the drawing process. Once drawn, make each shape stand out using Excel’s built-in color, outline, and other customization options.
4. Understand Exporting
Excel allows users to export their decision trees in different formats, like PDF and XPS. You can also change your file type into text, CSV, and other formats. These features can come in handy when you want to save your decision tree in a specific file type.
5. Minimal Text Rule
A diagram should have minimal text. Each shape in your decision tree should only contain short phrases or keywords that define its purpose. Avoid adding long sentences that make trees unattractive and complex.
How to Make a Decision Tree in EdrawMind
Excel might not be suitable for everyone due to its limited customization. Therefore, EdrawMind is our bonus alternative to discuss. It can also help you create decision trees in no time.
Here’s how to make a decision tree in EdrawMind:
Step 1:Download & Login
- First, download the EdrawMind application on your desktop, macOS, or Linux. It works with all
- Launch the application and sign in. You can also use your social accounts like Gmail and LinkedIn to log in. Creating a new Wondershare account is also free.
Step 2:Open a New Tree
Go to Tree Map and open New Tree Map from the main screen.
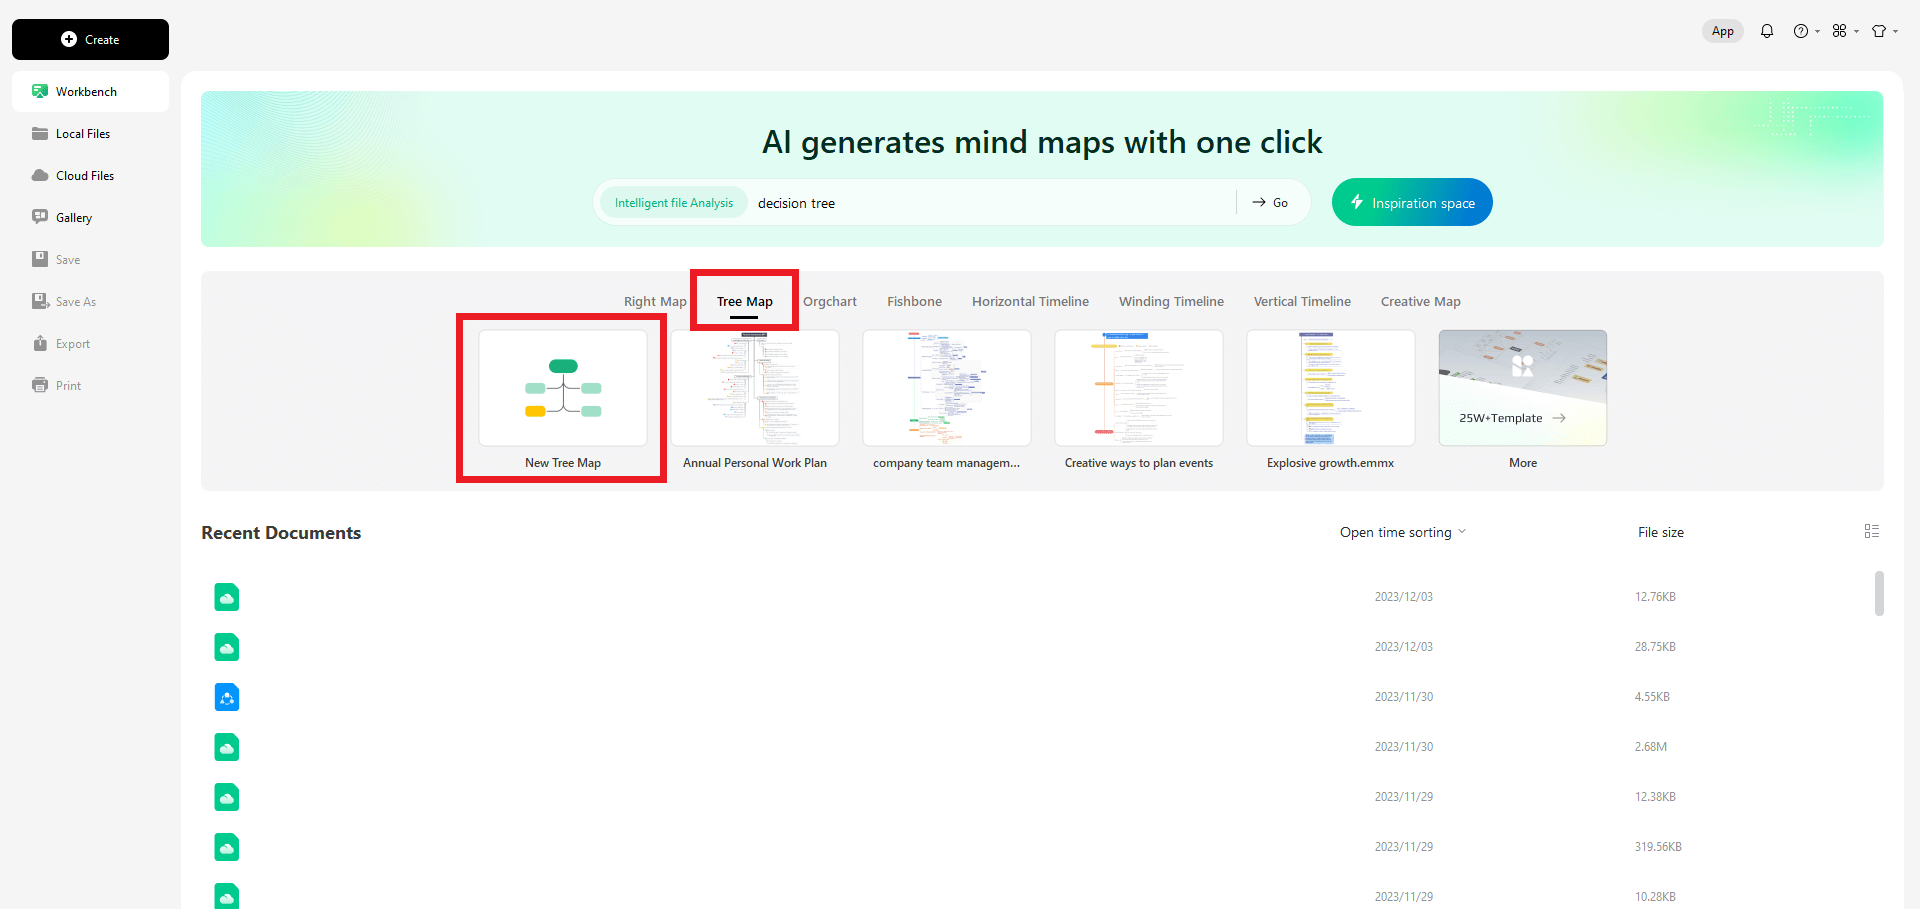
Step 3:Rename Elements
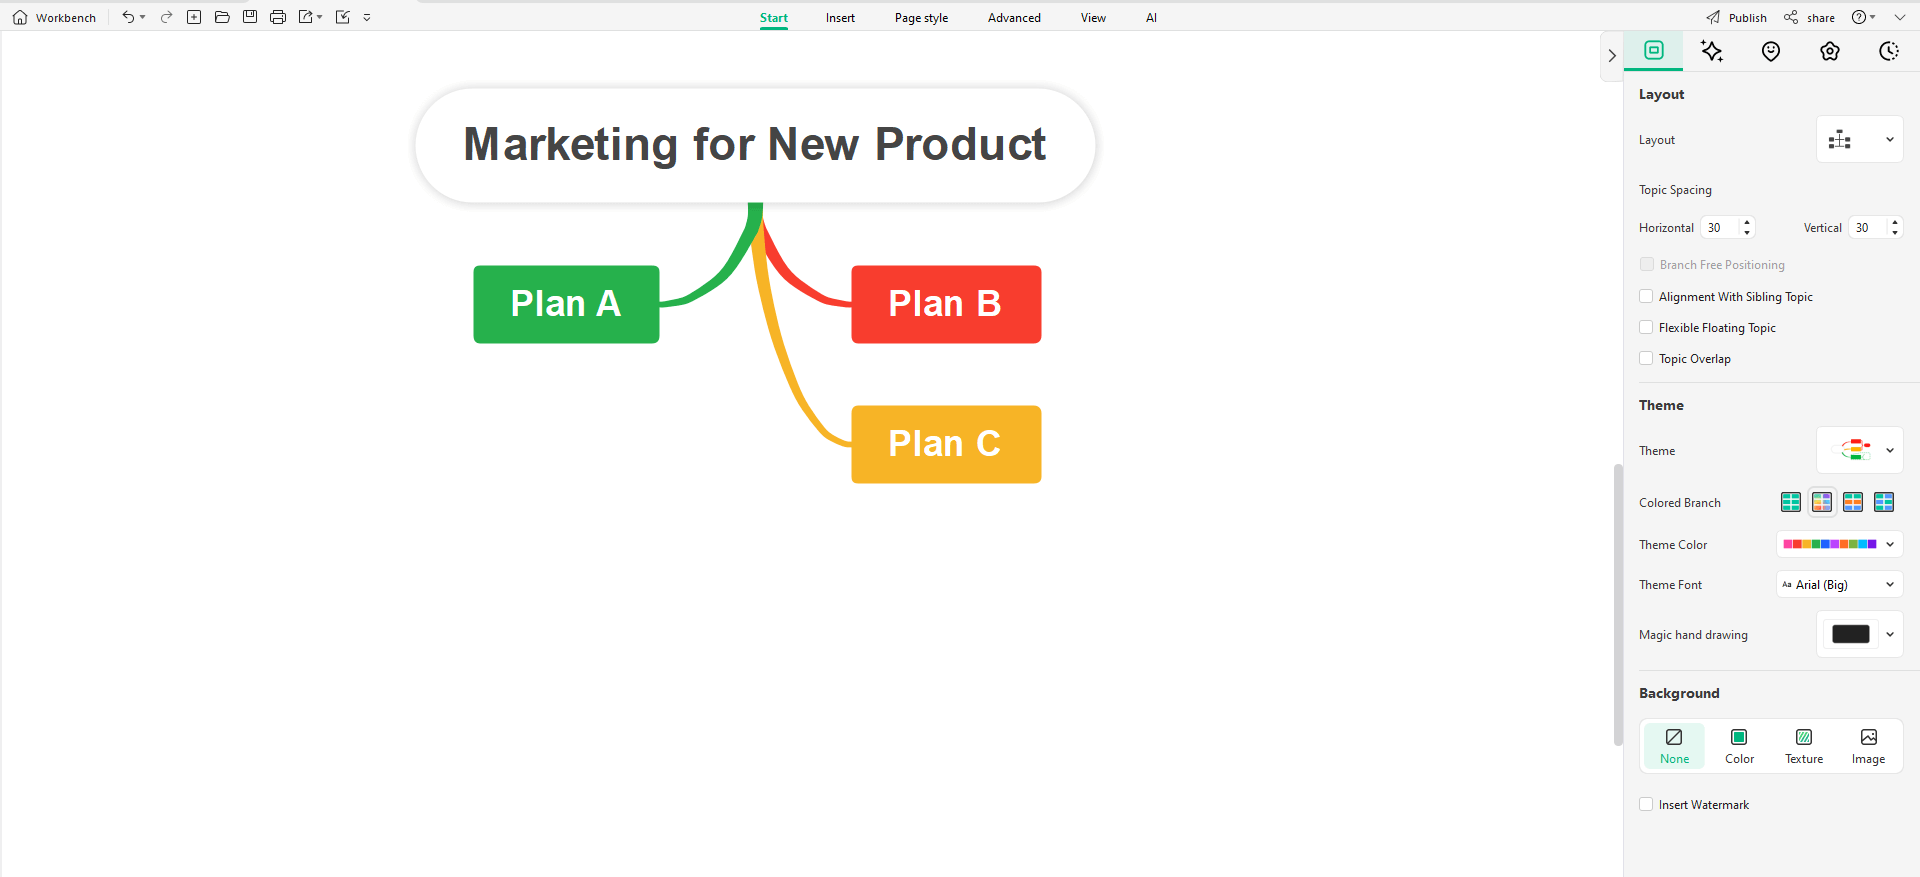
You will notice that every element has its default text. Let’s change that:
- Double-click theMain Idea to enter new text.
- Similarly, double-click Main Topics to change their text.
Step 4:Expand the Decision Tree
Let’s say you want to add more branches to the tree. Here’s how to do it:
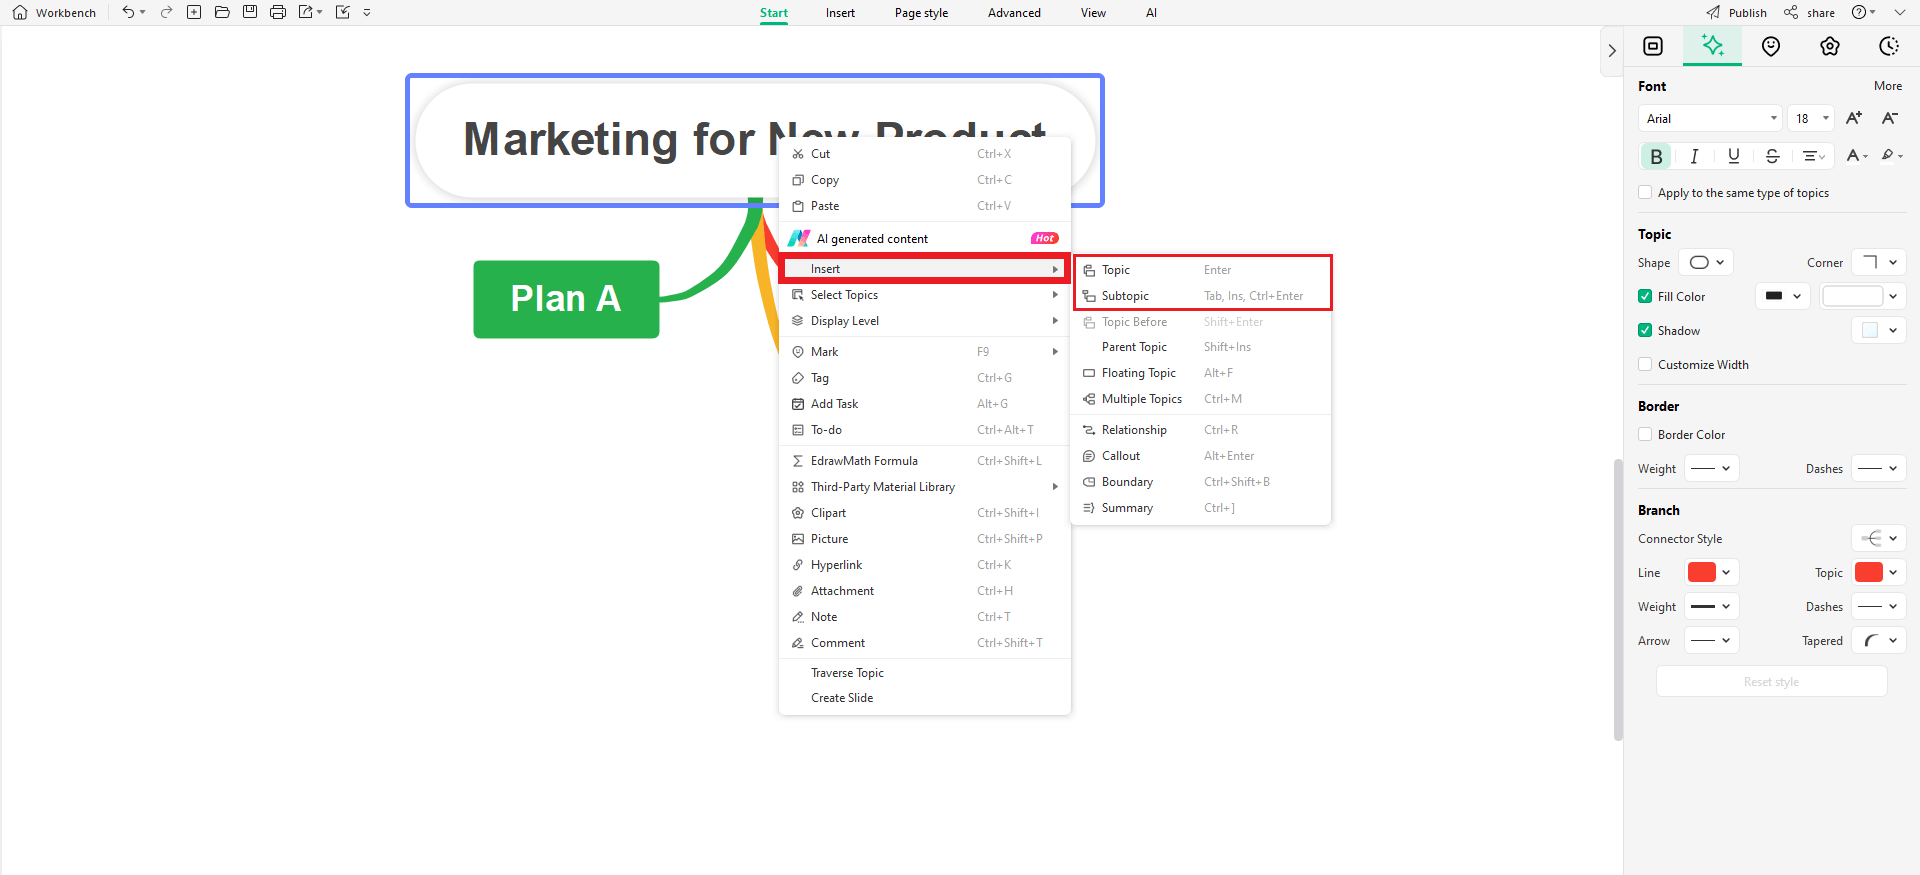
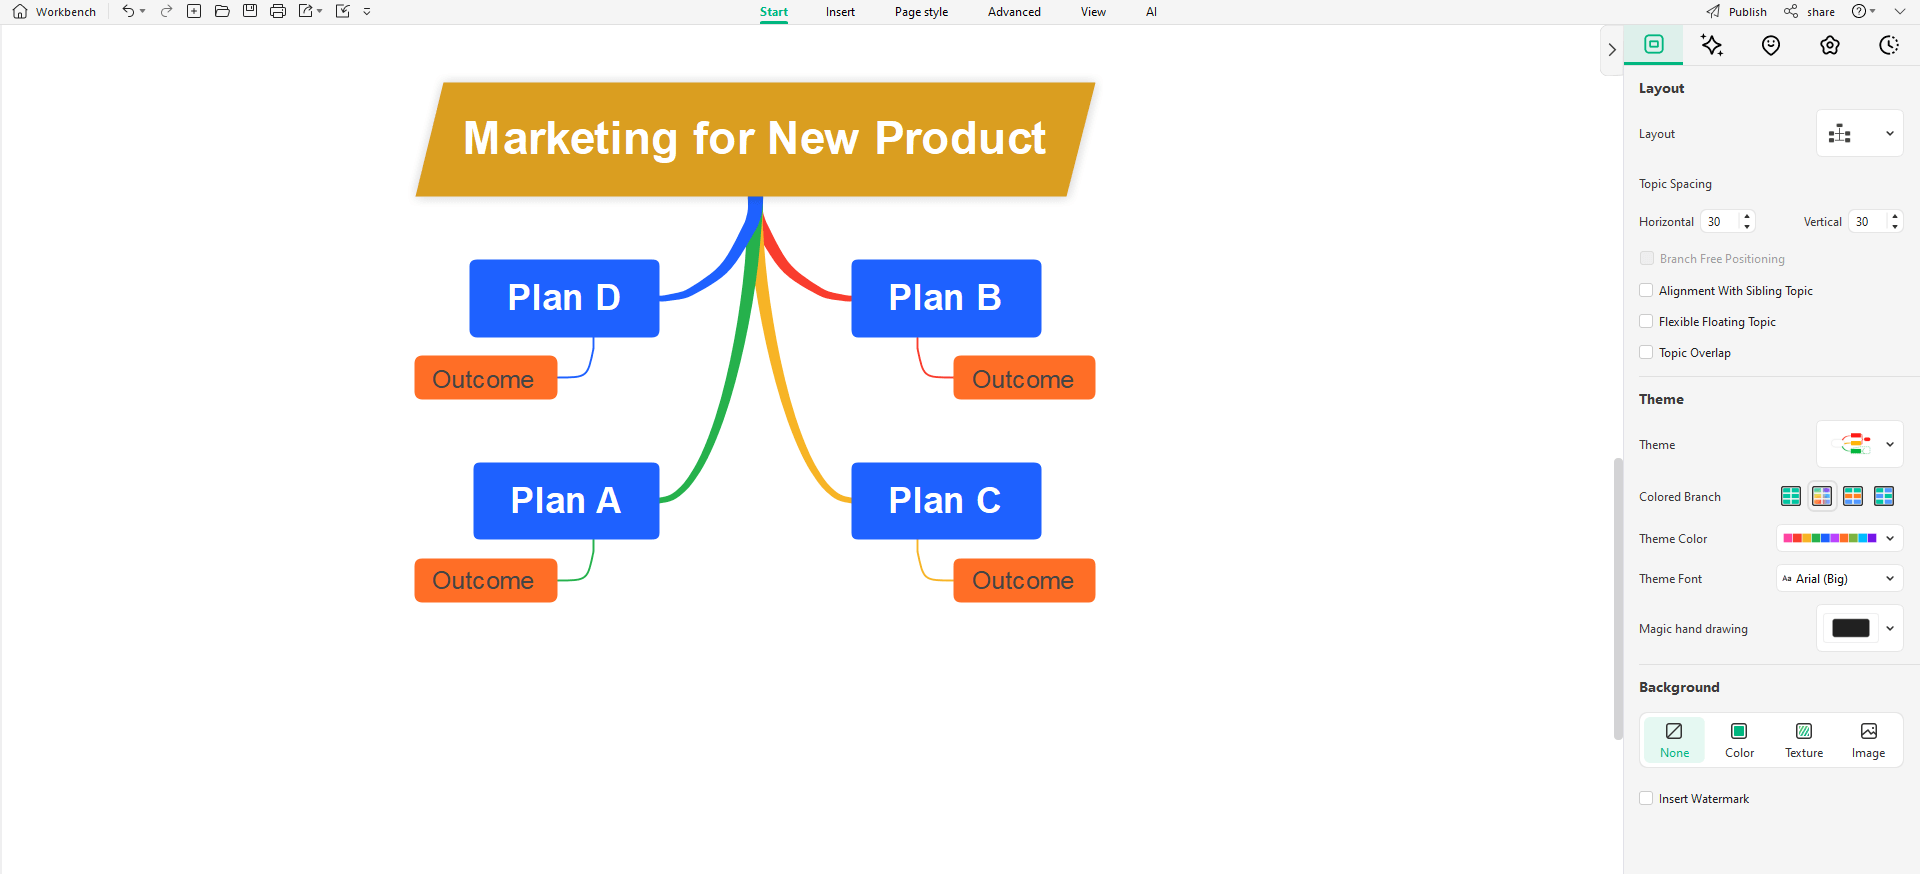
- Right-click the Main Idea (Marketing for New Product) to open a drop-down menu. Here, go to Insert> Topic.
- Similarly, right-click any Topic to add more Subtopics.
- Then, you can rename them following the previous step.
Step 5:Customization & Finalization
- Select any element and customize it from the right toolbar.
- Finalize the decision tree before saving it.
- Lastly, click the floppy disk icon at the top bar to save your decision tree.
Making Decision Tree in Excel vs in EdrawMind
Decision trees are easy to make in both Excel and EdrawMind. Both apps have their unique advantages. Let’s explore them to paint a clearer picture:
1. Benefits Of Excel
- Excel is easily a more well-known and accessible tool.
- You will find all the basic to intermediate tools and options for drawing decision trees in Excel.
- It offers two methods for creating decision trees via SmartArt or with the shapes library.
- Excel has a user-friendly UI, making it suitable for beginners and intermediate users alike.
- Even though it has some limitations, it offers an extensive collection of shapes, colors, and fonts to customize your decision trees.
Benefits of EdrawMind
- EdrawMind has no limitations in terms of customizations. It provides you a beginner-friendly interface to edit, thanks to its decision tree specific symbols.
- It offers tools and drawing functions for beginners, intermediate, and experienced users alike.
- EdrawMind is a diagramming tool with thousands of symbols and built-in templates ready to be used for decision trees.
- You have more freedom in EdrawMind as the app offers 20+ different hierarchical layouts to create unique diagrams.
- It allows live collaboration, enabling users to add their group members and work together on decision trees.
Free Decision Tree Maker

EdrawMind offers all the features you need to make decision trees for free. It is an effective free diagramming tool with tons of features.
Let’s look at some of its features:
1. Library of Templates
EdrawMind has a built-in gallery full of templates. You can search for decision trees or any other diagram and find many options there. Pick a template that fits your needs, customize it, and you are all set!
2. Full User Control
EdrawMind offers complete control to the user. Besides its templates, you can make decision trees from scratch. You can handpick each element's shape, color, border, shadow, and font to make personalized decision trees!
3. Collaboration
EdrawMind allows users to work collaboratively on single projects by sharing them with their group members. You can add more people to your decision tree diagram, get more ideas, and let others customize your project!
4. Sharing
Do you feel your decision tree is worth sharing with the world? Then, click the Share button and send your project to others via social media platforms or email.
5. Import & Export
You can import diagrams or models into your decision tree. It helps add icons, images, and visuals to make your diagrams more engaging.
Additionally, you can export your decision tree in various formats, including HTML, Excel, Word, PDF, PPT, SVG, TXT, and POS. Most of these formats are also available for importing in EdrawMind!
Conclusion
Decision trees can help you make better decisions that save you from unnecessary expenses, risks, and unwanted outcomes. Thus, learning this diagram is a MUST-have skill for business stakeholders. On the bright side, it is effortless to make. This guide has already defined all the simple steps on how to make a decision tree in Excel.
You can start with smaller diagrams and gradually move to more detailed ones as you progress. So, you will not get overwhelmed and can learn effectively. If you are close on your deadline, you can try decision tree templates from the EdrawMind’s mind map gallery. Just select a template and edit it to your requirements. The complete process will take you a couple of minutes.


