
Professionals have been using fishbone diagrams for decades to perform root cause analysis and solve problems. Whether you are an engineer or a product developer, adding a fishbone diagram to your presentation can instantly make it appealing.
For this reason, making a fishbone diagram in PowerPoint has almost become an unsaid professional norm. This tool allows you to make and present the diagram all in one place. However, using PowerPoint to make these diagrams is more challenging than it seems. It has no pre-built templates, less formatting options, and a little complex interface. So, it may take some hours to draw a fishbone diagram, as you have to manually draw shapes and connect them in a fish-like structure.
So, how about a digital workspace that has free fishbone templates, a presentation feature, shared team space, and even allows you to export a PPT file? Sounds good, right? Let us find out more about this alternative!
In this article
How to Make a Fishbone Diagram in PowerPoint
PowerPoint is a universal presentation tool, common in almost all offices. Although it is basically a presentation-making software, it has features allowing to create diagrams too. However, it lacks templates and has few formatting options, making it time-consuming to make shapes and build connections.
So, if you want an easy way to approach this, skip to the next part. But if PowerPoint is your only option, here is how to make a fishbone diagram in PowerPoint.
Step 1: Plan Your Diagram
Prepare for the diagram. Gather a team, make a problem statement, and brainstorm the potential causes and their contributing factors. Once done, note down everything on paper to prevent mistakes later on.
After this, download the PowerPoint desktop version and proceed further.
Step 2: Make a Fish-Like Structure
Open a blank document by clicking New from the dashboard. Once you are on the editing panel, locate the PowerPoint symbol library by clicking Insert > Shapes.
Add preferred shapes for your fish head and ribs. Let us use rectangles for this fishbone diagram. Typically, a fishbone diagram has six causes. So, click your preferred shape and drag your cursor to draw it on the canvas. You can also change its width and length by dragging the cursor.
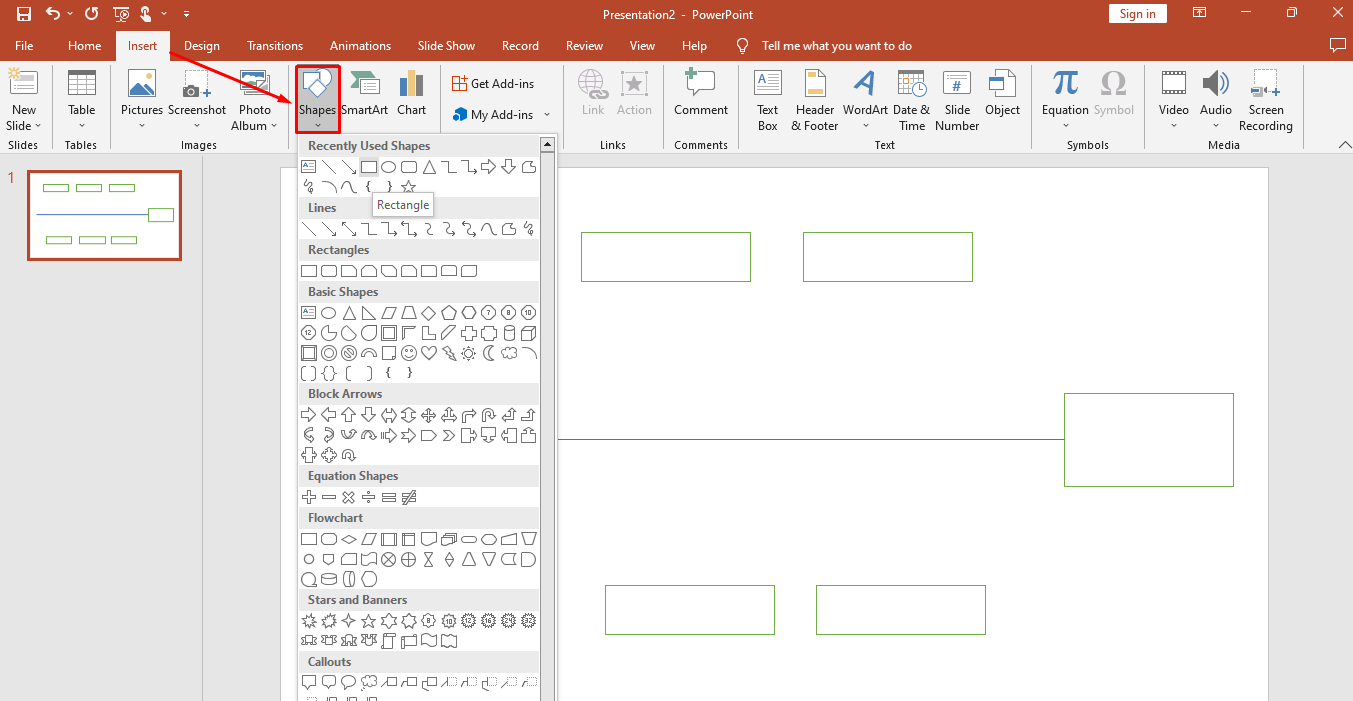
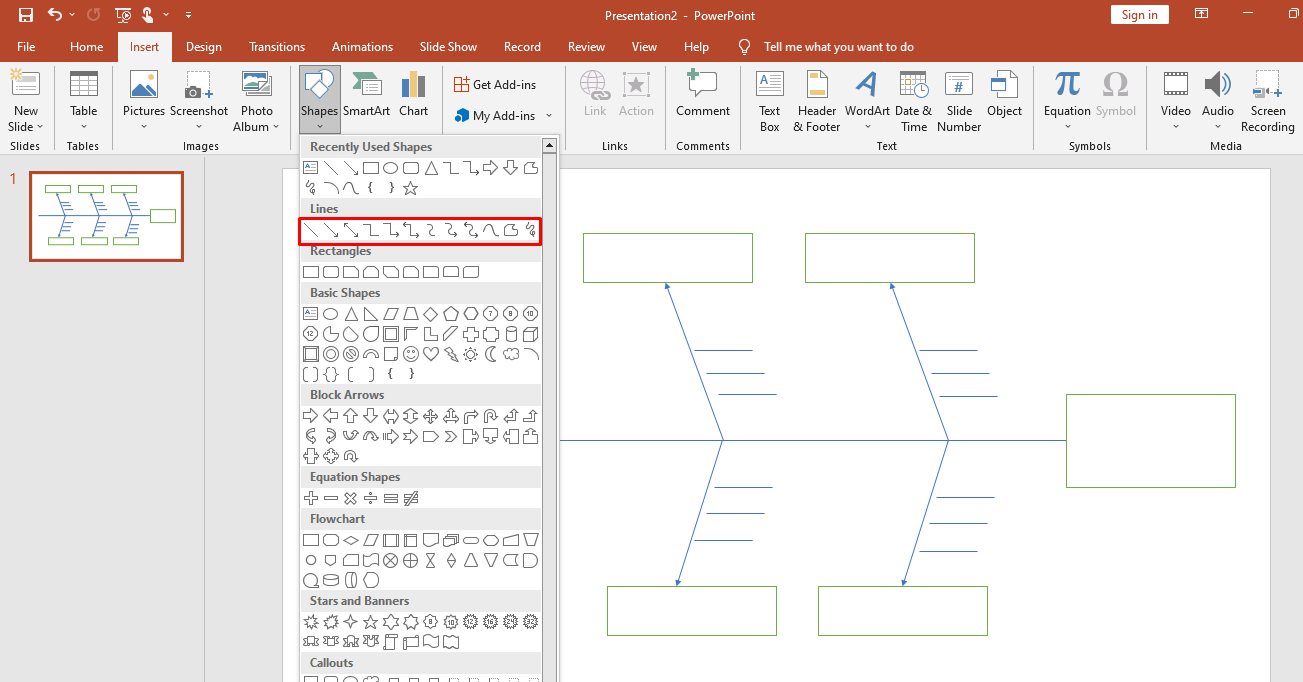
After this, add lines to connect the fish spine to the ribs or causes. You can do this by clicking Insert > Shapes > Preferred Arrow. Moreover, add three lines between each spine and rib for sub-causes.
Step 3: Add Text
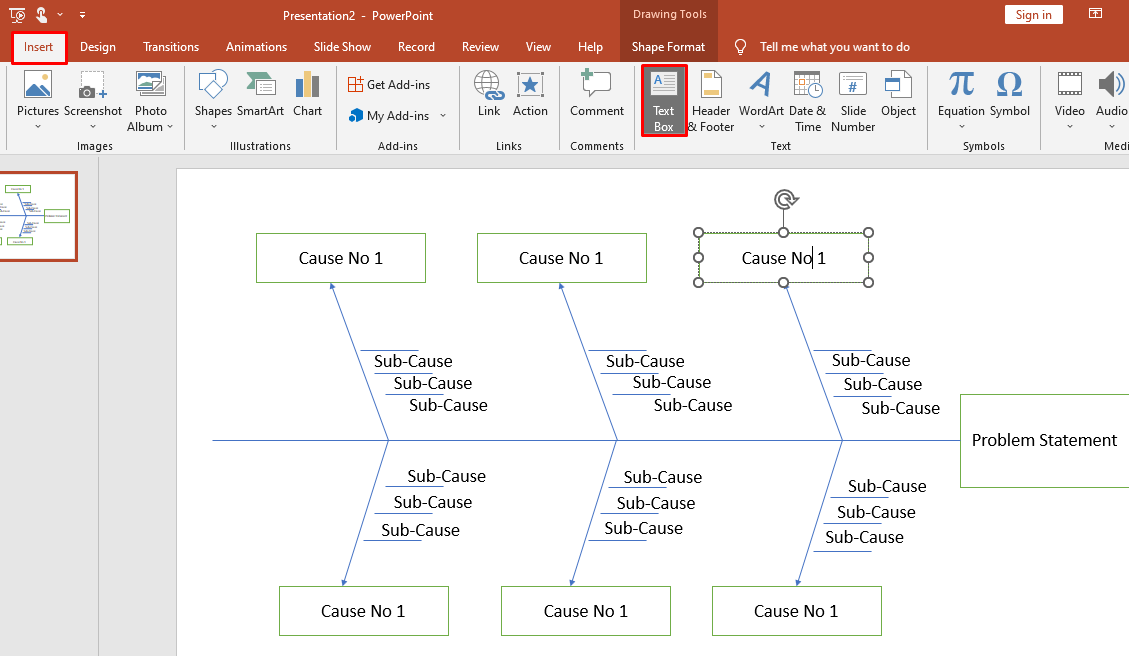
Once you have a fishbone diagram outline ready, add text for the problem statement, causes, and sub-causes. PowerPoint allows you to do it in two ways.
- Double-click a shape to write over it.
- Click Insert > Text Box to add text for sub-causes before the connecting lines.
Step 4: Format the Diagram
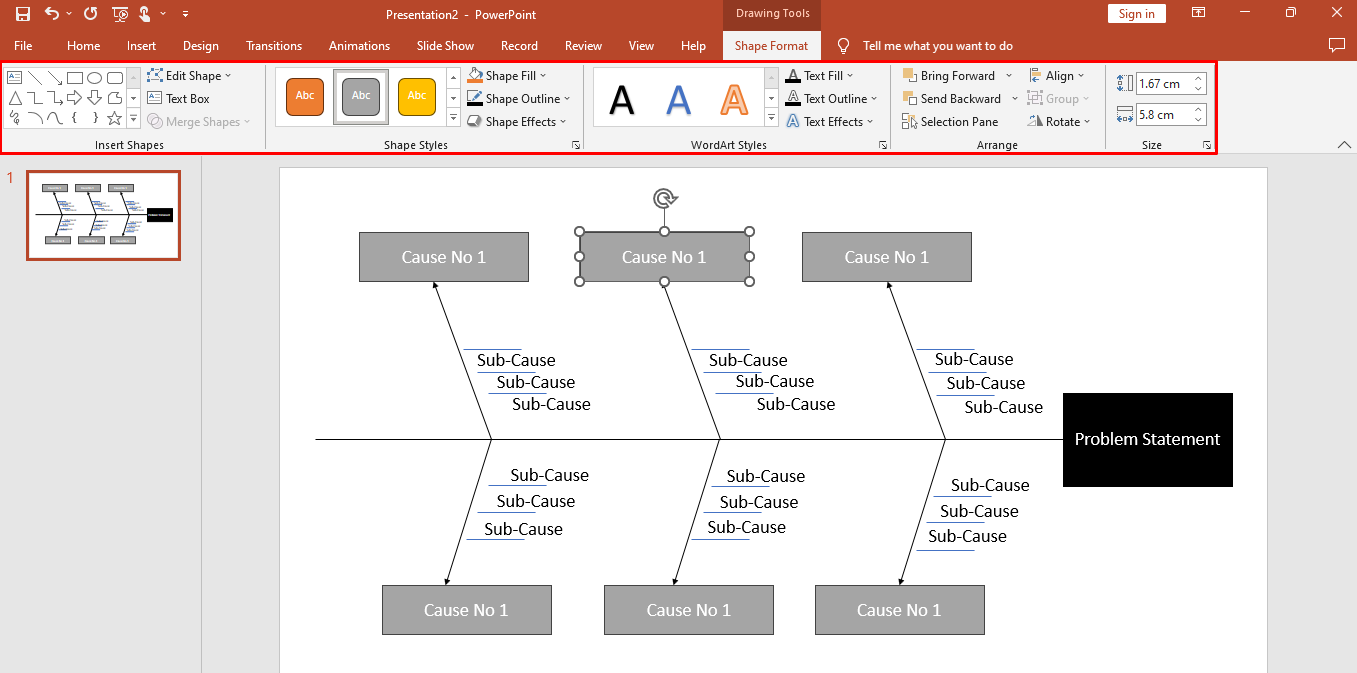
Although your fishbone diagram is ready, it could look more appealing. So, add or change colors, outline, and font styles. Unfortunately, PowerPoint has no themes and pre-defined color schemes. So, you have to rely on manual formatting for each shape.
For this, select any shape, and a Shape Format tab will appear on the top toolbar. Use it to change color, add font effects, and outline the diagram.
Step 5: Download the Diagram
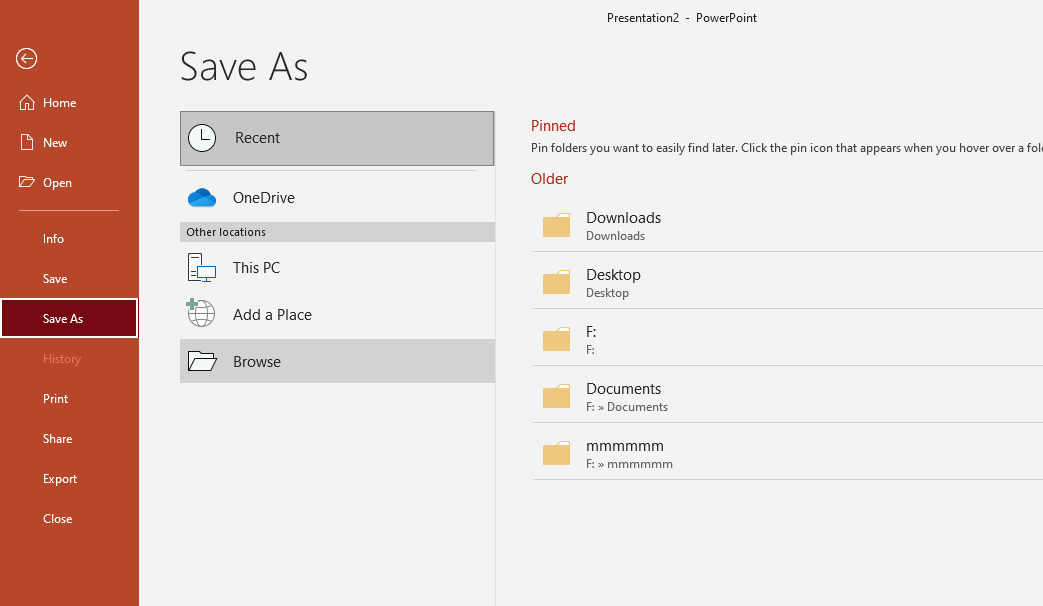
Congratulations, your fishbone diagram is good to go. Download it by clicking the File on the top-left corner and selecting Save As > Preferred Location. You can also export the final diagram in a different format by clicking Format > Create PDF/ XPS Document.
How to Make a Fishbone Diagram in EdrawMind
Having no pre-built fishbone diagram templates makes it challenging to make a fishbone diagram in PowerPoint. Yes, it's one of the options but a faster and easier way is to creating fishbone diagram is EdrawMind Online.
EdrawMind has pre-built fishbone templates, multiple formatting tools, and a presentation mode - all in one place. So, let us check out how to make a fishbone diagram in EdrawMind from scratch or by using templates.
Method 1: Make a Fishbone Diagram from the Scratch
Now, let us discuss how to make a fishbone diagram from scratch.
Step 1Expand the Diagram
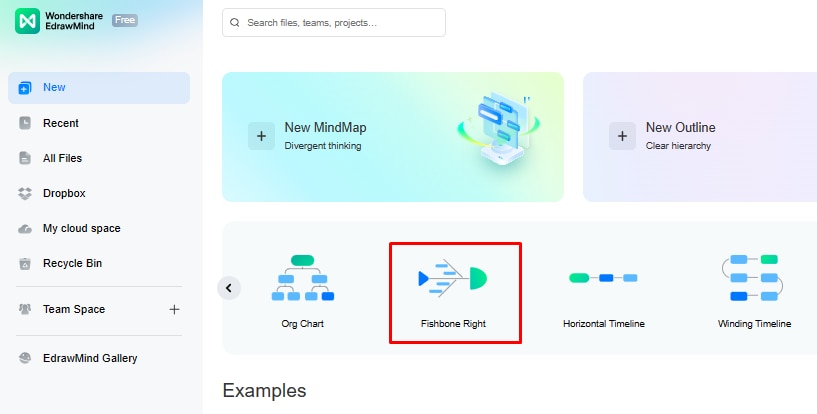
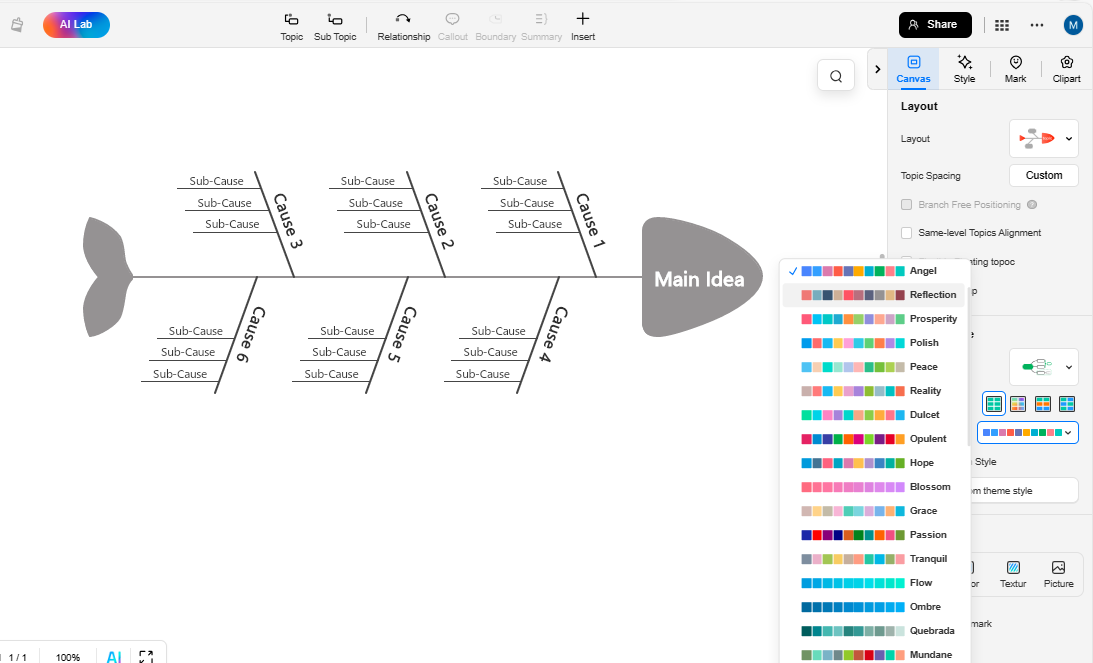
First, click New > Fishbone Diagram to open the canvas, and it will display a raw fishbone structure on your screen.
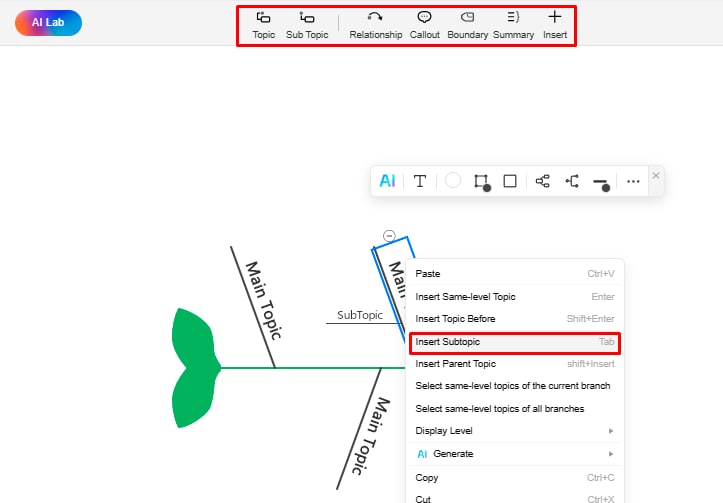
Now, you can expand your diagram. Insert the topics and sub-topics from the top toolbar.
Step 2 Add Text
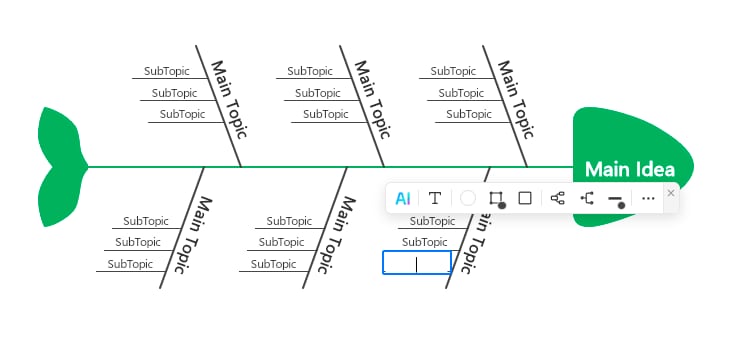
Once you have the outline ready, it is time to add text for the problem, its causes, and sub-causes. Double-click any box and start writing.
Step 3Customize the Diagram
Your diagram needs striking visuals to attract the audience. So, add color, change the theme, and modify the font to your diagram by navigating to the information setting panel on the right side of the canvas.
Method 2: Make a Fishbone Diagram Using Built-in Templates
Do you have a tight deadline and no time to make a fishbone diagram from scratch? No worries. EdrawMind Online has a template gallery with multiple pre-built examples. Just select the one that matches your task description and modify it. Here is how you can do this:
Step 1 Select a Template
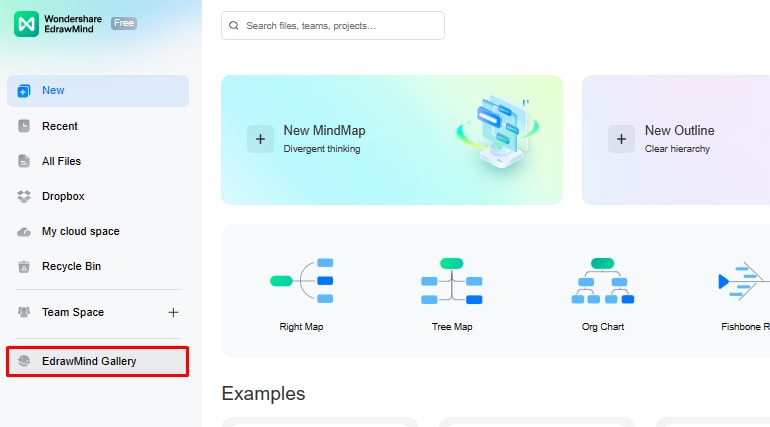
Open EdrawMind and visit the Template Gallery from the dashboard.
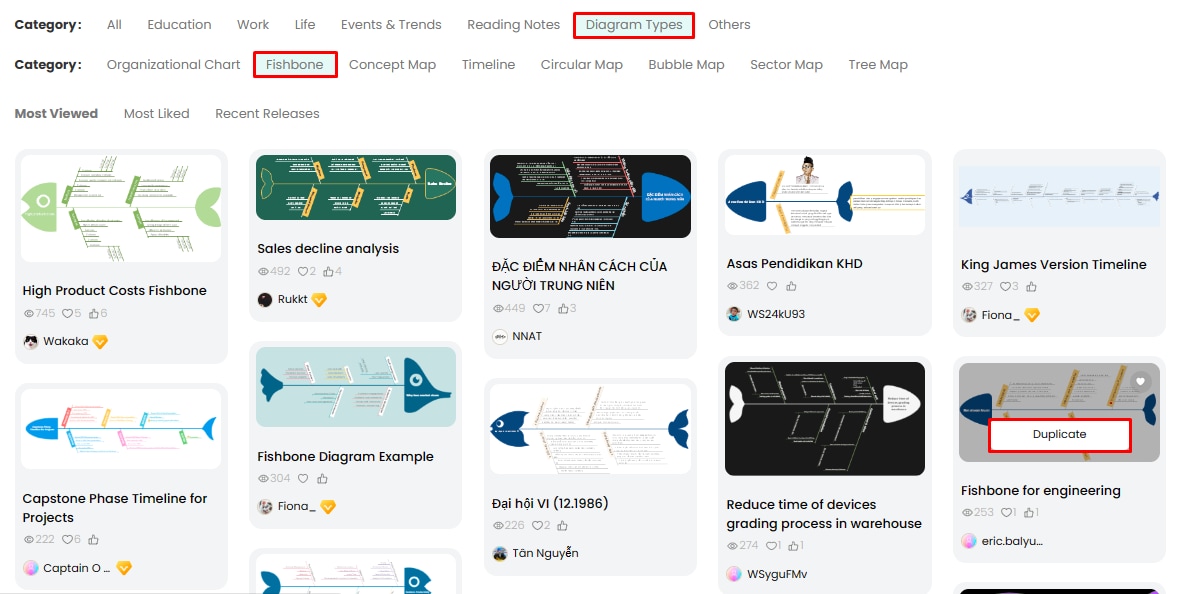
Filter your search by selecting Fishbone Diagram and narrow down the templates. Scroll down to find the right fit and click Duplicate. It will import the diagram's component on the editing panel.
Step 2 Edit and Personalize
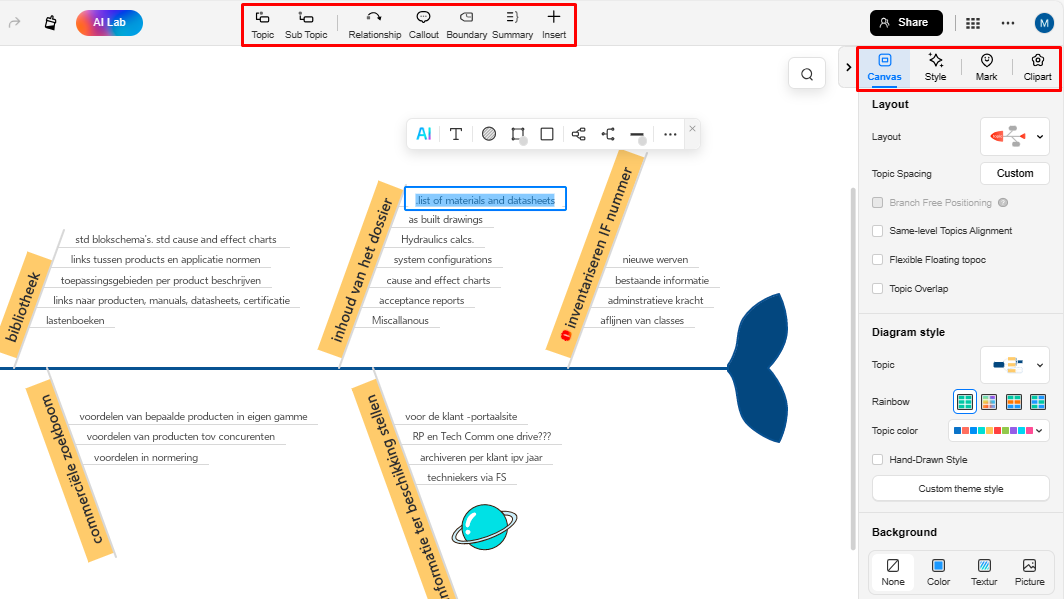
Add or remove topics to your suitability and enter data in the required fields. Now that the creation part is complete, you can modify its appearance from the right side of the canvas. And Voila! Your fishbone diagram is ready.
Download and Present the Fishbone Diagram
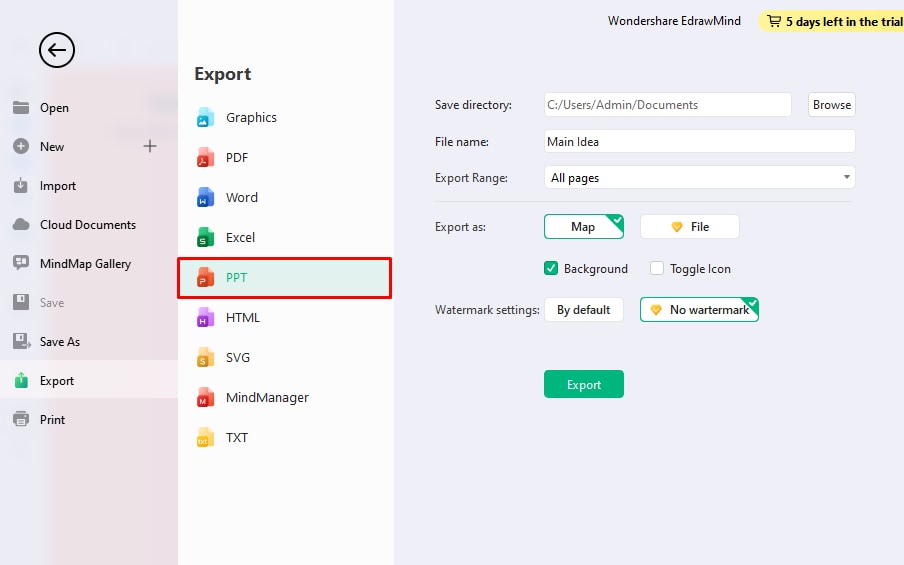
Finally, export your final design in a preferred format by navigating to the File from the top-left corner. Save it in a PPT file if you want to head over to PowerPoint for a presentation.
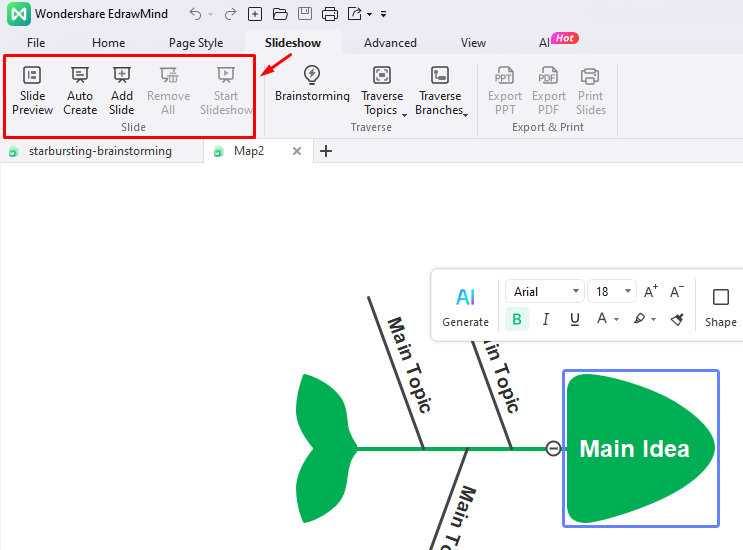
However, if you want to present it directly from EdrawMind, enable the presentation mode from the SlideShow tab on the top toolbar. It will automatically create a slideshow of your design. After this, click Slide Preview and present it in full screen.
Making Fishbone Diagram in Powerpoint Vs. in EdrawMind
Now that you have learned how to make a fishbone diagram in PowerPoint and EdrawMind let us compare their drawing methods so you can decide which tool is the right fit for you.
1. Pros of Microsoft PowerPoint
- Symbol Library with a diverse range of shapes
- A familiar interface with easy navigation
- Manual formatting options for color scheme, outline, borders, and font styles
2. Pros of Wondershare EdrawMind
- A basic structure for fishbone diagram for non-technical users
- Free pre-built fishbone designs available for modification
- Endless customization options with over 26,000+ shapes and infographic elements
- User-friendly UI for newbies
- Multi-format file support, including PPT, PDF, and PNG
Free Fishbone Diagram Maker

Making fishbone diagrams with pre-built designs is easy and quick. This is where EdrawMind enters with its template community. It allows you to create and present basic to advanced fishbone diagrams without a paid subscription. Here are some reasons why it is a good PowerPoint substitute.
- With AI Mind Map Generation, you can generate attractive diagrams with a single click.
- You get 6,000+ templates for all diagrams, including fishbone examples.
- The online version is accessible anywhere without installation, only requiring an internet connection.
- EdrawMind desktop version works on all major platforms, including macOS, Windows, iOS, Linux, and Android.
- It offers cloud storage, saving your local device memory and allowing easy access anywhere.
- You can add your team members and collaborate on a single fishbone diagram in real-time.
- EdrawMind ensures your documents stay secure with its file encryption.
Conclusion
Fishbone diagrams can make your presentations ten times more effective. However, making a fishbone diagram in PowerPoint comes at the cost of time and effort. Though it is professional and easy to use, the absence of pre-built templates and diverse formatting options makes us think twice before creating them.
In this case, a virtual space like EdrawMind Online may work better. It allows making and presenting fishbone diagrams in one place. It even lets you have the final design in a PPT format, so your colleagues can easily access it.


