
Mind maps are brainstorming visuals to organize your ideas. These can be completely pictographic or might use short phrases to convey meaning. To help you design engaging mind maps, different mind map makers are available in the market.
Being one of them, Microsoft Visio allows you to create eye-catching mind maps with detail. Therefore, we have given you a step-by-step guide on making a mind map in Visio, followed by essential tips to create effective mind maps.
In this article
How to Make a Mind Map in Visio
Step 1: Create a file
This first step involves creating a new file in Visio. Follow the steps below to start building a new mind map.
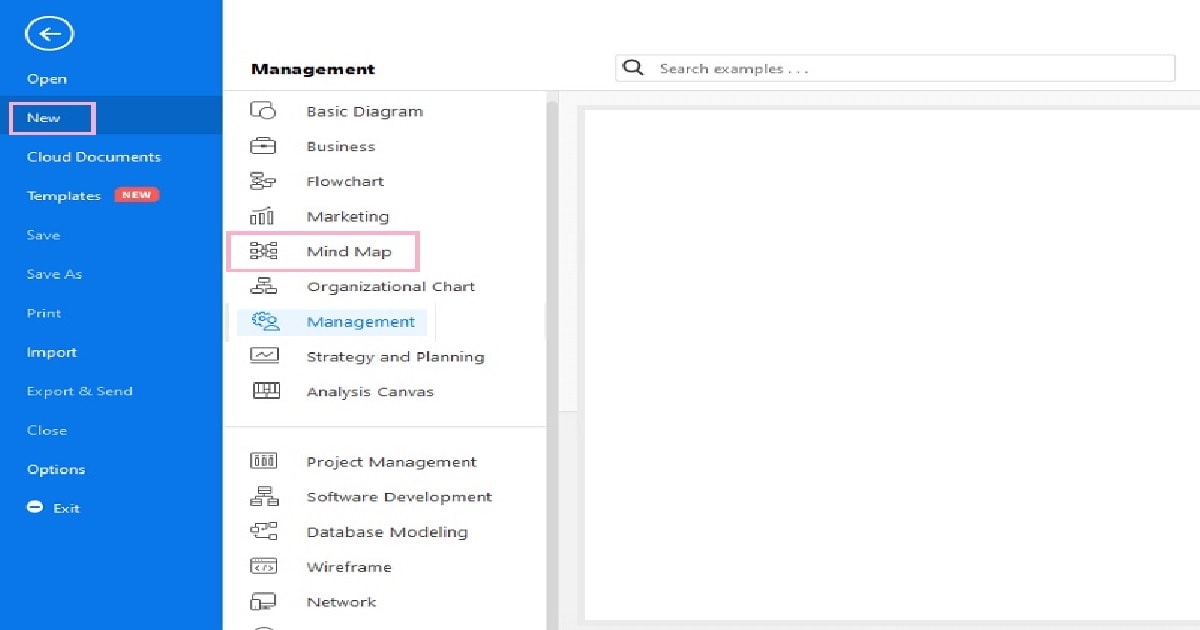
- Go to File > New > Business > Brainstorming diagram.
- Alternatively, choose File> New > Templates/categories > Brainstorming diagram.
Step 2: Add the main idea
To add the main idea to your mind map.
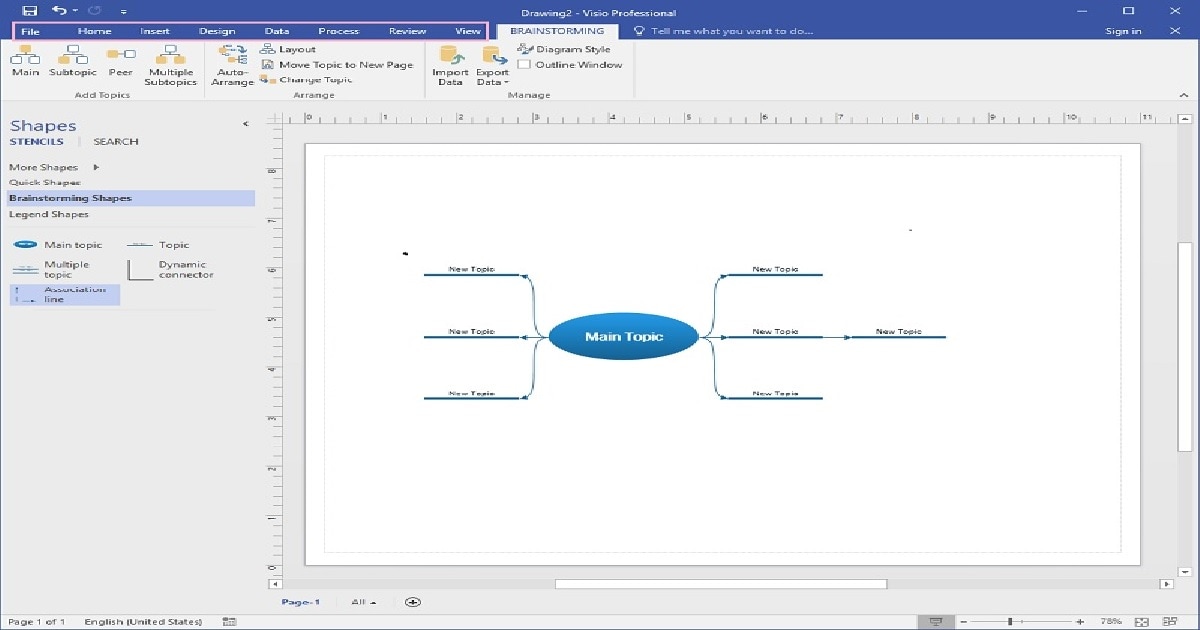
- Navigate to the Brainstorming tab > Main.
- Choose a desired shape for adding the main idea, and you are good to go.
- For example, to create a mind map on 'Shakespeare's Biography,' add this as the main idea to your diagram.
Step 3: Insert subtopic/ multiple subtopics
Subtopics can be included following the same procedure as the main idea. These are connected to the central point using arrows or lines. Below are the steps to include subtopics or multiple subtopics in your mind map.
- Choose Brainstorming > Subtopic to add a subtopic.
- This will include a subtopic directly connected to your main topic. For example, you can add 'childhood' as a subtopic for Shakespeare's biography.
- For multiple subtopic addition, choose Brainstorming > Multiple subtopic. Examples of various sub-topics include 'childhood,' 'adulthood,' 'work,' etc.
Step 4: Arrange the Topics
Arranging topics through the Brainstorming tab in Visio is easier than other related applications. This is because it features an Auto Arrange feature that can automatically sort all the topics without effort. For this:
- Navigate to the Brainstorming toolbar > Auto Arrange.
- That will rank the topics based on the hierarchy.
Alternatively, topics can also be arranged manually. For that:
- Drag the topic you want to organize and drop it at the desired location.
- You do not need to consider the relationship between the topics and subtopics, as they will be automatically adjusted upon rearrangement.
Step 5: Save the Final Output
After you have designed and customized the mind map according to your needs, it is time to save it. You can save the diagram on cloud storage within the Visio or save it on your device, whichever is suitable. To save the mind map on your device:
- Navigate to File > Save as.
- Locate the folder where you want to save your newly created mind map e,g. Downloads.
- Enter the name of the file with which you want to save it. For example, you can choose Shakespear's Biography Mind Map.
- Press OK, and the file will be saved to your device.
Tips and Tricks for Effective Mind Mapping in Google Docs
- Use built-in templates: Instead of starting from scratch, using available templates for creating your mind map is an excellent choice. Doing so not only saves your time but also requires less effort. This is because you just need to edit the text and do not need to adjust the alignment or add new shapes to design the map.
- Use colors: Colors can help build the mind map flow. Using different colors will attract the audience to the information.
- Auto-Arrange for customization: The Auto-arrange feature of Visio has changed the whole game. With this attribute, you can customize the details of the mind map at the back of your hand. There is no need to spend hours to re-arrange topics and aligning the shapes manually, Instead, the auto-arrange will do it for you.
- Keep it Neat: Remember to keep your map neat and straightforward. Avoid unnecessary details and write short phrases to convey the meaning.
- Include images: The Visio interface allows you to include images in your mind maps. You can insert pictures and symbols of your choice to improve your map's quality.
- Auto-resize: Besides auto-arrange, Visio also features an auto-resizing ability. This specification enables you to adjust the page size before designing the visual. Moreover, it is time-efficient and relieves the hassle of manually resizing the page.
- Use cloud storage: Microsoft's cloud storage is highly recommended if you are working on multiple mind maps. Saving on the cloud will allow you to recover your accidentally deleted files without any storage concerns.
- Be Flexible: Last but not least, be flexible. Mind mapping is a brainstorming technique, and your map might not necessarily be neat initially. Therefore, always leave room for modifications.
How to Make a Mind Map in EdrawMind
Step 1: Create a new file
1. Using Blank Canvas/Sketch
Creating a new file before you start working on your mind map is essential. To do this:
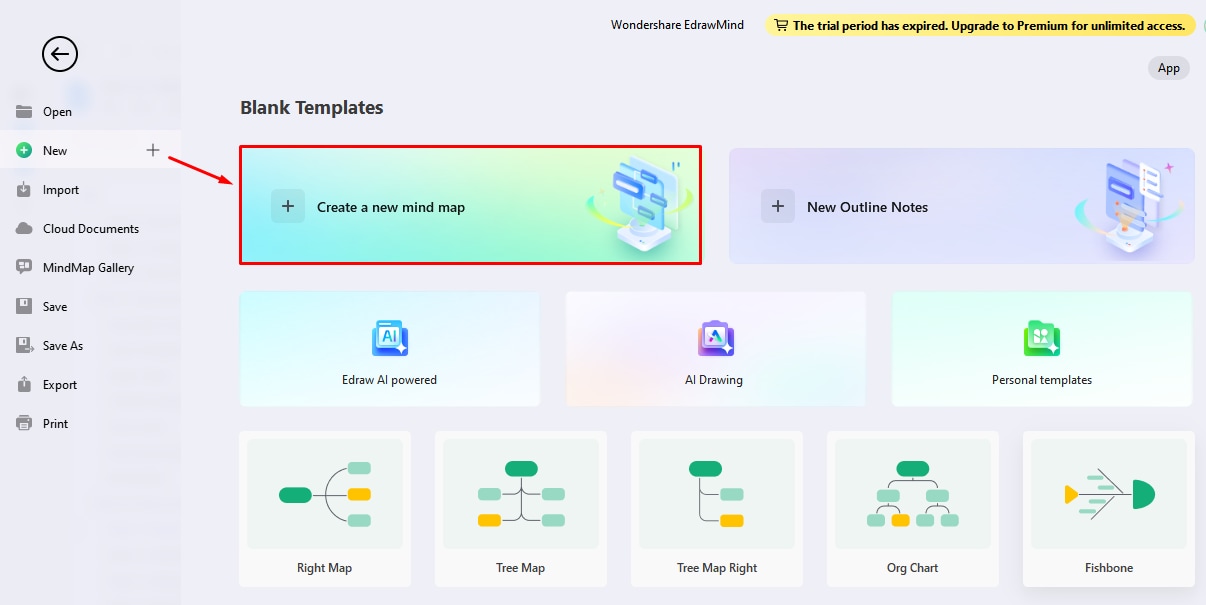
- Choose File > Mind Map > Create a new mind map.
- This will open a blank canvas for you to work on your map.
2. Using Available Templates
Alternatively, you can also choose from various built-in templates in EdrawMind that require less editing effort and time. For creating mind maps through available templates:
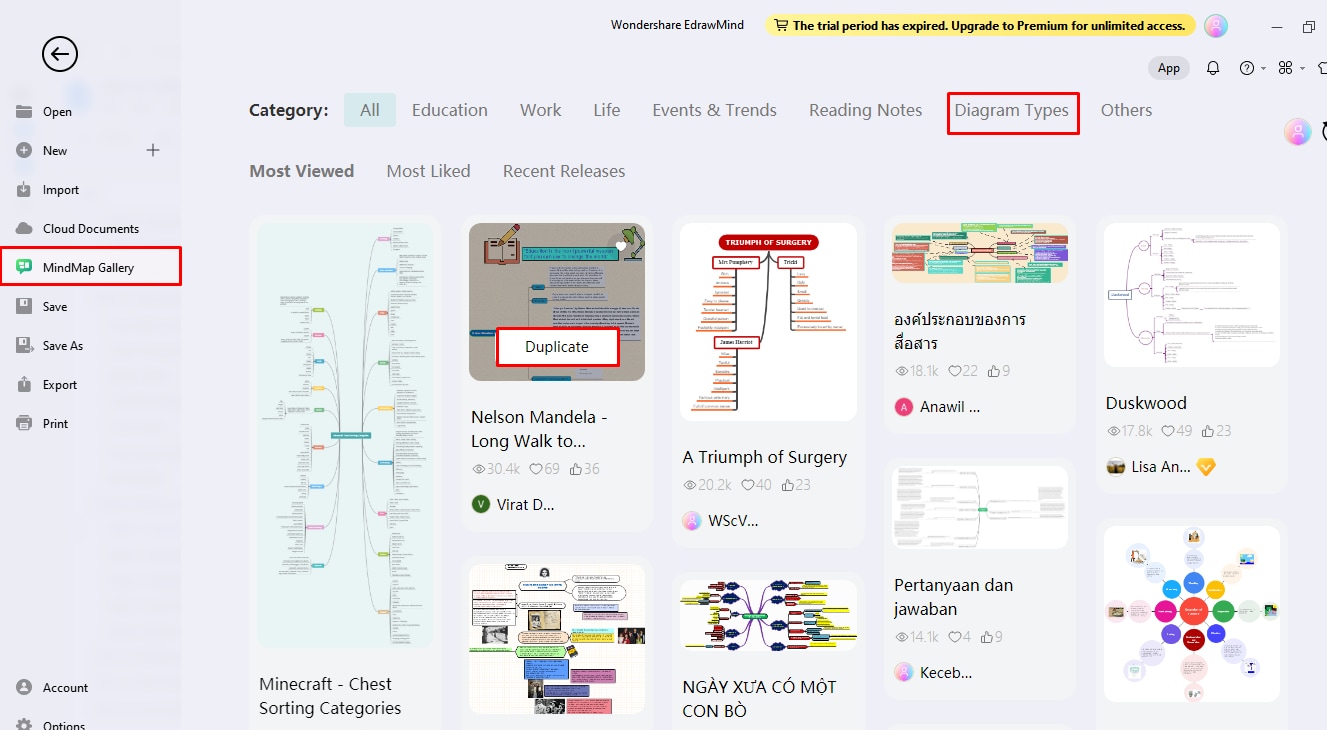
- Go to File > Mind Map Gallery > Category to select a suitable template.
Step 2Adding the main idea
1. Using Blank Canvas/Sketch
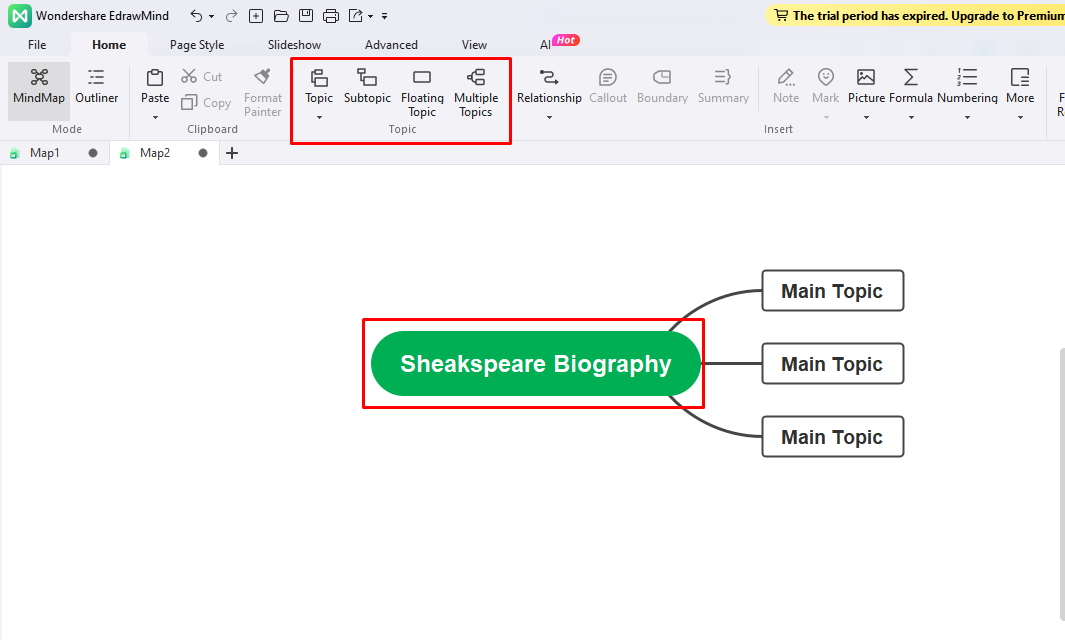
The shape for editing the main idea is available by default if you are using a blank canvas. You can insert the text to shape by:
- Press backspace on your device.
- Enter text. For example, "Shakespeare Biography", your main idea of the mind map.
2. Using Available Templates
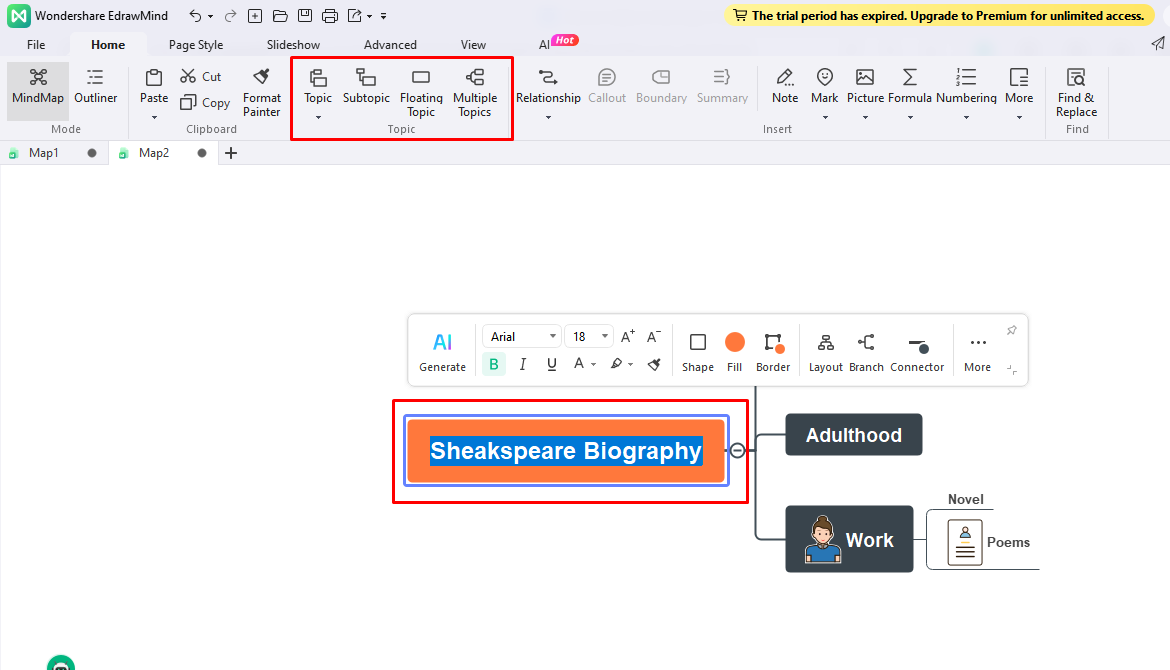
- In the case of a built-in template, you would be provided with the whole template, including the main idea and main topic.
- You need to edit the text only, which can be done by following the procedure mentioned above, i.e., by using the backspace button and adding text of your choice.
Step 3Adding main topic/subtopic
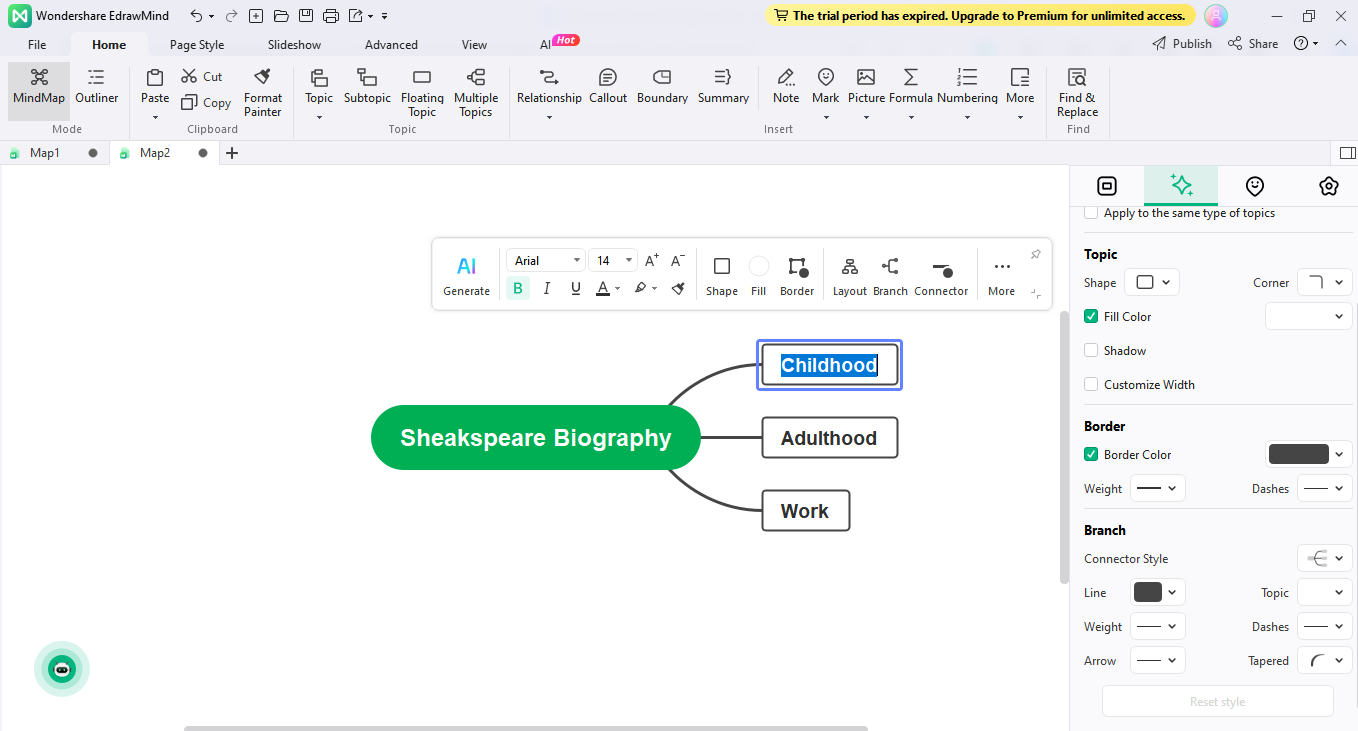
You do not need to add the main topic if you use a template, as it would already be included. You just need to edit it using the same steps mentioned to edit the main idea. However, the procedure is different if you are not using a template. Follow the steps below to add the main topic to the blank canvas.
- Press Enter on your keyboard, and a main topic will be added.
- Add the text of your choice. For example, in Shakespeare's Biography, the main topics would be "childhood", "adulthood", "work" etc.
Similarly, for the addition of a subtopic in both template and blank canvas:
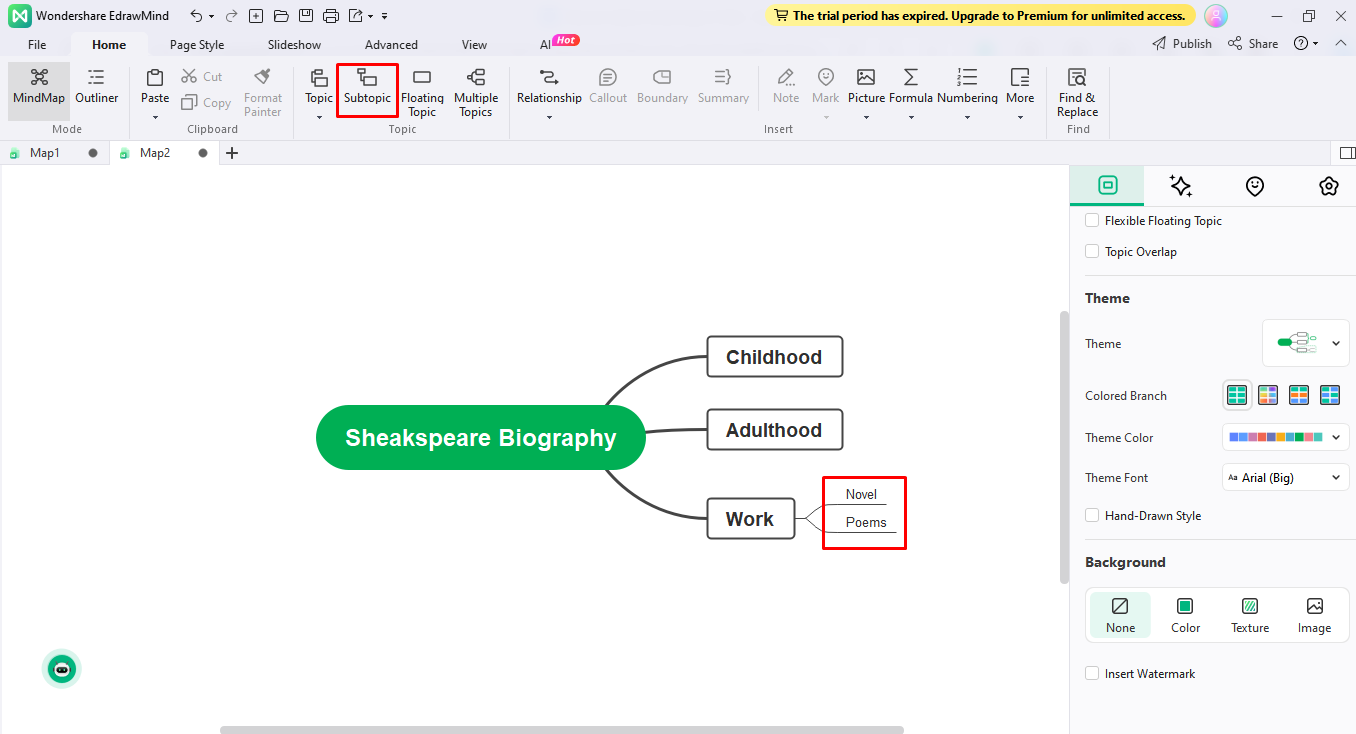
- Press the Tab button on your keyboard, and it will create a subtopic for you.
- You can follow this step again to include multiple subtopics.
- Subtopics for this example could include "novels" and "poems" under the "works" main topic.
Step 4Save the mind map
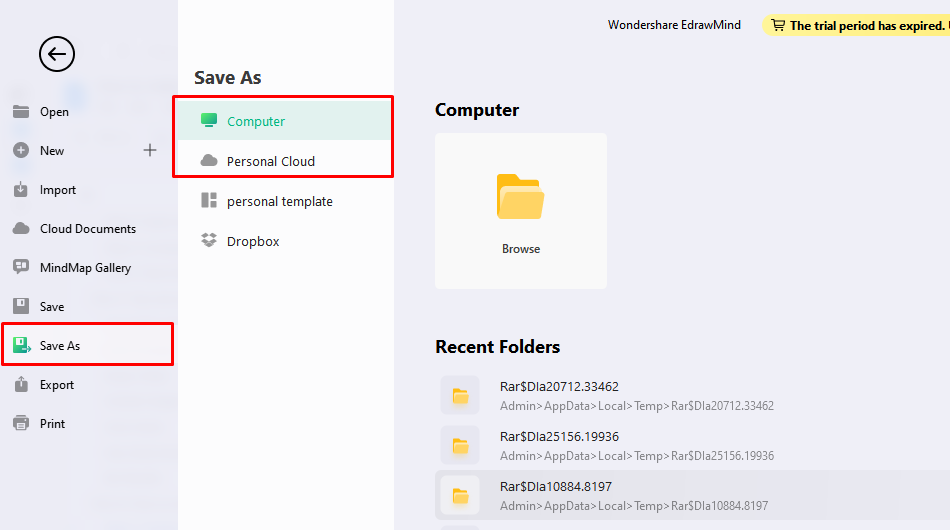
The next step involves saving the mind map. To do this:
- Navigate to the File > Save as > Downloads (or any other folder on your device). This will save the file on your device.
- Alternatively, you can also save on cloud storage by choosing File > Save as > Save on Cloud.
Step 5Export the mind map
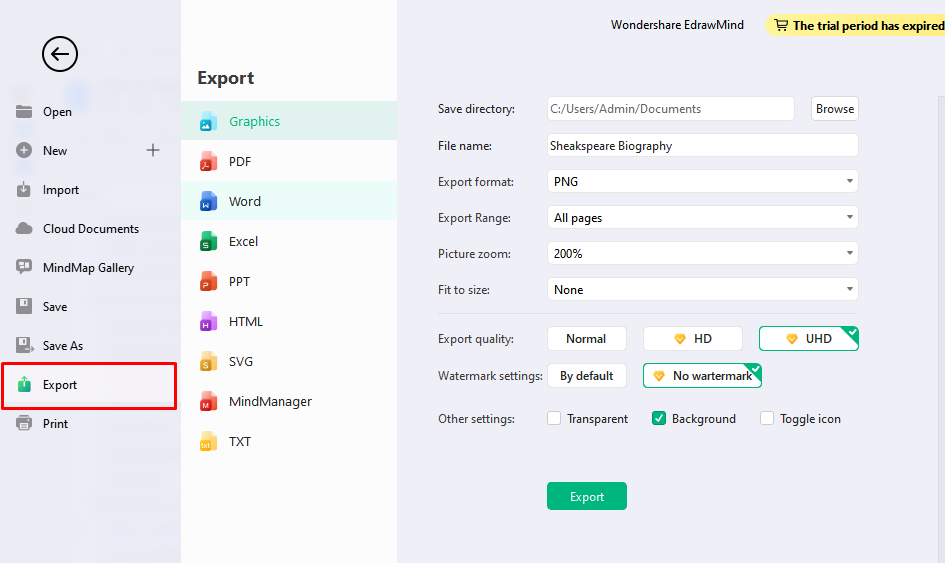
You can also export the mind map in other formats such as PDF, Word, and PNG. Here is how you can do this:
- Go to File > Export > Choose the format to export the file.
- For example, I have chosen 'graphics' to save the file in PNG format.
- Click Export and congratulations, your file has been exported.
Making Mind Maps in Visio vs in EdrawMind
Google Docs Vs EdrawMind, which is better? It is subjective and depends on your preferences. For instance, EdrawMind's advanced formatting features may appeal to professionals. In comparison, the familiar Google Docs interface might suit beginners better. Here is a comparison between the two tools so you can choose wisely.
| Features | EdrawMind | Visio |
| Built-in templates | ||
| Mapping themes | ||
| One-click AI | ||
| Cloud Storage | ||
| Auto-arrange | ||
| Real-time collaboration |
Free Mind Map Maker
Both EdrawMind and Visio have advantages and disadvantages. Though Visio was dominant a few years ago, recently, EdrawMind has taken over the internet with its hassle-free one-click AI diagramming abilities and diverse range of built-in templates.
Below are some features that make EdrawMind an outstanding, free mind map maker for creating mind maps.
- EdrawMind provides 30+ mind-mapping themes that can be used to create engaging mind maps. So, there is no need to use different software for your educational and professional needs.
- The mind map gallery features 6000+ templates in different categories, from life to education, to help you create interactive visuals without plagiarism.
- One-click AI technology allows you to create mind maps within seconds.
- Real-time collaboration allows you to work remotely on group projects.
Conclusion
Creating a mind map in Visio is easy, but if you want to design practical maps, a few tips should be followed. So, besides using the built-in customization features, also remember to keep your map simple and flexible.
You can also try different themes and color palettes to bring life to these visuals. This will increase engagement without use of words. Wondershare EdrawMind can be a suitable option as it features diverse themes and allows for real-time collaboration. So, it enables you to work remotely on group projects.


