Kanban boards are one of the most effective tools for representing tasks and making the project more manageable. It can be easily created in Asana to keep track of work, prioritize tasks, and manage work between team members.
In this short guide, I will provide details on using a Kanban board in Asana and getting the best from this approach. This Kanban methodology has benefitted me a lot in managing my team projects and can be helpful for you if you are a team leader responsible for a few subordinates or involved in several projects.
In this article
How to Use the Kanban Board Function in Asana
To make the most of the Kanban board in Asana, my go-to strategy is to follow a few simple steps that I have listed below. You can follow similar steps and make your tasks more manageable.
Step 1: Sign in to Asana
Log in to your Asana account using your login credentials. If this is your first time using the tool, create a new account on the Asana website.
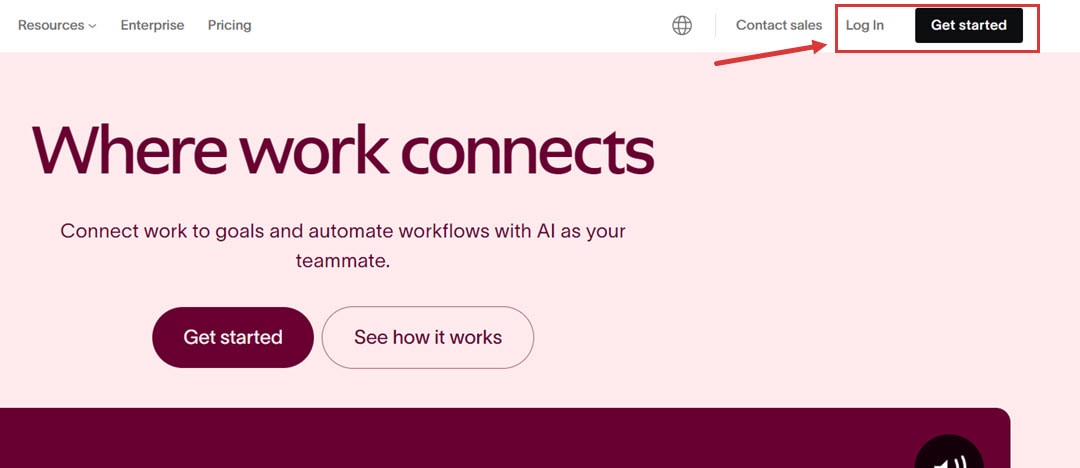
After Asana login, you’re directed towards a personal workspace with all existing projects visible on the dashboard. If you use Asana for the first time, the dashboard will be empty; however, you can create new projects and schedule them based on your requirements.
Step 2: Kanban Board Display
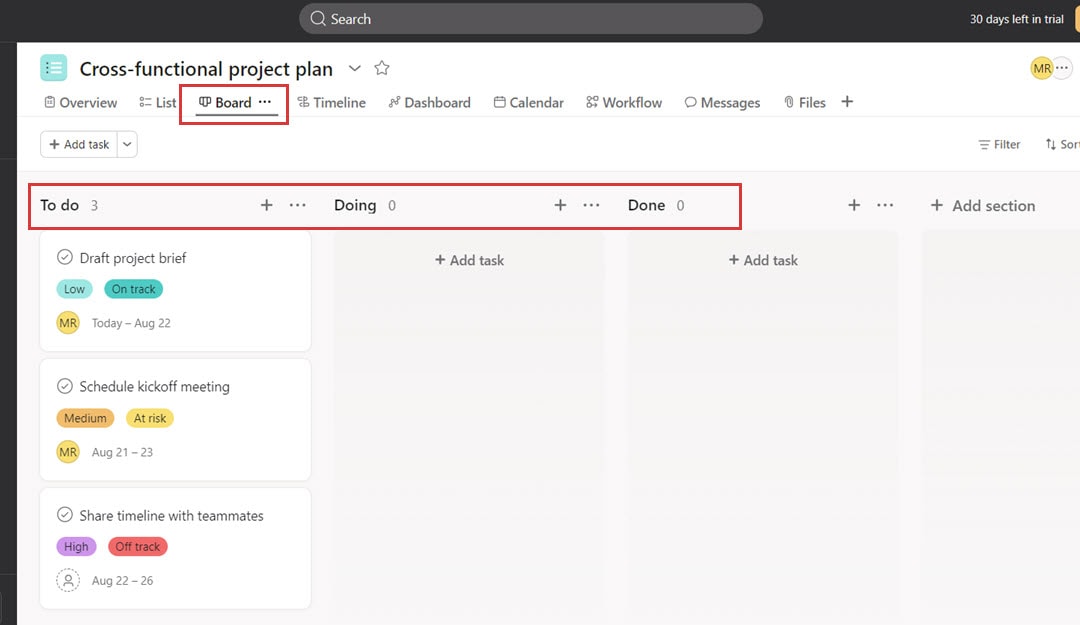
Select Board as your project display option. The tasks are shown on cards, and their progress is shown from one column to another.
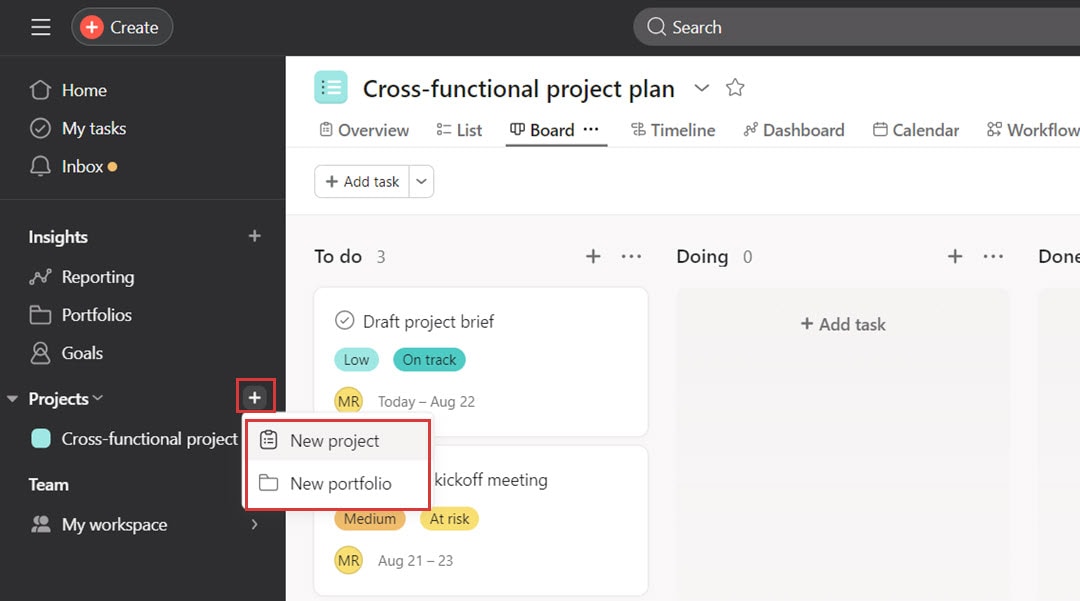
Click the + button on the left-hand sidebar to set up new projects or portfolios according to your requirements.
Step 3: Set Up Columns
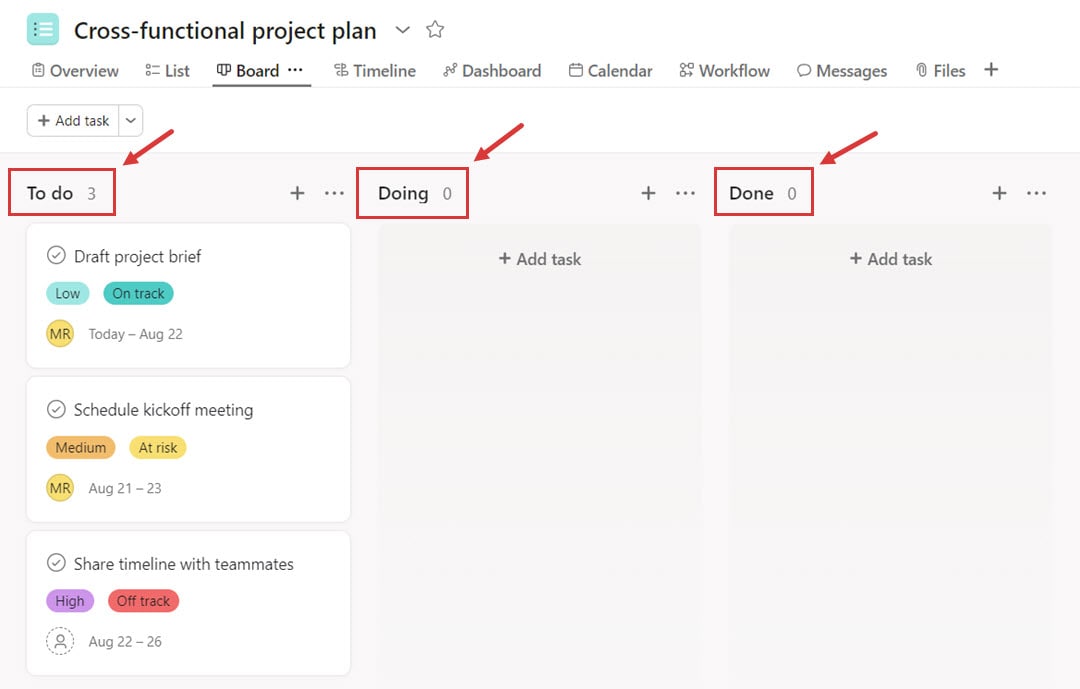
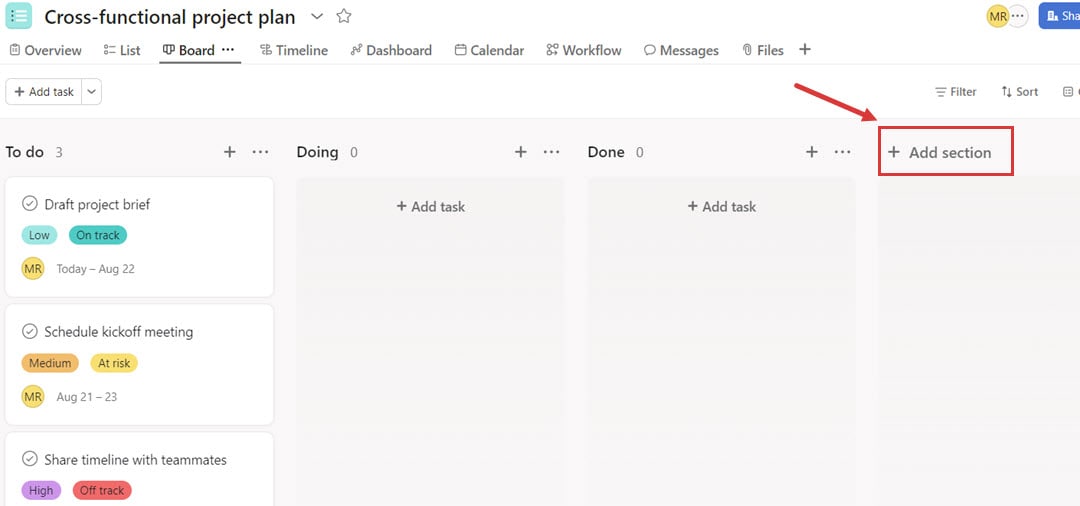
By default, Asana provides you with three columns: To Do, In Progress, and Done. These are among the simplest examples of the Kanban board. If you require more stages, add more columns at the base of the page using the + Add section button.
You can also reorder the columns to meet your preferences by just moving the columns into your preferred positions.
Step 4: Add Tasks to the Board
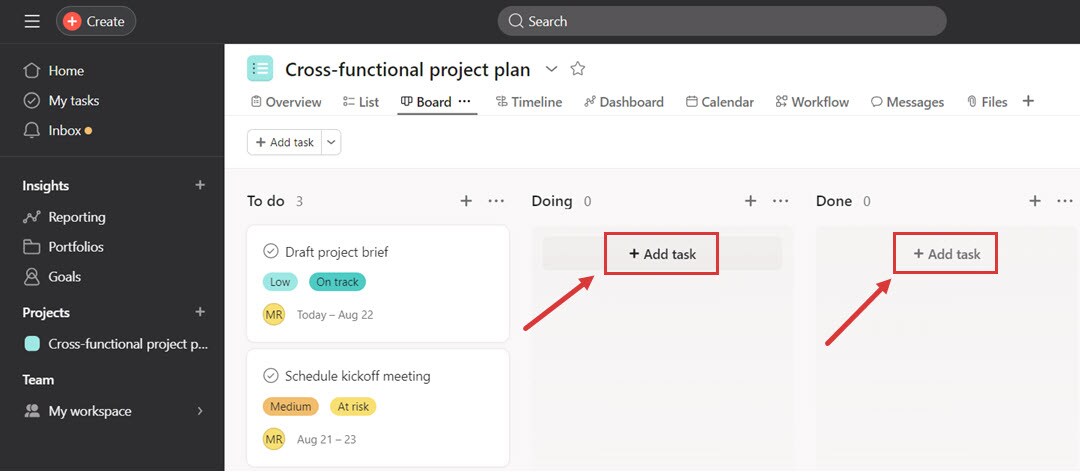
Once you’ve set up the sections on your board, add the tasks in the arbitrary columns based on task status/progress.
To add a task, select the + Add task or press Tab+N to create a new task more rapidly. You can also drag and drop the task from one column to another.
Step 5: Modify Tasks
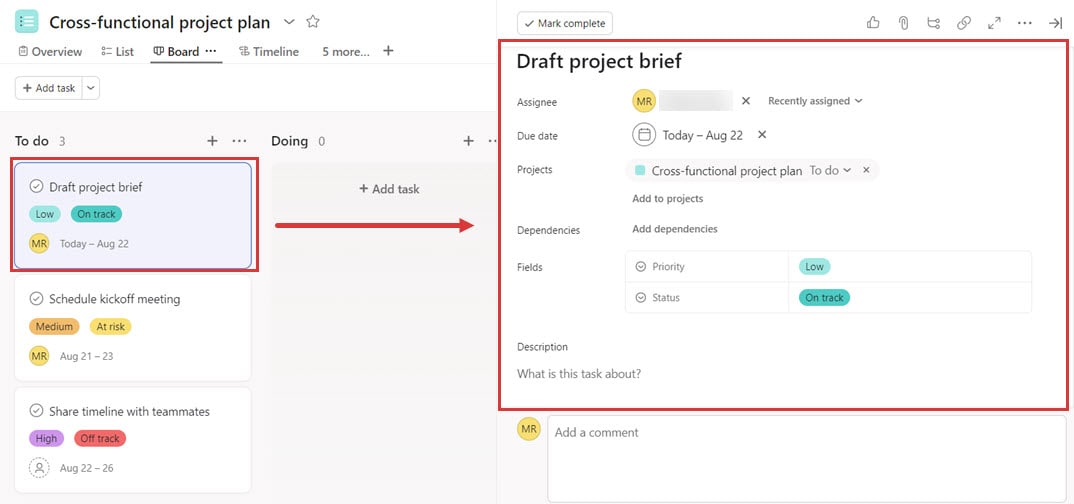
Expand each task card by clicking and getting more specific data in the opened window. Additionally, you can add a description of the task, several sub-tasks, files, and links to other documents or web pages.
Step 6: Assign Tasks and Set Deadlines
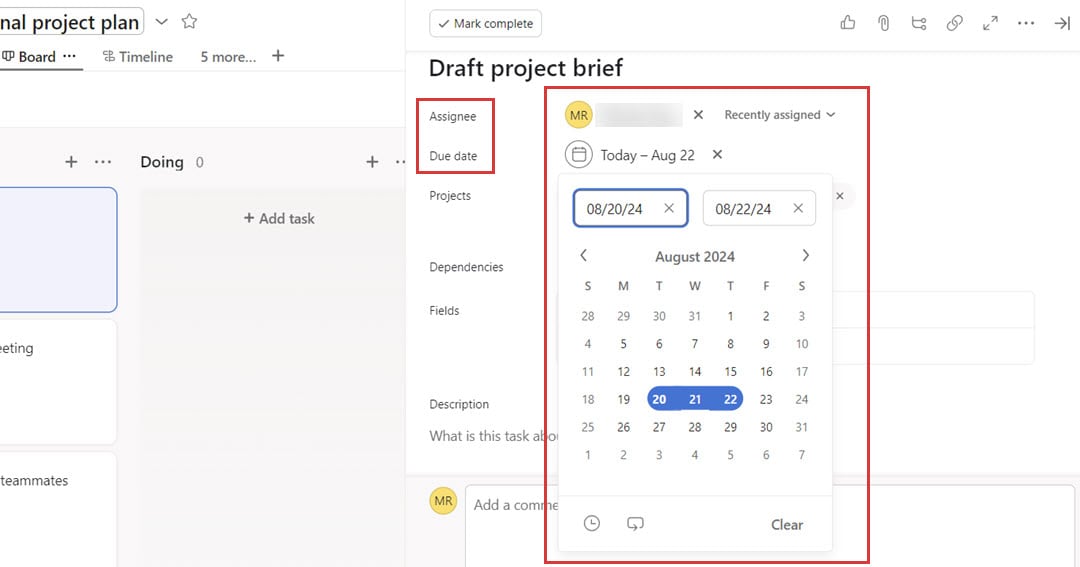
Click the Assignee option and select the team member you want to assign the task. This helps you to have every task executed and controlled by someone.
To set the deadlines, write in the due date field and click on it. Assigning priority and other filters to subdivide the work and guarantee focus on the most important items is also possible.
Step 7: Asana Kanban Swimlanes
As for the Asana Kanban swimlane, it does not allow it natively; still, you can mimic it by using sections or custom fields. For example, you can create sub-divisions of the columns for the different teams, phases, or categories. This also helps you make tasks stand out individually yet still be on the board.
Moreover, you can use Functional Groups (custom fields such as tags or categories) to mimic swimlanes, which provides a more detailed overview of the distribution of tasks.
Tips for Using a Kanban Board
The following are the major tips for using a kanban board in Asana:
Stay organized: Change the cards and the appearance of the Kanban board to match the ongoing tasks. This helps you stay organized, manage workflow easily, and update your team about the progress.
Limit work in progress (WIP): To reduce the workload on the team members, limit the number of tasks within the In Progress column. You can always modify these activities to maintain a balanced workflow.
Use asana templates: Use the asana kanban template to reduce the need to start from scratch. Some templates are pre-built workflows that take less time and simplify your work.
Leverage automation: You can use Asana automation to transport the taskbar or to inform the team of status changes. This ensures that your board is always up-to-date.
Utilize Asana’s reporting features: Use the reporting and the dashboard facilities to get better ideas about the performance of your teams. These reports help find trends, e.g., recurrent bottlenecks and make better decisions to overcome them.
Encourage team collaboration: Promote teamwork through member discussion on the status of the tasks, new developments, and comments on the status of each column on the Kanban board. This makes communication clear, and conflicts are dealt with immediately.
Conclusion
Working with a Kanban Board Asana helps me manage my projects by creating a visual and easily understandable format of my tasks and status. To maximize your Asana Kanban usage, you must learn how to organize your workspace and set task priorities using Kanban principles.
Also, navigate its elements so the work goes smoothly and the projects are finished on time. These updates and attention to the movements of tasks are important to retain productivity and the flow of tasks since they avoid stack or backlog.


