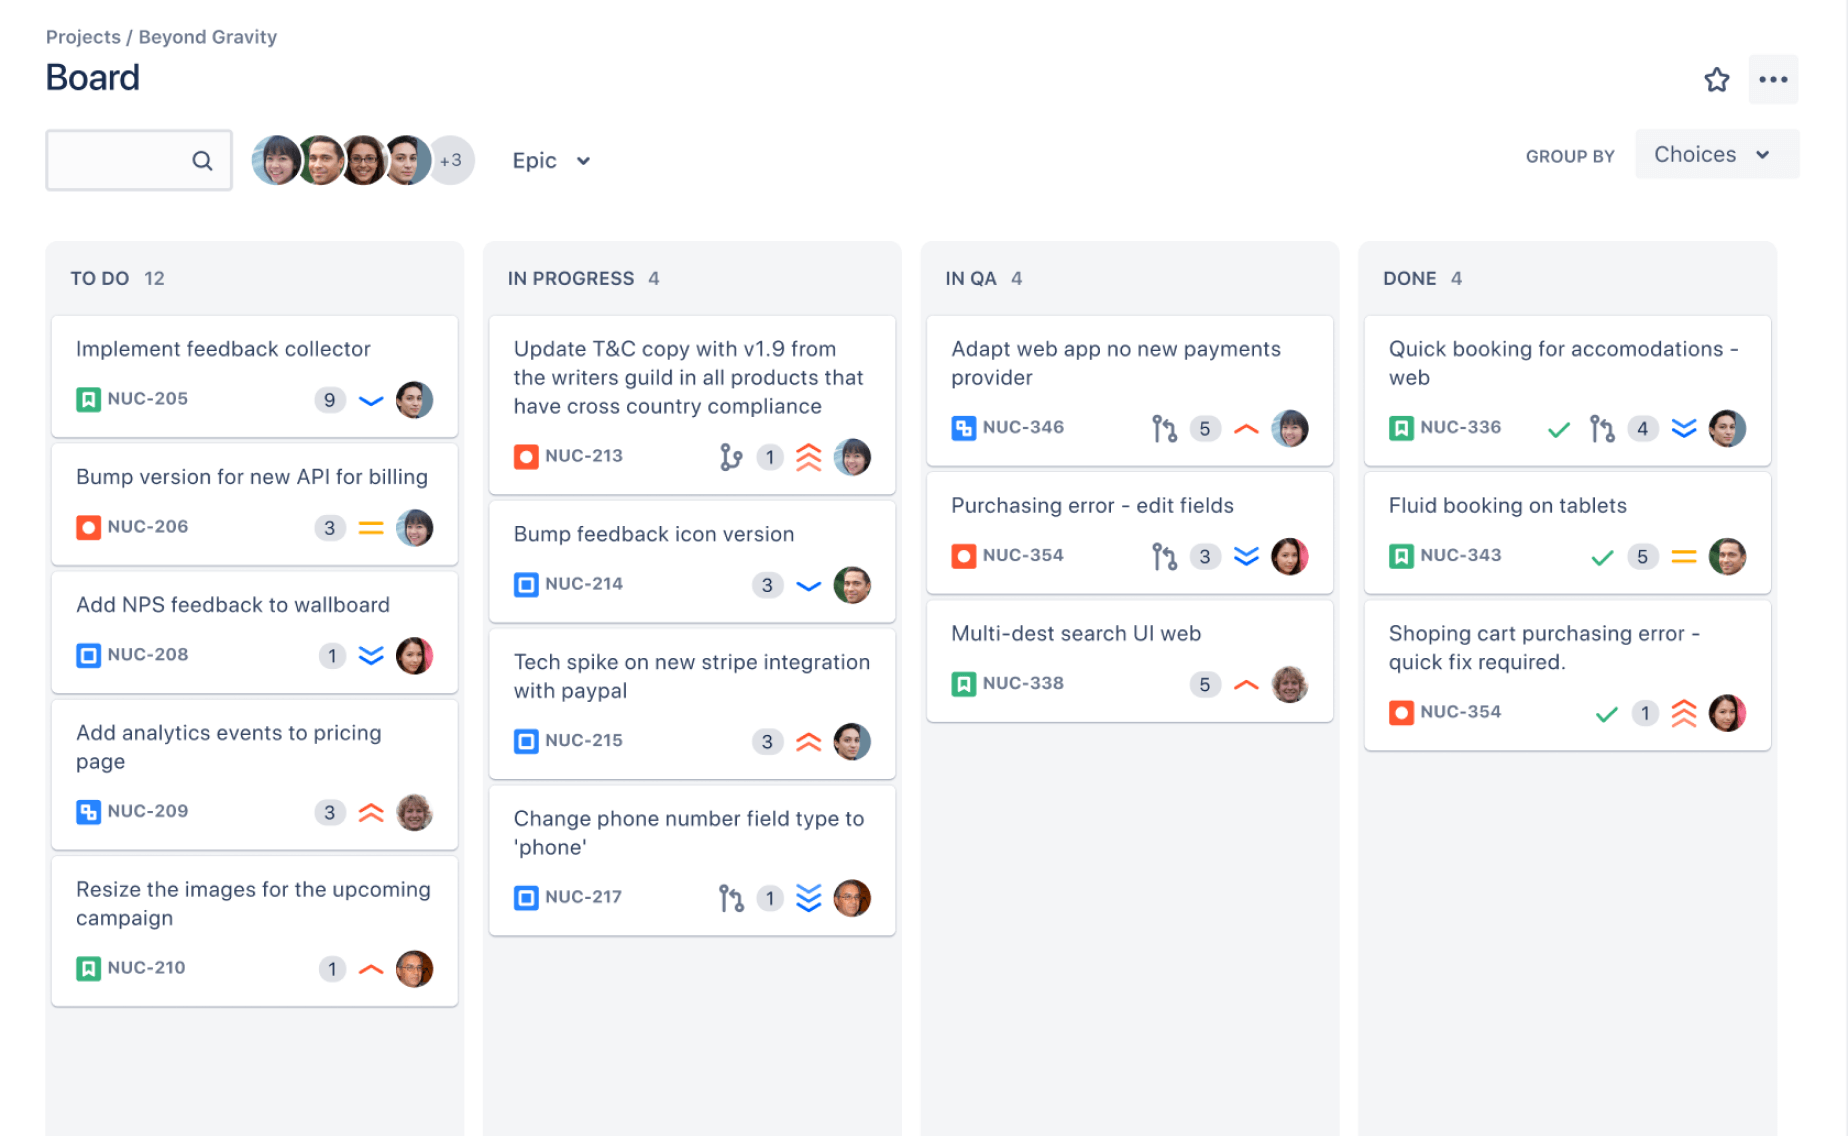
Sometimes, managing tasks alone can be quite tedious. Here comes Jira! A powerful tool for teams to effectively do their work. With a wide array of features, probably the most productive one is a Kanban board.
Jira Kanban boards allow a team to see their tasks quickly. Kanban boards display what needs to be done, what is currently being done, and what has already been completed. This helps team members monitor their work and work together more easily with others.
In this article, you will learn how the Kanban board function of Jira works. We will guide you through every part of how to create a Kanban project up to advanced features.
In this article
What is a Kanban Board in Jira?
A Kanban board in Jira is a visual tool that shows your team's work. It uses columns to represent different stages of work, like "To Do," "In Progress," and "Done."
Tasks move across these columns as they're worked on, giving a clear picture of what's happening in your project.
How to Use the Kanban Board Function in Jira?
Using a Kanban board in Jira can help your team work better together. It makes it easy to see what everyone is doing and what needs to be done next.
Remember, the goal of using a Kanban board is to make your work easier and more visible.
Don't be afraid to adjust things as you go along. If something isn't working for your team, you can always change it. The most important thing is finding a way that works best for you and your team.
Step 1: Create a Kanban Project
First, you'll need to set up your Kanban board. This means creating a new project in Jira and choosing the Kanban template. Once you've done that, you can add your team's tasks to the board.
To start using a Kanban board in Jira, you must first create a Kanban project.
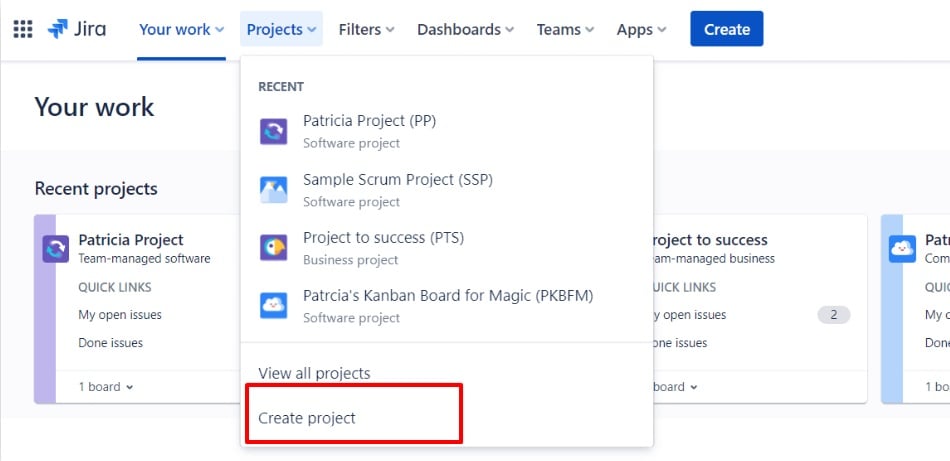
Log in to your Jira account. Click on Projects in the top menu. Click on Create project.
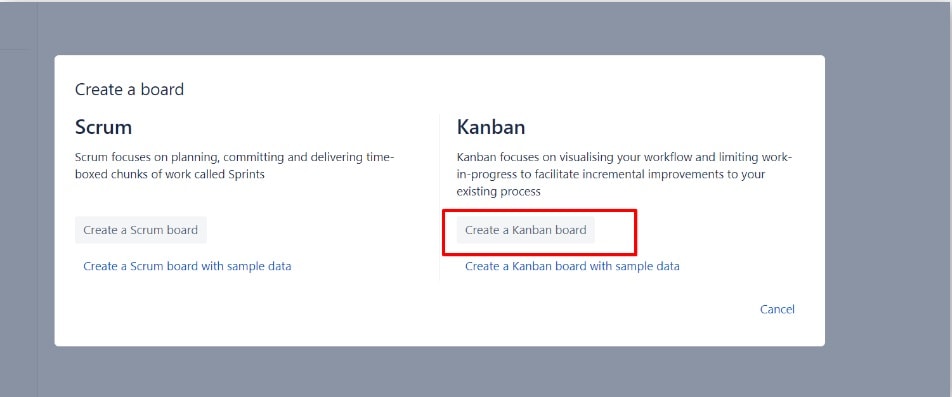
Choose Kanban from the project templates. Now you have a basic Kanban board set up and ready to use!
Step 2: Configure Workflow on the Kanban Board
Next, you'll want to think about how your team works. What steps do you follow when working on a task? You can set up your Kanban board to match these steps. This might mean adding columns like "Planning," "In Progress," and "Review" to your board.
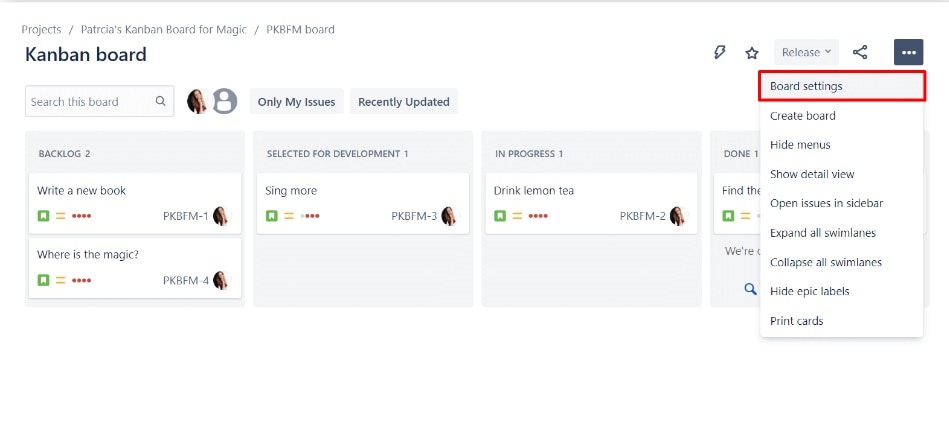
Go to your new Kanban board. Click on the three-dot icon on the top and select Board Settings.
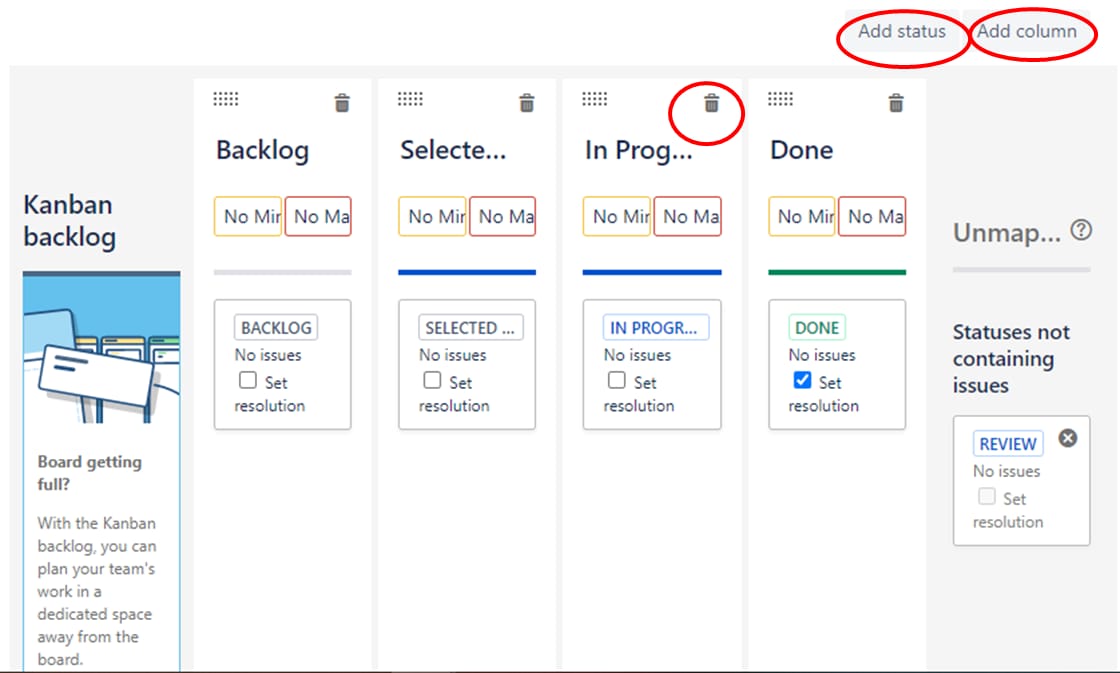
In the left sidebar, click on Columns. Here, you can add, remove, or rename columns to match your workflow.
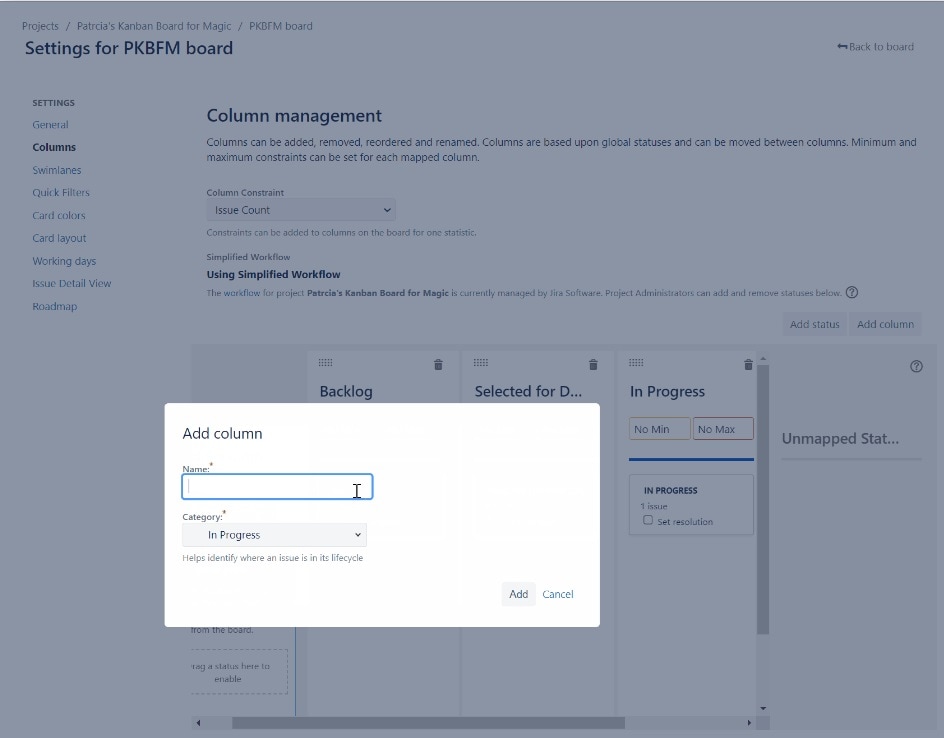
Click Save when you're done.
Your Kanban board now reflects your team's unique way of working.
Step 3: Add Task and User stories to the backlog
As you use your Kanban board, you'll add new tasks to the "To Do" column.
Now it's time to add some work to your board:
On your Kanban board, click the Create button at the top. Choose the type of issue you want to create.
Fill in the details of the issue. Click Create.
The new issue will appear in your backlog and is ready to be worked on.
Step 4: Create Swimlanes
Kanban boards also let you group similar tasks using something called "swimlanes." This can be helpful if you have different types of work or if you want to separate tasks for different team members or customers.
Swimlanes help organize your board further:
Go back to the board configuration screen. Click on Swimlanes in the left sidebar. Click Add Swimlane.
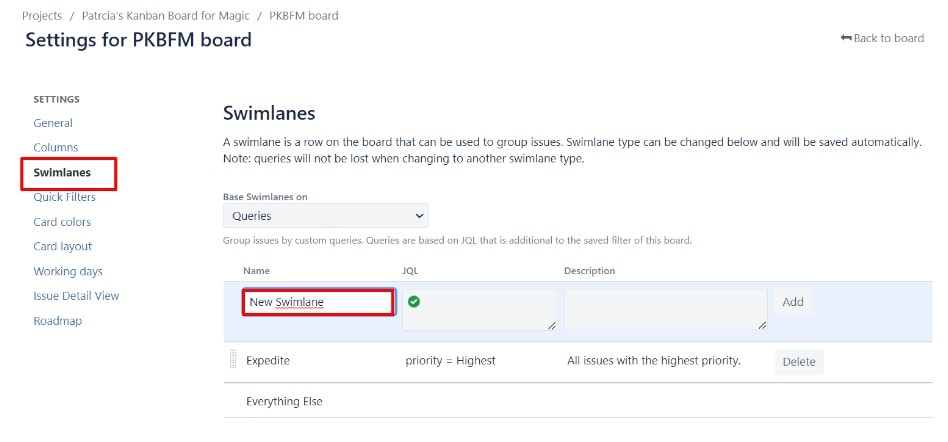
Choose how to group your issues (by assignee, issue type, etc.). Click Save.
Step 5: Set WIP limits
Setting Work in Progress (WIP) limits help prevent overload:
In the board configuration, click on Columns. For each column, you'll see a Max field.
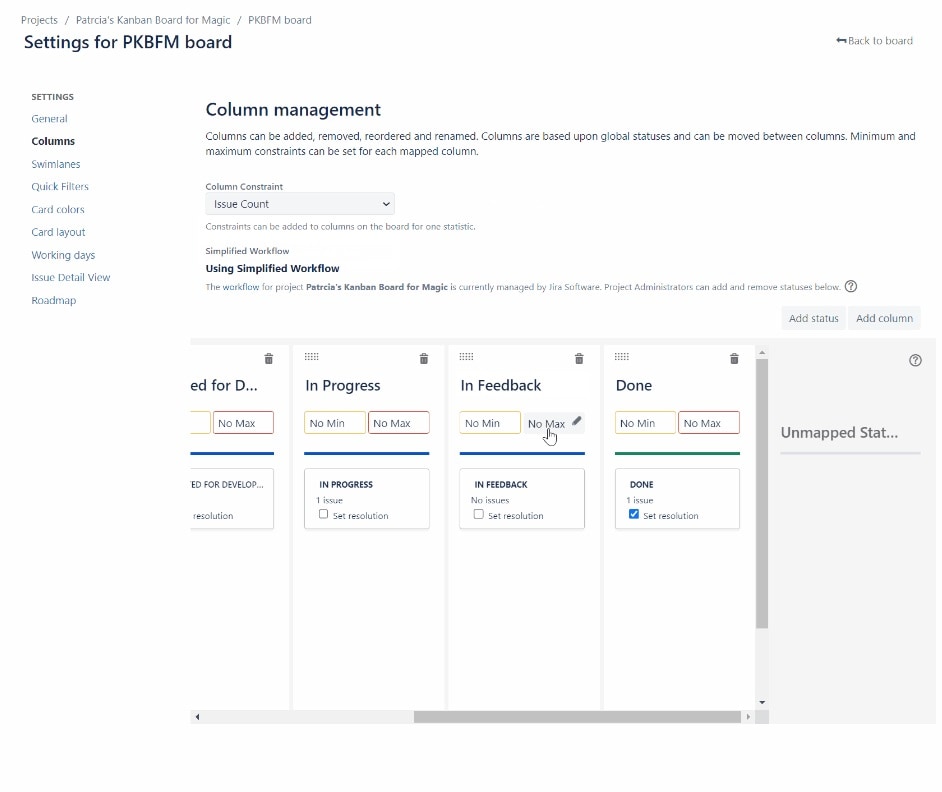
Enter a number to set the WIP limit for that column. Click Save.
Now, if a column reaches its WIP limit, it will be highlighted, signaling that no new work should be started until something is finished.
Step 6: Using the Advanced Settings
As you get more comfortable with your Kanban board, you can start using some of the more advanced features. These include creating different types of issues (like bugs or user stories), setting up filters to see only certain tasks, and using reports to track how your team is doing over time.
For more control over your board:
Go to the board configuration screen.
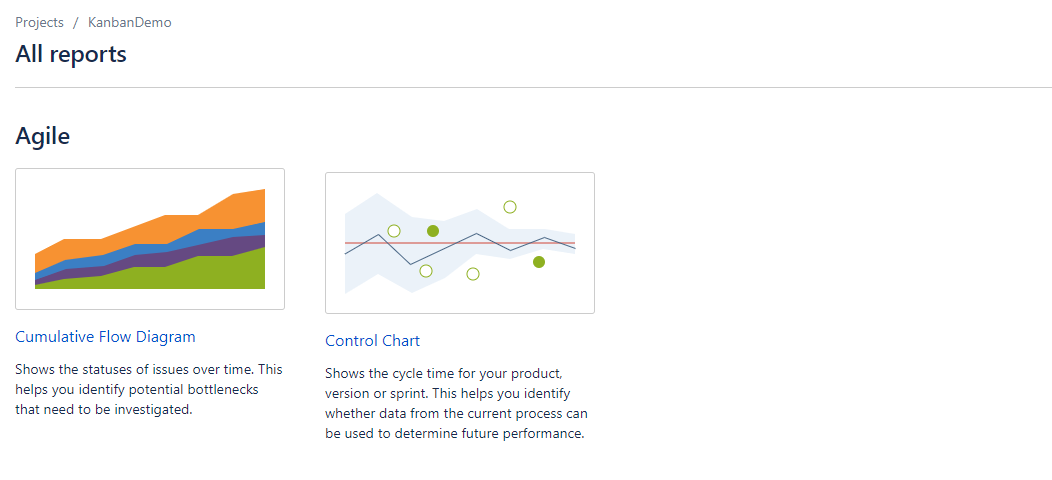
Explore various options here. Adjust these settings to fit your team's needs. Don't forget to save your changes!
These advanced settings can help tailor your Kanban board to your exact requirements.
Tips for Using a Kanban Board Efficiently
Here are some expert tips for using Kanban board in Jira like a pro:
- Keep your board updated: Make sure team members move issues as they work on them.
- Use color-coding: This can help quickly identify different types of work or priorities.
- Review regularly: Have team meetings to review the board and discuss progress.
- Don't overload columns: Stick to your WIP limits to keep work flowing smoothly.
- Use descriptions and attachments: Add details to issues to clarify them for everyone.
- Try different views: Jira offers various ways to view your board. Experiment to find what works best.
- Use reports: Jira's reporting features can give insights into your team's performance.
- Customize for your team: Every team is different. Adjust your board as needed.
- Encourage team participation: Get everyone involved in managing the board.
- Start simple: Begin with basic features and add complexity as you get more comfortable.
Try a Jira Alternative: A Quick and Easy Kanban Tool
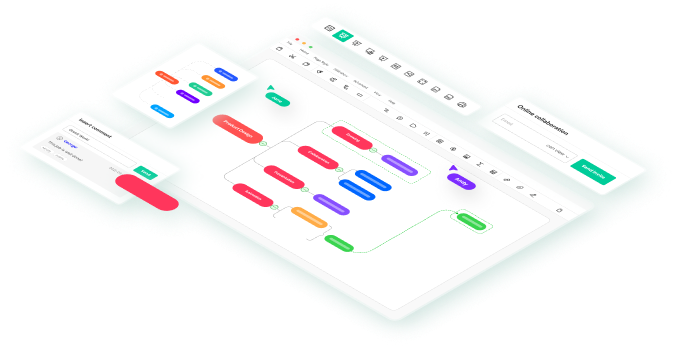
While Jira is a powerful tool, some teams might find it complex for their needs. That's where EdrawMind comes in. EdrawMind is an AI-powered Kanban software that can be used for project management, including Kanban-style workflows.
EdrawMind offers a simpler, more visual approach to organizing tasks and projects. It allows you to create mind maps that can function like Kanban boards but with more flexibility in how you arrange and connect ideas.
- Lots of Templates: You can choose from over 6,000 ready-made designs. It also has many pictures and icons you can use.
- Smart Map Making: The software can make mind maps for you quickly using smart computer thinking.
- Free to Try: You can use EdrawMind online without paying to see if you like it.
- Use It Anywhere: As long as you have internet, you can use EdrawMind on any computer.
- Works on Many Devices: You can use EdrawMind on Windows, Mac, Linux, iPhones, and Android phones. Your whole team can work together no matter what devices they have.
- Work Together Live: You can simultaneously work on the same mind map with other people. (Real-time collaboration only works online)
- Fits with Other Tools: You can bring mind maps from other programs and save your work in many file types.
- List View: You can switch to a list view to see your mind map as a neat, organized list.
Step 1
Install EdrawMind on your PC.
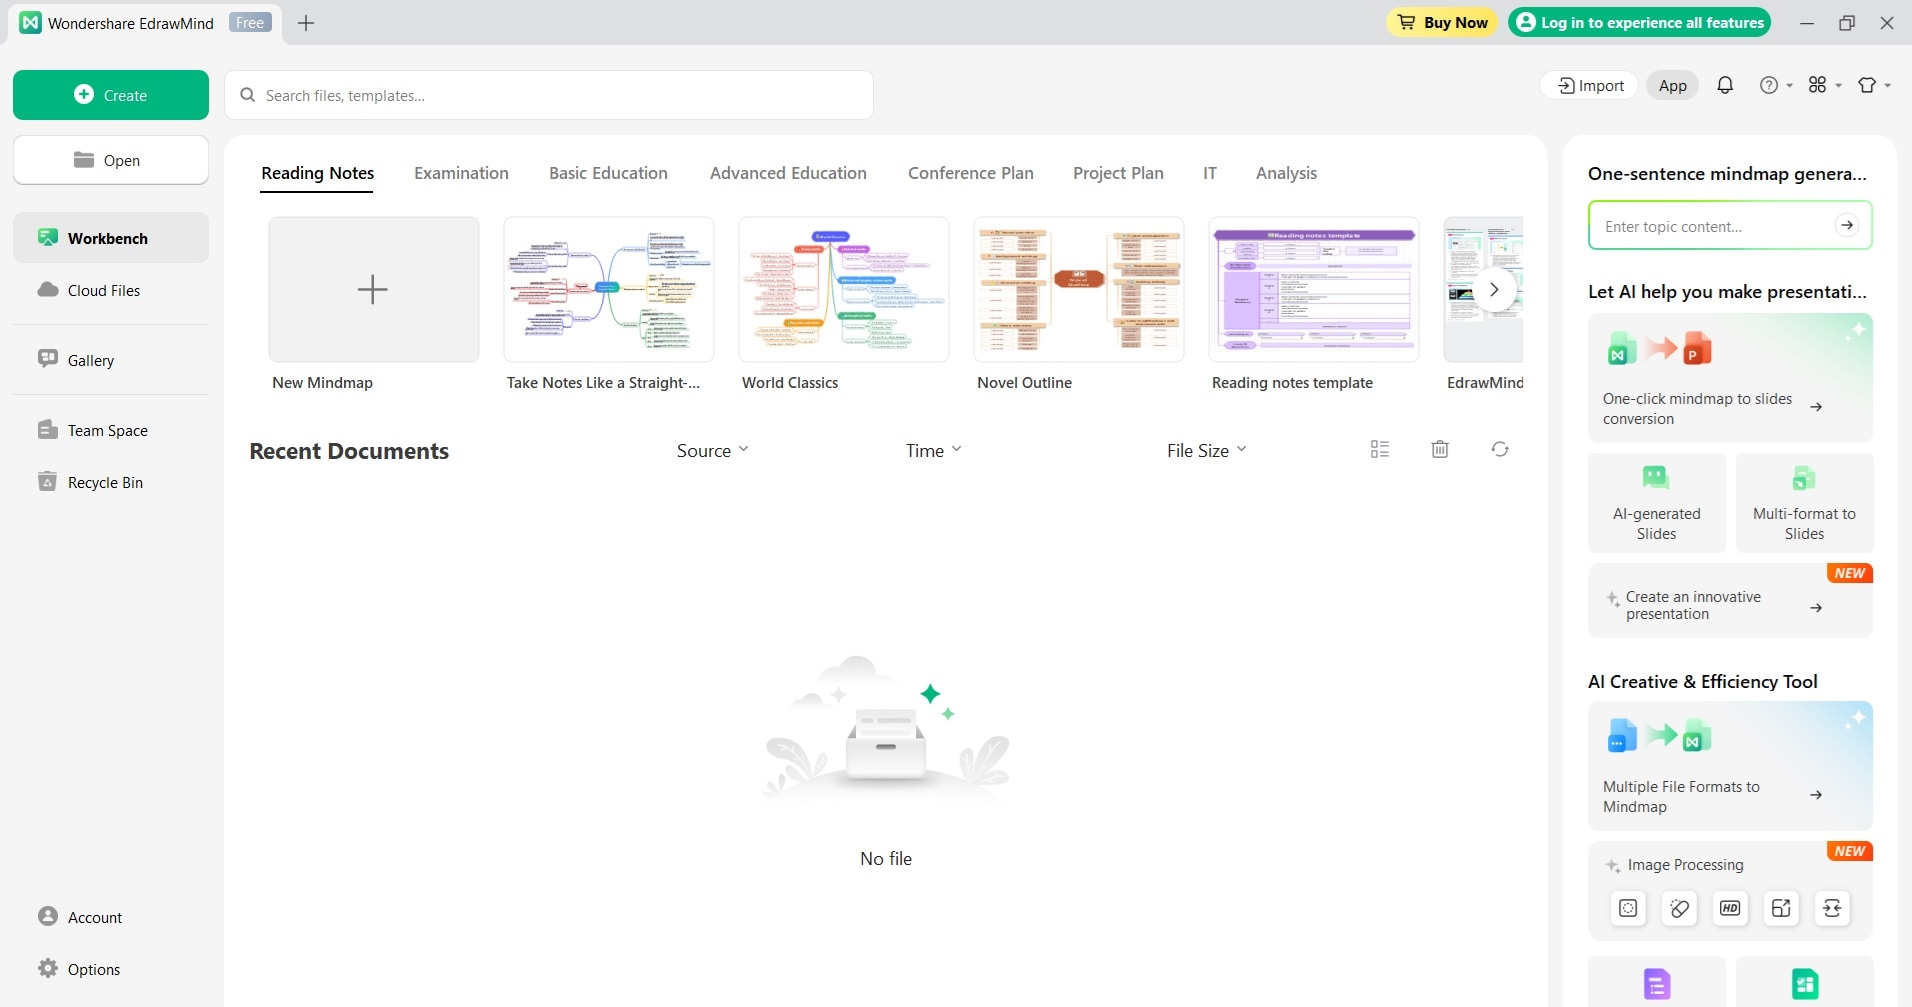
When you open EdrawMind, you'll see many template options. Pick one you like, or start with a blank page by clicking "New". Type in your main idea in the middle. Then, add more ideas around it using the tools at the top of the screen. You can change how the words look, too.
Step 2
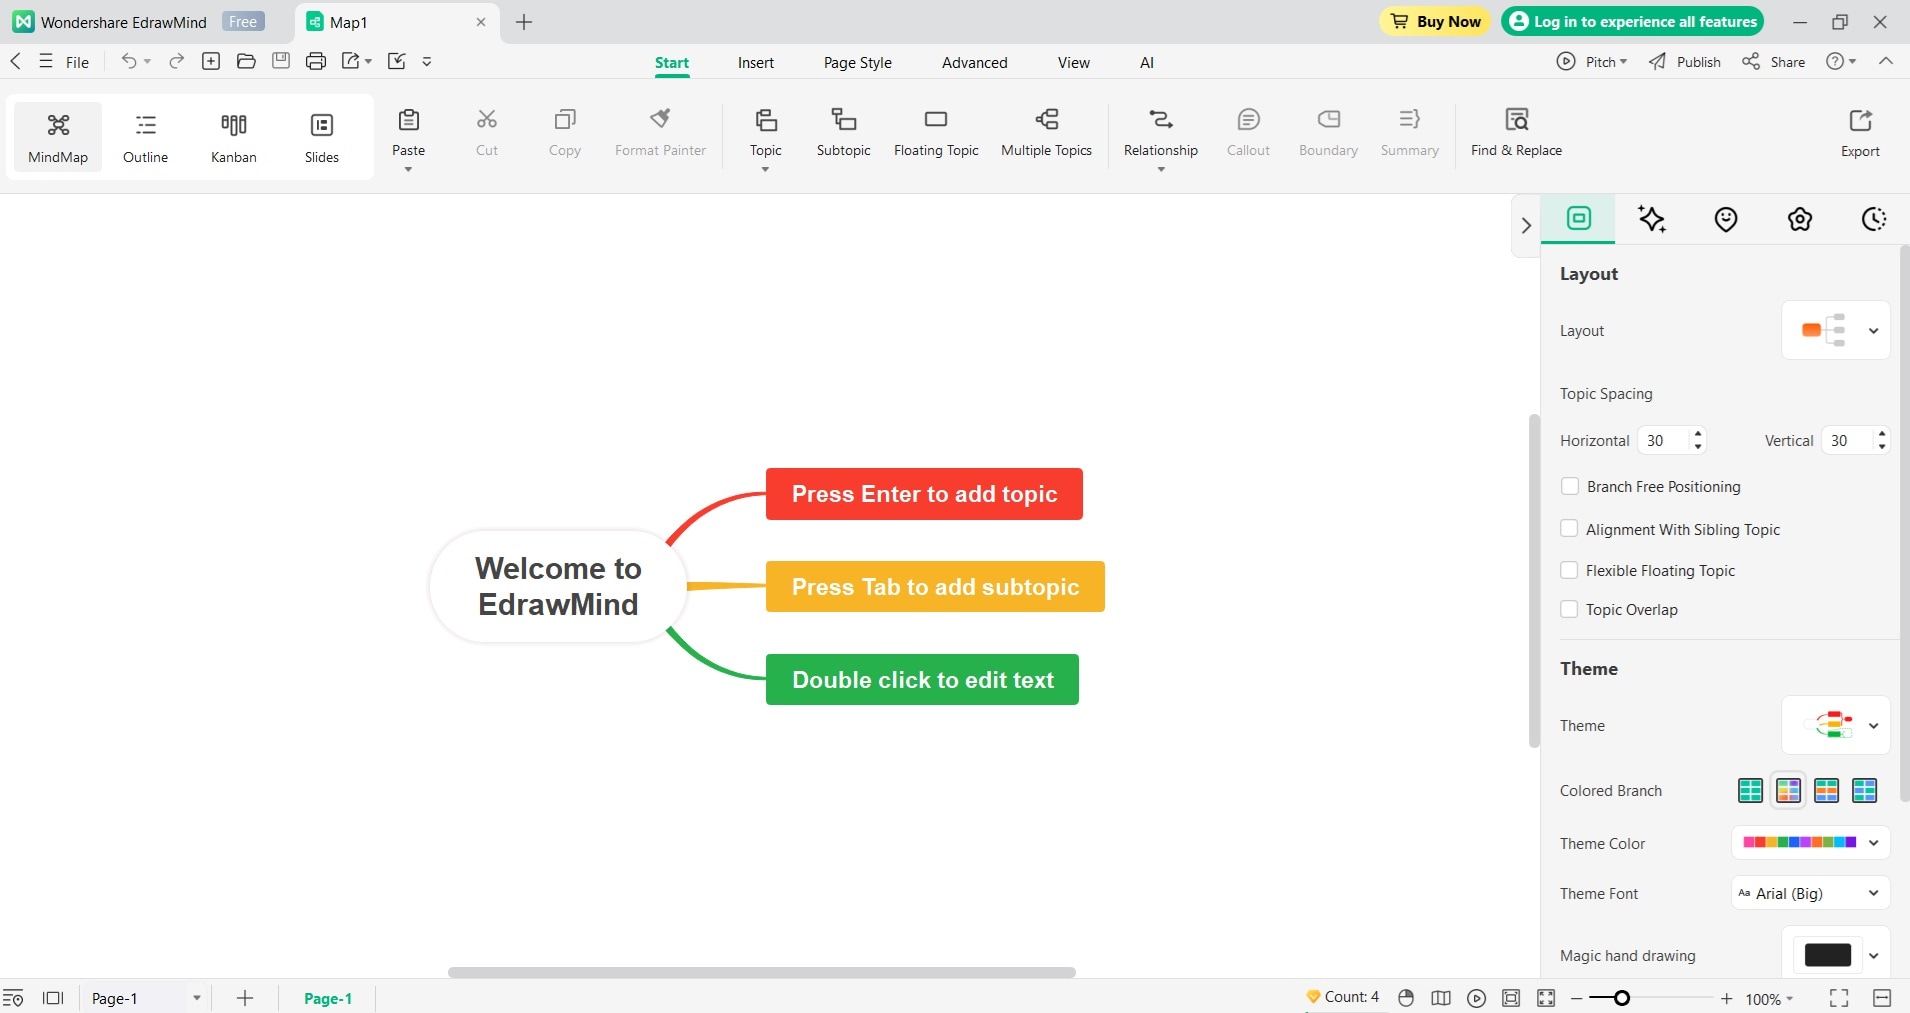
Add smaller branches to the main branches to include supporting details, examples, or additional information. This helps to further elaborate on each concept. Click the plus sign at the bottom to add more pages to your mind map. You can rename pages by right-clicking on them.
Step 3
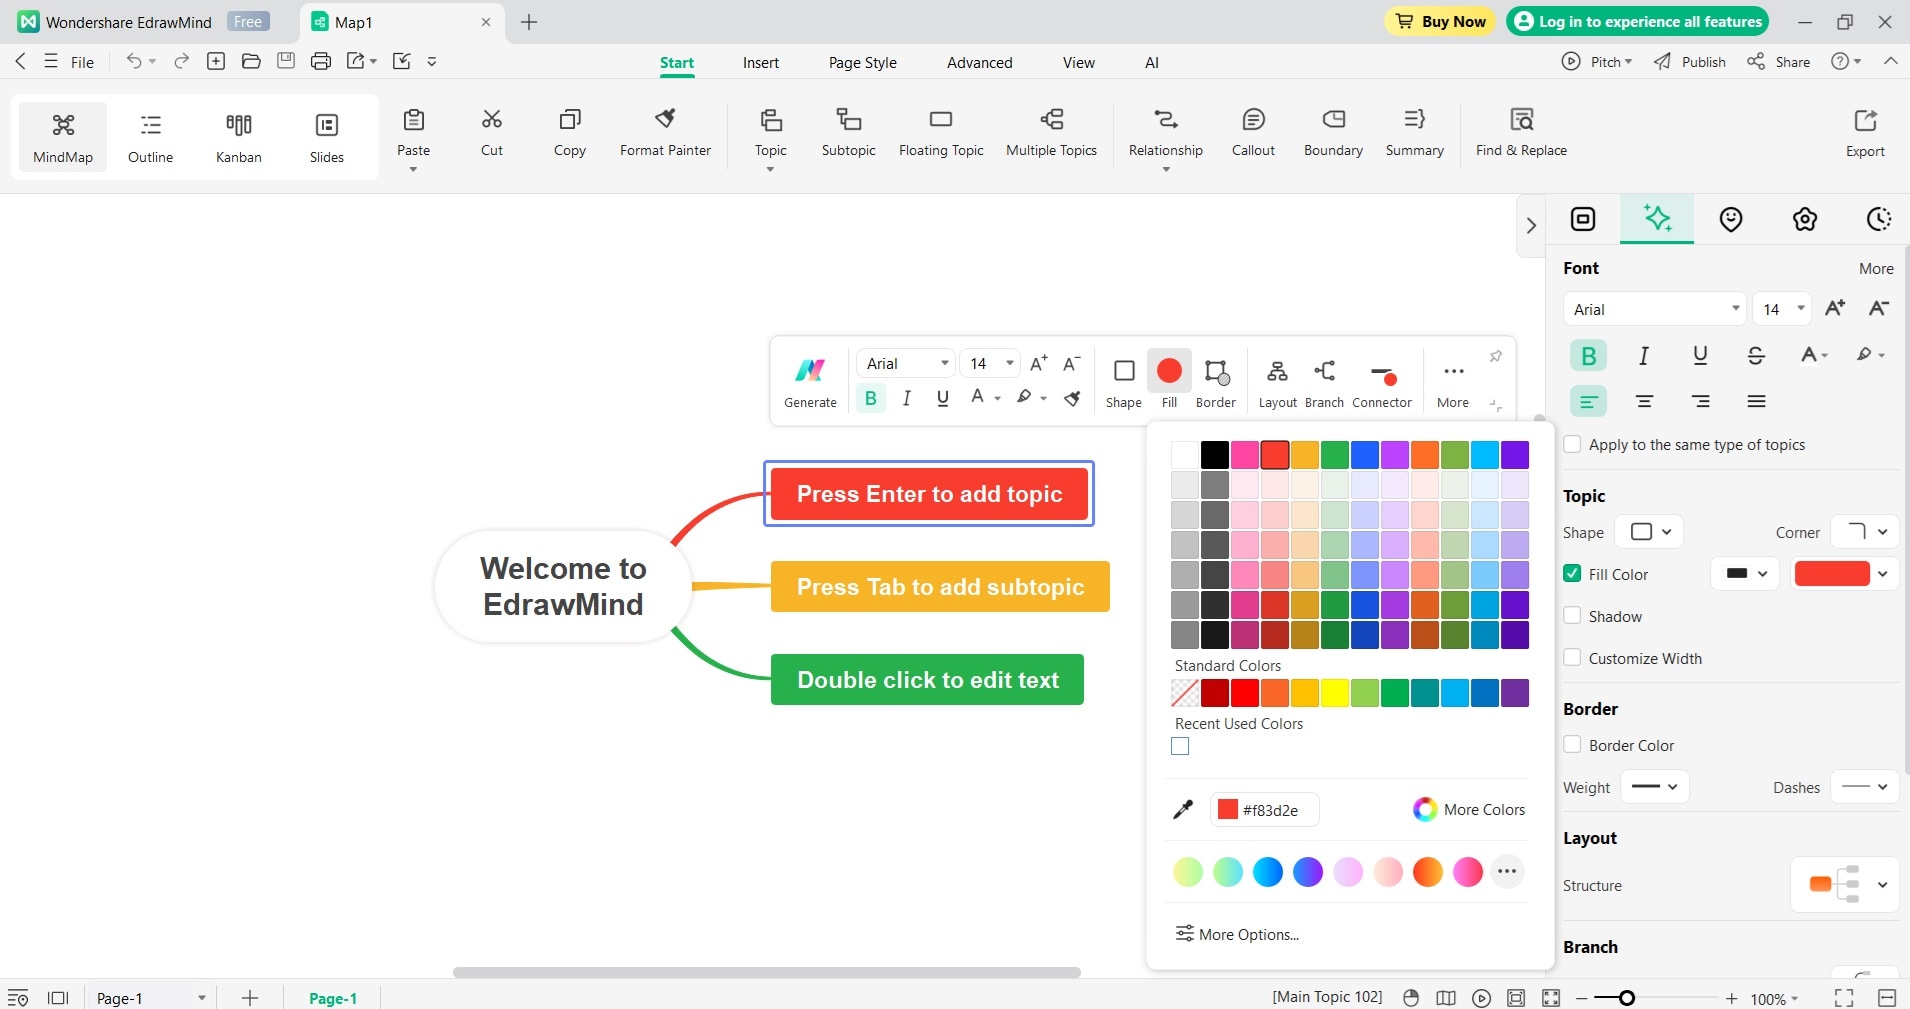
Use the customization options in EdrawMind to change the layout, colors, fonts, and styles of your mind map. This makes your diagram visually appealing and tailored to your preferences.
Step 4
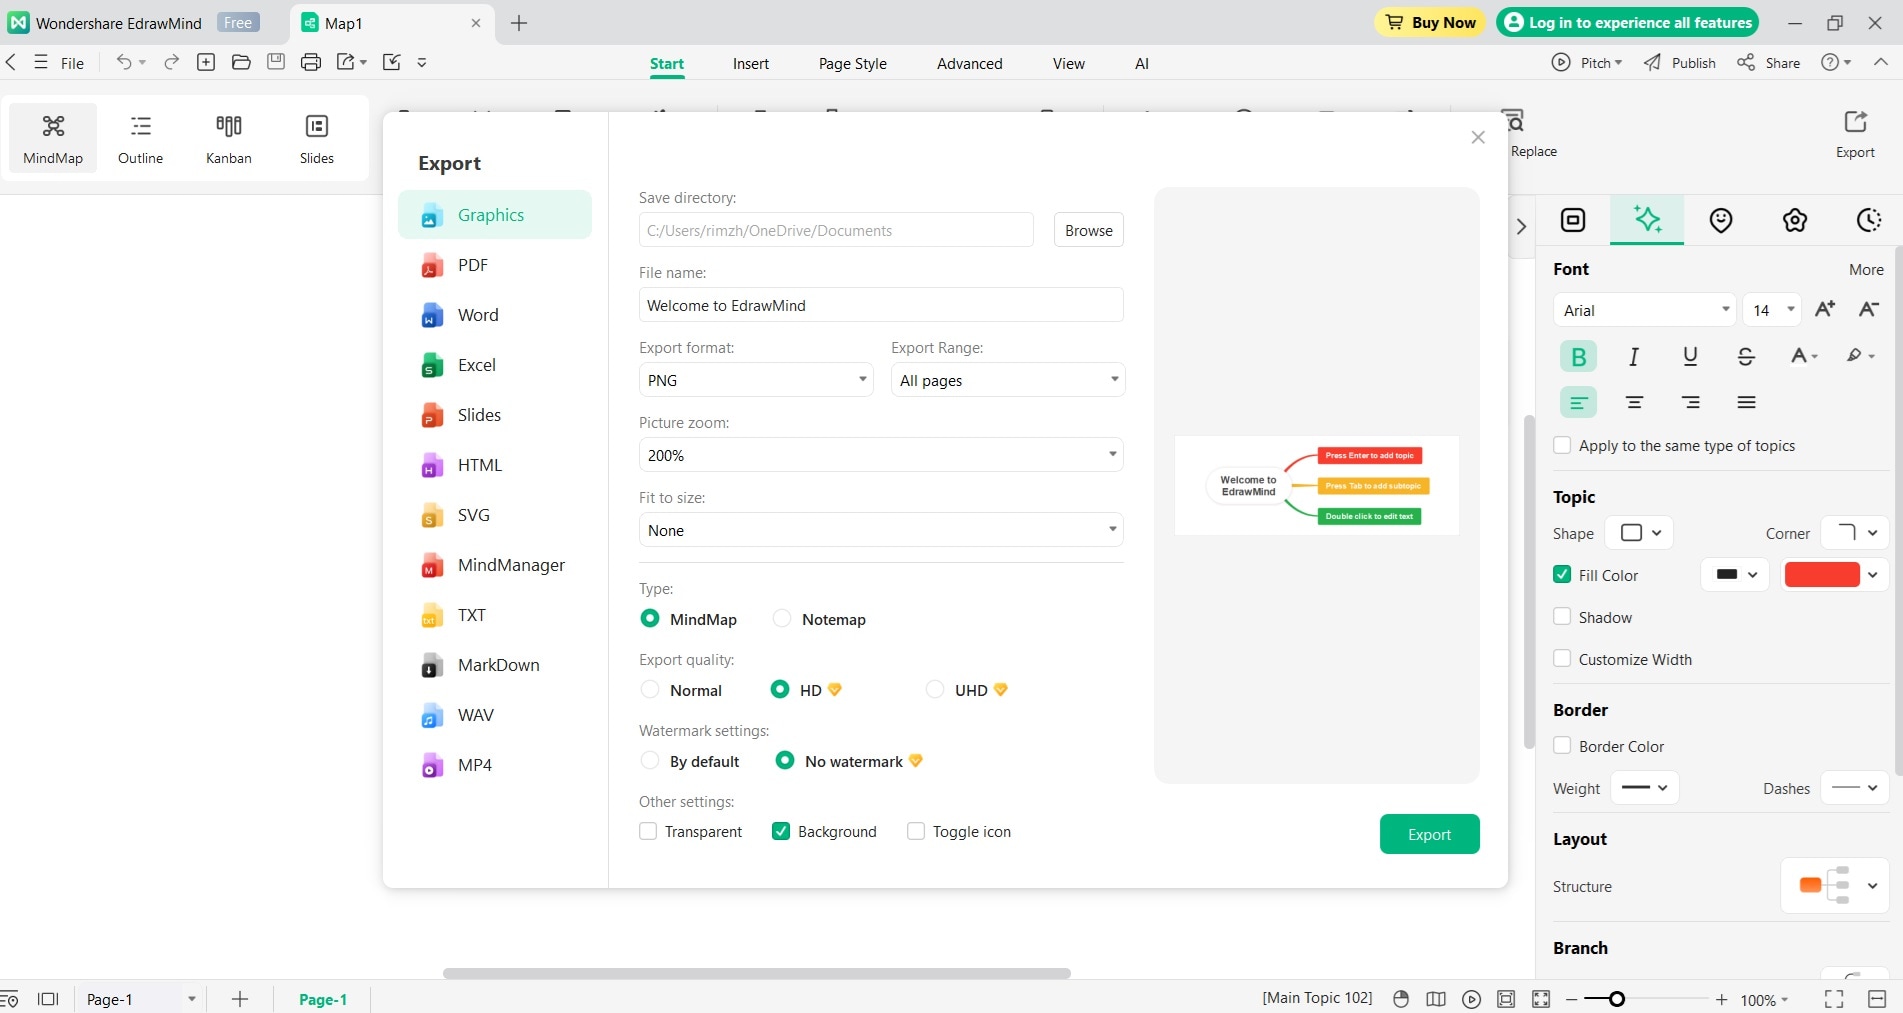
Once your mind map is complete, go to the File menu and select Export. Choose your preferred format (such as PDF, PNG, or other available options). Save the file to your desired location.
Conclusion
Kanban boards in Jira are a powerful tool for managing work and improving team productivity. Following the steps outlined in this guide, you can set up and use a Kanban board that fits your team's needs. Remember, the key to success with Kanban is to keep things simple and adjust as you go.
Whether you choose to use Jira's Kanban boards or an alternative like EdrawMind, the important thing is finding a system that works for your team.
With practice and consistent use, you'll find that visualizing your workflow becomes second nature, leading to better organization and more efficient project management.


