

Beginning in 1914, the First World War was no less than a global nightmare. The never-ending chemical and trench battles, followed by miscalculations on the part of nationalistic leaders, gave us enough to regret. The war, spanning four years, is all about exacerbating the animosity between nations, which comes with unavoidable consequences.
However, the multiple theatres of war on regional and global fronts often led to the confusion of the chronology. But no worries. Let’s use the World War I timeline to make sense of how the events progress.
In this article
Part 1: World War I Timeline in Order
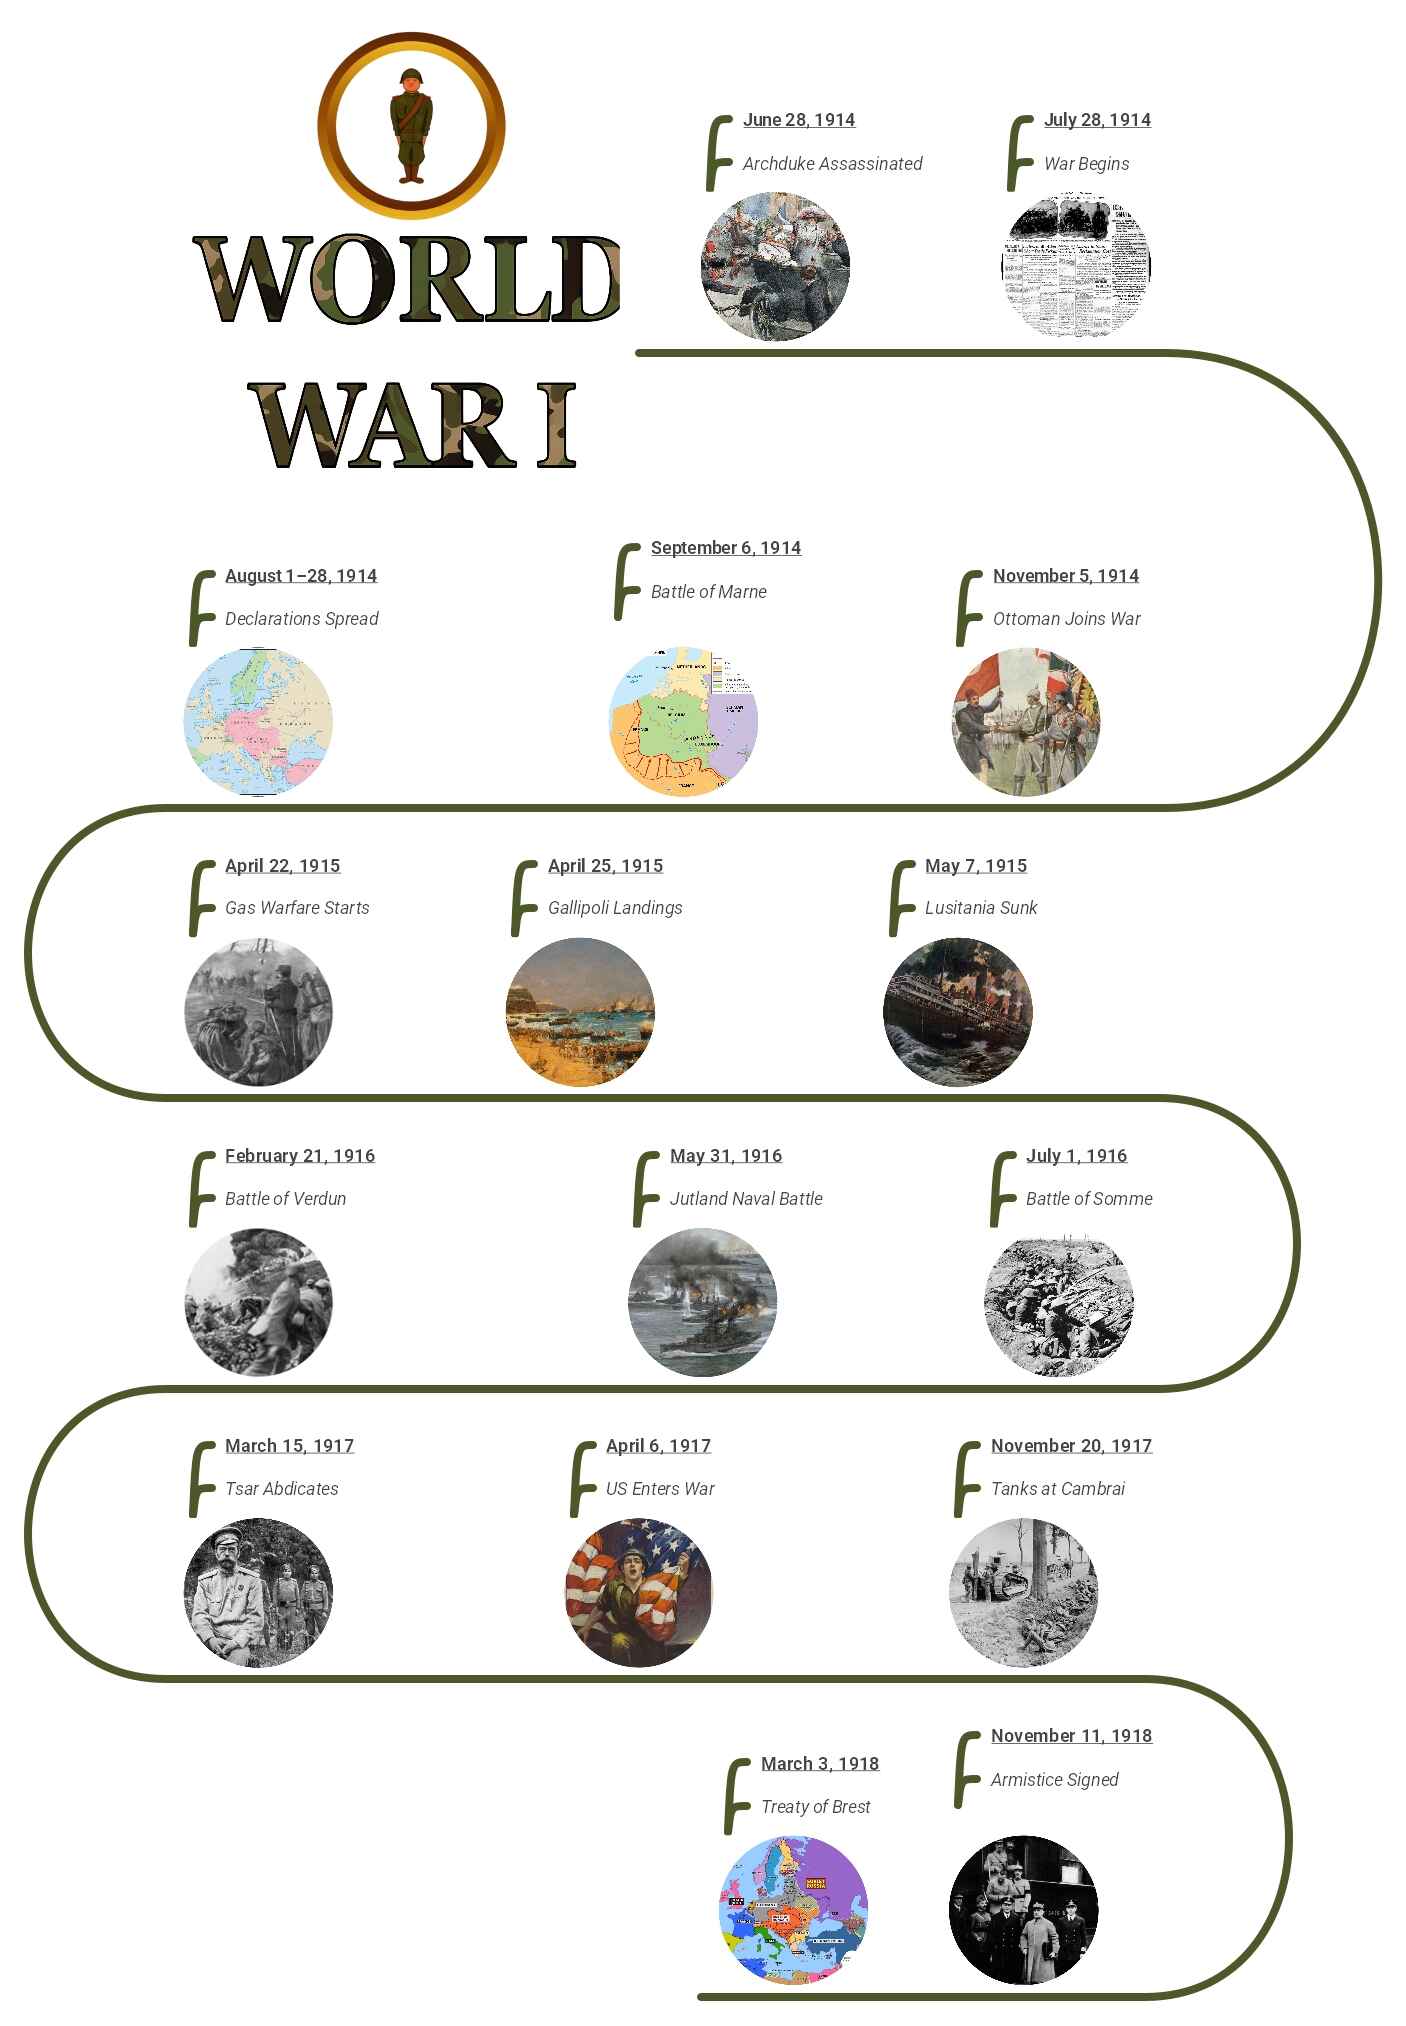
June 28, 1914 - Assassination of Archduke Ferdinand
A Bosnian-Serbian nationalist student based in Sarajevo assassinated Archduke Franz Ferdinand of Austria and his wife, Sophie. The couple was travelling to look into the resistance against troops in the occupied Sarajevo.
July 28, 1914 - Official Declaration of War
The Austrian-Hungarian emperor, Franz Joseph, declared war on Serbia and Russia, blaming them for his heir's assassination. In response, Russia turns to France for military support.
August 1 to 28, 1914 - Regional Powers Enter the Scene
During August, most regional states entered the war theatre, driven by their national interests and alliances. Here are some noteworthy declarations of war from this time.
- Germany against Russia, Belgium, and France.
- Austria against Russia and Belgium.
- Britain against Germany and Austria.
- Montenegro against Austria and Germany.
- France against Austria.
- Japan against Germany.
This is also when the British Expeditionary Forces invaded France. This further snowballed into the Battle of Tannesberg by late August. During this battle, the Russian army invaded Prussia, taking 125,000 prisoners of war.
September 6, 1914 - First Battle of Marne
The First Battle of the Marne began between France and Germany. Germany advanced 30 miles into Paris. However, over the next two days, France deployed more than 6000 infantrymen, defeating the Germans. The British Expeditionary Forces also aided them on the ground.
November 5, 1914 - Allies against the Ottoman Empire
France, alongside the British Expeditionary Forces, declared war on the Turkish Empire, also known as the Ottoman Empire.
April 22, 1915 - Second Battle of Ypres
The Second Battle of Ypres begins, with Germany initiating chemical warfare against the Allies' trenches. This resulted in 5000+ French and Algerian casualties. By the end, both sides had used significant quantities of chemical weapons.
April 25, 1915 - Allies Landed on the Gallipoli Peninsula
The Australian and New Zealand Army Corps and the British Royal Naval Division landed on the Gallipoli Peninsula in an attempt to capture the Ottoman Empire. However, given the massive resistance from Constantinople, the Allies failed.
The confrontation marked the greatest disaster for the Allies and resulted in more than 200,000 casualties. It also ultimately led to the collapse of the British government.
May 7, 1915 - Lusitania Sinking (The British Ocean Liner)
The German U-boat torpedoed Lusitania, a British ocean liner, near the Southern coast of Ireland. The liner sank in just 18 minutes. It was carrying around 1200 people, including 128 US citizens. Another significant loss for Britain was the 170 tons of ammunition and artillery shells on the ship.
February 21, 1916 - Battle of Verdun
Germany attacked France, initiating the Battle of Verdun. The battle lasted for ten months and resulted in more than 700,000 French casualties. By the end, the entire village had been wiped from the map.
May 31, 1916 - Jutland Naval Blockade
The French and British fleets confronted 60 miles of the Jutland coast in Denmark. It is the only major sea confrontation between the two sides.
July 1, 1916 - Battle of the Somme
The Battle of the Somme began with the Allies' attempt to push Germany out of Verdun. It was considered a success in this sense. However, the British suffered heavy losses, with nearly 20000 troops killed. Hence, July 1 was made the single bloodiest day in the British Army's history.
March 15, 1917 - Abdication of Tsar Nicholas II
Following the revolts in St. Petersburg, the capital of Russia, Tsar Nicholas II abdicated the throne. This day also marked the Russian Revolution, which eventually overthrew the Romanov dynasty. Now, Vladimir Lenin and the Bolsheviks held absolute power in the country.
April 6, 1917 - The US Entered the War against Germany
The US president, Woodrow Wilson, ended his long-term policy of neutrality. Four days before, he cited that Germany's practice of unrestricted submarine warfare was the primary motivation behind this step.
November 20, 1917 - British Forces Drive the Germans Away
Britain launched an offensive in Cambrai, France, against Germany. During the confrontation, both sides used large-scale tanks. Initially, Britain remained successful in destroying German defences and took approximately 7500 prisoners. However, the rough terrain and weather conditions pushed Britain back to where it started.
March 3, 1918 - Treaty of Brest-Litovsk
The Soviet government agreed to peace with the Allies after realizing its insufficient manpower. Hence, after a considerable delay, Russia signed the Treaty of Brest-Litovsk and surrendered its territories to Ukraine and Finland.
November 11, 1918 - Armistice Day
The Allies and Germany concluded an armistice based on Woodrow Wilson's fourteen points. The idea was that Germany could not continue the long battle because revolutionary forces were taking up the defense lines and major industrial centres.
Part 2: How to Make a Similar Timeline using EdrawMind?
An extensive chronology can make your mind boggle, even if the period is short. Such is the case with the First World War. Here, the wise way out is getting help from a timeline to make sense of the events. These infographics geographically showcase the data in an easily understandable manner.
The best part is that we now have advanced tools like EdrawMind to get help throughout. Its preset structure and resourceful canvas space enable even a beginner to plot a timeline. Let's see how we can make a similar World War I timeline using this tool.
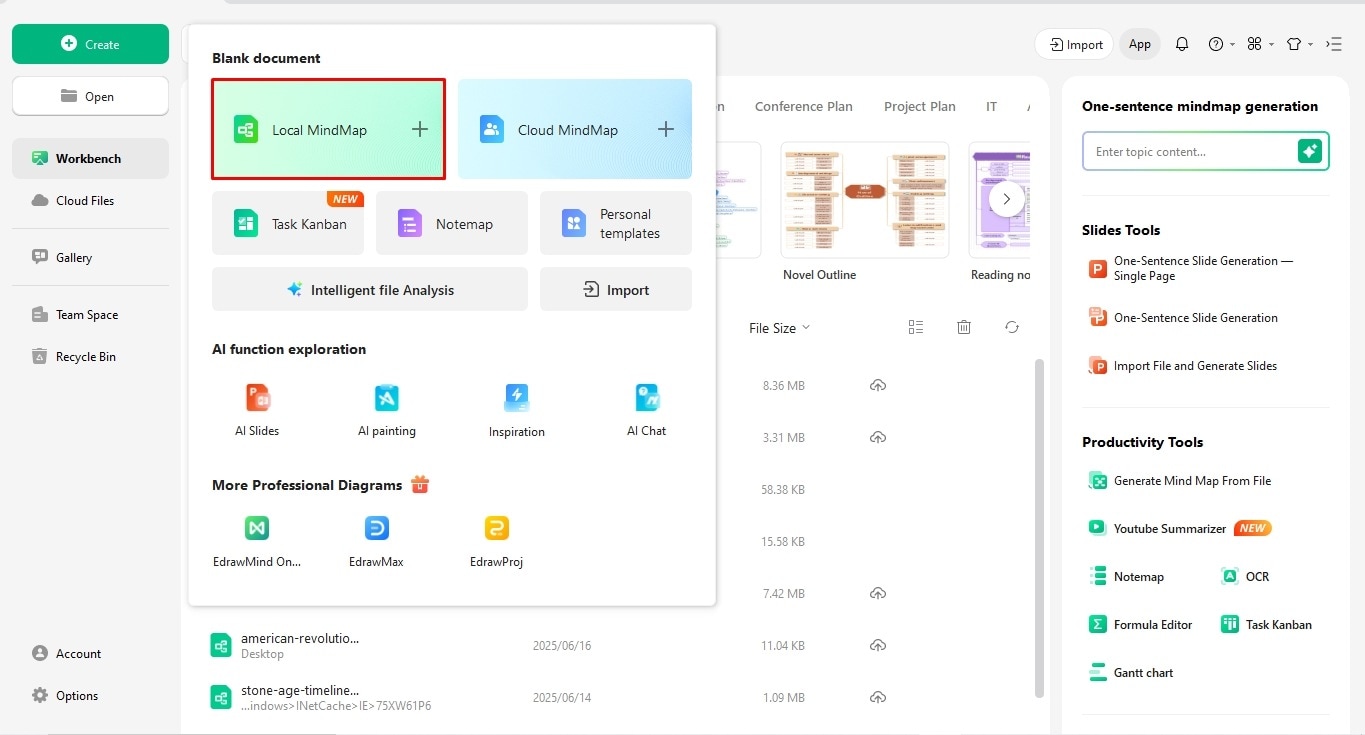
Step 1: Open Blank Canvas
Install the EdrawMind desktop version. Or try EdrawMind online.


Register your Gmail account or access the software using your social media handles (Facebook, Google, etc).
Alternatively, log in to your Wondershare account.
Explore the dashboard and click Create > Local Mind Map from the top-left corner.
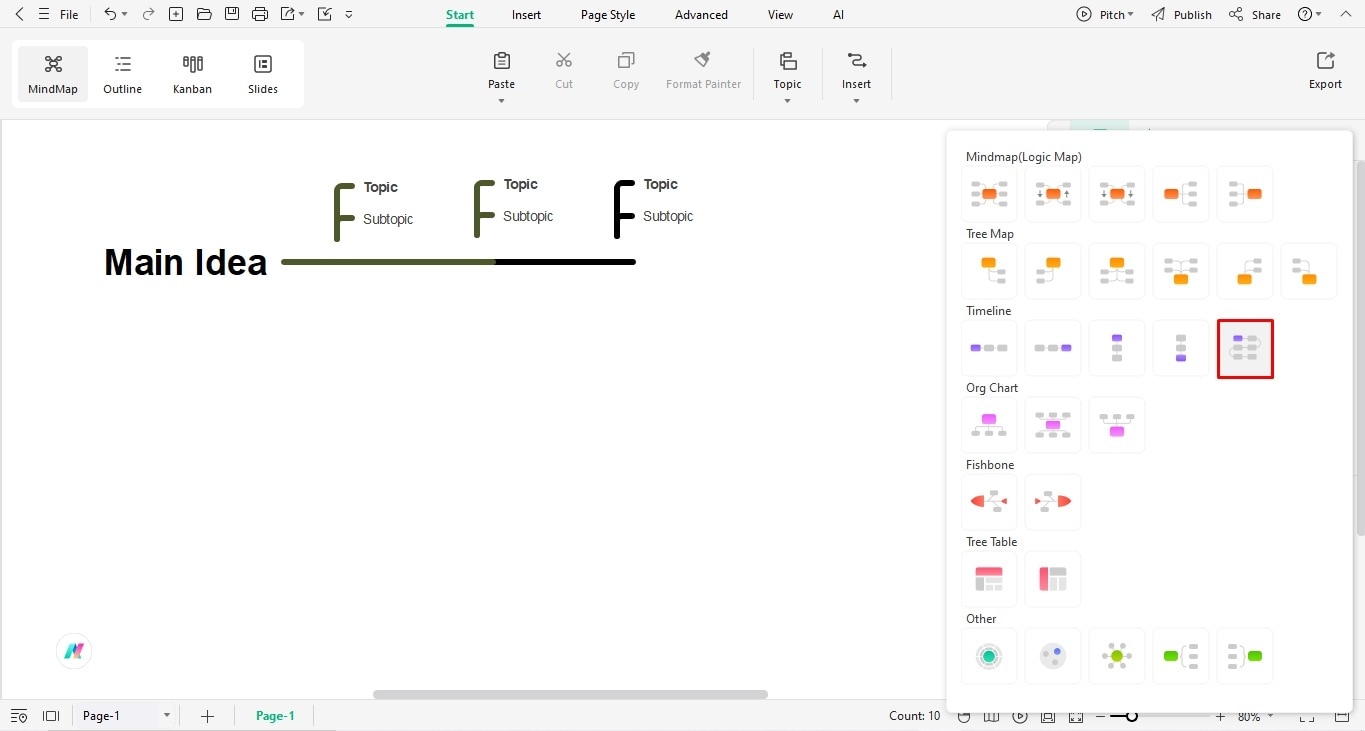
Step 2: Adjust the Layout
- Once on the dashboard, start by adjusting the layout to the timeline. The default layout of the EdrawMind canvas is set to a mind map. So, be mindful and don't just jump into expanding the structure.
- Select your structure from the display and change the Layout to Timeline from the right-side customization panel.
- Take a moment to understand your data. Decide whether a horizontal or snake-like structure is suitable for the information.
- For instance, the World War I timeline features a continuous flow of extensive information, much of which is a consequence of previous events. Hence, a snake-like structure is better suited for such data.
Step 3: Expand the Structure
- Now, you can proceed to expand the branches further. Most people do it at a later stage while entering data. Although there is nothing wrong with it, this practice unnecessarily complicates the process, especially for beginners.
- So, count the number of milestones in your data and choose accordingly.
- For instance, the timeline of the First World War has 16 major events. So, let's include one topic box for each event.
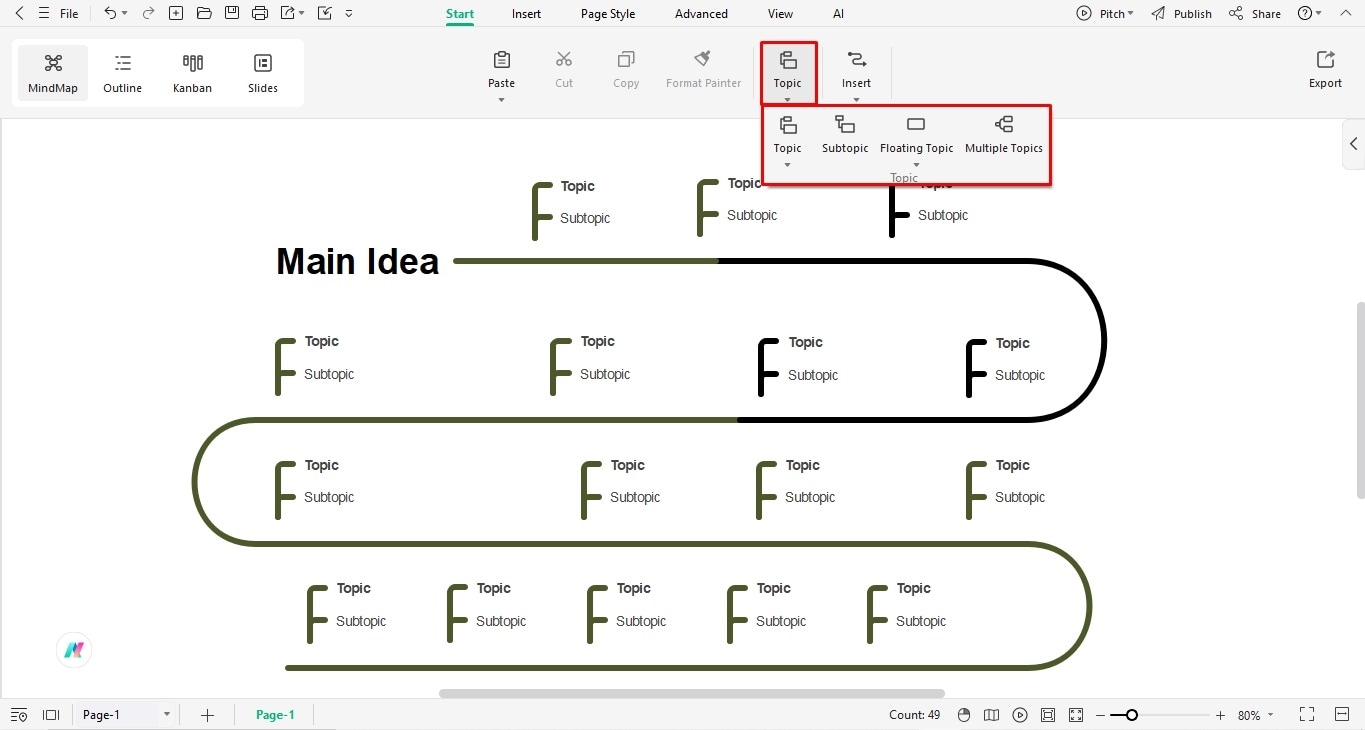
- For this, go to the Start tab at the top and click Topic > Topic. Or, simply press the Enter key on your keyboard to add a new topic.
- Wait, that's not it. You will also need boxes for the description of these major events.
- To add these boxes, again, visit the Start tab and choose Topic > Sub-Topic. You can always customize and choose floating topics for supplementary information.
Step 4: Insert Text Labels
- Notice - your timeline structure should be looking much better now. Now that you have a sense of direction, let's add the text labels for major events.
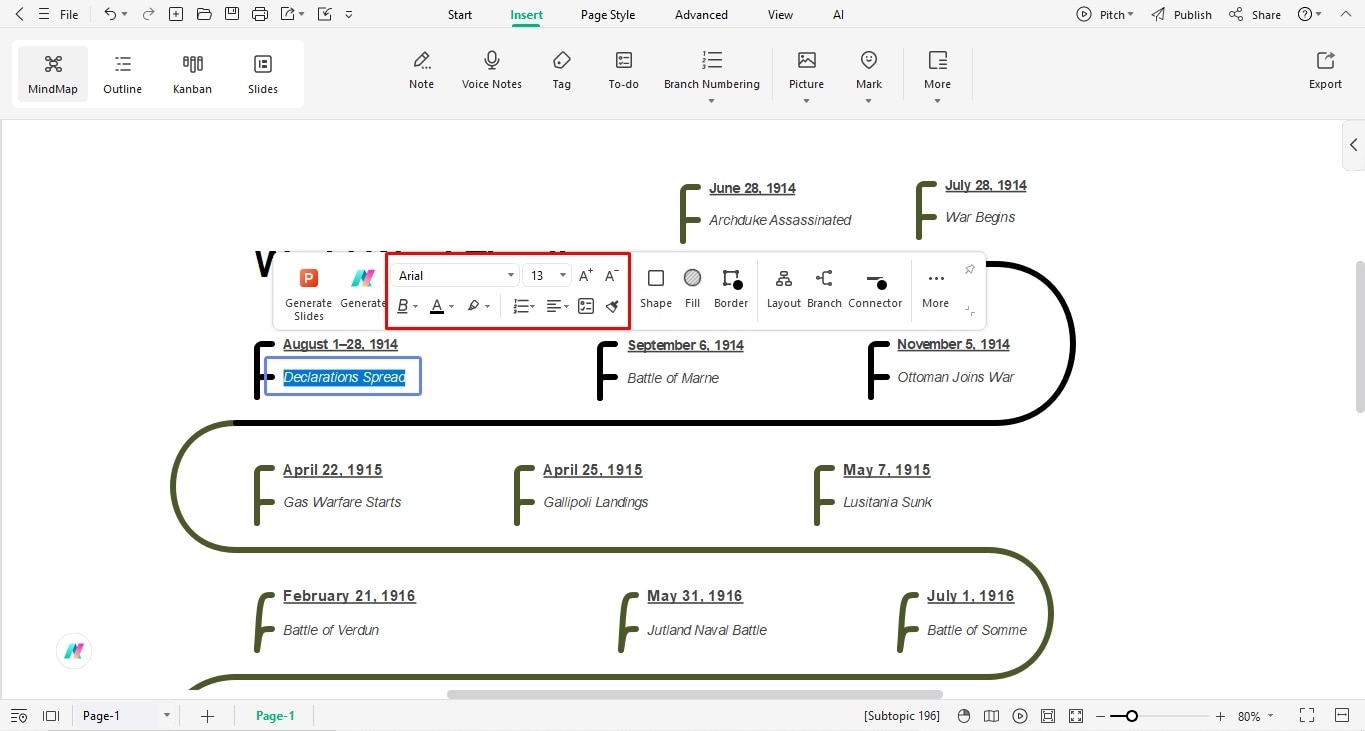
- Double-click any box and start typing.
- Do not overcrowd it. Just the name and date of the event are enough.
- Change the font size, style, and color from the on-screen prompt.
- You must be thinking, how do I explain what happened during these events? Well, the sub-branches are for this purpose.
- Double-click the sub-branches and start typing.
- Similarly, change the font details from the on-screen prompt.
Bonus Step: Derive Your Timeline Content with Edraw AI
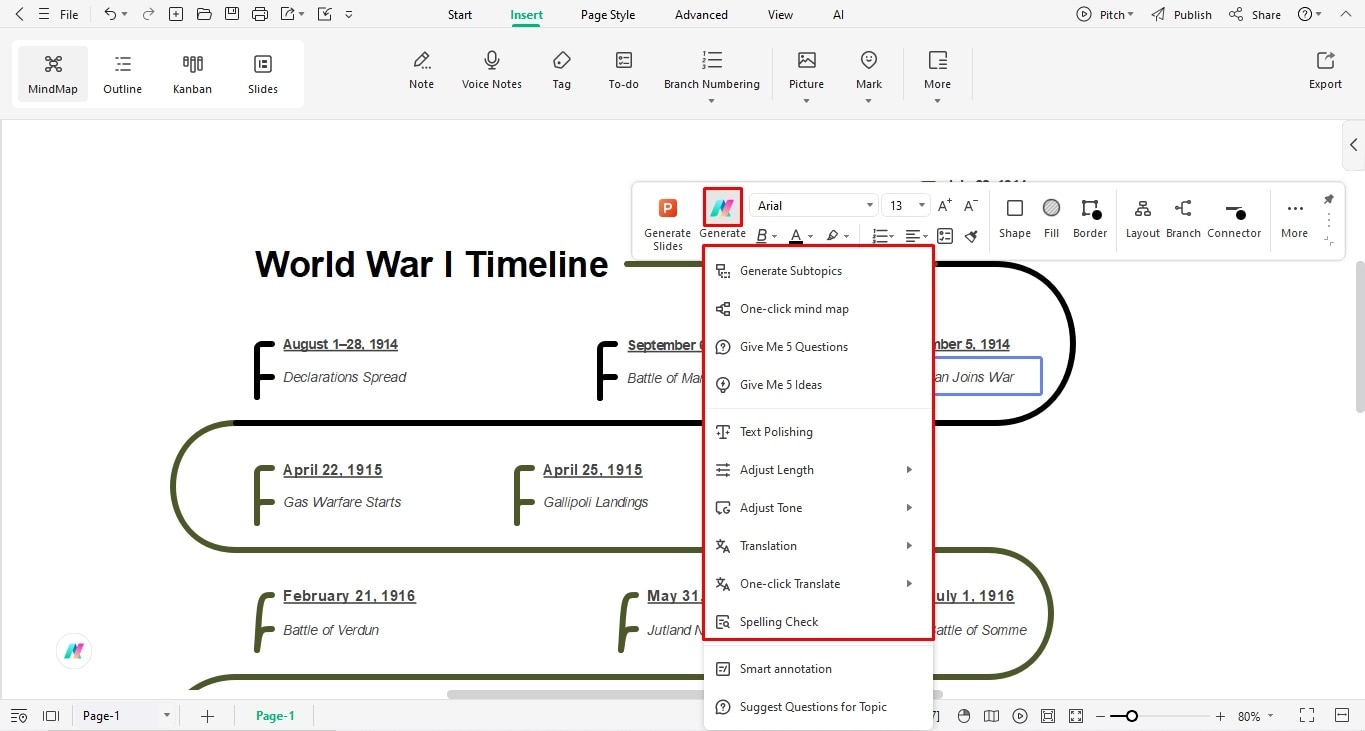
- Have a tight deadline and do not have the time to conduct research? No worries - Edraw AI helps you with it. It is an intelligent research assistant that helps you search for individual events and optimize text.
- Select the Topic you want to explain with AI and click Generate > Generate Sub-Topic from the on-screen prompt.
- Moreover, you can also shorten the text, translate it, or polish it further with this menu.
Step 5: Add Pictures to Your Timeline
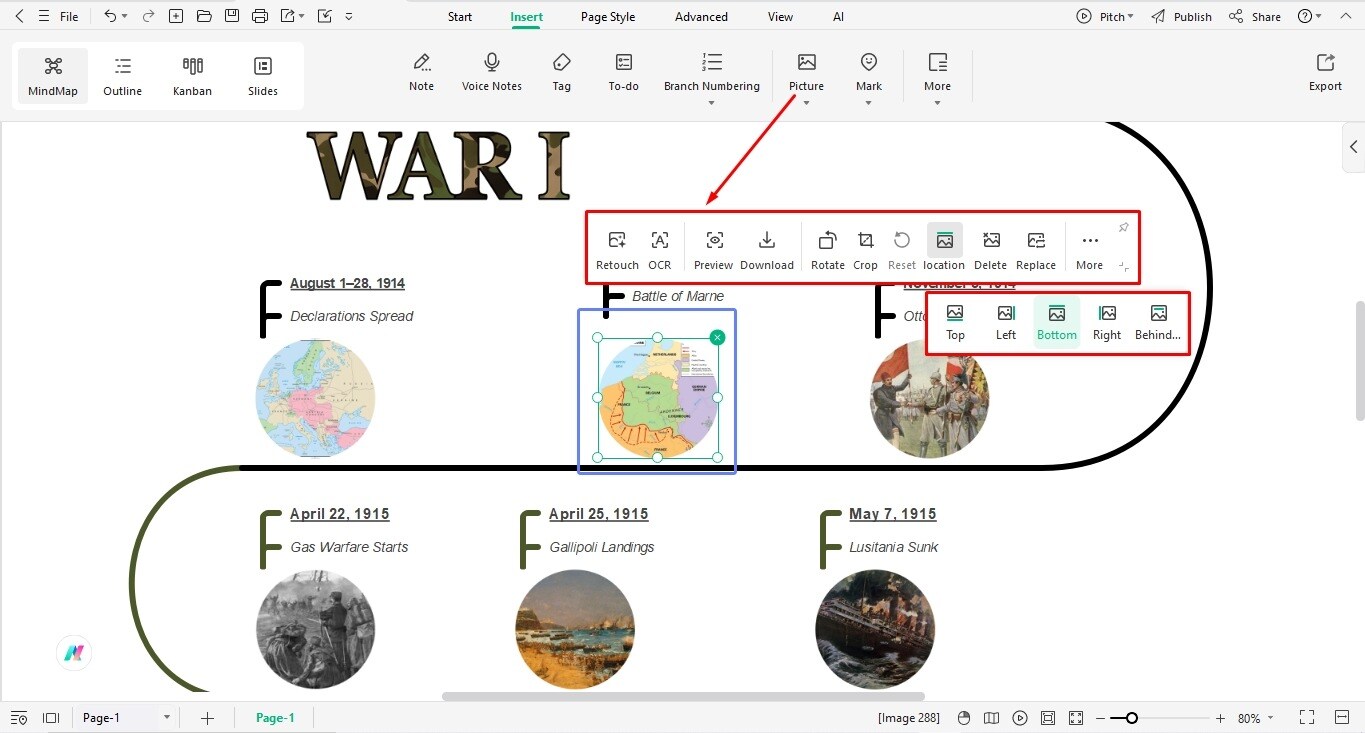
- After chronology, the next primary detail of the timeline lies in the visual cues. And, pictures are a great way to include this, as they help gauge your audience.
- To add them, visit the Insert tab at the top.
- Click the Picture, and browse them from your device.
- Crop, fine-tune, and rotate them accordingly.
- Moreover, you can place them however you like using the Location button from the on-screen prompt.
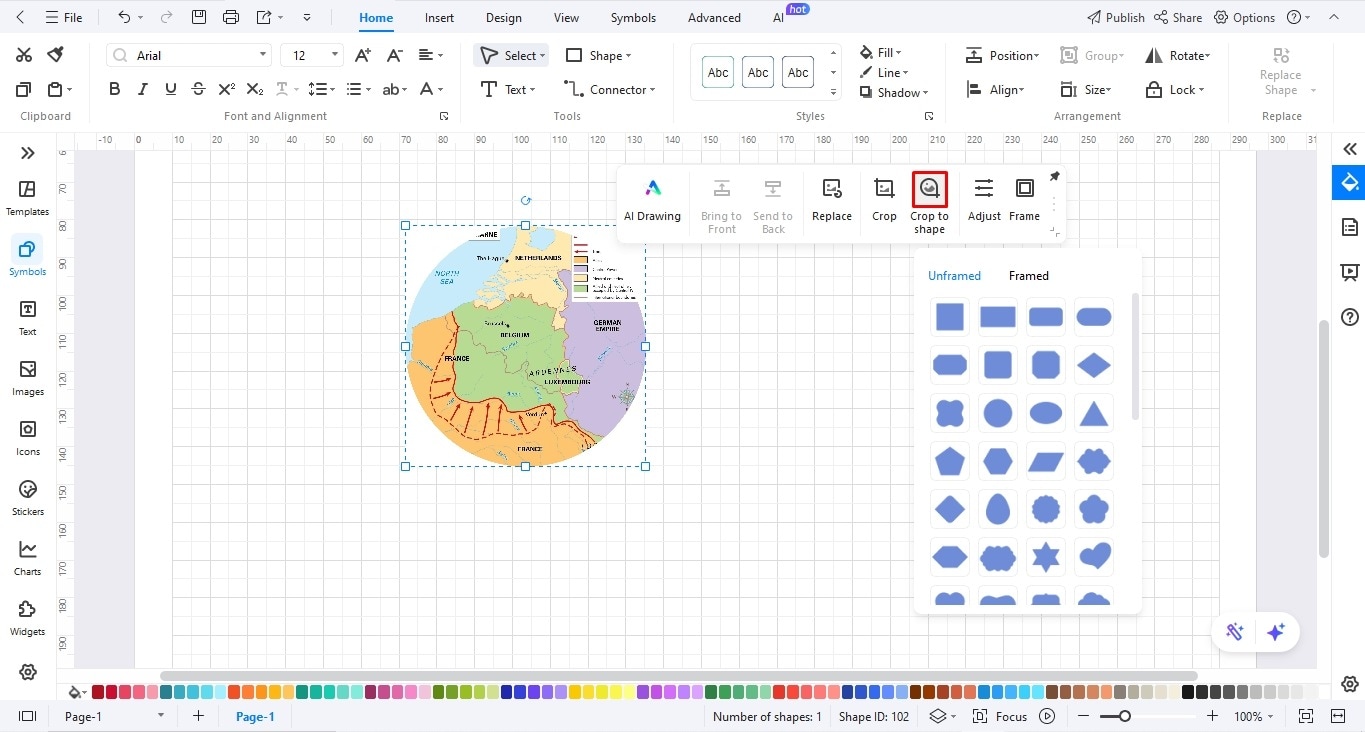
Bonus Step: Adjust Your Picture Frame with EdrawMax
- Oftentimes, the standard square frame of the pictures does not fit your timeline theme. EdrawMax is a great help in this case, as it lets you crop the frame of the image in a desired shape. Here is how it goes.
- Open EdrawMax blank canvas and paste your desired picture.
- Click Crop to Shape from the prompt menu and choose a preferred shape.
- Finally, paste it back in the EdrawMind canvas.
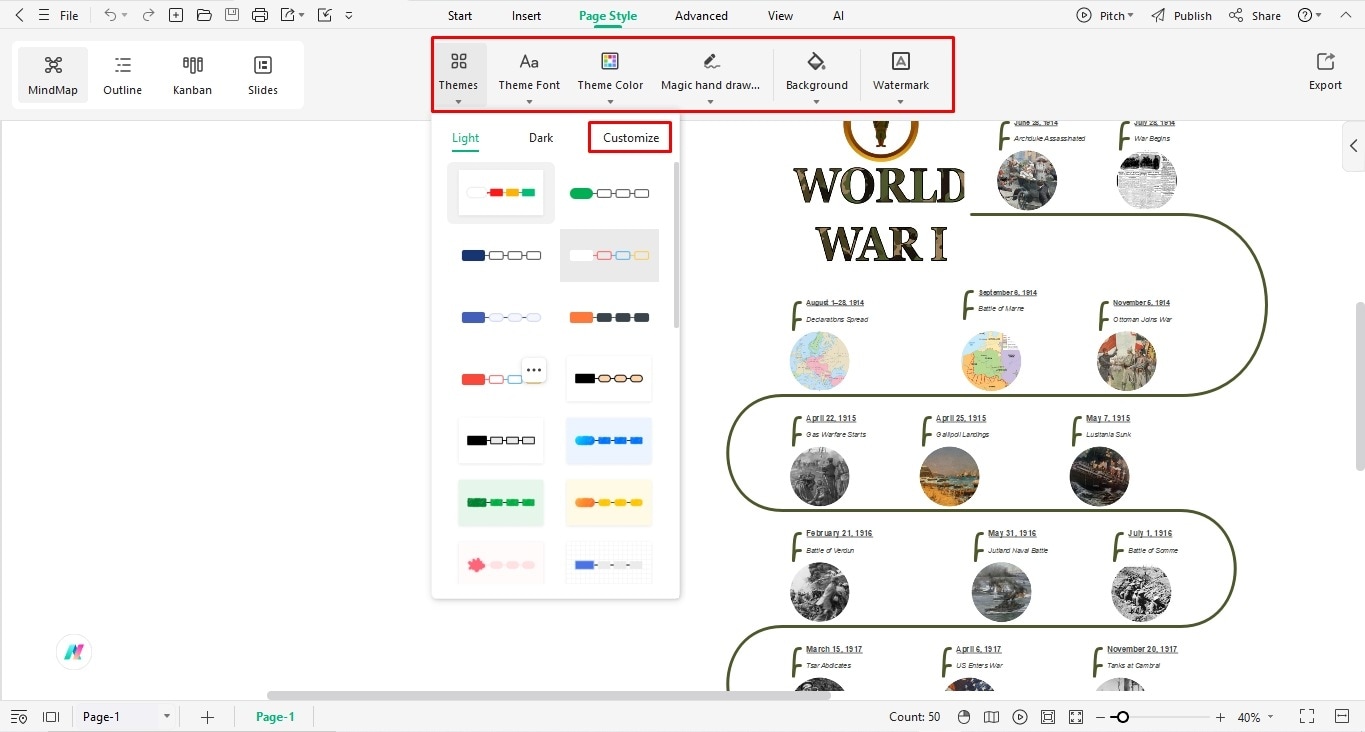
Step 6: Modify the Design Details
- Don't give up now. You are almost there. Just a few design elements and that's it.
- Locate the Page Layout button at the top.
- Apply a theme, color scheme, and background image that best suits your timeline.
- You can also customize themes using your brand colors, fonts, etc. This theme can be used in other infographics you make.
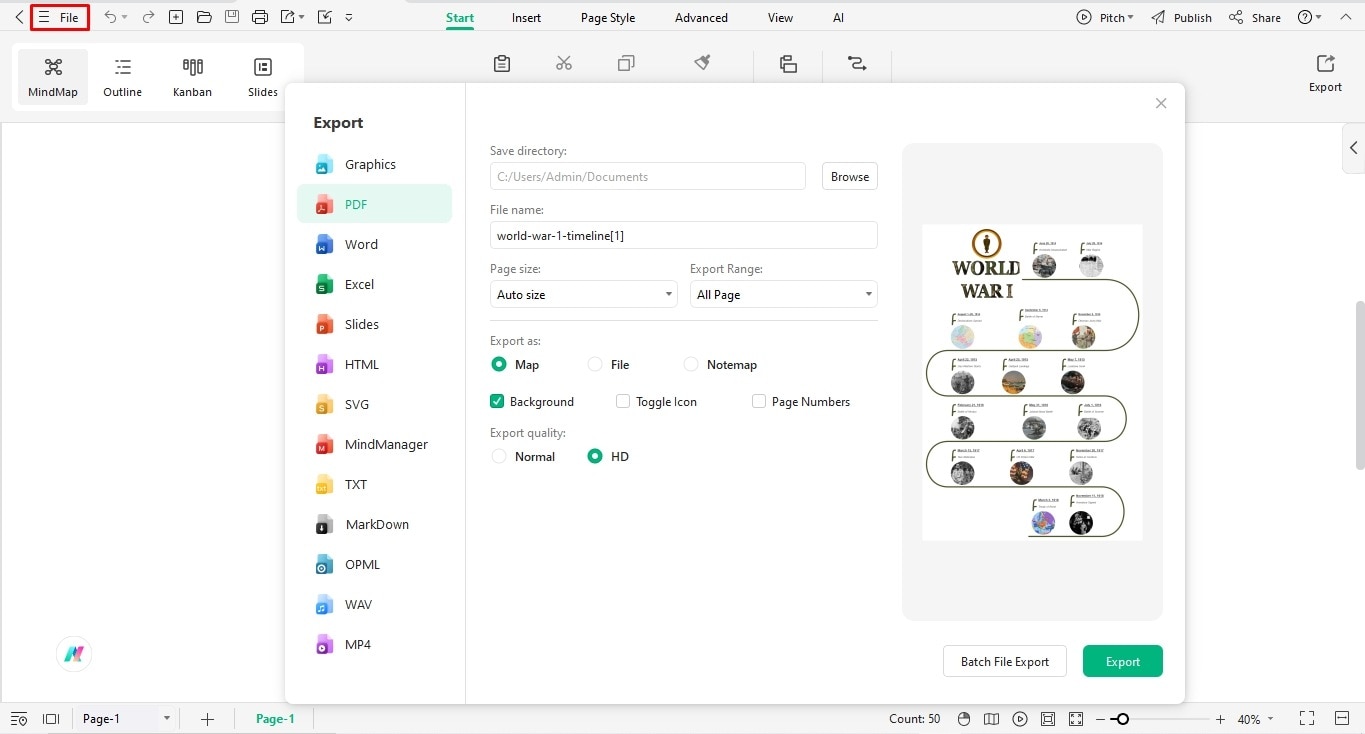
Step 7: Download and Save Your Work!
- Satisfied with the infographic you have made? Let's save it.
- Locate the File menu from the top-left corner.
- Click Export and download your infographic in more than ten formats (MS Office, Graphics, PDF, etc).
- Or, select Save As and download the EdrawMind file (emmx.) for further editing in the future.
Conclusion
Just like that, we have captured the messiest course of events in a single, easily understandable World War I timeline. You can do the same, even with no design skills. Make use of EdrawMind's resourceful kit to test your diagramming skills. Believe me, it won't take more than ten minutes.