


You can make a family tree in Excel in two practical ways: start from a family-tree template or build the hierarchy with SmartArt/shapes. Templates are faster when the number of generations is already known; SmartArt is better when you want to add, remove, and rearrange relatives manually.
The main challenge is that a family tree is not exactly the same as an organization chart: couples, siblings, children, and multiple generations can create relationships that a simple one-parent hierarchy does not represent cleanly. The steps below show how to structure names, generations, connectors, photos, and spacing in Excel, plus when a dedicated diagram tool is easier for a larger genealogy chart.
In this article
How to Make a Family Tree in Excel?
Creating a family tree in Excel isn’t as difficult as it sounds. You can make a family tree in Excel using two methods — templates and SmartArt. Let’s get started with the Template method first.
Make a Family Tree with an Excel Template
Firstly, launch MS Excel on your desktop and open a new spreadsheet. Click File > New from template or New, depending on your Excel version.
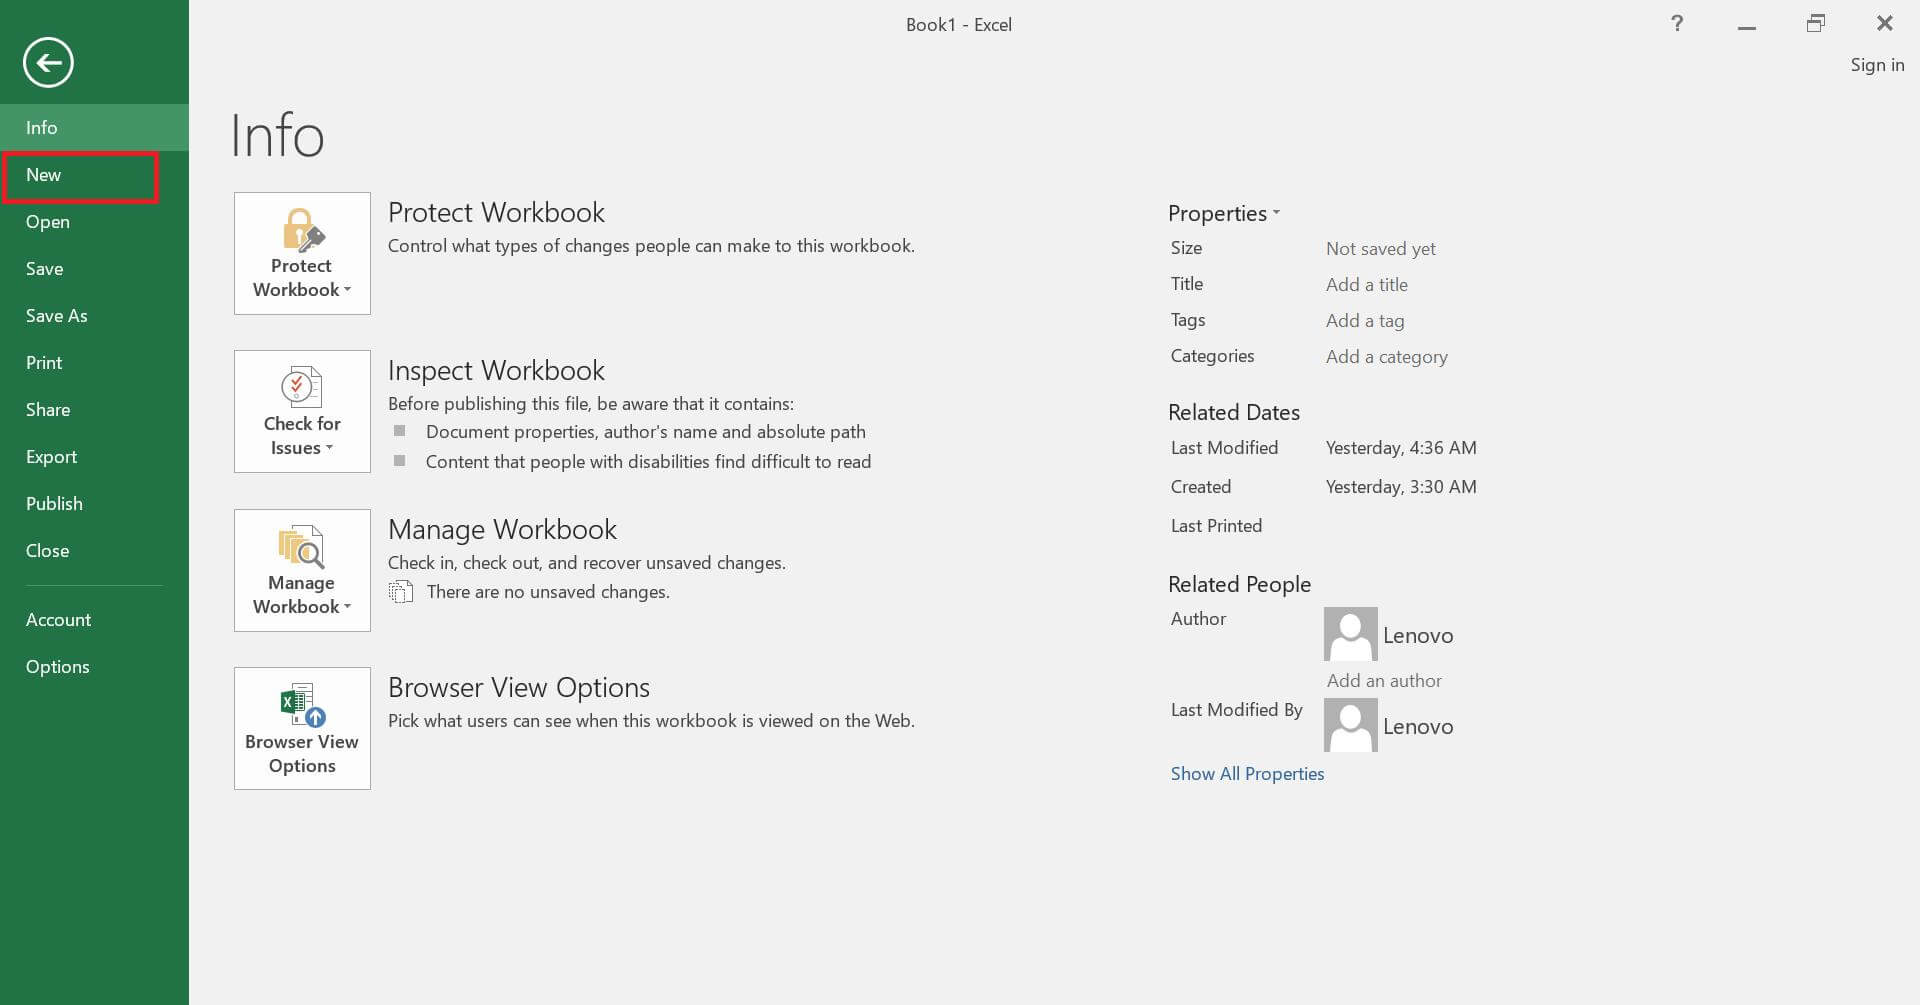
Preloaded spreadsheets and a search bar will appear. Type Family Tree Templates in the search bar and press Enter.
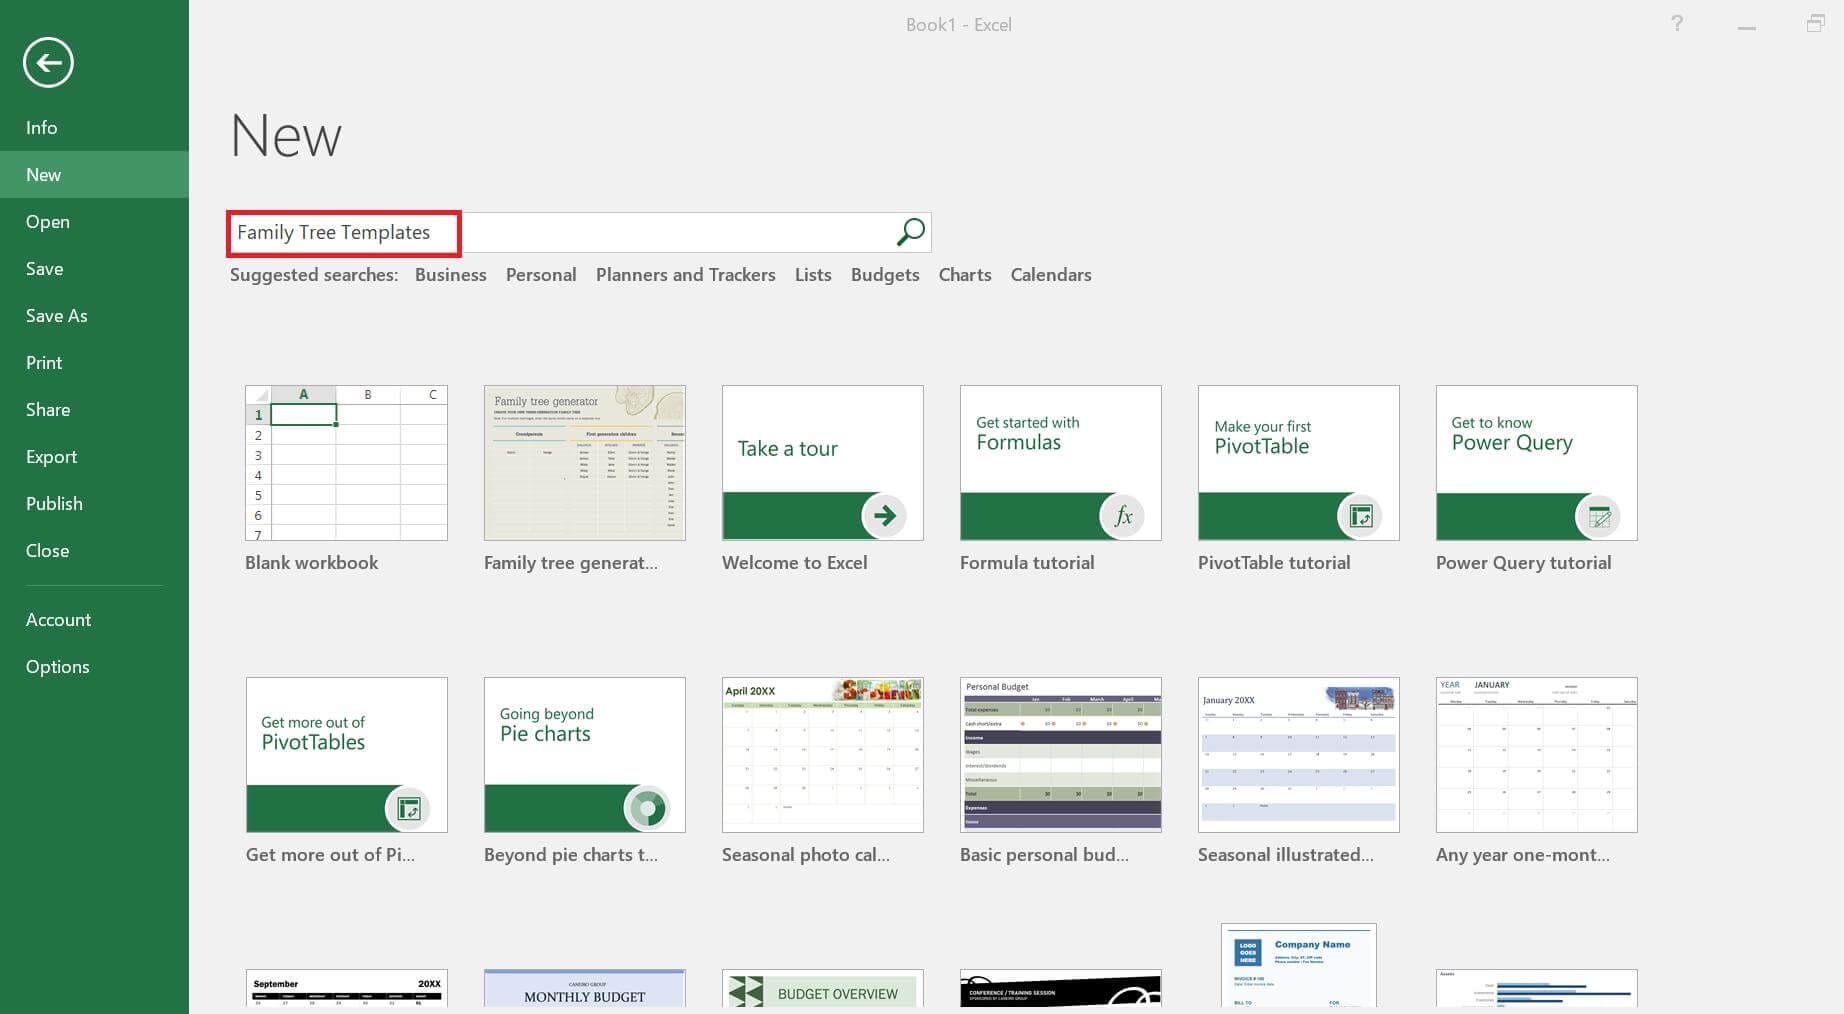
Select one of the family tree templates from the search results.
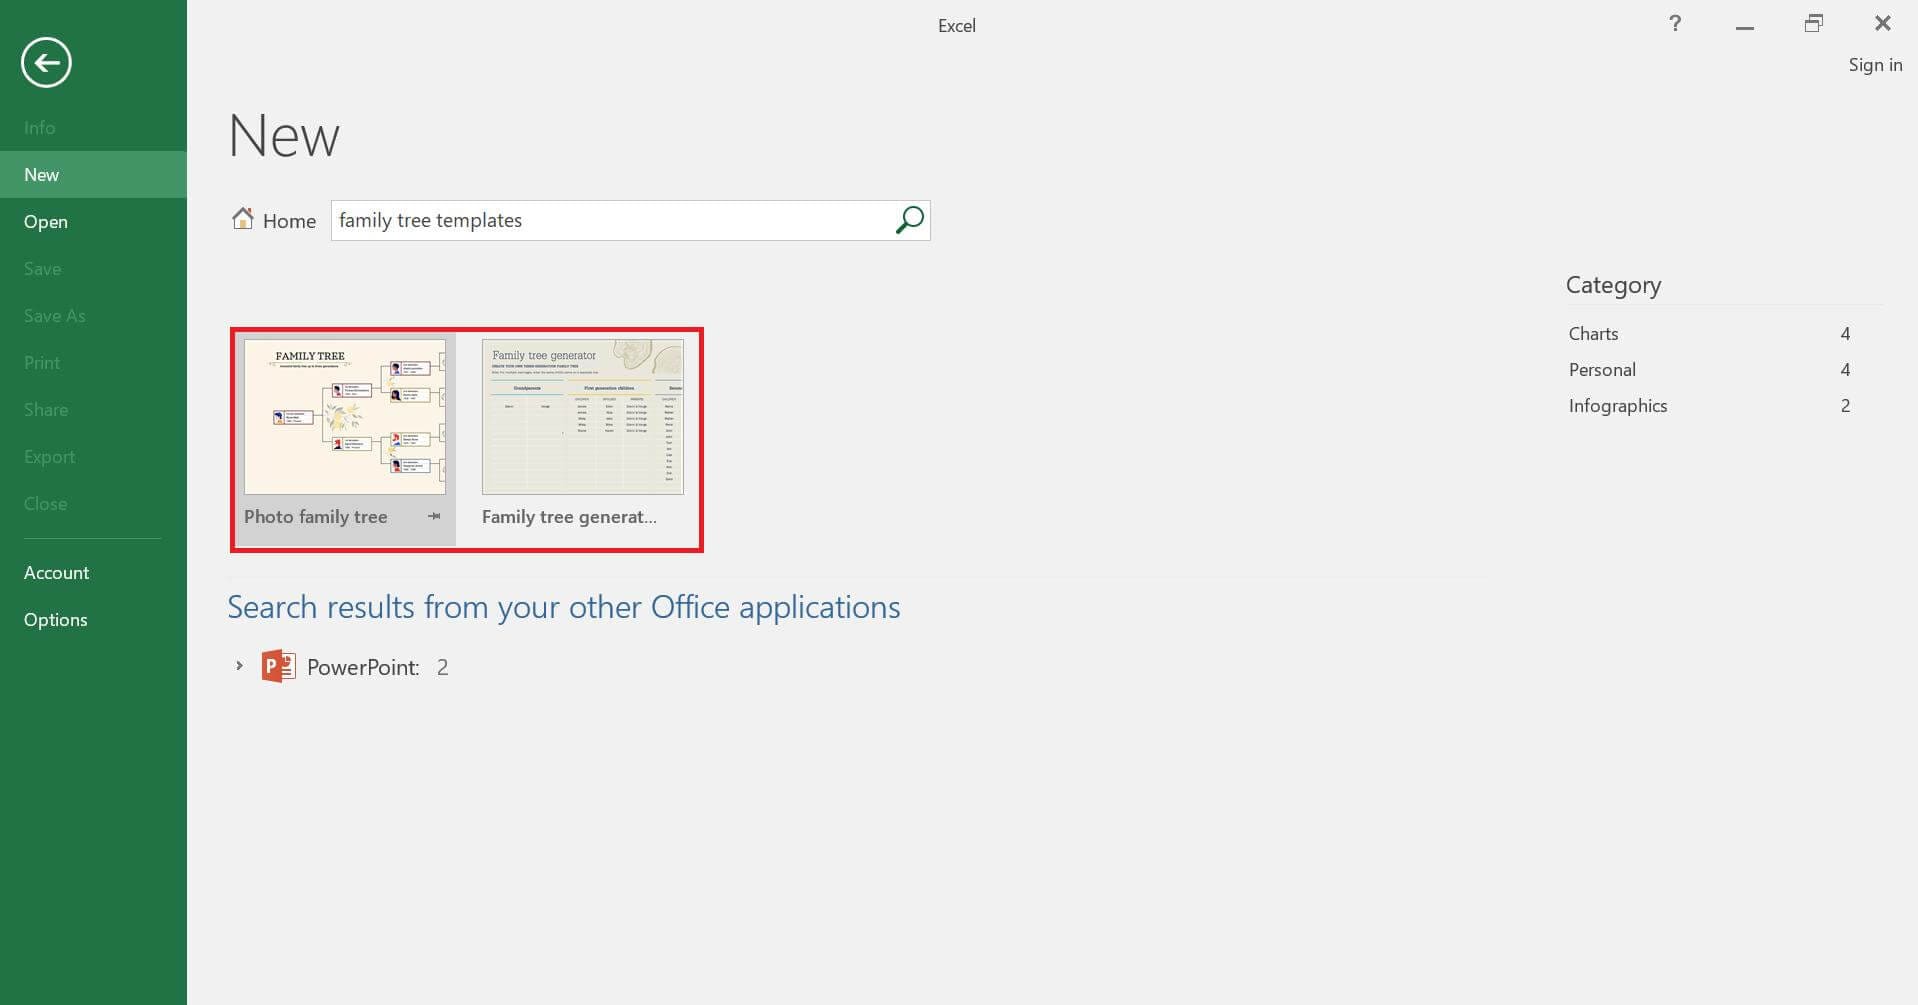
To download your preferred template, click Create, and it'll load into your Excel sheet. You can use it later as well, without downloading it again.
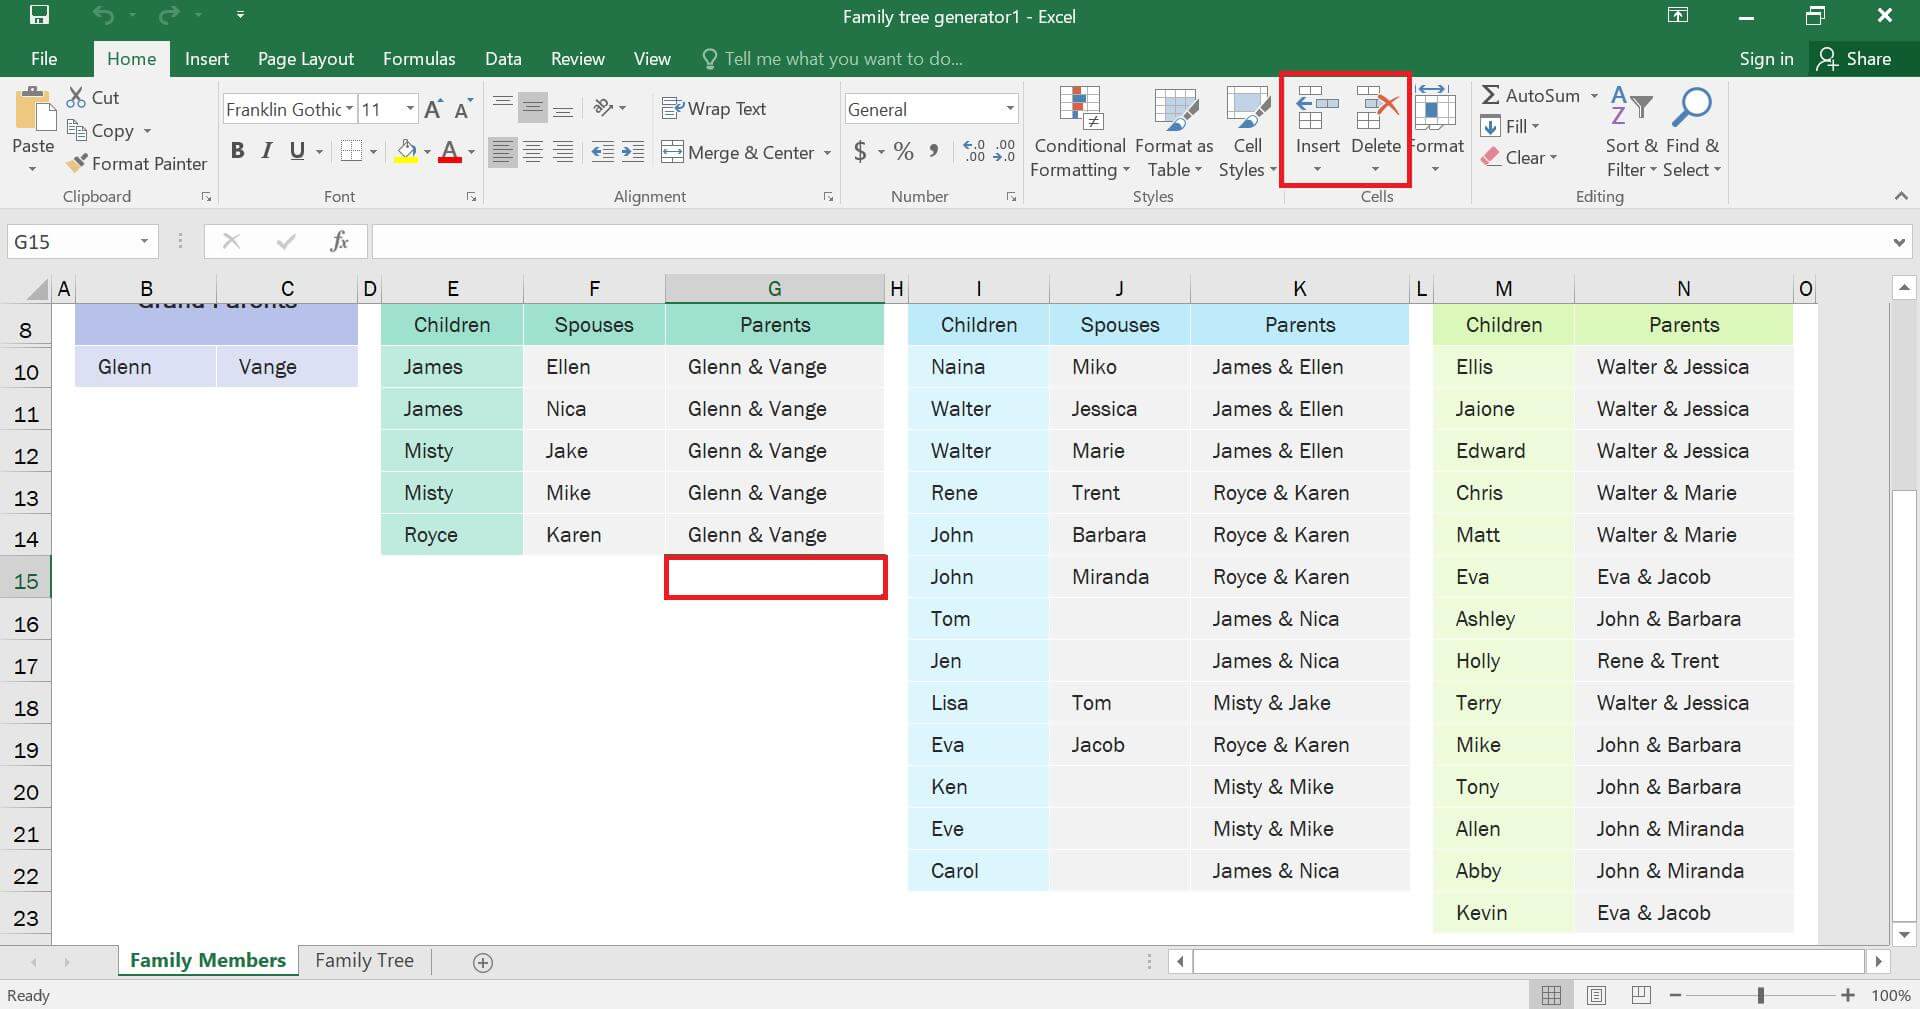
To add the names of the family members click the boxes in the templates. You can also add or delete boxes by navigating to the Insert and Delete tab in the Home panel.
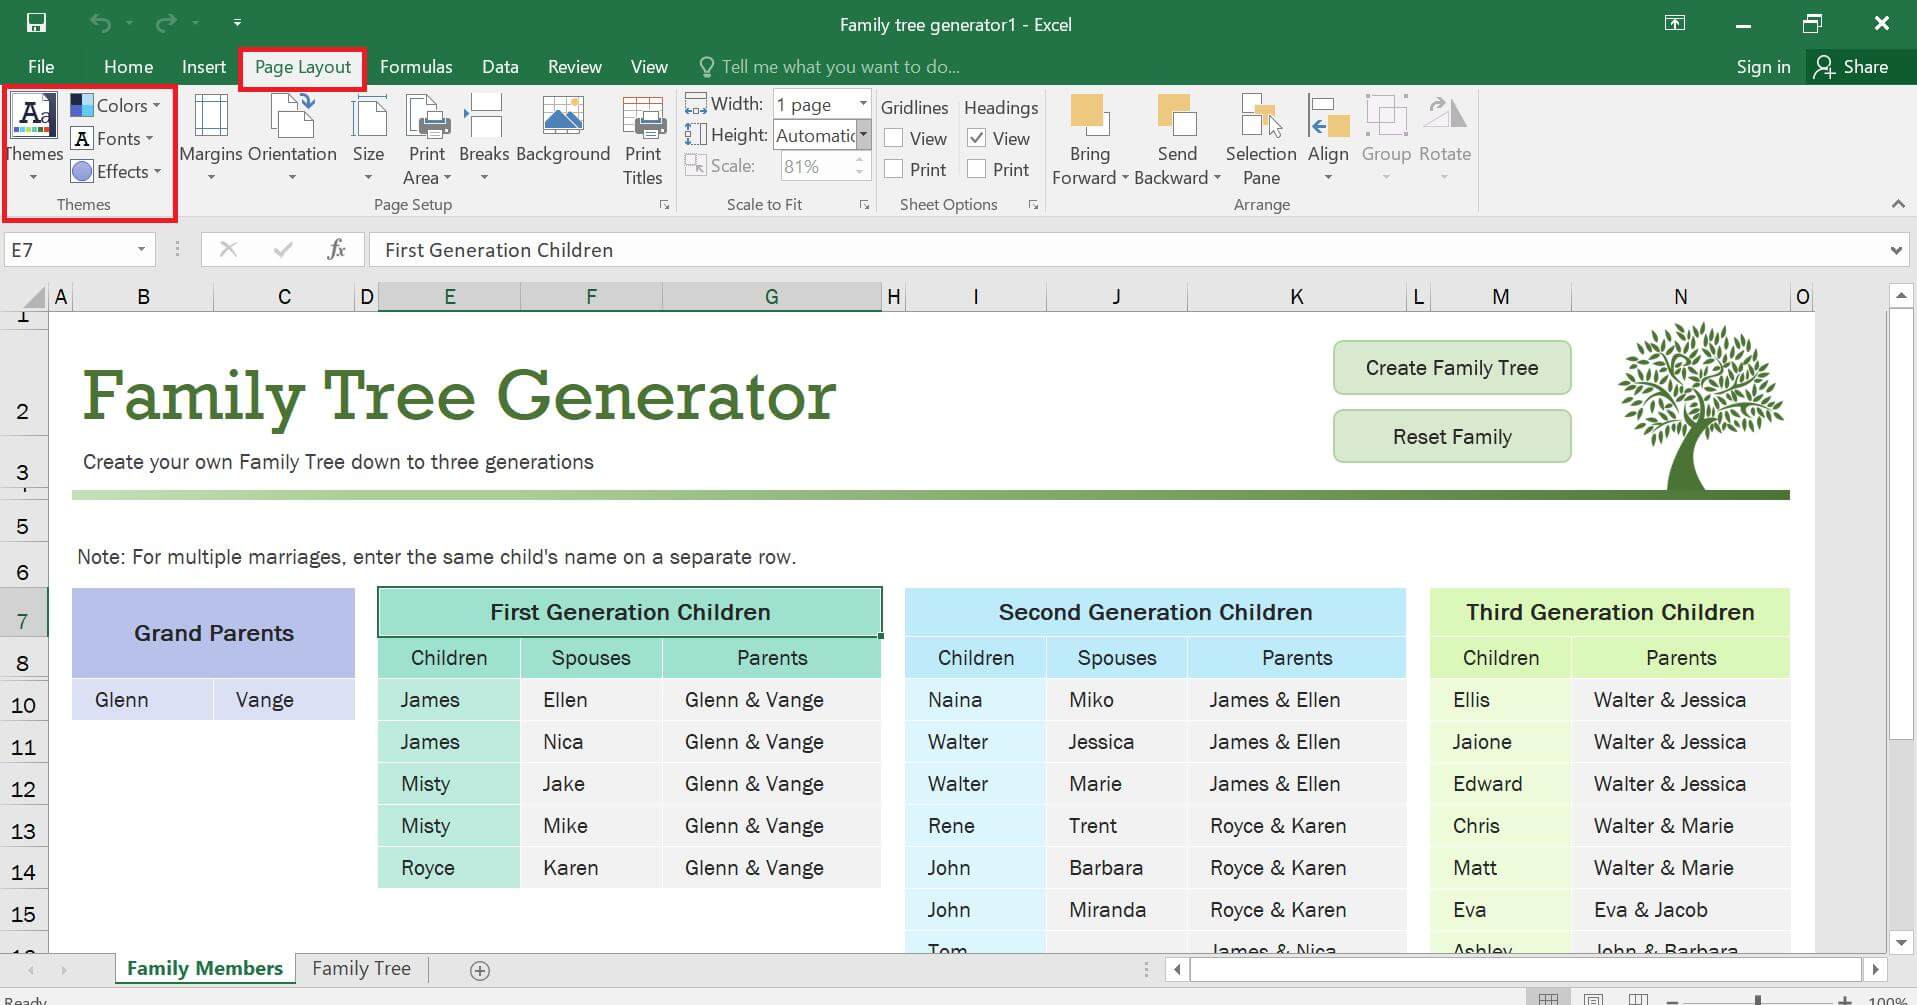
Finally, head to the Themes, Colors, and Fonts in the Page Layout panel to customize altogether. To change the color or font of a single box, you can simply right-click on it.
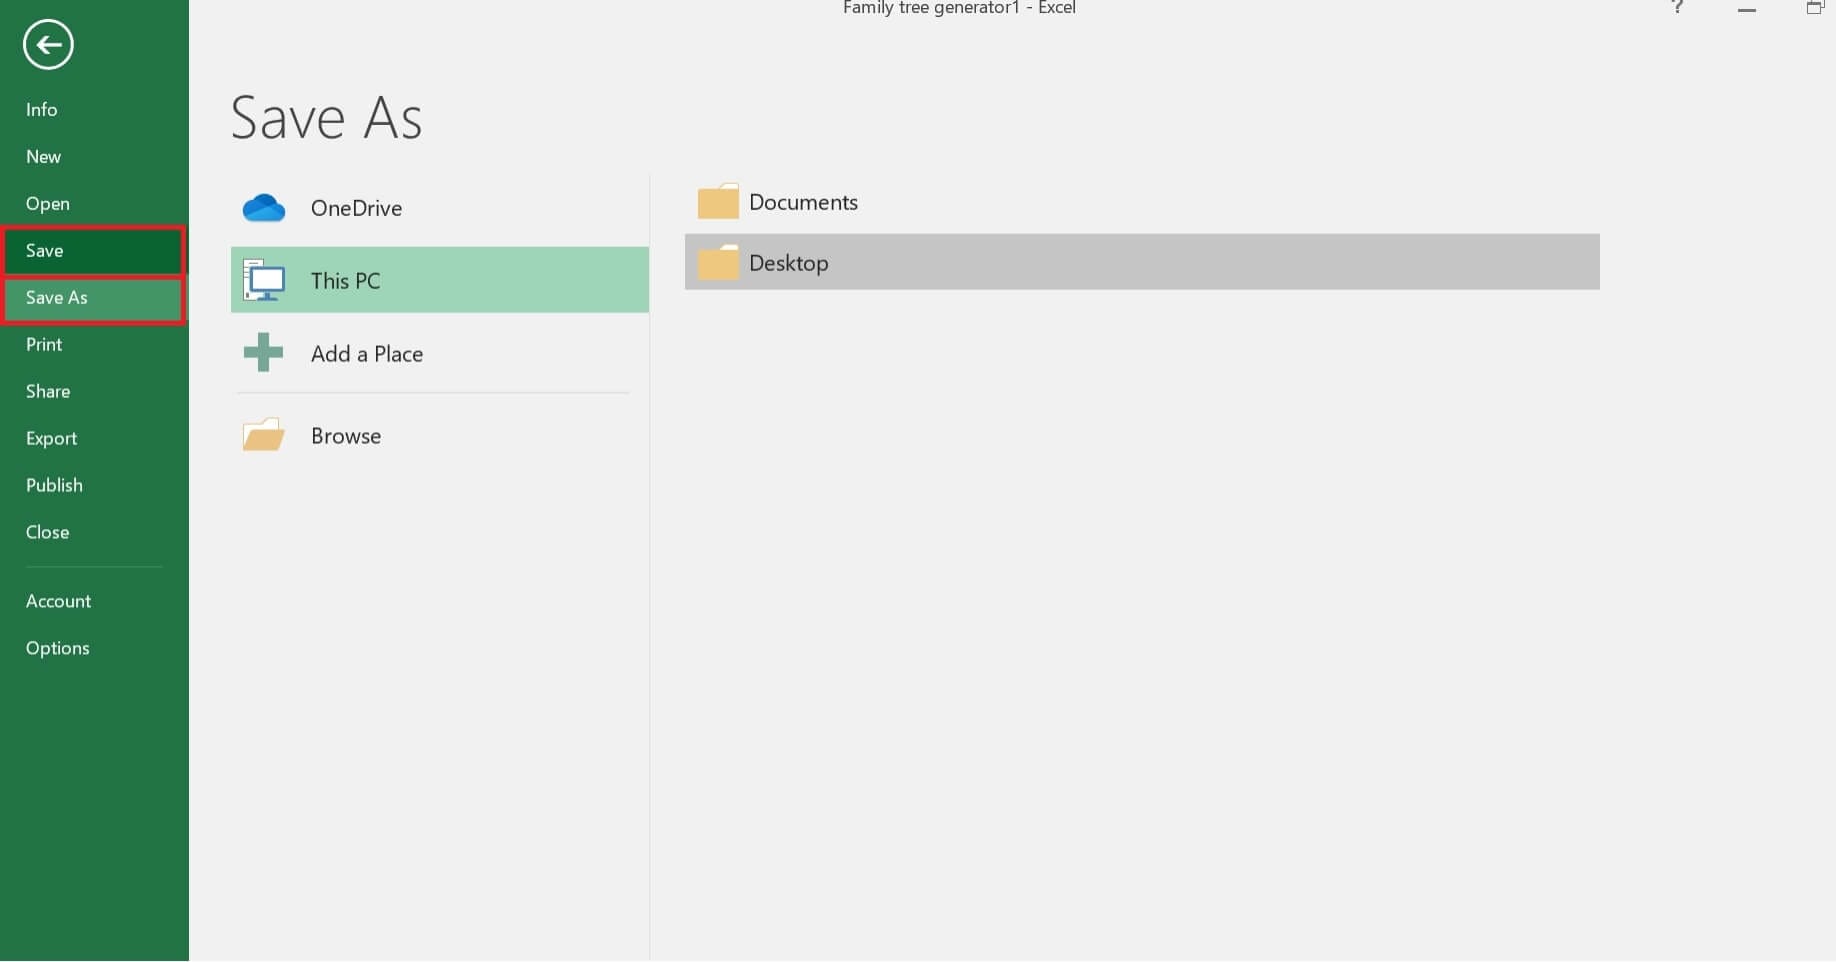
Once your family tree is completed, save your file by clicking Save or Save As in the File tab.
Make a Family Tree with Excel SmartArt
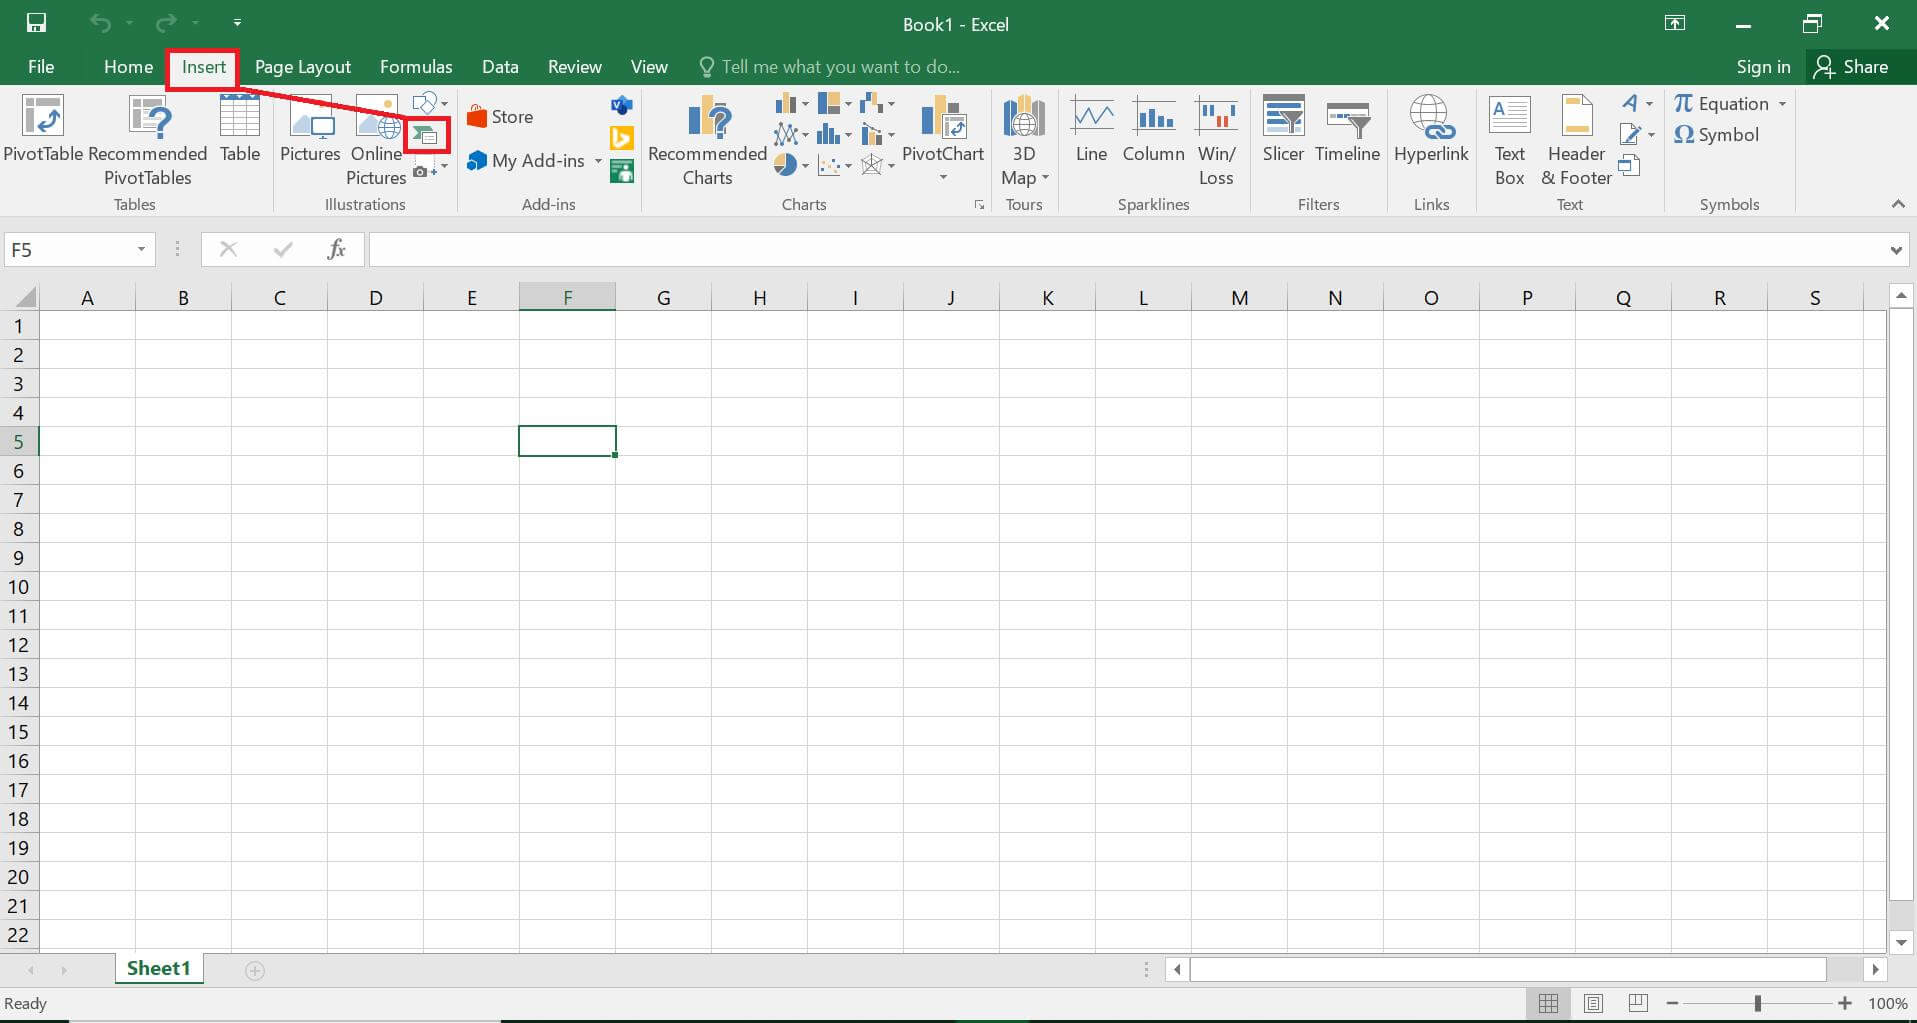
Open a new sheet, select the Insert tab, and click the SmartArt icon to open the menu.
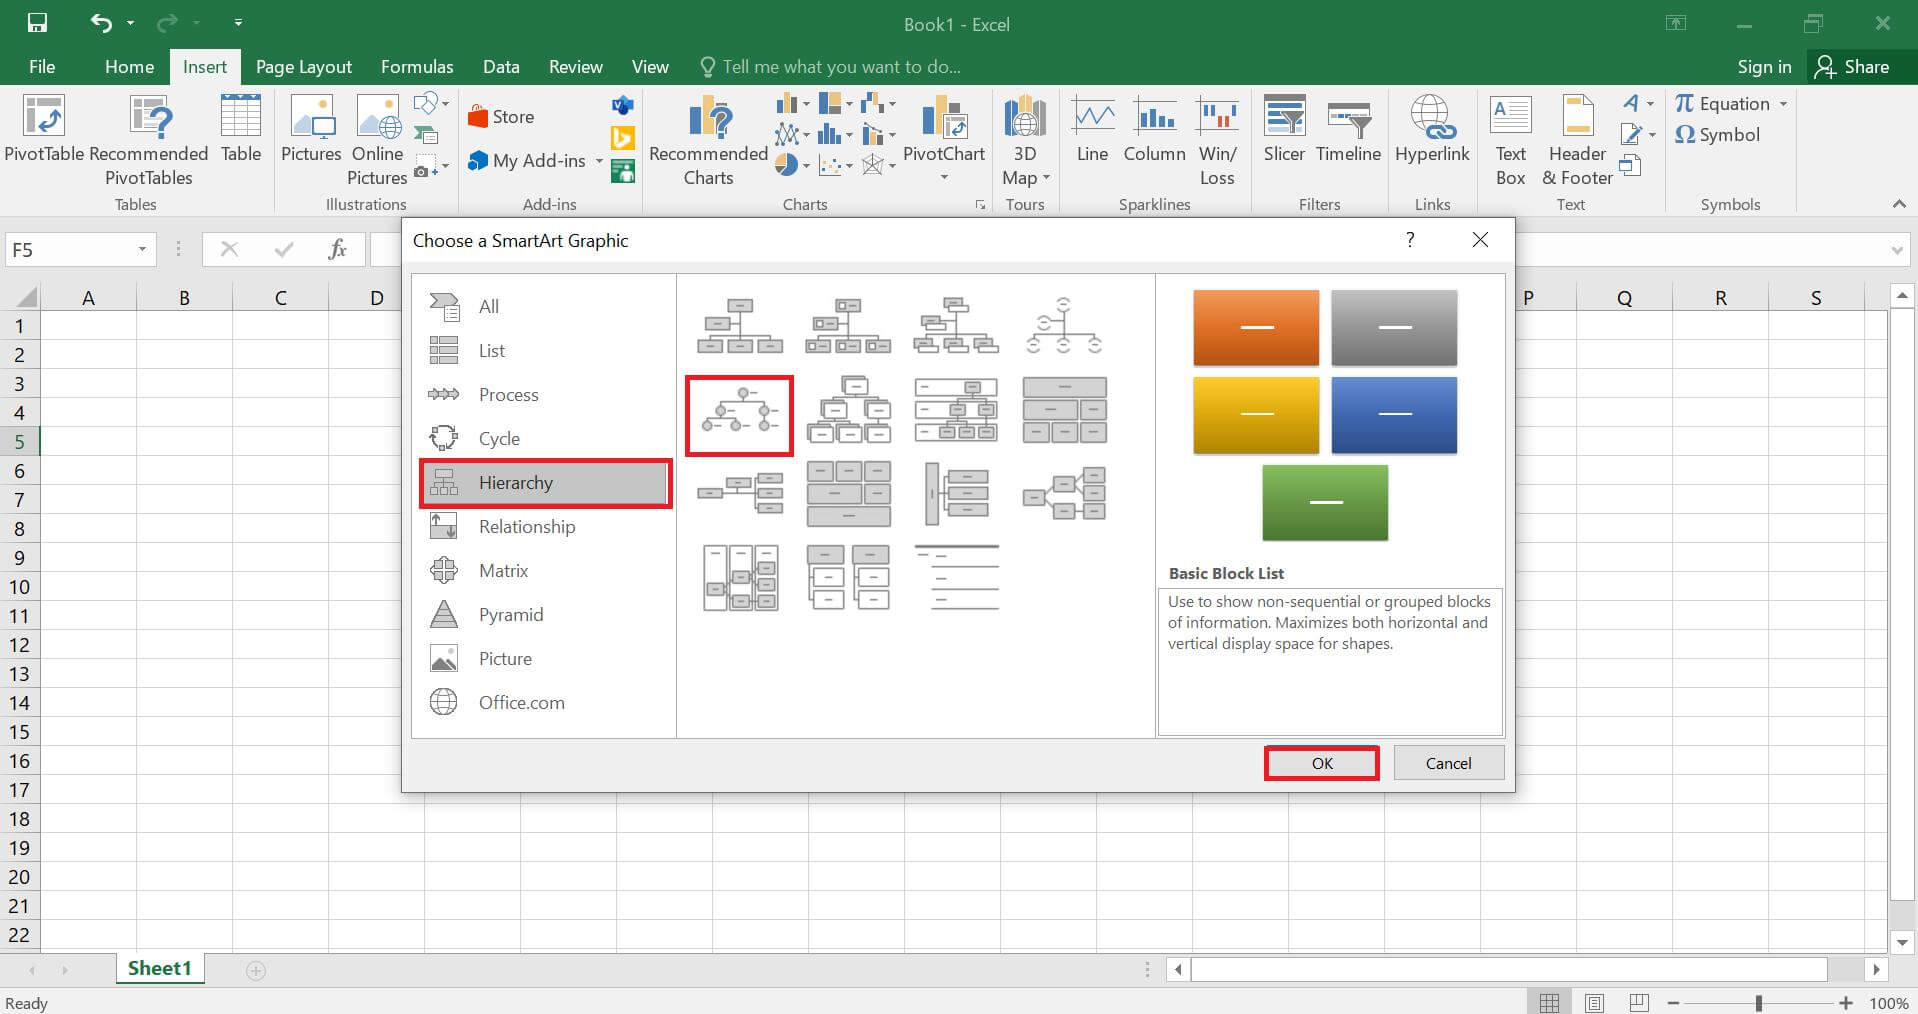
You will see a list of diagram options — click Hierarchy for diagrams that will be the right fit for your family tree.
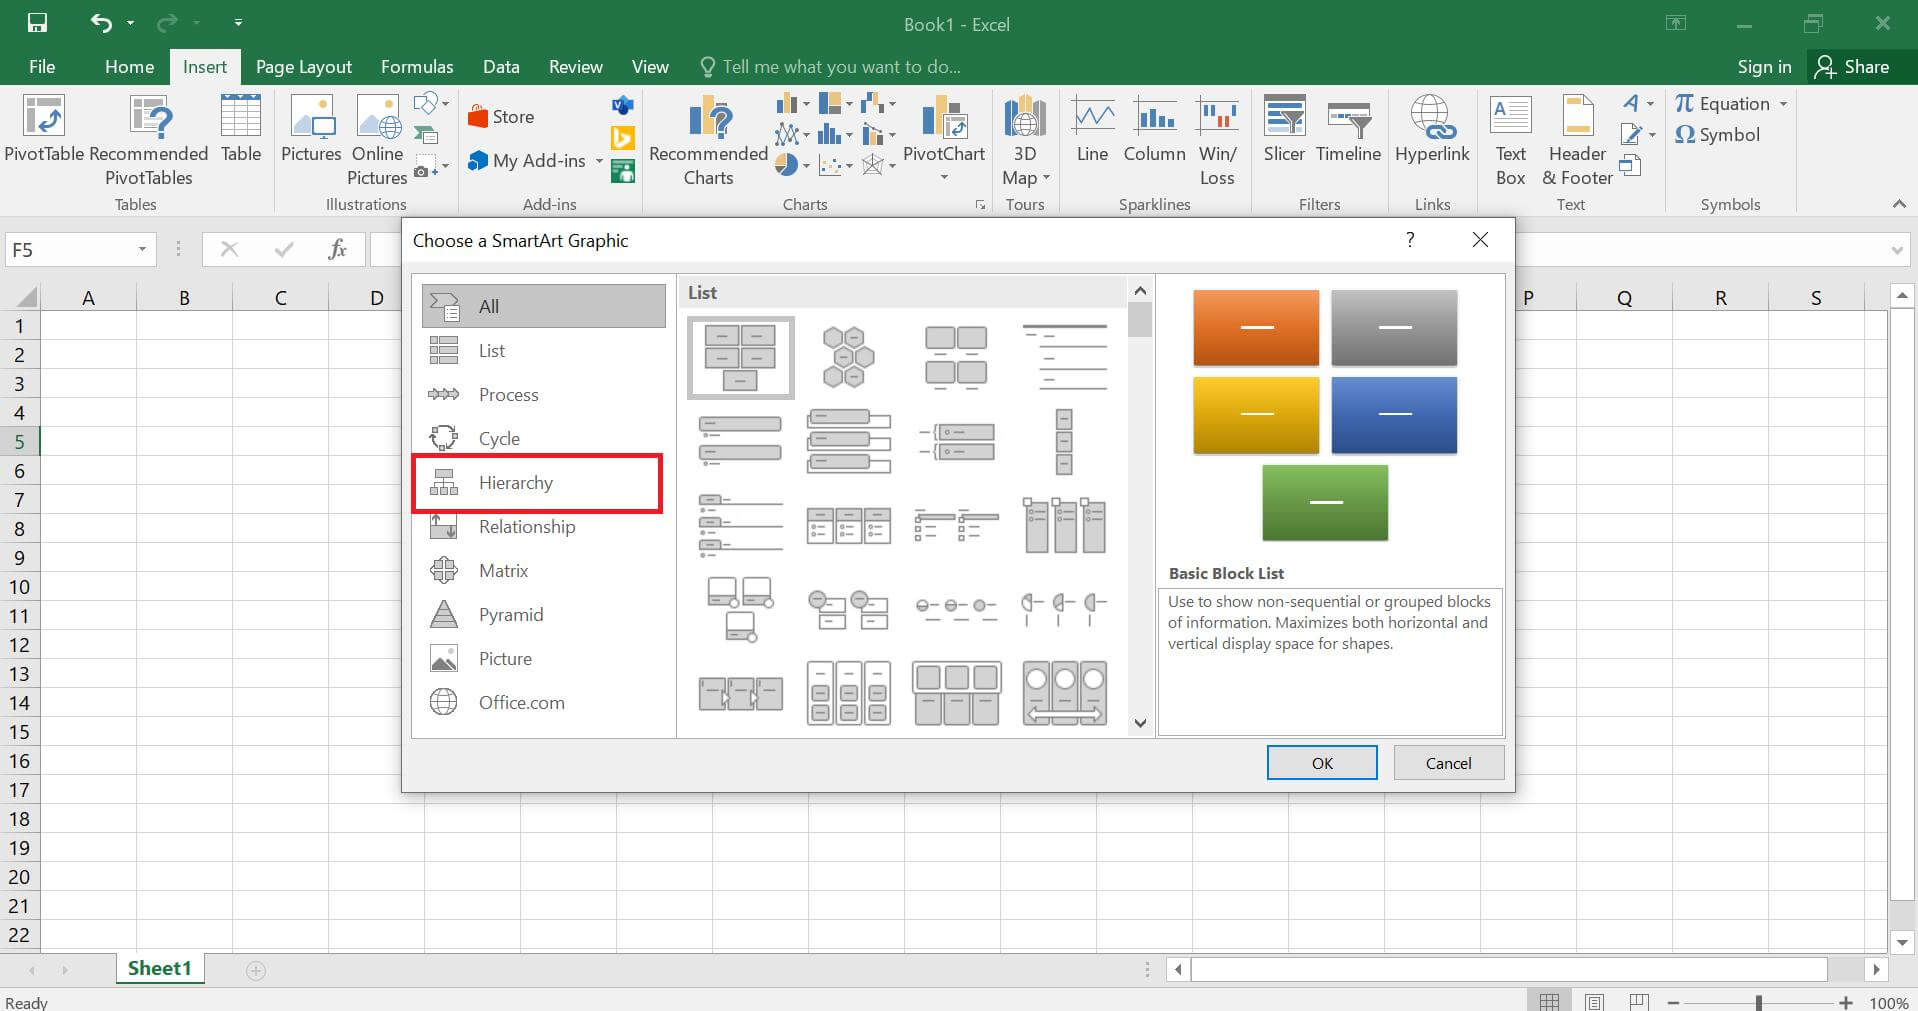
Select one of the hierarchical diagrams based on your family structure and personal preferences to insert it onto the sheet.
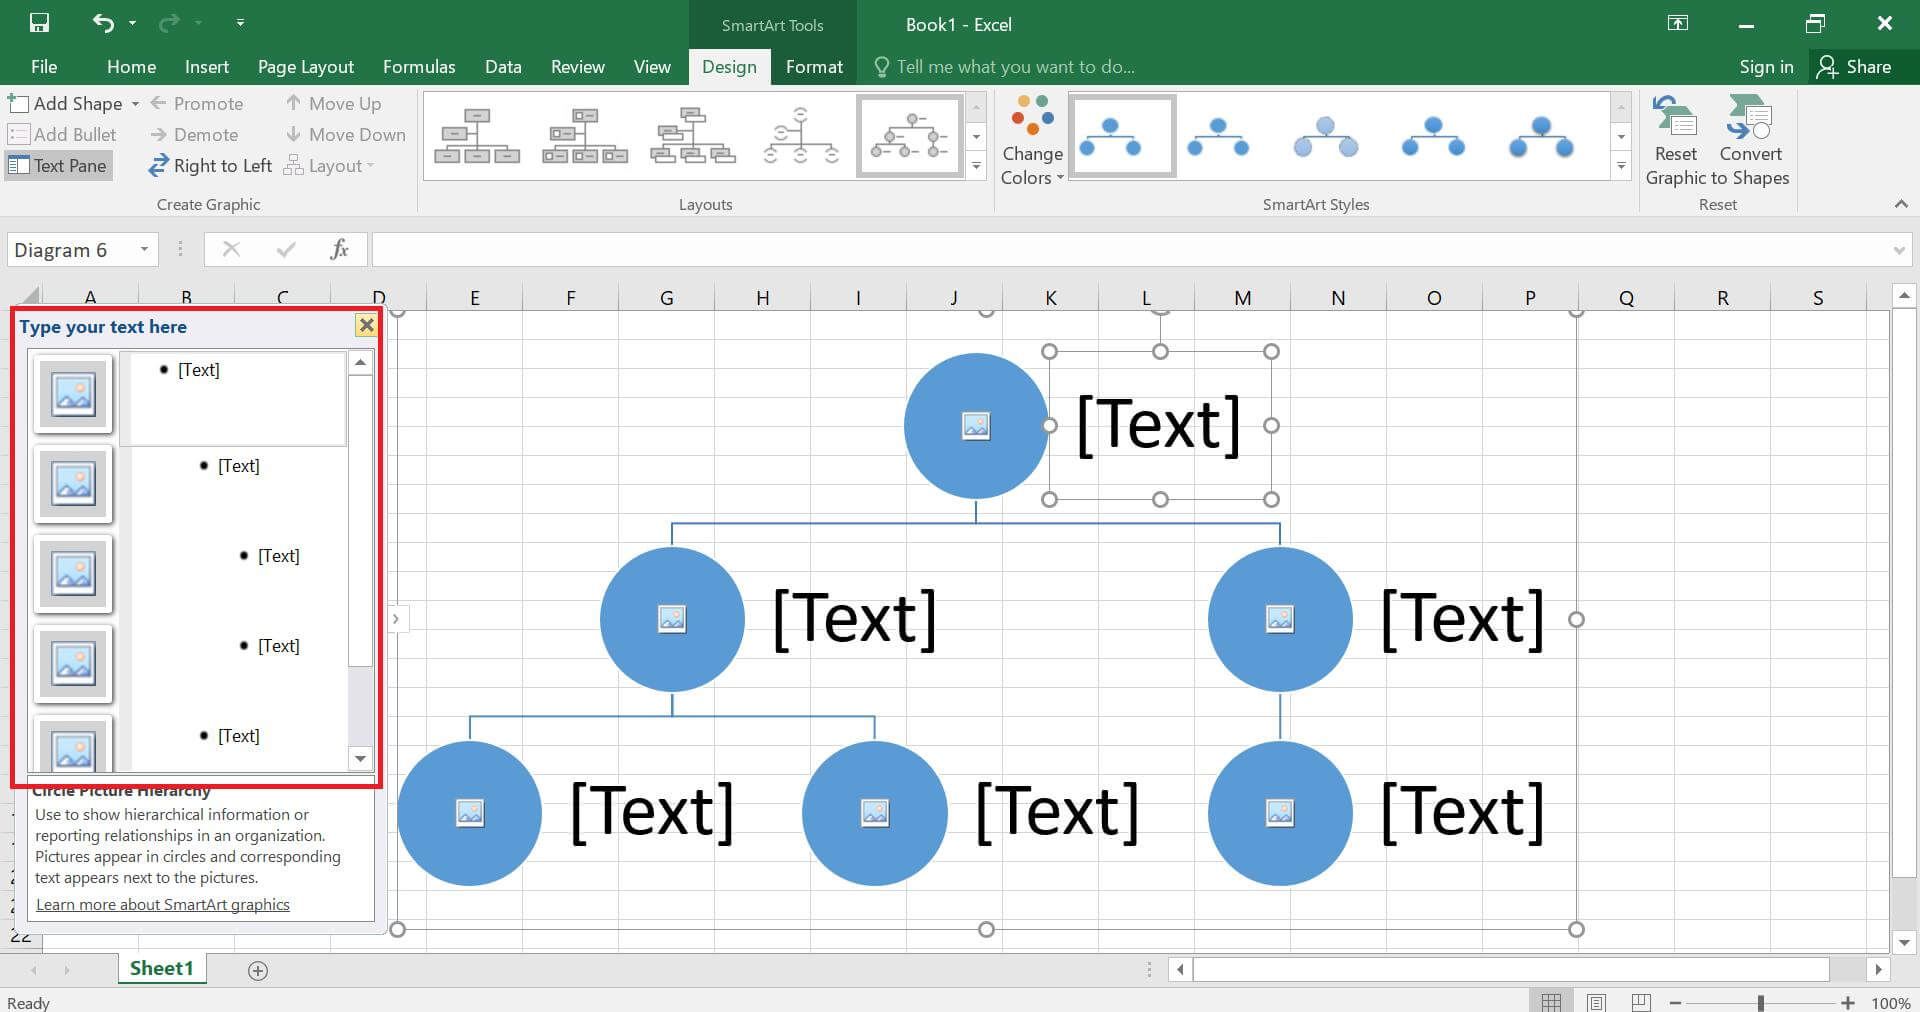
Click the left-side pop-up menu to insert family member’s names, starting from the most senior member of the family tree, and coming down to the youngest.
If you want to add a new box, for let’s say, spouses or siblings, select the box next to or before you want to put the new box. Go to Design and select Add Shape.
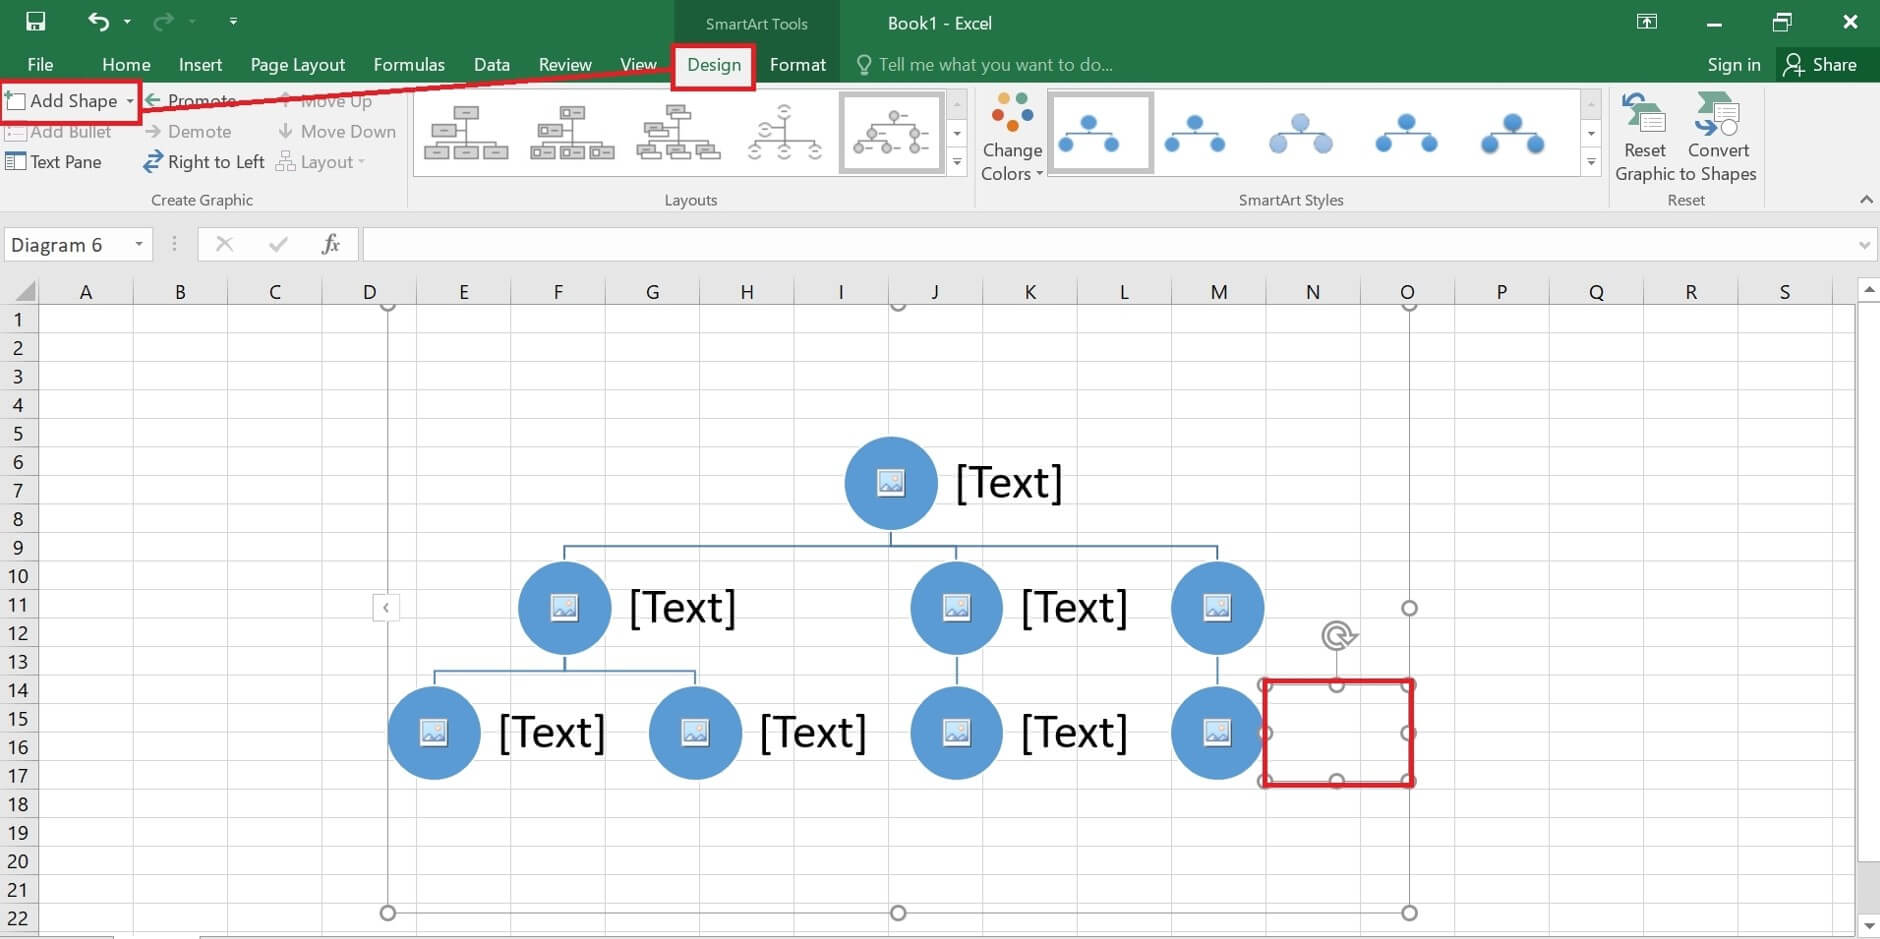
To show a relationship between boxes in one generation, like a marriage, select Insert and then Shape. Choose a line style, and drag it between the two related boxes.
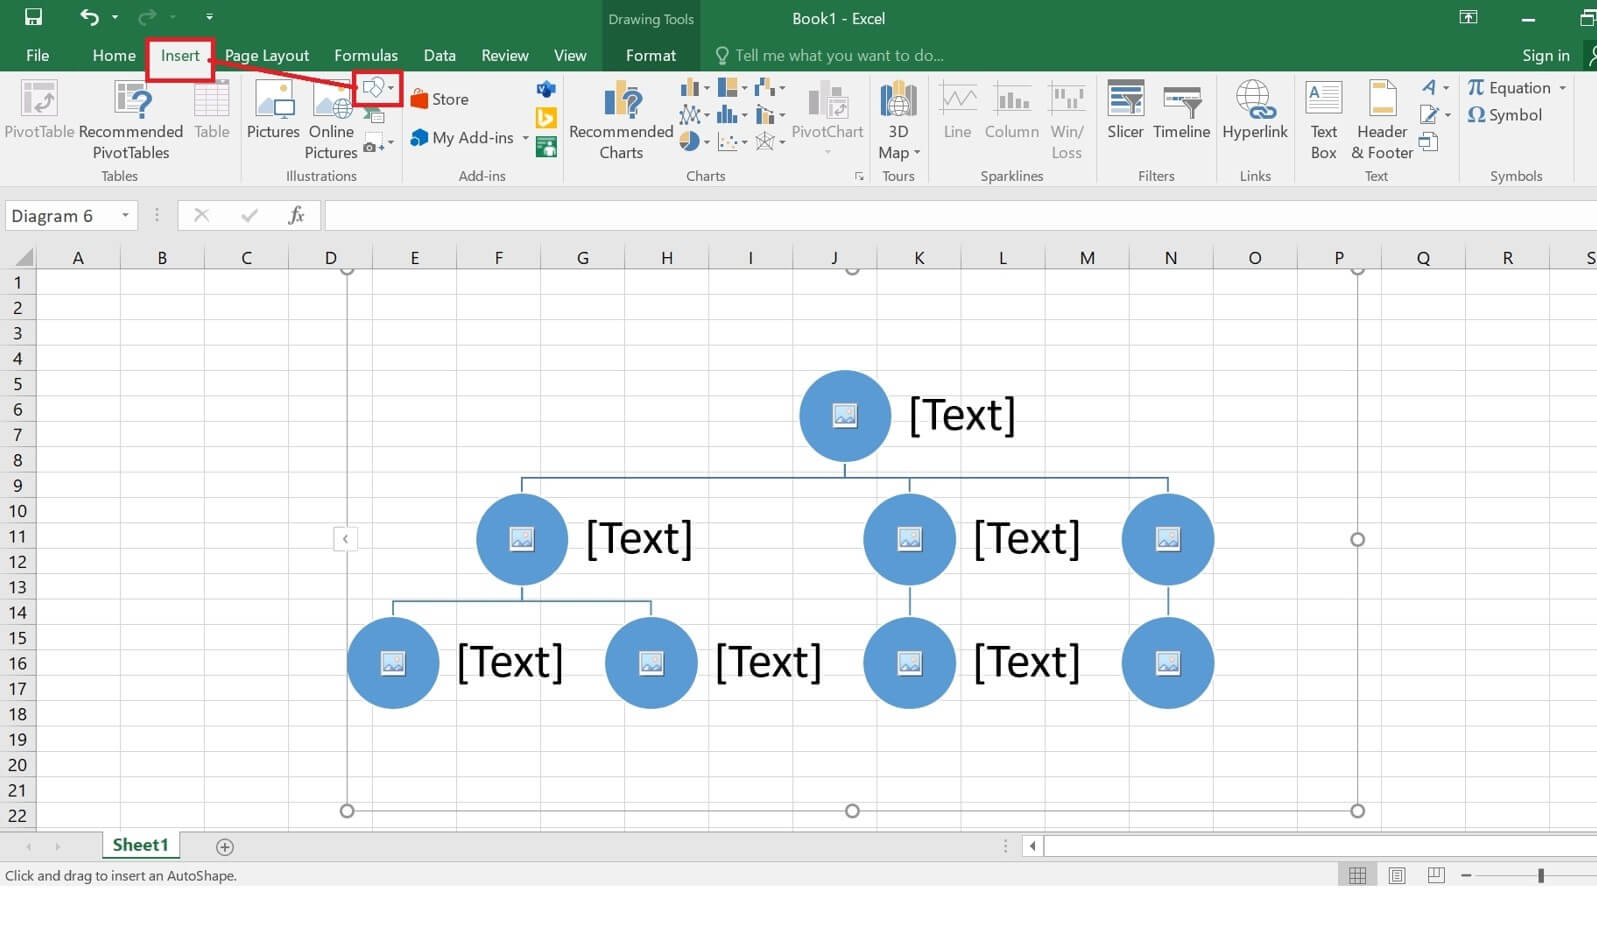
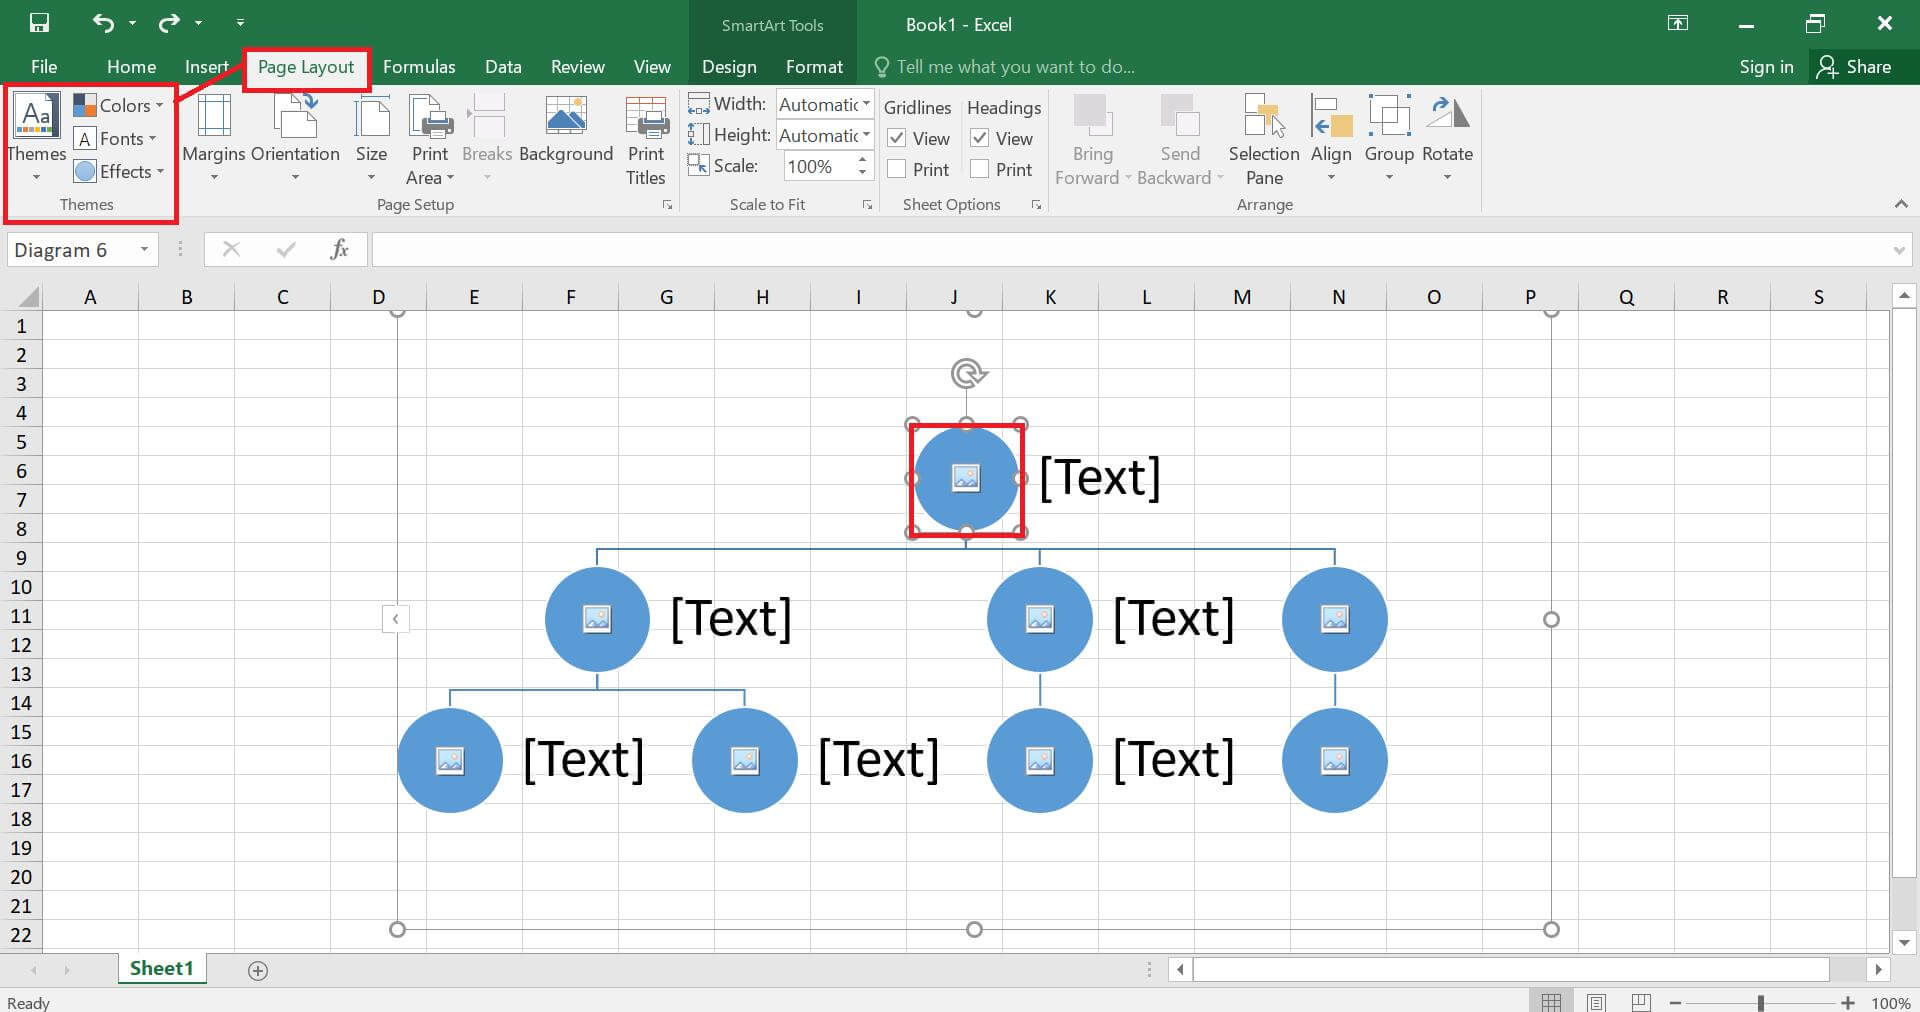
To customize the tree, go to Themes, Colors, and Fonts in the Page Layout panel and format it according to your liking.
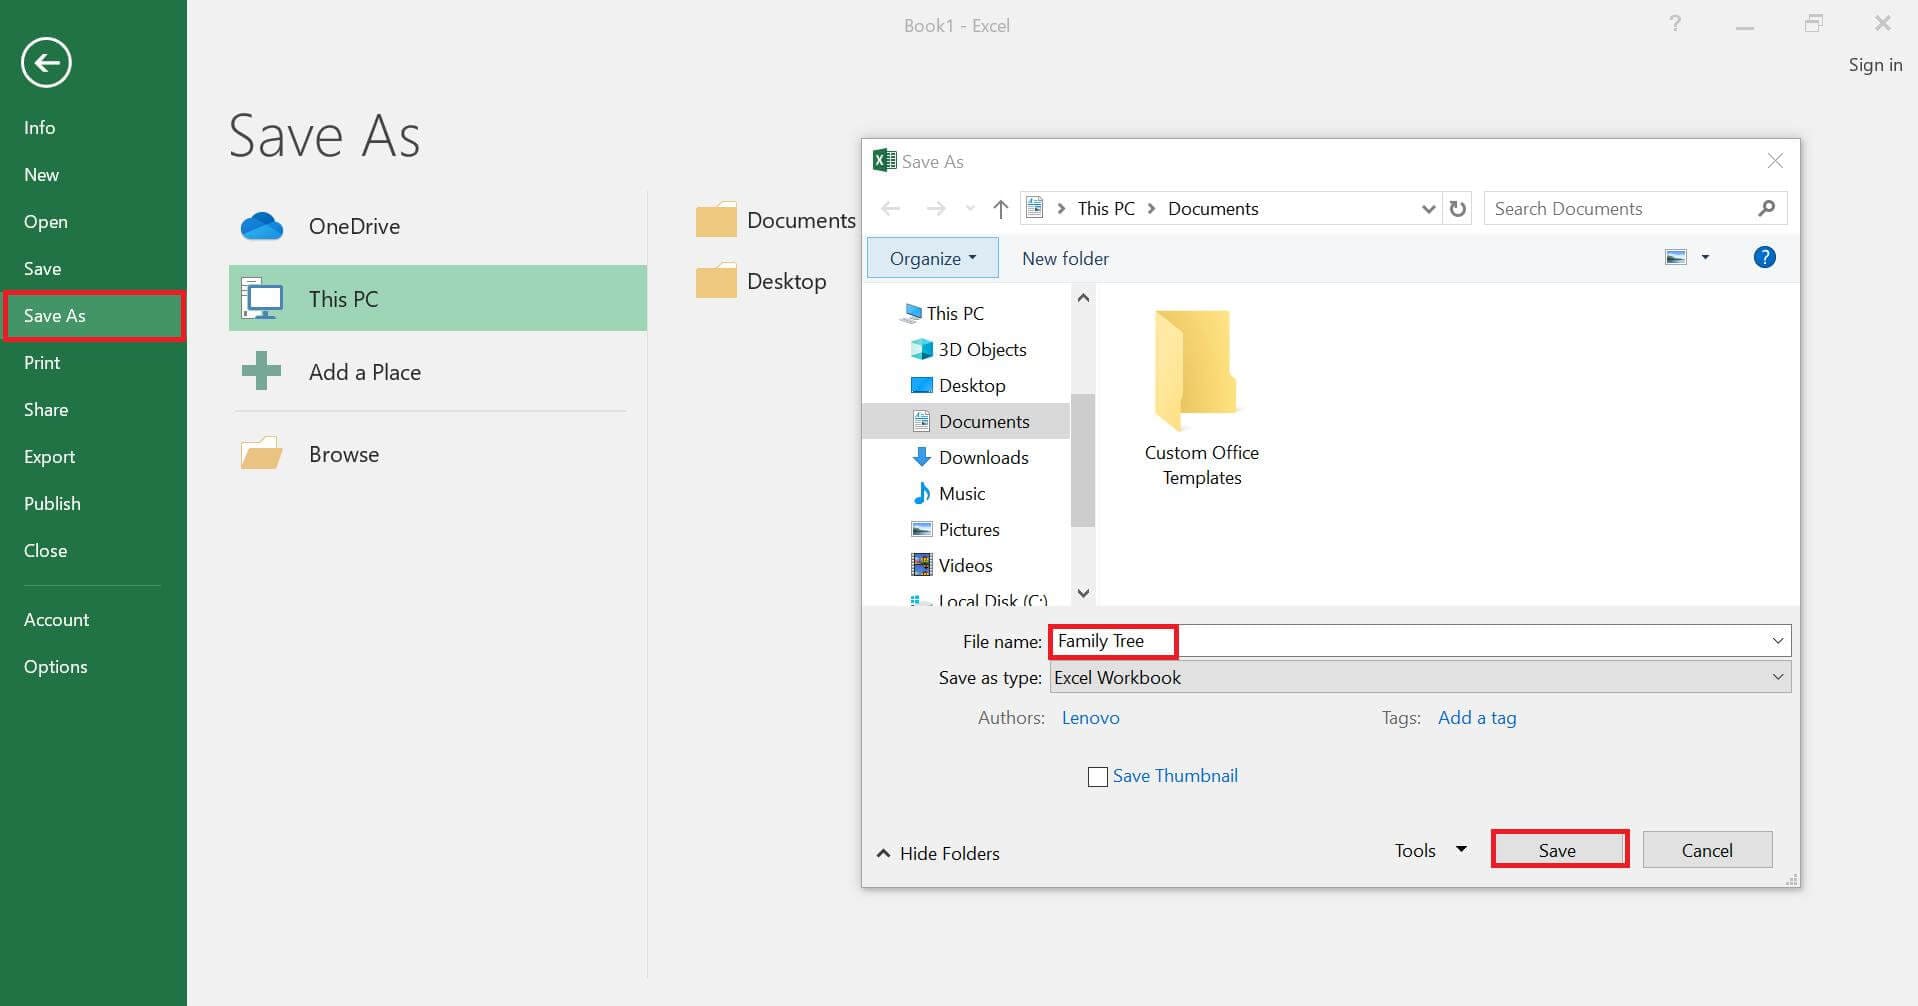
Finally, download your family tree. Navigate to the File menu and click Save As > Desired Location.
Excel is a good tool for building family trees due to its ability to utilize formulas and functions. However, when it comes to customizing it for visual representation, making it further detailed, or adding multiple generations, it falls short. Adding each detail is time-consuming and exhaustive.
It doesn’t let you convert your tree to a sortable list format or put it on a separate tab. Adding another entry to the tree is also pretty exhaustive. With all that in mind, let’s move on to my other favorite option for creating family trees, EdrawMind.
Make a Family Tree Faster and Easier on EdrawMind
EdrawMind is a great alternative to making family trees. It provides you with ready-made templates for family trees, be it 8-generation or 20-generation family tree templates. Plus, you also get family tree-specific symbols and clipart, so it becomes super easy to craft any type of genogram. Some highlighting benefits of EdrawMind include:
- Templates: EdrawMind has an abundance of ready-made examples on any topic you need. These family tree examples give you the freedom to visualize and create without needing to start from scratch.
- Cliparts: The software also provides a variety of 700+ professionally designed clipart to make your family trees visually appealing and vivid.
- Brainstorming Mode: The brainstorming mode in the Traverse section of the View tab lets you write and organize all your ideas in one place. You can start with an objective and explore all the possible angles before choosing the right ones for your map.
- Infinite Canvas: EdrawMind’s infinite canvas space lets you create and expand your family tree to any number of generations. It serves as the perfect boundless canvas for your limitless creativity.
 Try the app & get 500 free AI tokens


EdrawMind is more suitable for large and complex family trees. Multiple generations of a family can be added easily by adding new topics and subtopics.
On multiple occasions, I have saved a lot of time and effort using EdrawMind’s pre-made templates. It is user intuitive and beginner-friendly making it suitable for the newest genealogy enthusiasts. Here's how you can also make a family tree in EdrawMind in a few simple steps.
Steps to Make a Family Tree with EdrawMind
Step 1. Choose a template
After launching EdrawMind, go to the Gallery section on the main menu and type Family Tree in the search box. Find one that fits your task needs and click Duplicate to open.
Try the app & get 500 free AI tokens

Step 2. Input data
Once your template is open, go to the Start tab to add or remove topics or subtopics. To switch to a sortable list format, navigate to the Outline section. It will let you view the family tree in a list format for better content modifications.
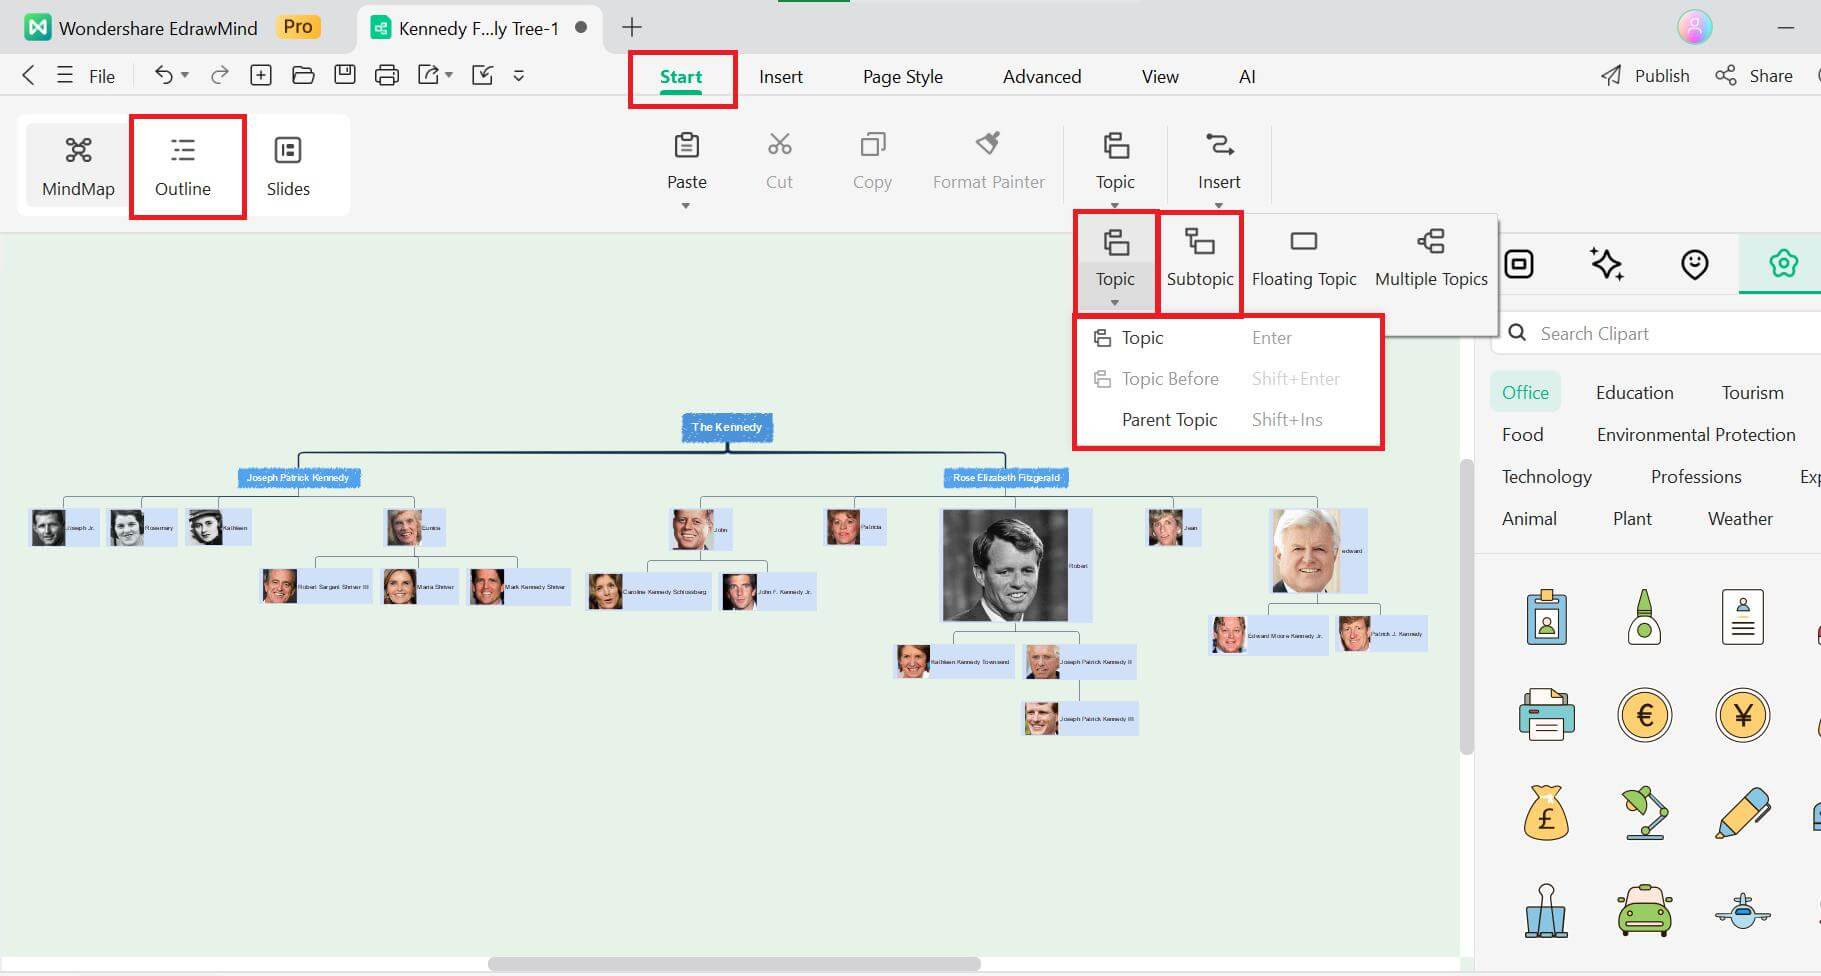
Step 3. Customize your family tree
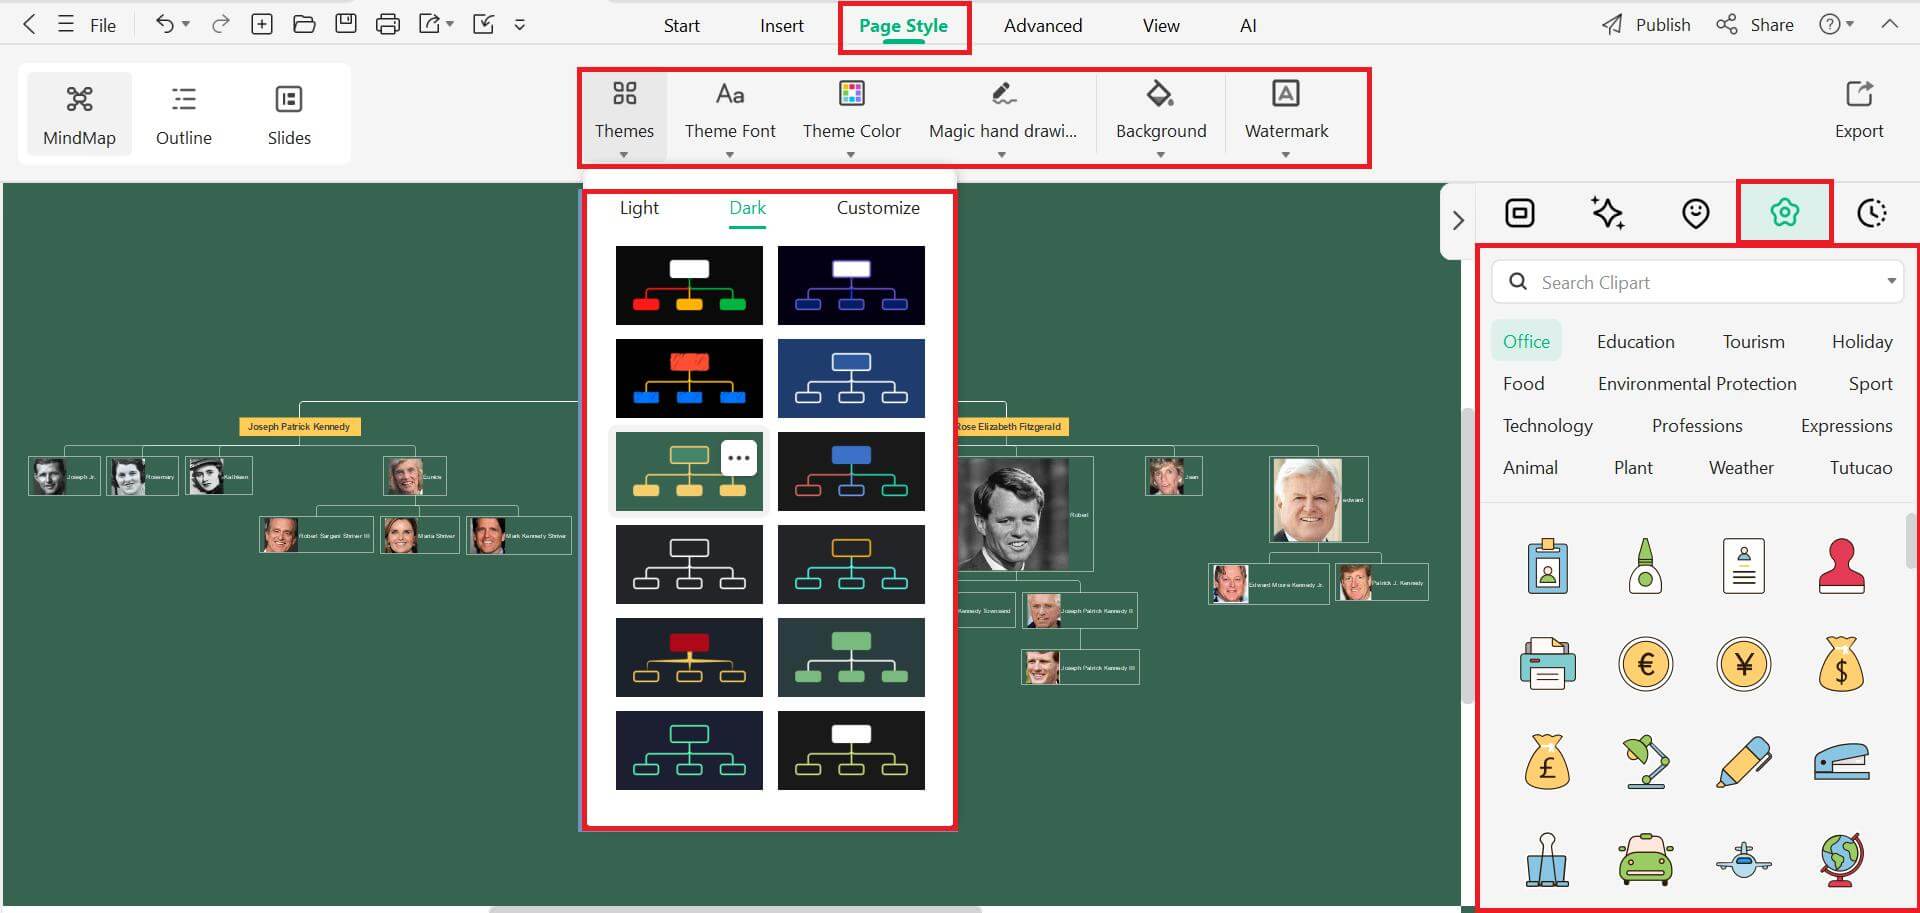
Now, for the customization, go to the Page Style tab to change the fonts and themes according to your aesthetics. Or, add Cliparts from the right-hand panel to your family tree to make it visually exciting.
Step 4. Add Pictures
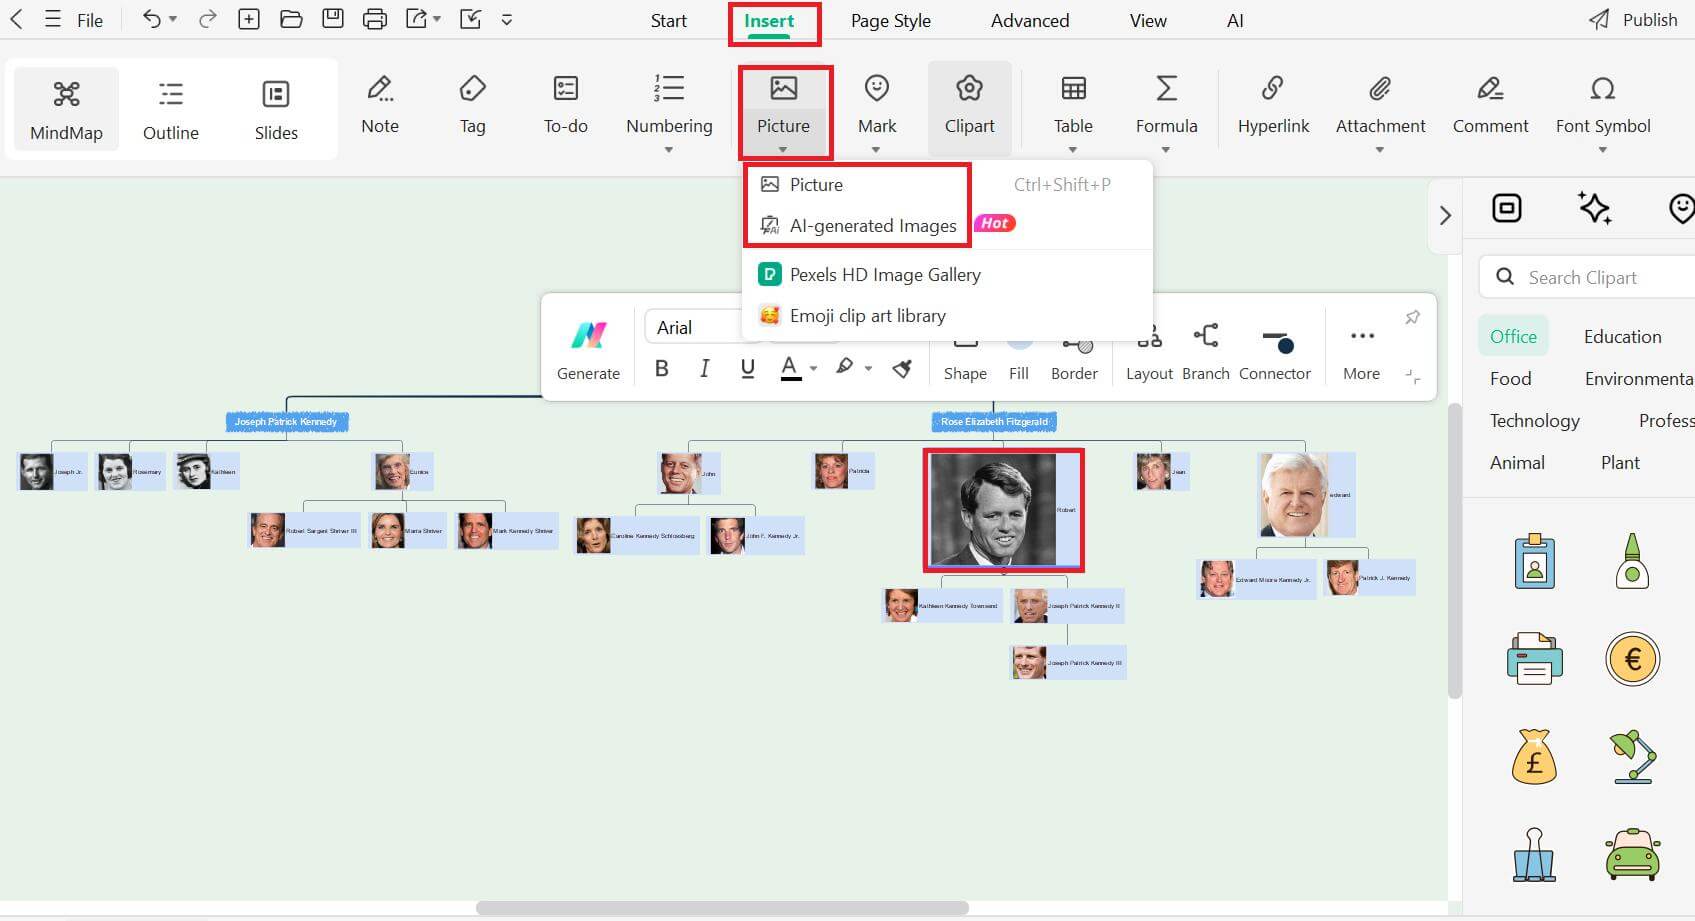
Head to the Insert tab to add pictures of the family tree members. Click the box before adding the photos from your device directory or to create an AI-generated image.
Step 5. Present your family tree
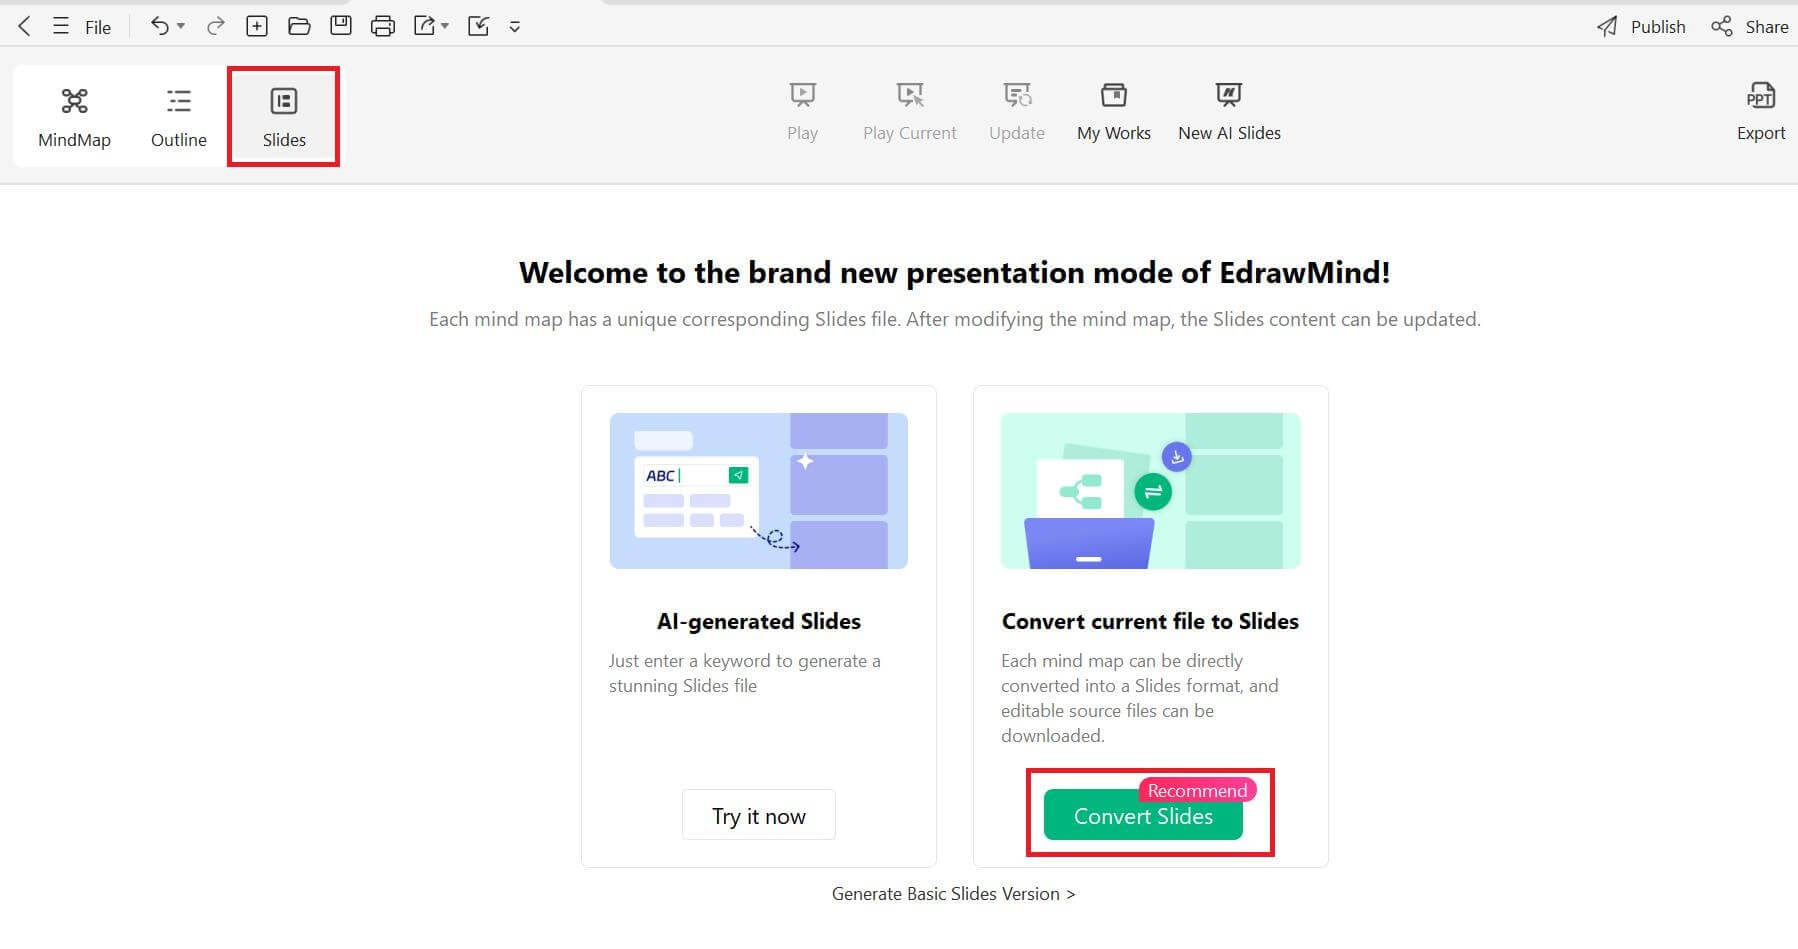
Next, go to the Slides section to present your creation directly. Select Convert Slides to convert your current file to slides and display your family tree in full screen.
Step 6. Export and share
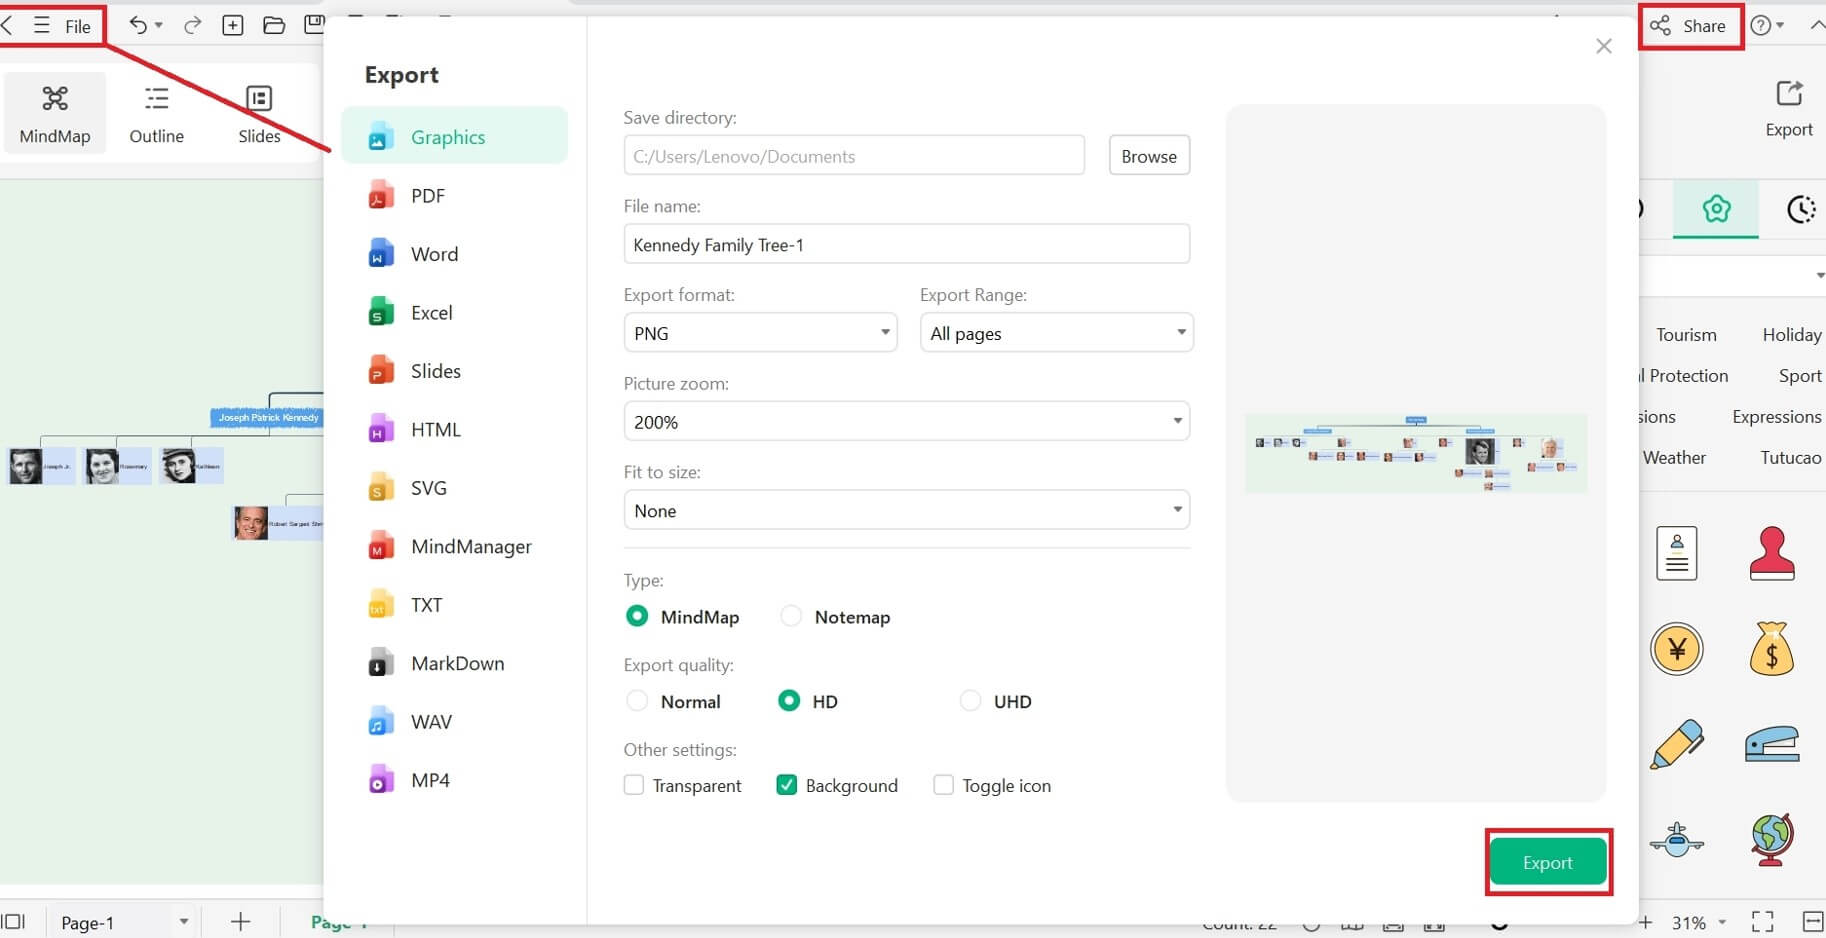
Finally, export your family tree in the desired format from the File menu or share it directly with your collaborators by navigating to the Share tab in the main menu.
Tips to Create Family Trees Effectively
Incorporating several generations of family members and their data into a single family tree can be frustrating. However, starting with a clear plan and objective makes the entire process more seamless. Employ these tips and tricks in your family tree generation for an even more effortless experience, no matter which tool you use.
- While many people may prefer starting from scratch, in my opinion, pre-designed templates are a much better and time-saving option. It helps you make sure that you don't miss any crucial elements by providing a clear structure to follow. Softwares like EdrawMind provide an abundant variety of ready-made examples catering to various styles and needs.
- Personalizing your family tree by adding photos of family members is always a good idea. It not only enhances your visual experience but also brings your family tree to life.
- Make your tree stand out by incorporating pre-made icons and graphics. EdrawMind, for example, gives you a variety of graphics and visual aids that can help you represent different family events or roles, making your family tree more interesting.
- While it’s tempting to include every little information, it is better to focus on the important details only as it leads to a clean and easy-to-read tree.
- Additionally, make sure to verify all the information before you draft it into the tree as well. Keep your family tree up-to-date and add new details as it becomes available.
Final Words
Digital tools have transformed the way family trees are created, making the creation process a lot more effortless than before. In a busy corporate setup, tools like Excel and EdrawMind help save plenty of time and effort with their intuitive design and customizable templates. Consider using a software that provides you access to numerous editable examples and more editing options.
Which Excel Family Tree Method Should You Use?
Use a template when you want the fastest setup and your family fits a predictable number of generations. Use SmartArt for a simple parent-child hierarchy. Use shapes and connectors when you need more control over couples, siblings, photos, or unusual family relationships.
Limitation: Excel is a spreadsheet first, so large genealogy trees can become difficult to space and maintain. For many generations or complex relationship lines, a dedicated diagram tool is usually easier to edit.
Frequently Asked Questions
Can Excel automatically generate a family tree?
Excel does not build a genealogy tree automatically from family records by default, but you can start from a template or create one with SmartArt, shapes, and connectors.
Is SmartArt good for a family tree in Excel?
It works well for a small, regular hierarchy. Complex spouse, sibling, adoption, or multi-branch relationships usually need manual shapes and connectors.
How many generations can I fit in Excel?
There is no fixed limit, but readability becomes the constraint. Large trees often need a larger canvas, landscape orientation, or a dedicated diagram tool.
 EdrawMind
AppsEdrawMind Online
EdrawMind
AppsEdrawMind Online