A timeline makes everything clear and structured. Google Sheets' timeline view is a built-in feature that simplifies the process. Whether you manage projects, plan events, or track historical data, a visual timeline helps.
This guide will show you how to quickly make a timeline in Google Sheets. You’ll also find extra tips to enhance your chart and an easier way to create timelines. Let’s get started.
In this article
What Are Timeline Views?
Google Sheets features a pictorial representation of a timeline view, which helps schedule and monitor activities, processes, or events sequentially. This feature presents a timeline, which is horizontally arranged which making monitoring time periods, durations, and correlating factors easy.
Purpose of a Timeline View
Timelines are beneficial for organizing various activities such as project planning, scheduling, and other event or time-based activities. Timelines allow for easier monitoring and reporting, ensuring accuracy and order through set deadlines.
How It Works
Tasks or events appear as bars or milestones along the timeline. Each entry includes a start and end date, showing its duration and dependencies.
Key Features
- Chronological Order: Tasks are arranged by date for easy tracking.
- Clear Visualization: Displays timing and relationships between tasks.
- Customization: Allows filtering, grouping, and scaling to fit different needs.
Common Uses
- Project Management: Ensuring timelines are met, tracking progress to completion, and preventing stagnation.
- Marketing Strategies: Organizing releases, advertising, and other major activities.
- Event Management: Organizing spots, tasks, meetings, and other activities within time limits.
- Strategic Planning: Defining comprehensive strategies with distinct objectives and timeframes.
How To Create a Timeline View in Google Sheets
To create a timeline view in Google Sheets, input the relevant data you wish to track as a timeline. Subsequently, you can enhance the design further by grouping tasks, adding colors and selecting other relevant details to enhance the clarity of the timeline. Follow these steps:
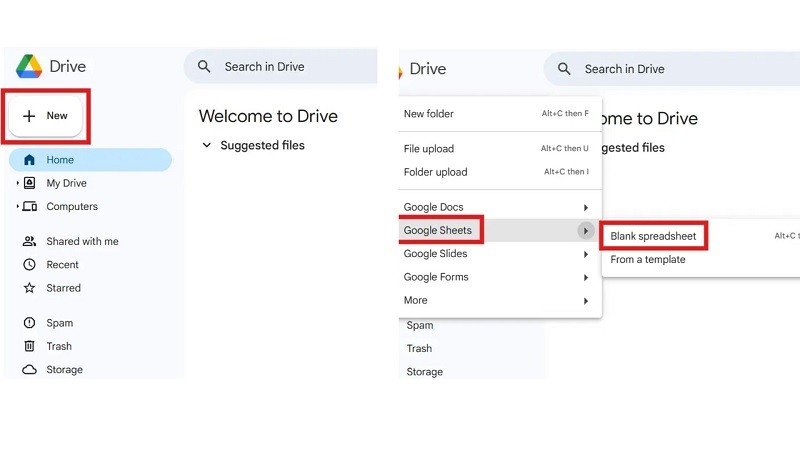
Step 1 Open a New Google Sheets File
Click New > Google Sheets > Blank spreadsheet to create a fresh document.
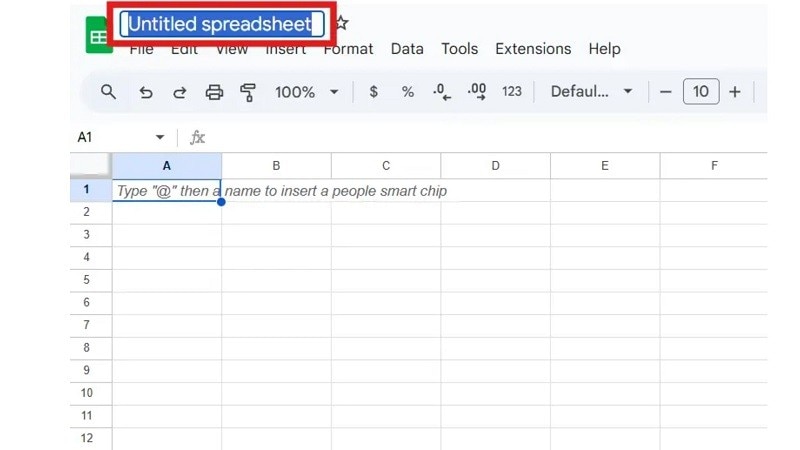
Step 2 Name Your Spreadsheet
Replace the default title with a relevant project name. This keeps things organized and easy to find later.
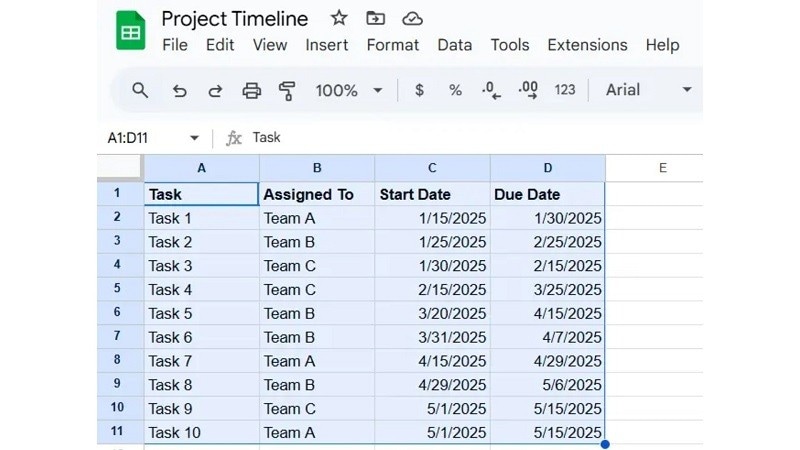
Step 3 Enter Your Timeline Data
- Expand the content of the project by detailing tasks, users assigned to them, and the relevant start and end dates in new columns.
- Make certain that every date adheres to the MM/DD/YYYY standard for precision.
- Add links where further references or supporting documents are needed.
Note: The Task and Start Date columns are required to generate a Google Sheets timeline view properly.
Tip: Tag users using @ to assign responsibilities directly within the spreadsheet. This feature improves team collaboration.

Step 4 Convert Data into a Timeline
Highlight the dataset you want to include in the timeline view in Google Sheets.
To allow future updates, select extra blank cells beyond your existing data. This ensures new entries appear in the timeline automatically.
Click Insert > Timeline > OK.
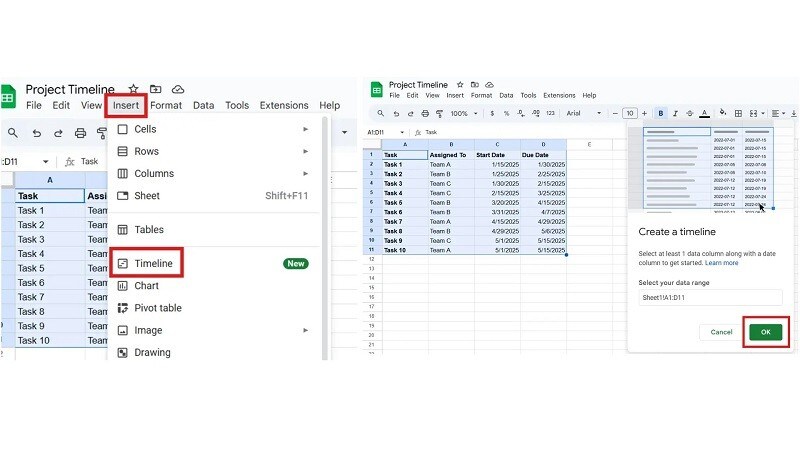
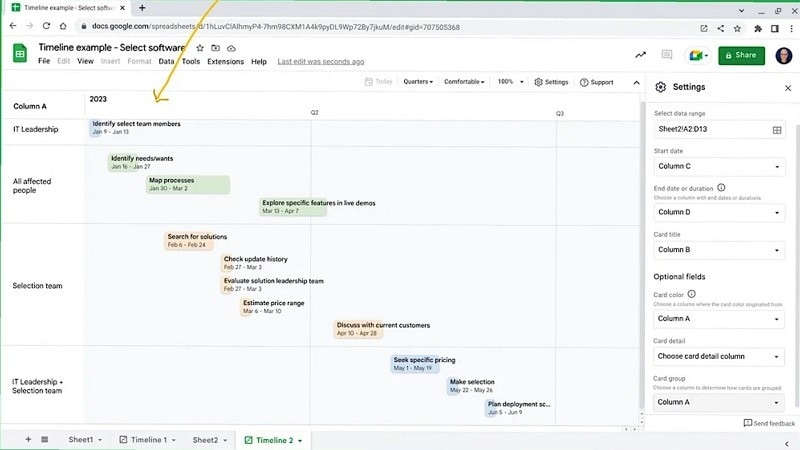
A new tab will open, displaying your timeline based on the selected data. Use the Settings panel to adjust fields, labels, and layout.
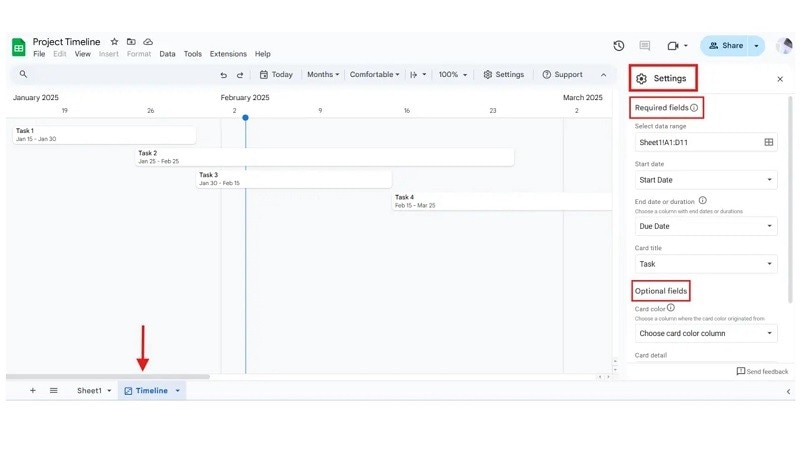
Step 5 Modify the Timeline View
Click View timeline by, then choose a time range that suits your project needs. This helps in tracking short-term or long-term activities efficiently.

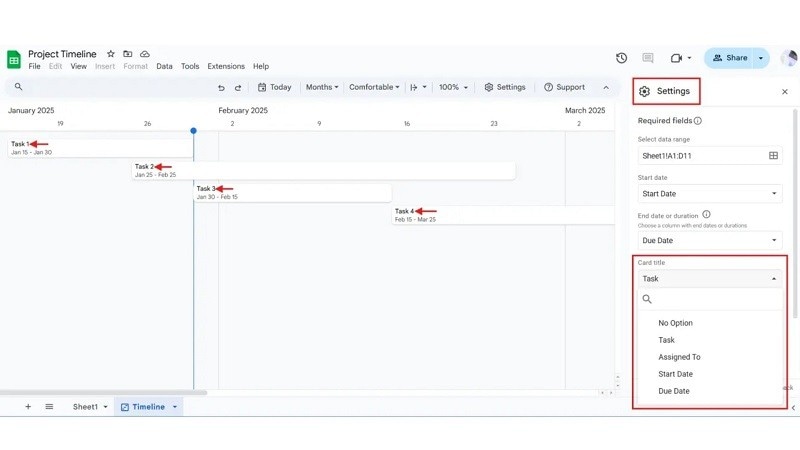
Step 6 Personalize the Timeline Cards
To change card titles, click Settings > Card title and pick the column you want to use as the title.
To apply color codes:

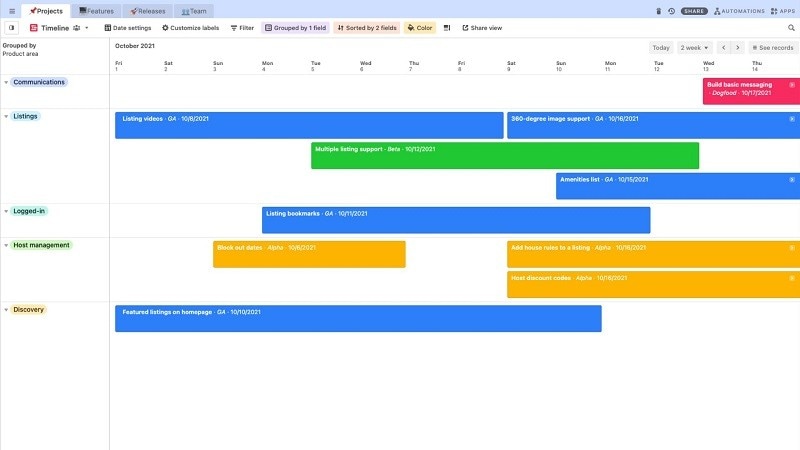
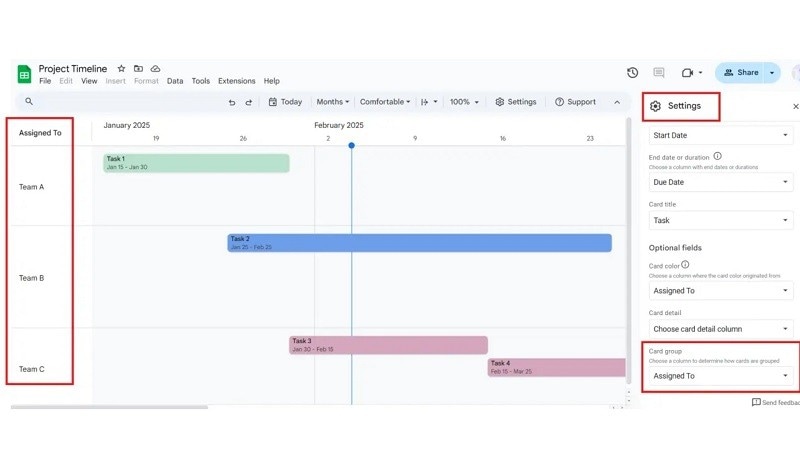
Step 7 Group Tasks for Better Organization
- To categorise timeline cards, go to Settings > Card group, then select a column such as task, assigned user, or due date.
- The timeline will update with a new category column on the left for better sorting.
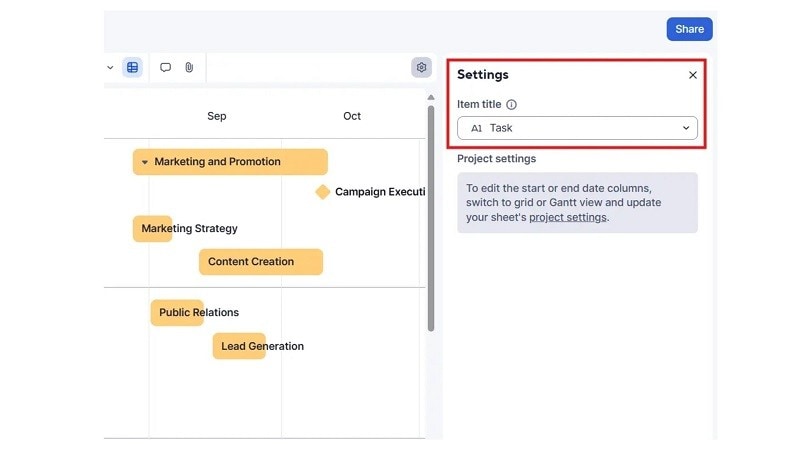
Step 8 Customize Bar Titles
Select the Settings button in the upper-right corner, then select your bar title from the Item title drop-down list to modify the text that appears in your task bars. The task is chosen in the illustration below.
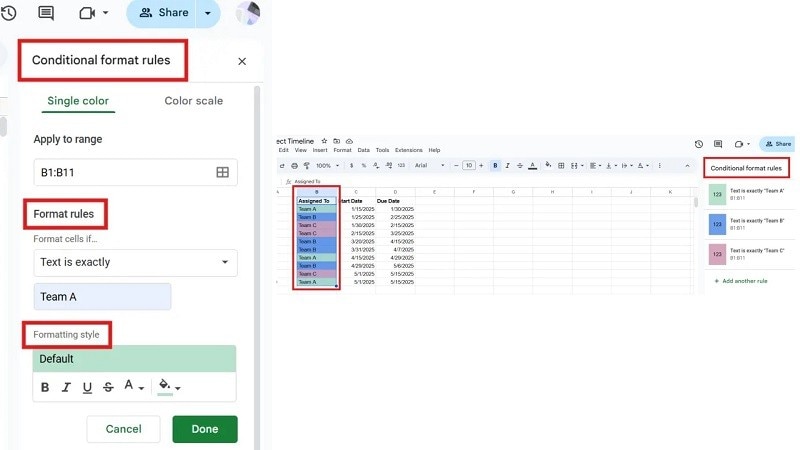
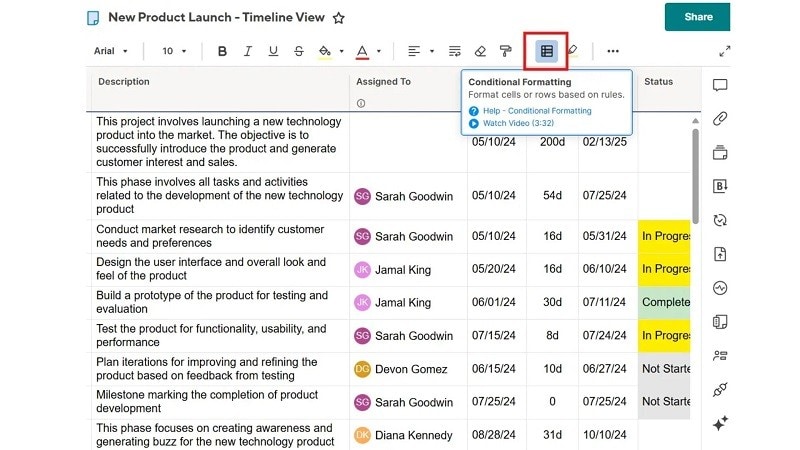
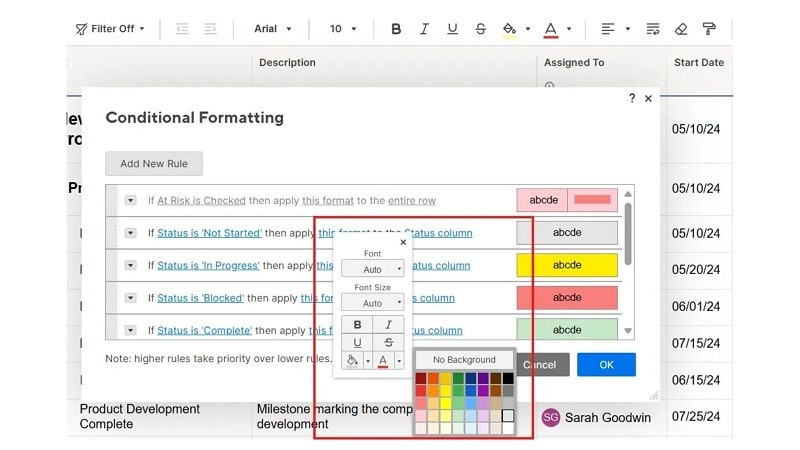
Step 9 Customize Bar Colors
Make use of conditional formatting in order to personalize the colors of the taskbar. Make sure you are in Grid view, and then select the icon that represents Conditional Formatting. You can also customize the taskbar text font, font size, and more.
Step 10 Export or Share
Click File > Download to export as an image or PDF. Click Share to collaborate with others.
How to Make a Timeline View Easier
While Google Sheets' timeline view is helpful, it has some limitations. If you want more flexibility and a visually engaging timeline, EdrawMind is a great alternative.
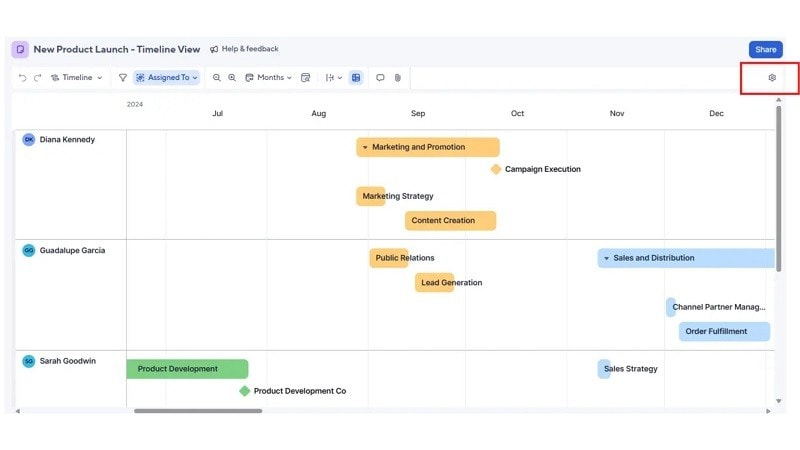
EdrawMind is a no-code timeline and mind-mapping tool designed for effortless workflow management. It enables users to make, edit, and disseminate interactive multimedia timelines for projects, historical events, personal planning, and storytelling. Unlike Google Sheets, which has mere skeletons of timeline views, EdrawMind offers elaborate features alongside ready-made designs and IT-assisted tools that enhance the appreciation and navigation of timelines.
EdrawMind also integrates seamlessly with Google Sheets, Asana, Trello, and Jira, ensuring automatic data synchronization across platforms. This means any updates in Google Sheets are instantly reflected in your project timeline.


- Project Navigator: Plan milestones, set deadlines, and keep teams aligned.
- Life Planner: Organize personal goals like career paths or events.
- Historical Roadmap: Track past events to analyze trends and connections.
With its AI-powered and simple-to-use layout, EdrawMind's Timeline maker makes creating timelines a breeze. This free tool has a range of themes that can be used to make timelines for movies, personal events, historical events, or religious stories.
Let’s look at how easy it is to build your first EdrawMind flow and make a timeline in Google Sheets.
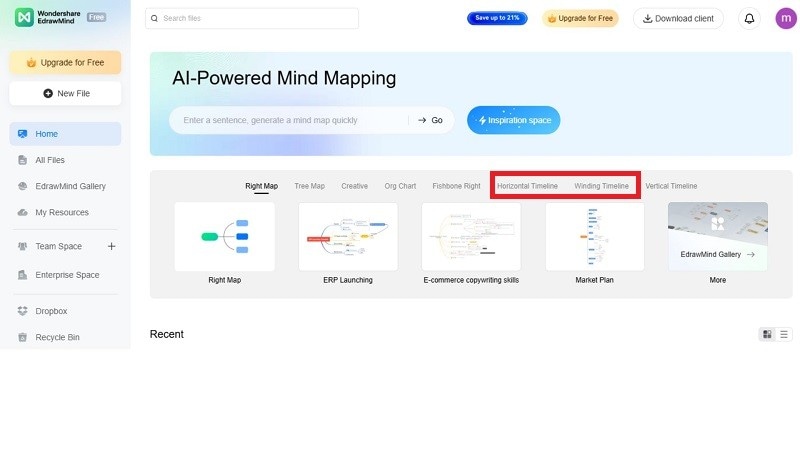
Step 1 Select a Timeline Style
Choose between a horizontal timeline or a winding timeline to get started. Each style offers a unique way to display your timeline events.
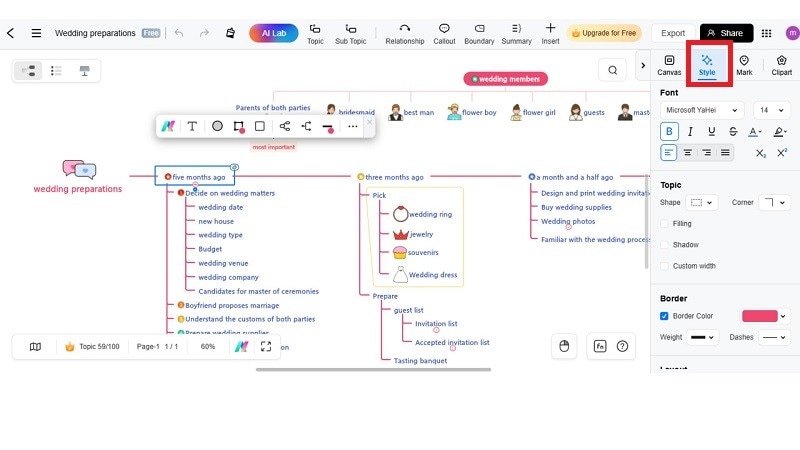
Step 2 Customize Your Timeline
Pick a theme from the right panel or personalize it with colors, icons, and other design elements. Enter your timeline details as needed.

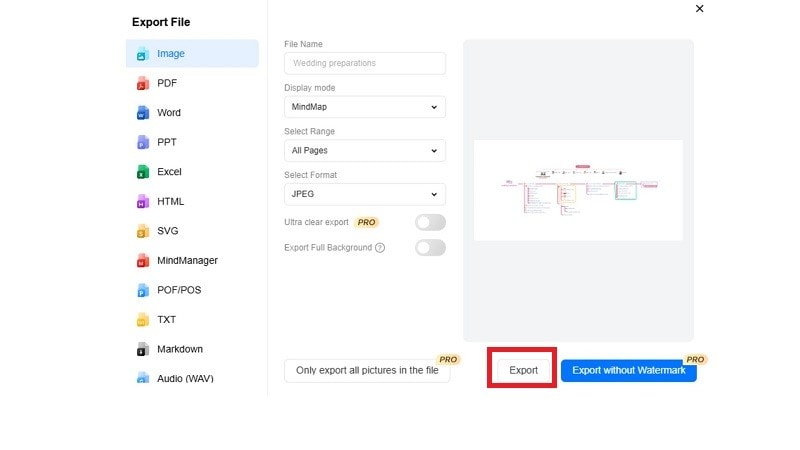
Step 3 Export and Share
Save your timeline in different formats, print it, or share it via email and social media.
Additional Tips and Tricks
Enhance your timeline view in Google Sheets with these simple yet effective techniques:
1. Use Conditional Formatting for Clarity
Highlight key events or deadlines using conditional formatting. This makes important dates stand out and improves readability.
- Select the column with dates or tasks.
- Click Format > Conditional Formatting.
- Set custom rules (e.g., color-code urgent tasks in red).
2. Optimize Data Labels
Make your timeline easier to understand by adding clear labels.
- Click on the timeline chart.
- Go to Customize > Labels.
- Select event names or descriptions to display directly on the timeline.
3. Adjust Time Ranges for Better View
Narrow or expand the time range to focus on specific periods. Click View timeline by and select the preferred duration.
4. Keep Data Structured
Use a clear format with start and end dates in MM/DD/YYYY format to avoid errors.
5. Share and Collaborate Efficiently
Use Google’s sharing options to collaborate with your team in real time.
Conclusion
Google Sheets' timeline view allows you to manage your information, track events, and organize projects efficiently. These steps will be useful for constructing a timeline view in Google Sheets. Nevertheless, Google Sheets has some restrictions on customization and design.
To create advanced and visually appealing timelines, EdrawMind serves as an excellent substitute. It has pre-made templates, offers a level of customization, and works effortlessly with Google Sheets and other applications. For project planning, history tracking, or personal objectives, EdrawMind facilitates a smoother and quicker process. Try it today and enhance your timeline experience with better visuals and organization!