Genograms are family trees without pictures. “Genogram” refers to a person’s genealogy, making them appropriate for depicting family structures. An average genogram uses shapes instead of images to include behavioral, psychological, medical, and familial connections.
The first genogram was used by psychologists Monica McGoldrick and Randy Gerson. They used different symbols to plot the intricacies of their patient’s families. Today, clinical professionals like therapists, counselors, and pediatricians use genograms to illustrate the patient’s family’s medical history visually.
However, making a genogram takes a 180-degree turn against family trees. It demands resources, effort, and skillset. Most healthcare prefers using Microsoft Word due to its familiarity and beginner-friendly interface. This article explores how to make a genogram on Word.
It also offers a quick alternative if you do not want to spend hours perfecting genograms on Word. So, dive right in to find a suitable method to plot a genogram.
In this article
How to Make a Genogram on Word
Plotting genogram symbols on Word is straightforward yet time-consuming. It is a quick starter for genogram newbies. If you have just stepped into the professional world and have no clue, here is how to make a genogram on Word.
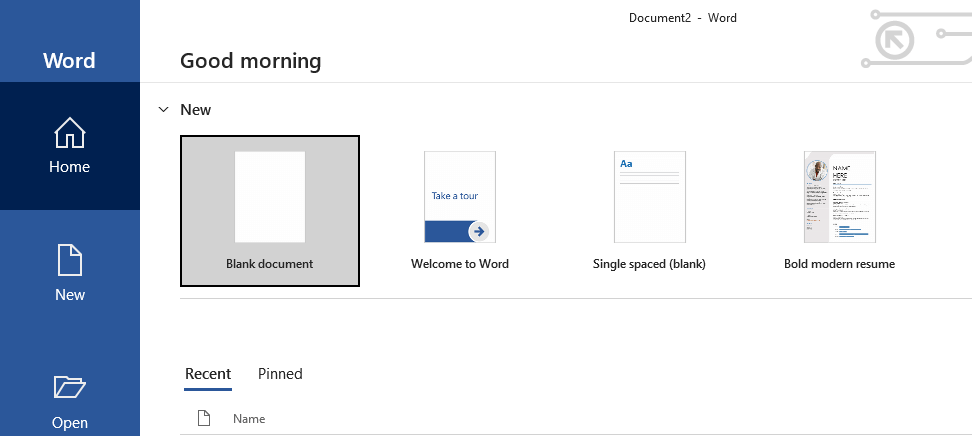
Before plotting the chart, launch Microsoft Word and click New > Blank Document to open the canvas.
Step 1: Add Family Members
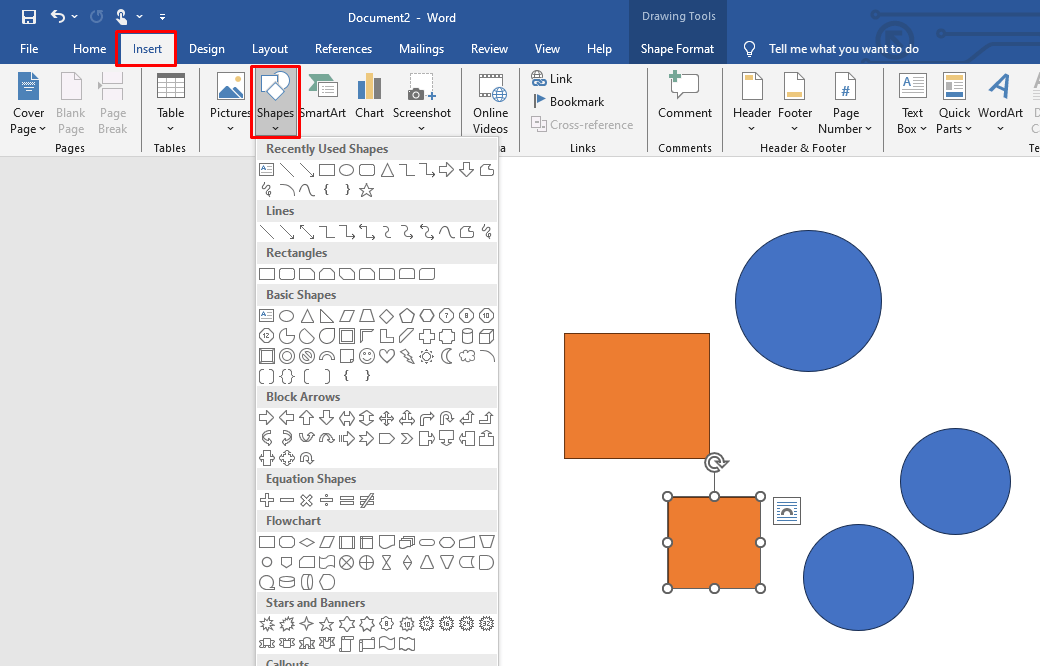
Genograms have squares and circles to represent males and females, respectively. So, the first step of making a genogram is adding the family members. Here, we will create a family genogram with a couple having four children, a pair of daughters and sons.
- Go to the Insert bar on the top and click Shapes > Square for each male family member.
- Do the same, but choose circles to represent the females in the family.
- Once the shapes are on the canvas, arrange them.
Step 2: Insert Information
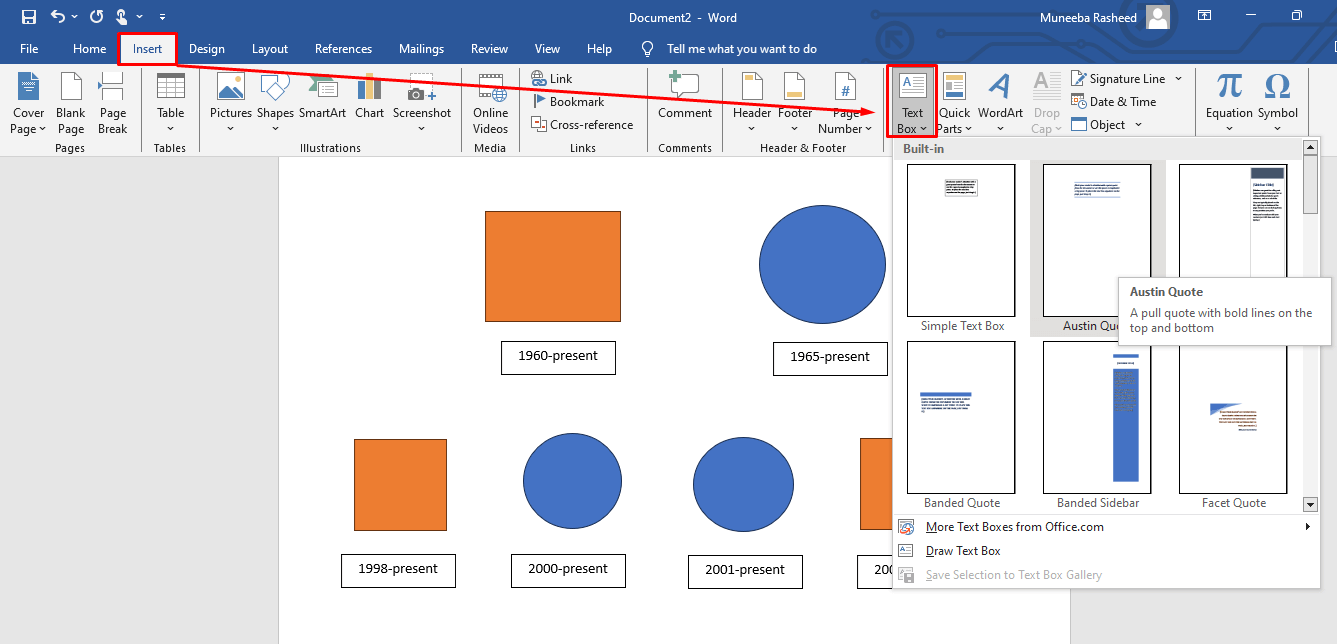
Once the shapes are arranged, it is time to add information for each family member. Typically, the information for members in genograms can be personalized accordingly. Here, I will be adding the year of birth and death. You can always add the names, professions, and a small bio.
- Go to the Insert bar and clickAdd Text Box > Preferred Option.
- You can adjust its size by dragging the corners.
Step 3: Build Connections
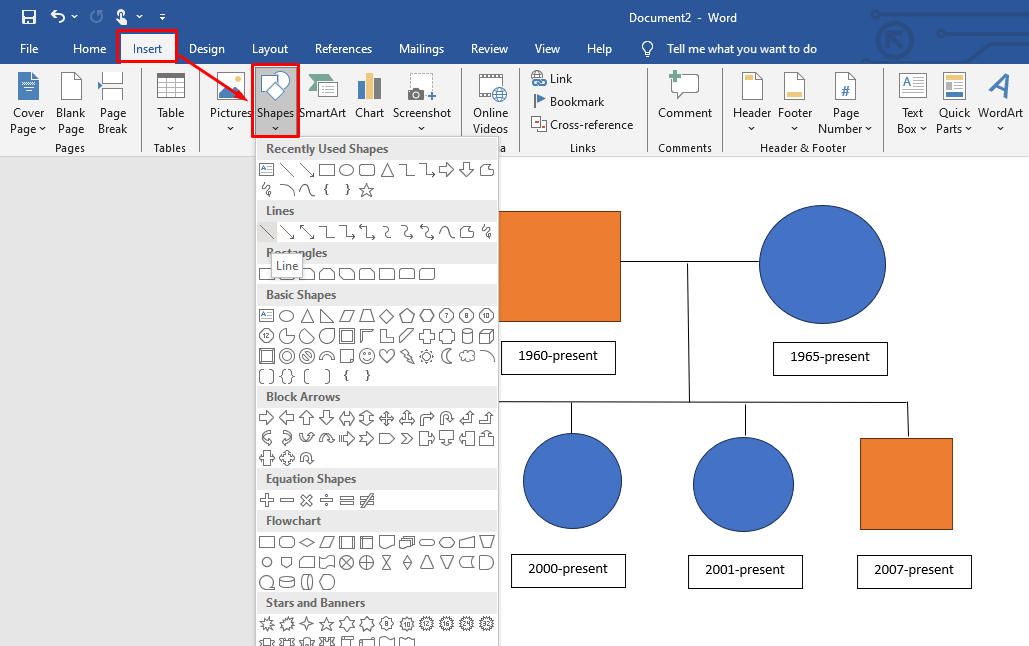
After completing the layout, build connections. Genograms use a wide array of relationship symbols. This family chart has blood or marital relationships; straight lines represent both.
- So, go to the Insertbar and click Shapes > Straight Lines.
- Add straight lines between each family and plot a hierarchy.
Step 4: Change Formatting
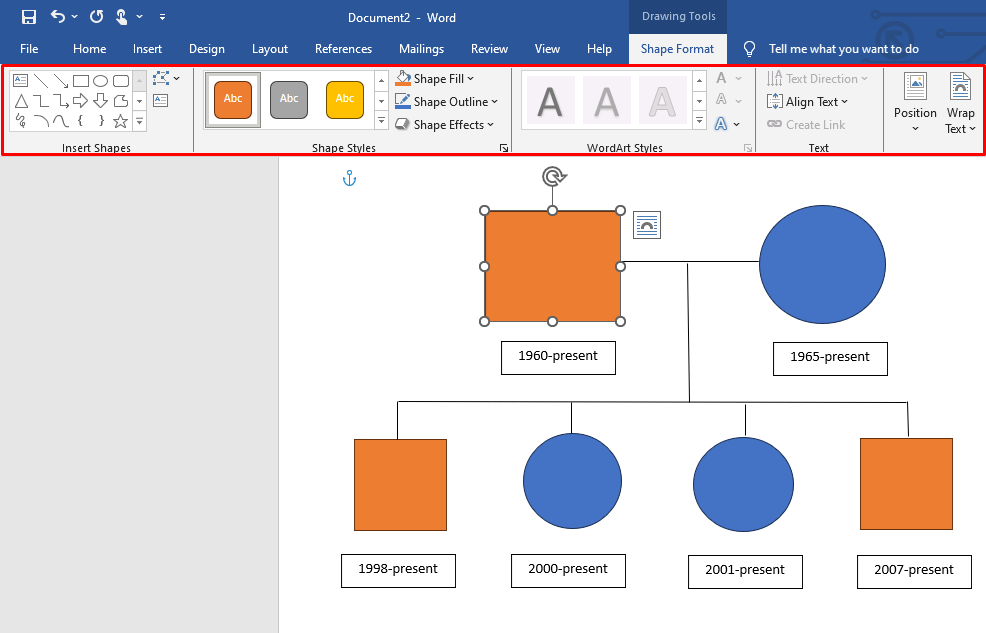
Congratulations, your genogram is complete. But it can do better with a few visual modifications. However, Word has no formatting option for the entire diagram. Instead, you will have to format each shape individually.
- After you click any shape on the canvas, it adds a Shape Format bar on the top toolbar.
- It lets you change the color scheme, border, fill, and effects.
Step 5: Download the Genogram
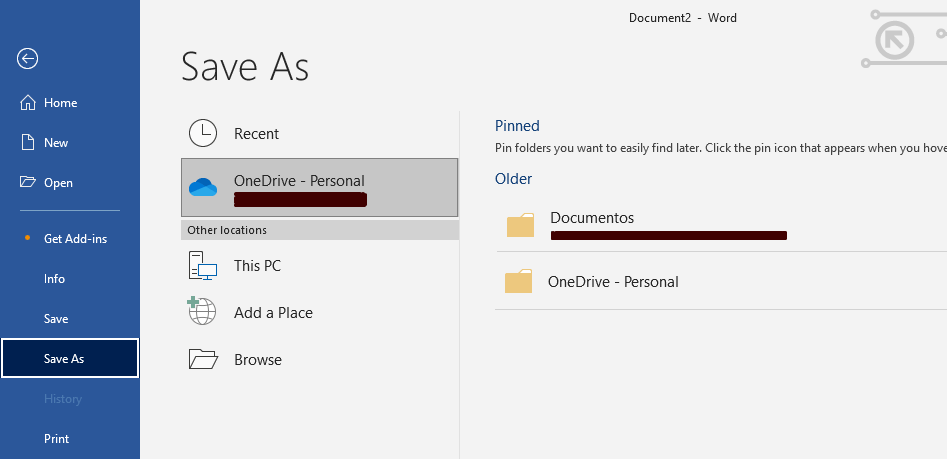
Finally, the genogram is good to go. Download and save it on your device.
- Visit the File menu from the top-left corner and click Save As > Preferred Location.
Tips and Tricks for Effective Making a Genogram in Word
Planning to make your first genogram on Word? Give these tips a quick read before plotting shapes on the canvas.
- Research Thoroughly
- Start with a Sketch
- Use a Symbol Guide
- Add Colors
- Add Descriptions
- Update Genogram Regularly
- Prefer a Digital Canvas
Family relations are subjective. Hence, much research goes into creating genograms with accurate relationship representation. The key to a quality genogram is research. It can be through questionnaires, interviews, and discussions with family members.
Genograms are technical, which means any mistake can ruin your family structure. To avoid this, starting with a rough sketch on paper is better.
Genograms use various symbols to represent family members, relationships, and medical conditions. So, if you are making one, it is significant to have a symbol guide to prevent mishaps.
Genograms are full of symbols. Shapes without colors can puzzle a human mind. Ideally, using different colors for each shape makes them visually appealing and easily understandable.
Genograms are undoubtedly interpreted differently by viewers. However, small yet accurate descriptions can help maintain their relevancy.
Family relations are always evolving, meaning you must update them regularly. It maintains accuracy and makes genograms useful for medical use.
Plotting family relationships without images and drawing assistance can take an eternity. What’s better is a special diagram software such as Word and EdrawMind. They have genogram-specific symbols and templates, saving you effort and time.
How to Make a Genogram in EdrawMind: Easier and Faster
Considering its manual editing and formatting options, making a genogram in Word can take forever. What’s better is to switch to advanced diagramming software like EdrawMind. It has exclusive pre-made genogram examples and drawing assistance that can save time and effort. So, let us see how you can make a genogram in EdrawMind in half the time.
- Start by downloading the EdrawMind desktop version and log into your Wondershare account. You can also access the software using your social media accounts (Google, Facebook, etc).
Step 1:Select a Template
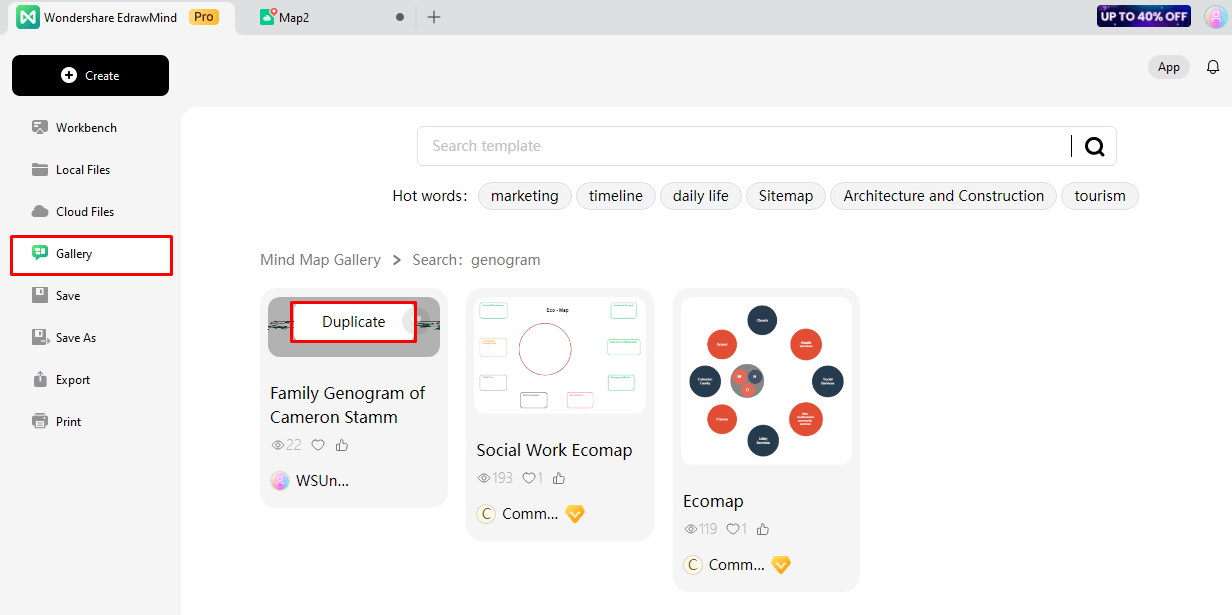
First, visit EdrawMind Mind Map Gallery from the main menu and type genogram in the search box. Choose one and click Duplicate. It will import the components of the template on the editing canvas.
Step 2:Start from Scratch
If you are starting with genograms and want to start from scratch, go to EdrawMind main menu and click Create > New Mind Map.
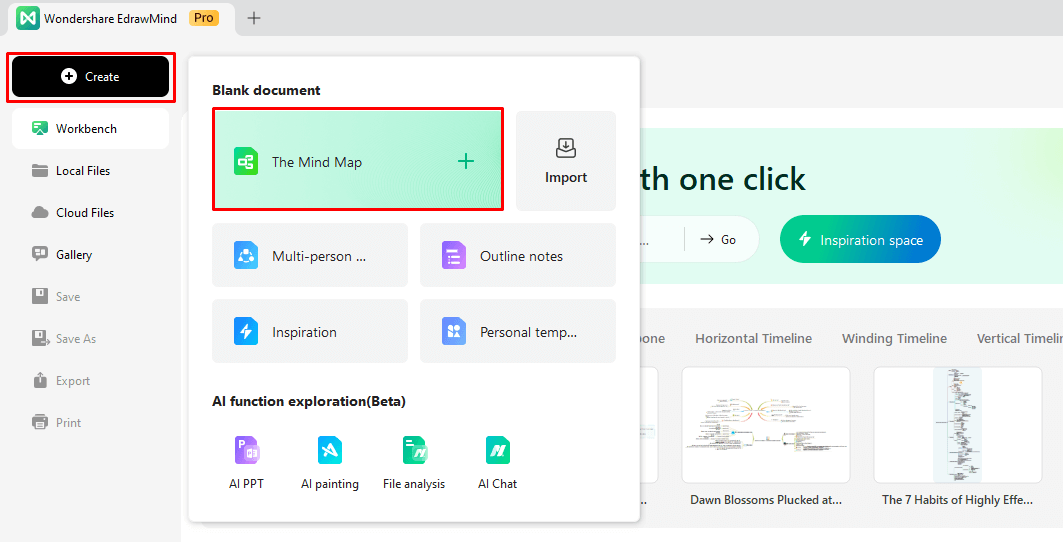
Once on the editing panel, adjust the layout from the right-side information setting panel.
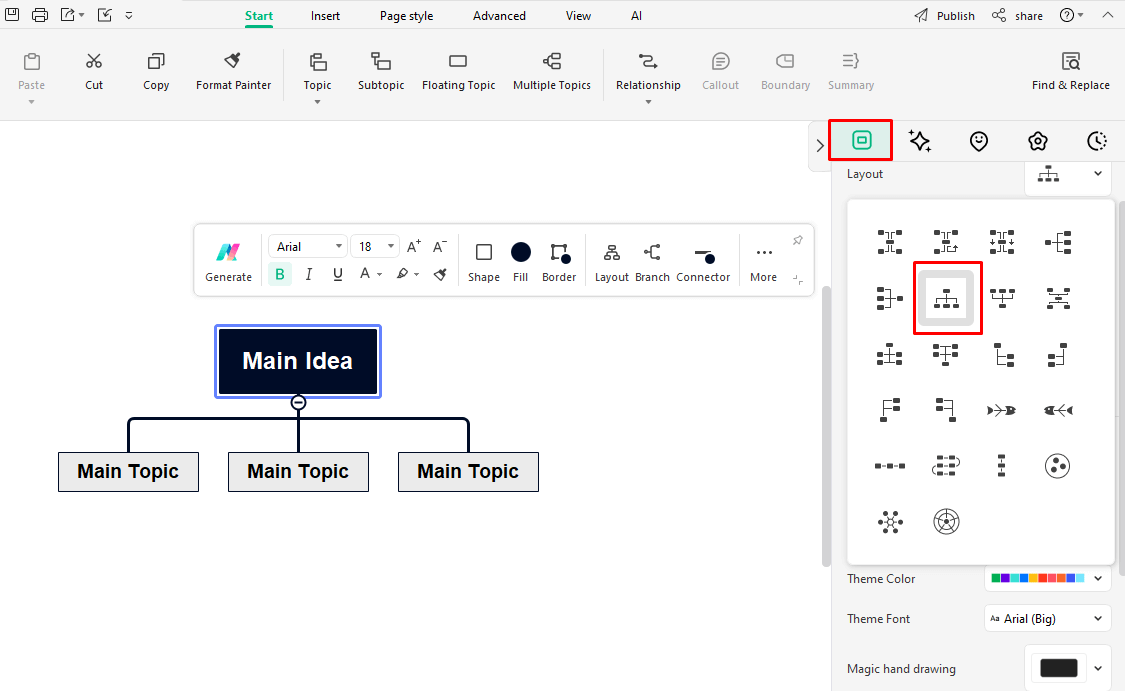
Step 3:Build Relationships
The next step is personalizing relationships and family members. For this, go to the Start bar on the top and add topics, subtopics, and floating topics. Use the Relationship button to connect with family members.
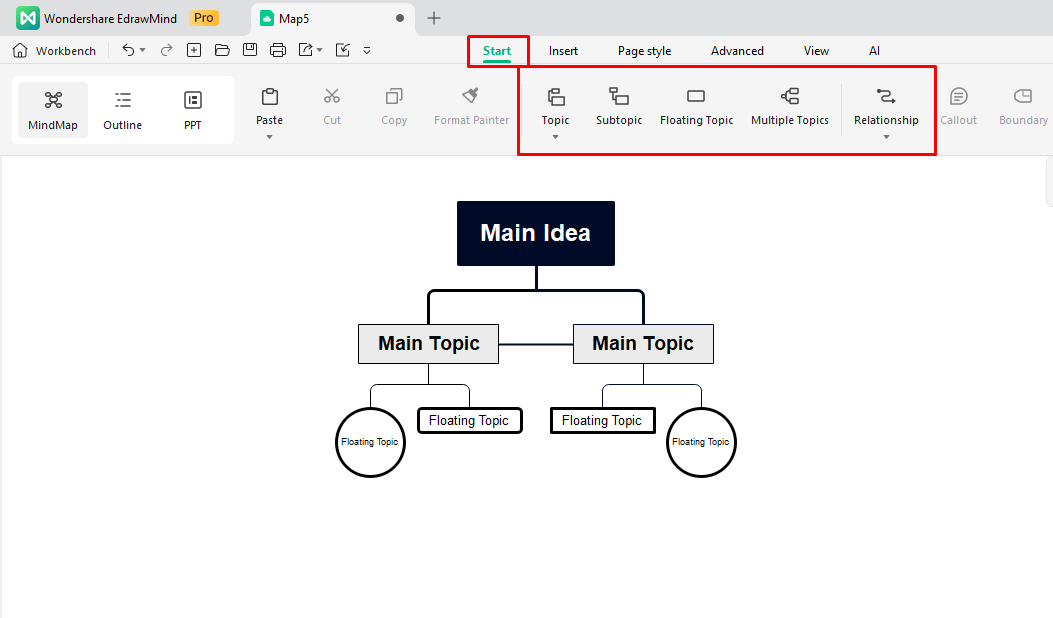
Once done, recheck all the relationships to avoid mistakes later.
Step 4:Change Formatting
Now, your genogram is ready to go. But it is better to add some colors for aesthetics. Go to the Page Style tab and personalize. Change the theme, color scheme, and orientation of the genogram chart. You can also do the same from the right-side information setting panel.
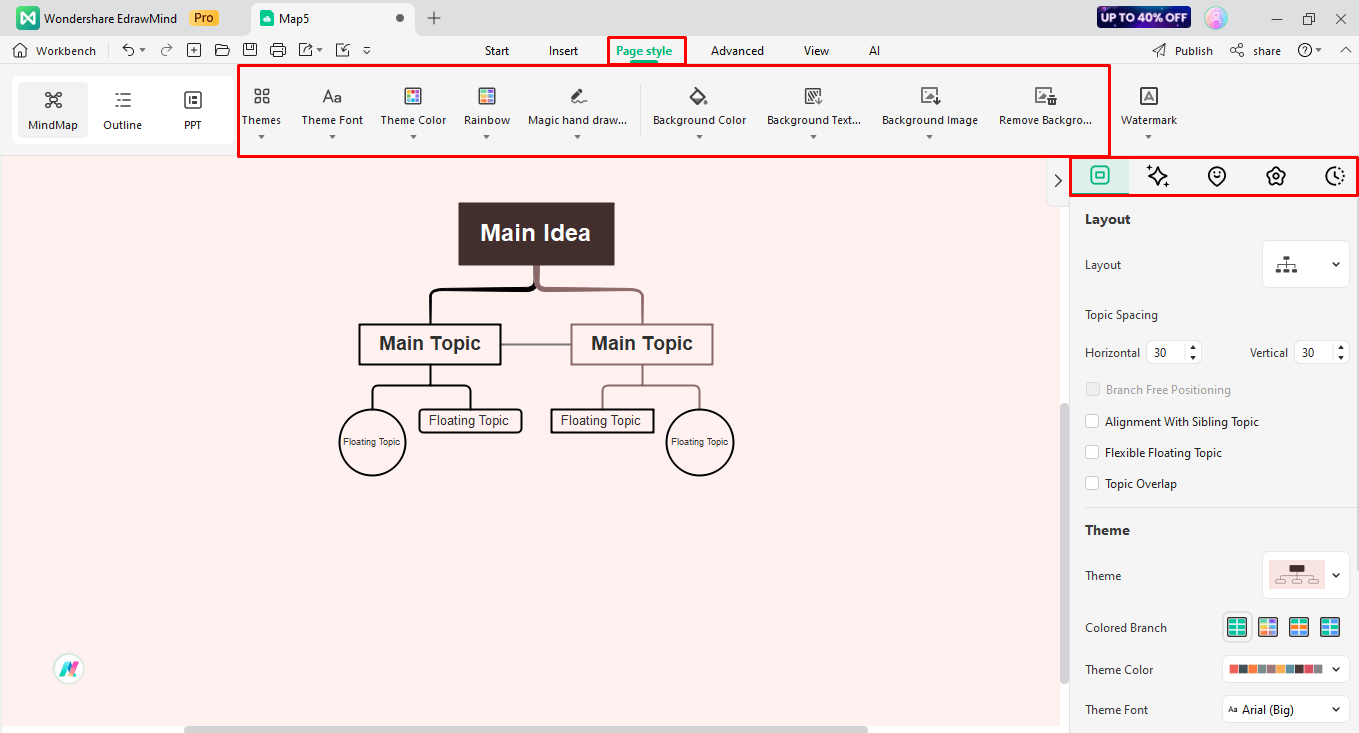
Step 5:Download and Share
Finally, download your work on the device. Click the Export icon on the quick-access toolbar and select a preferred option. You can also show your work to social media friends by clicking Share > Edit Permission.
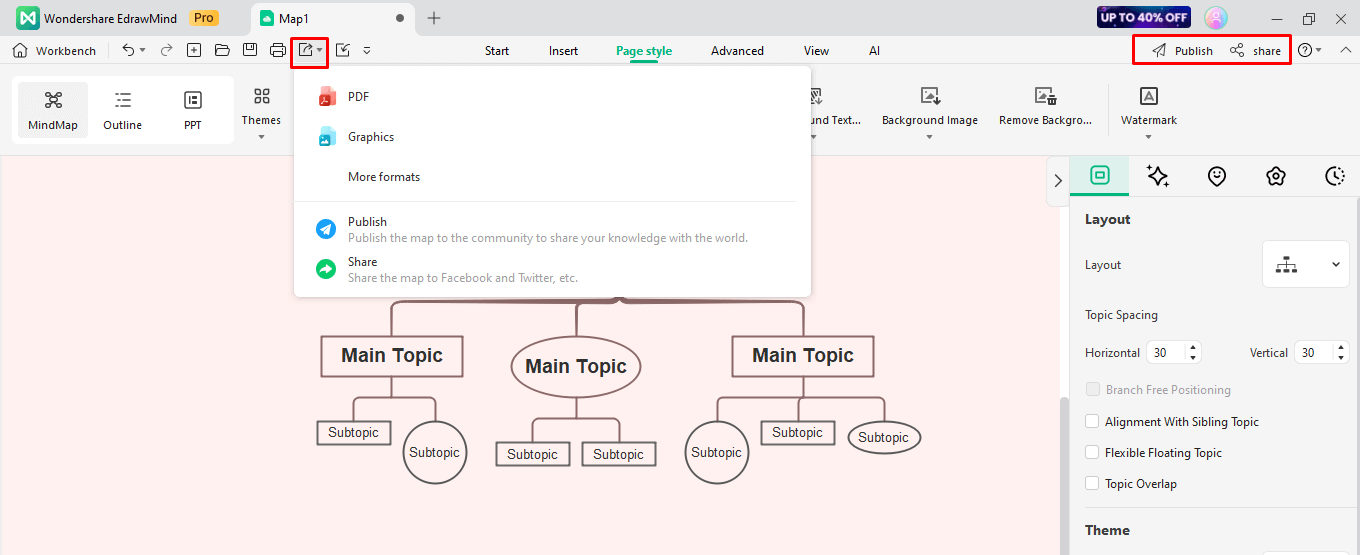
Making a Genogram on Word Vs EdrawMind
MS Word Vs EdrawMind: which is better for making a genogram? Well, it all comes down to your preference and skill set. Let us discuss the genogram creation process on both and see which software better suits you.
- 3600 pre-made templates, including genogram and ecomap templates.
- Advanced formatting options (automatic one-click formatting).
- User-friendly interface with accessible tools.
- Personal Cloud space to collaborate.
- Advanced editing options, including topics, sub-topics, relationships, and floating topics.
Wondershare EdrawMind
- Intuitive, familiar interface for corporate users.
- Basic shapes available (square, rectangles, etc).
- Manual formatting for individual shapes.
MicroSoft Word
Free Genogram Maker
Making a genogram on Word is suitable for beginners but equally time-consuming. So, it is better to switch to free software like EdrawMind. It is an advanced mind-mapping tool with exclusive drawing and editing features. Its premade genogram examples and AI-powered editing and diagramming functions are a blessing for corporate officials. Here are some reasons it might be a better substitute amidst a busy schedule.
- It has a massive mind map gallery. The gallery supports over 3600 templates, including ecomaps and genograms.
- The AI-powered drawing function produces diagrams in seconds. Just provide a detailed prompt, and it is done.
- EdrawMind is equipped with an AI chatbot. You can use it to explore ideas and make inquiries about genogram symbols.
- EdrawMind has an outline function. You can utilize it to note down family information and medical history.
- The updated version gives you access to the revision history. So, you can always check previous changes and restore them for later use.
Conclusion
Making a genogram on Word does not hit the spot. Yet, most healthcare and corporate professionals prefer the software convenience. If you are just stepping into the corporate world, it makes sense. Need help figuring out how to start? Follow this How to make a genogram on Word guide.
But if not, work smart and move beyond Word. Get ready to become a genogram ninja with EdrawMind. Its pre-made templates and AI assistance save you from messy, hectic genogram sessions. Plus, its intuitive interface is suitable for non-technical users.


